Set Reviews

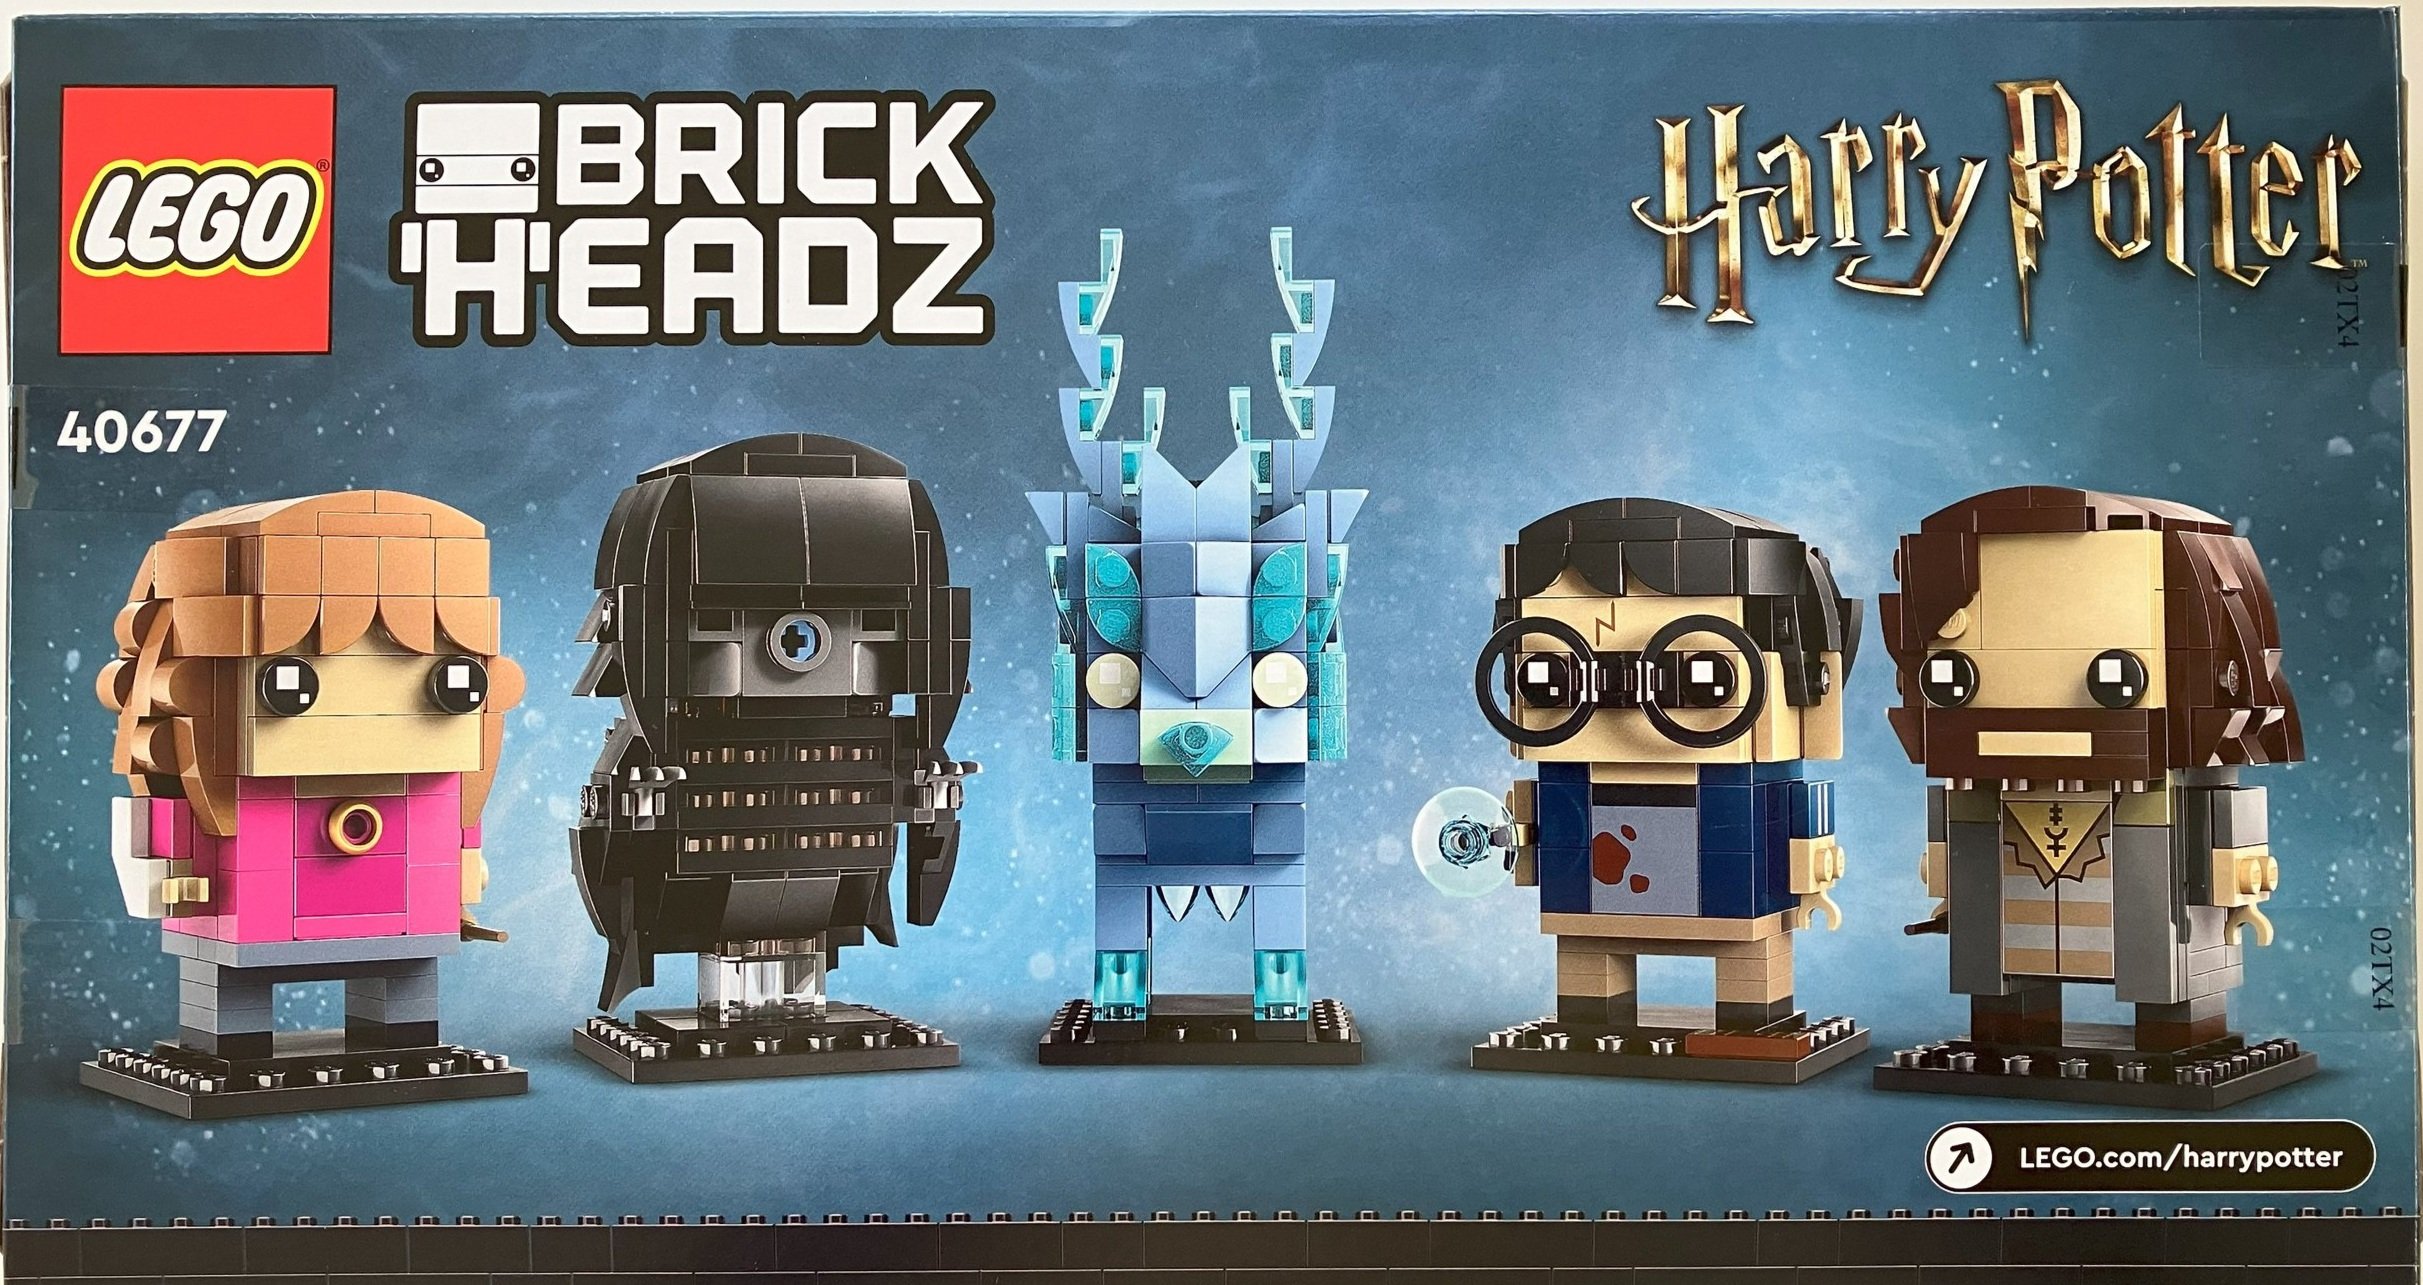
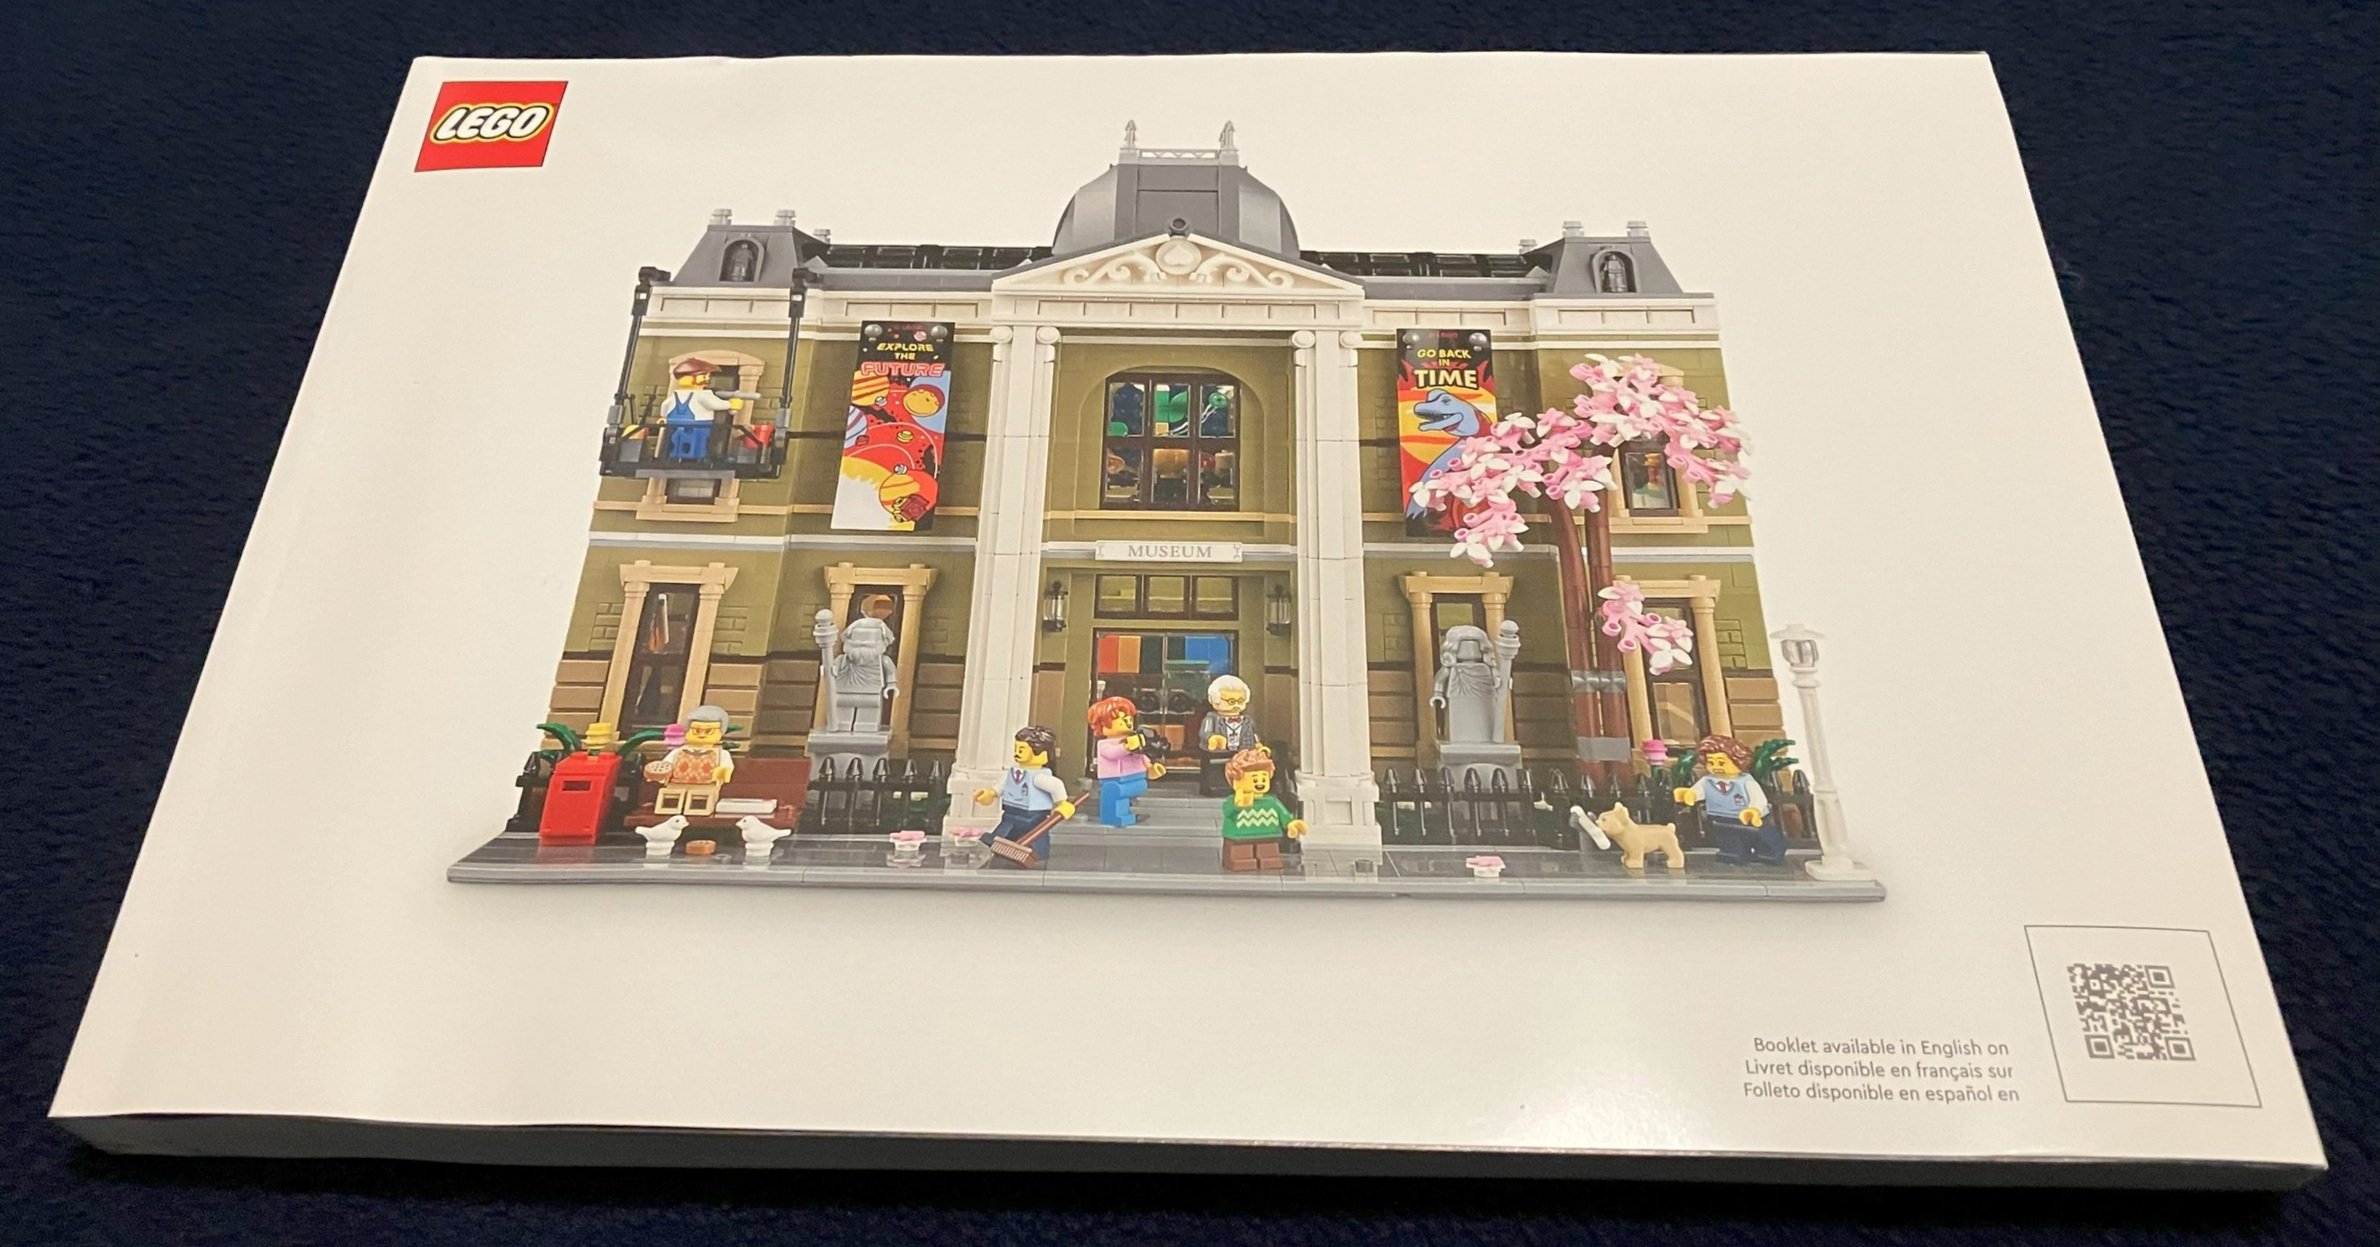
Set Review - #40749-1: Joy, Sadness & Anxiety - Inside Out 2 - Brickheadz

Another Brickheadz set. This one is Joy, Sadness & Anxiety from the Disney Pixar movie “Inside Out 2.” This set was released on 1 June 2024 and retails for $19.99. It contains 300 pieces and the price per piece works out to $0.067. The set contains three Brickheadz. Number 239 is Sadness, number 240 is Joy, and number 241 is Anxiety. The front of the box shows the characters with the Brickheadz and “Inside Out 2” logos. It also has the number of each character in the Brickheadz line. The back shows the characters in different views.

The set contains six parts bags and three instruction booklets. Interestingly, I didn’t see a spot to scan in the instructions to get Insiders points. I wonder why?

Bags one and two build Joy. Nothing too out of the ordinary here. The front and back have printed tiles for her dress. The hair is made up of blue and translucent blue plates and tiles. It is a slightly different color of yellow from the standard yellow so that part is good. Not much else to report.

Bags three and four assemble Sadness. Again, not a whole lot special here. She is only three studs wide versus the four studs in Joy. I do like that the eyes are 2x2 round tiles to show her glasses. That’s a nice touch.

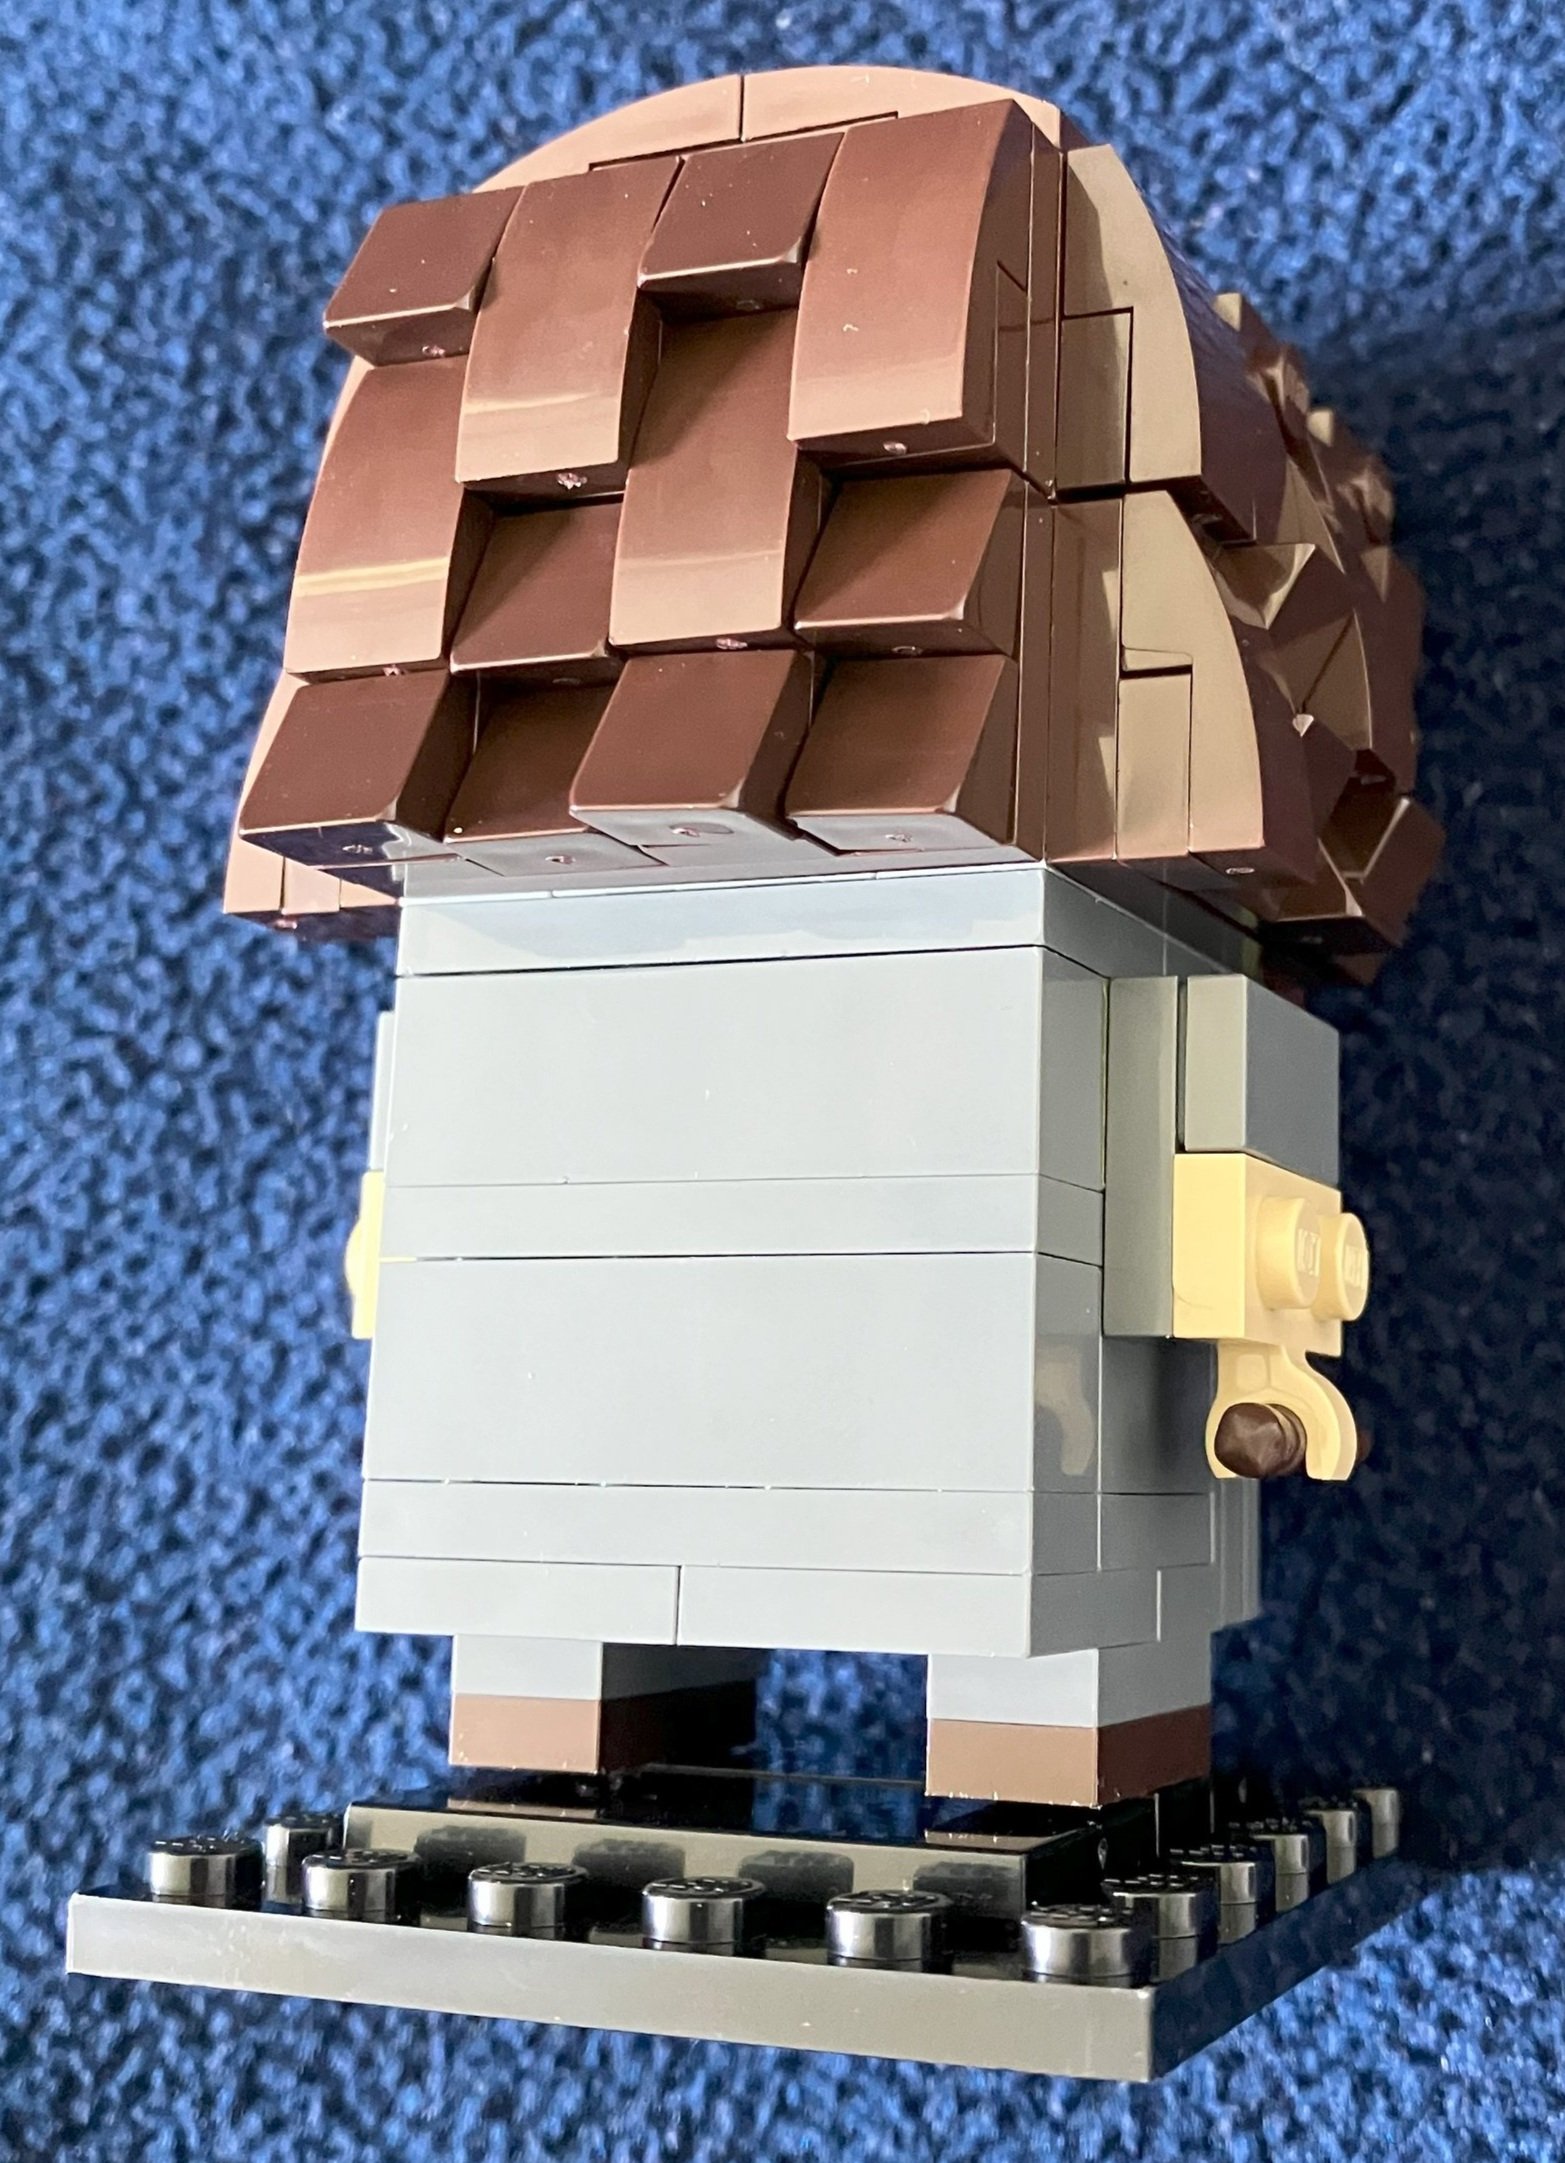
Bags five and six assemble Anxiety. I haven’t seen the movie yet so I don’t know much about the character, but the printed teeth and big eyes are a fun touch. The hair assembly with the translucent pieces is a cool design too. Beyond that, it’s a fairly simple build.

Here are the final builds of the three characters. As mentioned, nothing super exciting here. Rumor has it, these will be retiring at the end of the 2024 so if you’re a Brickheadz collector or a fan of the movie, grab this one soon. Otherwise, I wouldn’t go nuts trying to find this one. I enjoyed the first movie and added this set in to grab a GWP so no complaints from me.

Happy building!

Set Review: #71046 - Series 26 - Collectible Minifigures

SPACE!!!!!!!!! May 1, 2024 saw the release of Series 26 of the Collectible Minifigure series. Much like the previous sets, these minifigures are $4.99 each. There are 12 minifigures in this series and unlike some of the random minifigures in previous series sets, this one is all space themed. Some are original designs, but others are related to retro space themes which is awesome to see their return to the LEGO world.

In the past, I’ve purchased the boxes of six. Series 26 is no different with #66764 containing the boxes of six. I had a 10% off deal at Target so I picked up some of the individual minifigures in the store. I used the Figure Finder web based tool from falconbricks.com to scan the individual boxes to find each one of the 12. Thankfully it worked and the store I went to had enough in stock so I was able to get all 12. The site isn’t instantaneous so you have to give it a few minutes to find what you’re looking for. One fellow shopper noticed what I was doing and joined in as he was looking for a specific minifigure. He ended up finding what he was looking for too. While I understand the concept of the random bags and that LEGO likes to keep us guessing (and purchasing), I’m glad they’ve allowed the creation of these apps to find what we’re looking for. So thank you to LEGO and the fan community for making this happen.

Onto the review of the minifigures…


Spacewalking Astronaut: This one is in line with the new Space subtheme tied to the CITY theme with similar logos. This minifigure has the most gear to include a space jet pack with controls and a printed tile on the back. You’ll also note that the black base plates are printed with a star pattern which is a nice touch.

Imposter: The head on this one is dual printed with the print in this picture and then a standard minifigure face on the other side. Besides the antenna on its head, it also comes with three small alien microfigures.


Alien Tourist: This one is a fun one with a cool looking hat to go with the alien face. The Hawaiian shirt he has on covers up a white shirt underneath with a red heart and then a picture of Earth. He also has a back pack along with the camera he’s holding.

Retro Space Heroine: This one seems to resemble the Retro Space Guy from Series 17. The difference on this one comes with a dog to go with it.


M-Tron Powerlifter: I was a big fan of the M-Tron theme as a kid and was excited to see this one come back. The torso is the same, but that’s about it. The legs are cool with printing on the front and the sides. The claw is a cool touch. The helmet is different and doesn’t have a visor like back in the day, but it’s good to see the sub-theme return

Nurse Android: Let’s be honest here. No one cares about this minifigure. It’s all about the pink space baby to go with the other ones. We couldn’t get enough of the different colored Classic Space minifigures and now we can collect different colored space babies.


Flying Saucer Costume Fan: I don’t think we’ve ever seen one like this before. The legs and torso have the star pattern and blend in with the base plate quite nicely. Then it looks like it’s just a head in a flying saucer flying through space which is fun.

Ice Planet Explorer: I had a few of these sets as a kid too. The minifigure is similar to the originals, but with a few differences. No translucent orange skis and the helmet doesn’t have the translucent orange visor. The translucent orange chain saw is in line though. Also, the robotic penguin is a nice touch.


Robot Butler: I don’t know where they got the idea for this one, but I think it’s fun. This one has a different base instead of legs, but the torso and head are similar. The translucent green head covering is interesting.

Alien Bettlezoid: The head on this one is interesting. It’s nothing like the normal head. Also, the legs are molded differently from regular minifigure legs so they have a different form.


Orion: Have they made one with translucent parts like this one? I like the references to the constellation and how this one has silver and then the sparkling purple.

Blacktron Mutant: Last one is this Blacktron minifigure. I was excited to hear there would be a return of this sub-theme, but I’m not a big fan of the minifigure. It has the second generation Blacktron logo, but I’m not excited about the mutant aspects. It’s creative, but I was hoping for a minifigure that would go with my old collection of minifigures. I can’t complain too much I guess.


Set Review - #10332-1: Medieval Town Square - Icons

After the success of #10305-1: Lion Knights’ Castle, it’s no surprise that LEGO returned to the theme with #10332-1: Medieval Town Square. This one is a re-make of #10193-1: Medieval Market from back in 2009. It’s also the third set in a line of larger sets LEGO has brought back if you include the Ideas set from 2021, #21325-1: Medieval Blacksmith. Back to the set at hand, this one was released on 1 March 2024 and it contains 3,304 pieces. The retail price in the US is $229.99 so the price per piece works out to $0.07. This isn’t too bad, but you also need to factor in that it’s not a licensed theme and there are a lot of small pieces mixed in too.

I ordered my set from LEGO Shop @ Home. It arrived in an outer cardboard box designed for the set. The sticker on the outside says the set was produced in March 2024 and it looks like it was made in Mexico I wonder how long it will take for us to see sets from the US once the plant in VA is complete?

The set box itself shows one side of the set on the front with the Icons logo and 18+ greebling. The back shows some of the play features

The set contains 25 individually numbered parts bags, an un-numbered bag with some of the larger plates, and an envelope containing the instructions and stickers.

The set contains two instruction books in the paperboard envelope. Book one includes some details about the set, designer, and history of the castle theme.

Sadly, there are stickers in this set which you’d hope wouldn’t be there at this price point. The sheet isn’t super big, but there are a few larger ones which are always a pain for me to put on.

Bag one starts off with some small accessory builds. It includes a chair, a desk/furniture piece, a food stand, a stand for the wood worker, and then a spinning wheel for making string/yarn. There’s also a minifigure with a hammer as she is the woodworker.

Bag two starts to build a building for the wood worker. It includes an awning with some discoloration (different colored tiles) and some weapons inside.

Bag three adds the second floor and a crane/pulley system to lift stuff up. There is a wagon wheel up top and you attach one of the pulley system. The pulley has a Technic gear on the outside to raise or lower the hook. Inside the building you assemble a latch system so that the hook doesn’t just fall to the ground if you let go. It’s not too complicated to build and is a nice small touch for this section.

Bag four adds the thatched roof to the building. It is placed on top and stays with gravity, but can be easily removed for playability.

Bag five builds the section for the tapestry maker to work while bag six adds the roof to it. This section connects to the first building with some hinge pieces. This building is slightly different from the last one as it as a darker colored thatched roof and a small window built into the roof. Inside are some different string/yarn colors to use and you can attach a tapestry in work to the jumper plates on the floor as well.

Bag seven adds the chimney with a piece for smoke coming out which is used throughout the build. Outside of the set is a small garden area with some carrots, pumpkins, and a bee hive. The tapestry maker is included in this bag. He comes with some scissors and a small bag.

Bag eight starts to build the kitchen for the cheesemonger. I’m not sure how accurate it is for what it takes to make cheese, but close enough. This bag includes a small kitten and then a girl minifigure who is working in the kitchen.

Bag nine builds up the walls with a cool technique used throughout the build to make it look like there’s timber framing. I did some Googling and it said this is the Tudor style. Can anyone confirm that? There are a few plants on the window sills, and a flag on the outside for the shop.

Bag 10 adds the roof, chimney, and some smoke.

Bag 11 connects the three buildings together and adds some fencing so you can build a pen for the goat. This one is yet another print which is different from the original one and from the one that appeared in the Series 25 Collectible Minifigures. Everyone is so excited about the goat that they forget to mention that you also get a squirrel. WOOHOO!

Bag 12 builds a tree. On the tree you put some wanted posters which calls out the crook which happens to be a Wolf Pack minifigure. Then you get a Wolf Pack minifigure which is the first return of that subtheme in a while. Also in this bag is a small stand to place a log so you can hack at it with the ax.

Bag 12 ends the first instruction book.

Bag 13 begins to build the Broken Axe Inn. It starts to build the first floor with the start of what will be some furniture and fixtures. This bag includes the inn keeper minifigure who comes holding a glass.

Bag 14 completes the first floor and walls of the inn. There’s a keg, some candles, a lute, table/counter area, and a chess board with two large pieces.

Bag 15 gets to work on the second floor with some food and a cooking area. You get a loaf of bread, a crab, a fish, and a cooking space with some extra wood to stoke the fire.

Bag 16 completes the walls on the second floor, adds some windows, adds a pie cooling in the window, adds some kitchen utensils, and adds a roasted bird of some sort.

Before finishing off the roof on the inn, bag 17 takes you over to the shield painter’s area where she’s dripped a lot of paint on the floor. The shield painter minifigure comes in this bag.

Bag 18 completes the first floor of the shield painting space and adds in some stairs.

Bag 19 starts on the second story using the same Tudor style building technique as seen earlier.

Bag 20 builds a bedroom for the inn which includes a bed and some furniture.

Bag 21 adds a roof to the inn and then another floor to add more on top.

Bag 22 adds roofing over the inn.

Bag 23 adds a bedroom where the tax collector hangs out. If you haven’t read any reviews or seen any videos on the set, there is a fun hiding spot for the tax collector to store some extra coins.

Bag 24 adds a watch tower for a guard to hang out. The minifigure included is a Lion Knight so it fits in well as if this town square is near the Lion Knights’ Castle. I wonder why they did that? Hmmm???

Bag 25 finishes up the build. You add some plant life outside, a bird’s next, and a small tree. You also add the roof on top of the tax collector’s room. Finally, you include a stand for the shield painter to use when painting shields.

The set comes with eight minifigures. Many folks always complain that there are never enough minifigures in a set, but I think eight is a decent number for this one. I’ve introduced the rest already except I failed to show the tax collector. The tax collector has a cape and comes with a tile that you add a sticker to for his record book. He also has a quill for writing.

The Bricks for Bricks Bricklink store is closed and it’s still in transition so I don’t have access to my usual building spaces. At some point in the future, I hope to have a good space for taking photos. In the meantime, I set up the full set and took two pictures to capture the full thing. Overall, I thought it was a great set. It was fun to build, it has some great play features, and you get some fun pieces for future MOCs if you decide to take it apart. It’s a little pricy, but the price per piece is decent. I used this set as an opportunity to grab a cool GWP that I was interested in. Look for options to get double Insider points or a GWP or two to snag this one. I’m not sure if or when it will go on sale, if ever.

I did get the full thing in a top down photo.

As mentioned earlier, the buildings attach to each other with hinges so you can open them up for play. Here’s a picture of the inn and shield painter’s space opened up.

Finally, the buildings for the cheesemonger, wood worker, and tapestry maker opened up.

Happy building!

Set Review - #40677-1: Prisoner of Azkaban™ Figures - BrickHeadz

We have another Brickheadz Harry Potter themed multi-figure set for 2024 after 2022’s #40560-1: Professors at Hogwarts™. This one is #40677-1: Prisoner of Azkaban™ Figures. It was released on 1 March 2024 for $49.99. It contains 697 pieces which works out to $0.072 per piece. This set has figures from the third book/movie to include another Harry and Hermione Brickheadz, but our first Sirius, a Patronus, and a Dementor.

The box is standard with the Brickheadz shown on the front and then in a different order on the back.

The box contains nine numbered parts bags and then an envelope with the instructions inside.

There is an instruction booklet for each Brickheadz figure as shown here.

#221 - Harry Potter™

First up is Harry. Nothing super out of the ordinary from other past Brickheadz. He has the printed scar, glasses, and black hair. His shirt has a mud stain and then some stripes on the sleeves. There’s also a 1x2 tile printed as a chocolate bar. He’s holding a wand which is made differently to include a part to clip on the end. Then you attach a translucent piece to make it look like he’s giving a patronus charm which is cool. Harry is on the standard base for a Brickheadz figure.

#222 - Hermione Granger™

Next up is Hermione. Other than the charm that is supposed to be a necklace which holds the time turner, there isn’t much different about her. It’s the standard Brickheadz build.

#223 Stag Patronus™

This one was a fun build. Between the light blue color and then the translucent blue pieces, it’s a cool design. Also it’s not your average shape of a person which is a nice change. The figure doesn’t balance well without the stand as the head is not centered so it’s a bit front heavy. It uses some different parts too which nice.

#224 - Dementor™

This one is different as it’s a magical creature instead of a person. The center of the figure is clear pieces which is not usual and then the face has a hole in the center which is different for Brickheadz. Instead of making hair, they recreated the cape/headscarf type thing the Dementor wears. It’s not the greatest of characters to re-create, but it’s cool to see something different besides the three main Harry Potter characters in different clothing.

#225 - Sirius Black™

Last up is Sirius. He comes in his prison garb and is pretty simple, but you can see Sirius in the look. I like the use of SNOT on the face and the studs pointing down for the beard. The shirt is printed for some more detail.

Overall, I wouldn’t get this set unless you are a Harry Potter fan or a Brickheadz collector. Nothing overly spectacular about this one. On a price per brick standpoint, it’s reasonably priced, but the pieces are all rather small so it doesn’t seem like you’re getting a lot for $50. I recommend waiting for a sale, double Insider Points, or a cool GWP before scooping this one up.

For fun, I lined up all of my built Harry Potter Brickheadz for a picture. I think I have a few more put away in a box somewhere. I’ll find them at some point and take another picture.

Happy building!

Light Kit Review - LeLightGo - Kit for #42083-1: Bugatti Chiron (Technic)

The folks at LeLightGo reached out to me and asked if they could send me a light kit so I could review it on my blog. So here goes.

I was given a choice so I selected the light kit for #42083-1: Bugatti Chiron from the Technic line. In case you’re not familiar, you can see my review of the LEGO Technic set here (part 1) and here (part 2). Also, you can get up close and personal with a real Bugatti Chiron at that link (okay, maybe not super personal, but closer than I’ve ever been).

The company’s web site lists a UK address, but the shipment I received came from California. The box was roughly 6 inches long by about 5 inches wide and a little over an inch tall. It was labeled as the 42083 Classic Version.

The box just contains a bag with parts bags inside so I went to their web site. They have some general instructions for how to handle their kits under a section labeled USER GUIDE. I scrolled down and there were two instructions for set #42083. One was labeled as the “new version” and the other was just the number. As you recall, the box I received said “classic version.” I was a bit confused as to which instructions to use. I ended up opening them both and used the process of elimination to figure out what to use.

The box contained eight parts bags. One through six were labeled and then there were two others. One contained the battery container.

The build started with taking apart a few pieces in the front of the car to get to the headlights. Then you place an LED under each 1x1 clear plate. Having a wire in the way makes the connection not as solid, but it holds. You connect four LEDs on each side and then all of the wires run into the front trunk space.

The next build installs a light above the seats. This one has a wire that you then connect back to the front trunk as well. I didn’t do a good job making the connections tight so it is more obvious that I used a light kit here.

There are a number of connections in the back. You install one on the spoiler, one along the brake light, and then one underneath the car. The one on the spoiler was tough as the wiring had to connect down through the car to the bottom to make some additional connections to lead to the power connection in the front. The one along the brake light requires you to change around the build a bit. The kit includes some knock off pieces that you install so there is one clip on the back versus two. Then you tack on the two light strips. The strips are a little too long in my opinion so getting them to fit was a bit sporty, but I eventually got the fit to work. The lights on the bottom required removing some more parts, but I eventually got all of this to work.

Once the lights in the back are attached, you have a long wire that you run to the front of the car. From there you connect all of the wires together to then connect to the power source. I didn’t have the three AAA batteries required on hand so I connected the USB plug to a USB to American power cord adapter and…

I was shocked that it all worked on the first try. It was actually fairly easy to put together despite having never done a kit like this before. The front headlights really look awesome. I think the one above the seats is a bit bright, but it does the job of lighting the cabin. You can also see the red LEDs in the rear spoiler which looks pretty good.

I think the back looks awesome. The red LEDs along the brake lights looks great and the blue that shines down on the ground is a cool contrast from the red right above it.

Thanks to LeLightGo for sending this set for me to review. Overall, it was a good first experience at LED lights and I think it helps to make the Technic Bugatti Chiron look better. I have nothing to compare this to so I can’t say whether it’s better than other companies or not, but no big complaints on this one after I figured out which instructions to follow. This set would originally cost $48.99. As of the writing of this post, it’s on sale for $38.99 plus a buy one, get one 30% off sale if you buy another kit. If you’re looking to get a light kit, definitely watch for sales and opportunities to save some funds.

Have you used light kits before? What are your opinions? Have you used LeLightGo or others? Let me know in the comments.

Happy building!

Set Review - #10326-1: Natural History Museum - Icons - Modular Building

LEGO knows that every year is they keep producing awesome looking modular buildings that I’ll shell out whatever price they set and this year is no exception. #10326-1: Natural History Museum was released on 1 December 2023 for $299.99. It contains 4,014 pieces which works out to $0.075 per piece. This one is bigger than past sets as it includes a 32x32 baseplate and a 16x32 baseplate. Lots to dig into so let’s go…

The box is pretty standard. The front shows the full set with a set name logo and mentions the modular building collection. It also has the Icons branding on the bottom. The back shows the other modular building sets available now along with some of the features of this set.

The box contains the parts bags for bags 15 through 33 and then another box. When you open that box, you get the remainder of the parts bags, a bag that isn’t numbered, the base plates, and the instructions.

The instruction book is pretty hefty as you would expect for a set of this size. You also get the banners to hang on the outside of the museum advertising exhibits.

The first bag adds the flooring to the 16x32 baseplate. You also get a female minifigure that works at the museum.

Bag two adds some of the flooring to the 32x32 baseplate and connects the two together. I like the addition of some bones in the floor that are eventually covered up to be found at some later date.

The third bag adds in more flooring. You also get some plants on the outside, and a toilet in the back. There are also some tile pieces on the floor that end up being a clay pot that has fallen over. There’s also another surprise under one of the floors that I’ll save for when you build it or another reviewer spoils it for you.

Bag four adds tiling on top of some of the raised floor areas and adds in the front steps to the museum.

Bag five starts to add in some more details including more to the bathroom, a small lab area, some steps, and finishes off the flooring patterns.

The sixth bag makes the walls higher and adds in some doors.

Bag seven starts to add in some of the displays at the museum along with the front desk area. I won’t go through each of the displays so you can have fun figuring them out when you build the set (or just read the captions in the instructions that describe each one). You also get another minifigure who is a worker at the museum.

The eighth bag builds up some of the front of the building.

Bag nine starts to build up the olive green walls. You get railings at the entrance of the building and some windows as well.

Bag 10 builds up more of the details of the front and the walls of the sides of the building.

Bag 11 continues to finish off the front of the building with windows and some more olive green pieces.

Bag 12 tops off the whole floor with tiles so it can be connected to other floors. You also add in a set of stairs to go to the second floor.

Bag 13 finishes off the first floor. The front of the building gets some columns on each side of the door and then some minifigure statues as well. There’s some additional plant life too. Since I haven’t shown the back yet, there are a few details including a pipe which leaks water to let a plant grow, and a dog checking out the trash to see if there are any bones. There is a door in the back as well.

Bag 14 builds the dinosaur skeleton. As shown on the front of the box, the skeleton is not permanently fixed to the floor so you can pick it up and move it elsewhere as desired. It’s a pretty decent build considering the size and where they had to fit it. It does have some non-white pieces for attachments, but the light gray works.

Onto the second floor…

Bag 15 assembles the plates that make the base of the floor with two spots to look down and also let the stairs connect and dinosaur skeleton peek through.

Bag 16 builds up some of the wall and adds the base for where the model of the solar system is placed.

Bag 17 adds in some railings around the holes in the floor so no minifigures fall down. You also build the model of the solar system which is a great design at such a small scale. This bag comes with a boy minifigure.

Bag 18 adds some displays to the floor and adds a female minifigure with a camera. This minifigure has a prosthetic leg.

Bag 19 builds up the walls around this floor.

Bag 20 adds in some windows, more walls, and a few more displays to include a map with a rocket zooming by (Classic Space symbol???).

Bags 21 and 22 build up the wall structures and add in more windows.

Bag 23 finishes the floor with tiles on the top and you add on the plastic banners.

Bag 24 adds to the columns that match and fit right in with the first floor despite the break between the two floors.

Bag 25 attaches the plates that make up the third floor/roof.

Bag 26 begins to build up the roof area with a few plants and the start of some of the decorative architecture.

Bag 27 adds in more of the roof walls and the door to the stairs to the second level.

Bag 28 starts to add more detail. The roof level includes a small office and you build out some of the details of the office. This bag comes with the museum curator minifigure.

Bag 29 adds the structure around the office area which actually looks pretty good considering there is an office inside.

Bag 30 builds up more of the architectural details for the roof.

Bag 31 finishes off the structural details, adds in a telescope for the curator to use and then adds in some sky lights that open up to both levels of the museum below for some natural light.

Flipping the set around, bag 32 adds in the roof/awning section of the front of the building that covers up the stairs leading into the museum. Now that I’ve flipped it around, you can see on the left and right side, there are some arch/window pieces. It’s hard to tell from the picture I used, but there are microfigures inside as miniature statues which is a fun detail.

Before wrapping up the build, here are the seven minifigures you get with this set minus the two statues. You get a good mix of workers and museum goers. It’s always great to have more, but I can’t complain with the offerings that come with this set.

Bag 33 adds some final details to include a park bench, a mail box, the blossoming tree, a lamp post, some birds, and the stand for the window washer to use to clean the windows.

Overall, it’s another great modular building to build. Someday I hope to assemble all of my modulars in one place, but for now, you get just an individual picture. The price continues to go up on these, but the piece count on this one is higher and it is larger so not too many complaints there. There are plenty of great pieces inside too so if you’re a MOC builder, you won’t be disappointed. If you’re a fan of the modulars, definitely look for an opportunity to snag this one. Maybe with a good GWP or double VIP points. I think it’ll be a while before we see a sale on this one.

Happy building!

Set Review - #43249-1: Stitch - Disney

LEGO is expanding the buildable characters that are less than a foot tall and about 6 to 8 inches wide. We had them with Star Wars and here we have it with Disney. #43249-1: Stitch was released on 1 March 2024 for $64.99. It contains 730 pieces which comes out to $0.089 per piece. This isn’t a bad deal, but I suspect if you wait until maybe closer to Christmas time, this set will be discounted 10% or 20%.

I took pictures during the build and somehow they got messed up when I transferred them to my computer so this won’t be the normal review (sorry).

Here’s the box. The front has the LEGO and Disney logos. It has the full set and then a cartoon drawing of Stitch on the bottom. The back shows how you can move some of the parts like his ears.

The set contains 7 parts bags, a small sticker sheet, and the instructions. The sticker sheet is the flowers for his Hawaiian shirt so it’s not a ton of stickers to place on the set.

Here’s a close up of the small instruction booklet and then I took a picture of the stickers and my computer messed it up somehow so it’s tiny. You get 12 full flowers and then 2 half flowers for the shirt.

The build starts with his torso and then adds his legs, arms, and then his head. The head comes off (as you can see). It’s attached by a Technic pin and you can rotate it as desired for display. The arms and legs don’t really move, but you can adjust his claws. As shown on the box, the ears can move and his mouth moves very slightly, but not by much.

The eye pieces are printed (thankfully) and you just put them in so it helps to make the build easier versus having brick built eyes.

The flower can be removed. There is a small piece to make a connection on his head as desired.

Here’s the final build. I added the ice cream cone in for this picture. You can take it out of his hand if you want. This picture also lets you see the stickers on his Hawaiian shirt. I’m guessing they didn’t print them on as it’s a curved piece. Maybe?

Overall it’s a fun set with some interesting SNOT techniques to get the shaping. My 6 year old helped me build it and we had a good time putting it together. It wasn’t too hard if you have experience building. The set has some playability, but is mostly a display piece. If you are a MOC builder, you get a bunch of brightly colored pieces if you just wanted to assemble this once and then take it apart. The price isn’t bad, but wait for a sale and you can get it at an even better price.

Happy building!

Set Review - #71045 - Series 25 - Collectible Minifigures

It’s series 25 already! How crazy is that? This batch was released 1 January 2024 and they are still $4.99 each. Individual minifigures are #71045 or you can purchase the box of six with set #66763. There are scannable codes on the boxes to tell which minifigures are inside so it should prevent the boxes from getting broken into like we saw with the last version. I’m more of a fan of the non-licensed versions that they produce so let’s take a look at this round.

First, a picture of the boxes of six. Nothing super exciting.


My kids helped me put these together and they saw the fish with the Film Noir Detective and couldn’t figure out why it was there? Does it matter? This one is a fun concept and I’ve already seen a MOC or two posted using the minifigure as a main character.

Not our first gamer, but the E-Sports Gamer comes decked out with the most gear to include headphones, a controller, a keyboard, and the trophy.


Everything castle seems to be popular lately so we’ll see if this one joins that party. the translucent red ax blades are pretty cool. I doubt Vampire Knight will be a new sub theme, but it’s pretty creative.

We’ve had numerous Olympians before. The Sprinter here is different as he has prosthetics on.


Goatherd. Is everyone happy now? There’s a goat. I’m not sure why everyone is so excited about this goat, but it’s here. I hope you all can get some sleep at night now.

The Mushroom Sprite is very fun. The mushroom cap is a fun detail and you get a colorful butterfly as well.


The Fitness Instructor comes equipped with a kettle bell, fitness drink, and printed abs. She looks like she could kick any minifigure’s butt.

The Triceratops Costume Fan is great. Could go well with the new Natural History Museum modular or maybe as a Jurassic Park visitor.


Harpy is… um… what is it? Wings, claws, purple hair… okay?

Train Kid is fun with the costume similar to past boat and plane characters. We weren’t sure why he has an eye patch on. I assume he has an injury that he’s healing from. The printed part on the front of the train piece is a nice detail. You get two in the bag so figure out how to use the extra one.


The Fierce Barbarian could be a good addition to a Viking Village. This is not the first time we’ve had a barbarian if you can remember back to Series 17. If you have the previous one, you can now grow your barbarian horde.

Lastly, we have a Pet Groomer. This one comes with a dog that I don’t think we’ve gotten before. The minifigure has a dual printed face and the apron is printed on the torso and legs.

There you go…Happy hunting!

Set Review - #10321-1: Corvette - LEGO Icon

The LEGO Icons line has been kicking out some classic cars pretty regularly at a similar scale and 2023 was no exception with #10321-1: Corvette. This is the classic 1961 version according to the instructions. This set was released on 1 August 2023 and retails for $149.99 in the US. With 1,210 pieces, it works out to $0.124 per piece which is pretty steep. There are a lot of larger pieces and some non-standard ones so I’m sure that added to the cost. I grabbed this one before Christmas from LEGO when they were offering 3X Insider Points so it was a slightly better deal. Still, look for opportunities to grab this one at a discount or with something better than just the standard high price.

The box showed up in a cardboard box designed for the set which was slightly damaged during shipping. The front shows the set with the Corvette logo, Chevrolet logo, Icons logo, and 18+ greebling. The back gives some additional shots of the vehicle and a schematic with dimensions.

The box contains nine individually numbered parts bags, a bag with the wheels, and then I got two of the new paper bags with the two windshields in them. The instructions come in a paperboard envelope for protection.

The instruction book has a few details about the vehicle and the set in the front before launching into the build. Sadly, this set comes with stickers. Thankfully, they’re all pretty small and add some decent detail to the set overall.

Bags one and two start with the chassis of the vehicle. There are a lot of Technic beams and pins that get connected together before you start to attach pieces that will contain the outer mold line of the vehicle.

Bag three gets some of the trunk built along with a bit of the front.

Bag four adds more of the trunk space along with some of the curves. When I started this build, we had a few days of nice weather before the cold spell that hit the US and I brought a table to build outside while my kiddos played with friends. A neighbor who walked by saw the box and said “That’s LEGO? Wow!” I agree. It’s not the blocky, rectangular sets we’re used to. There are a lot of curves to make this a smooth vehicle. The question I have is whether it’s too far. While I think the vehicle looks sleek, have we gotten too far away from the LEGO concept where we are not making whatever parts we need to get the shapes we desire? I’m not sure there is a wrong answer here. It’s really up to the fan base.

Back to bag four… you add stickers to the license plates. You get three so pick what you like. Also, the bumper includes some gray banana pieces which is a fun detail.

Bag five adds some details to the front of the car to include the mechanism for the steering column. It’s pretty similar to past vehicles, but that’s okay. I don’t buy Icons sets for functionality. It’s more of an added bonus. If you want functionality, go for Technic sets.

Bag six builds the sides of the front of the car to include the wheel wells. You also add in the bumper which includes more gray banana pieces.

The seventh bag adds in headlights using a piece that I haven’t seen used before. Maybe it’s new? You also add the curvature to the top of the car over the wheels in the front. You add in some tiles which are printed to get the racing stripe look. This bag also adds in both doors. They are built in a similar way only mirrored. You use some interesting techniques to build them, but there are more pieces which seem a bit specialized so you be the judge here.

The eighth bag adds the front hood and trunk in the back. The hood in the front opens from the back up versus the front. The fit didn’t seem quite right to me and I’m not sure if I did it wrong or that’s just how it’s intended. Also, the hood piece doesn’t stay onto the assembly that connects to the front of the car real well as you open/close it. The hood has some larger curved tile like pieces… again, helps the model look great, but seem to be rather specialized. I forgot to get a picture here, but you’ll see the engine parts next. You build an engine with this bag. The trunk is added as well. There is a small Technic piece that is loose that seemed out of place that you added in earlier. This piece is used to help you open the truck as it is hard to do otherwise. A smart move and it doesn’t really stand out so I appreciate the effort. There is a sticker on the trunk and I think I centered it okay.

I also failed to take pictures of the seats, but they get added here too.

Here’s the final build with a few picture of the final vehicle. Bag nine adds in the windshields, roof, an antenna, and the steering wheel. Overall, it’s a sleek looking build. I’ve already complained enough about the specialized parts. I enjoyed the build, but wasn’t so sure about all the parts. Also this car is a bit overpriced considering the piece count. The 3X Insider Points along with GWPs helped encourage me to grab this one, but I wouldn’t buy it without multiple promotions.

What are your thoughts on this one? Could have been better? Just right? Awesome?

Happy building!

Set Review - #10325-1: Alpine Lodge - Winter Village - Icons

The Winter Village theme continues with 2023’s Alpine Lodge. This set gets away from Santa and elves and is just a fun winter scene with some Christmas decorations included. The set was released for sale on 1 October 2023 and retails for $99.99. With 1,517 pieces, it works out to $0.066 per piece. LEGO has managed to keep the price of this set at the same range for quite a while now and the price per piece one this one makes it seems like a good deal even with a light brick included.

The front of the box shows the full set built from the front side. The back shows the other side of the set, some play functions of the set, and gives dimensions of the set once it’s built.

The set contains 10 numbered parts bags, two instruction booklets, and a small sticker sheet.

The instructions are designed so that you can build together. One person can work on the lodge itself and another can work on the ice skating area, snow mobile, tree, and out house. I built this set with my 6-year old. I found pieces for him and did some building, but he put most of it together without too many issues.

Only four stickers so not too bad. It could be worse. The stickers add some fun details to the set so I can’t complain there.

The first bag builds some of the smaller items in the set. This includes a snow mobile pulling a sled, an out house, and then a tree. It seems that every year the LEGO designers come up with another way to make a Christmas tree and this year is no exception. The sled attached to the snow mobile can pull minifigures or you can place the tree on top to carry it to the lodge. The outhouse is a simple design and looks like one should with a hole for taking care of business. There is a small tree next to it which is built using the fern pieces. The top pieces are white for snow. This bag contains a female minifigure with gray hair. She comes with a cap and goggles for driving around on the snow mobile.

Bag two builds a small ice skating area. It reminds me of the skating area from set #80109-1: Lunar New Year Ice Festival. There are translucent wall pieces placed on their side for the ice and then you use plates to create a shape around the ice for them. It’s a small skating area, but it gets the job done. There is a small dock leading to the pond. The dock has minifigure snow foot prints on it which is a fun detail. There is a table with some ice skates that I assume you are supposed to rent given the $100 bill that comes with the bag and is placed next to the skates. There are also two trees. One is a small molded tree and the other is similar to the one from bag one with the fern pieces. This bag come with one kid minifigure who has a hockey stick and puck. The minifigure comes with a hat and scarf as well as a hair piece. There is a small snowman like figure in the build as well. My kiddo thought the hair should go on the snowman.

Bag three starts the lodge. You start with the front wall which includes an arched doorway and a window. There are some good details here including the shutters, some plants as decor, the lamps around the door, and the use of textured bricks and different bricks to show details on the walls. This bag comes with a male minifigure who we can assume runs the lodge.

Bag four continues on this floor with the start of the chimney, a stack of logs, and building up some of the wall.

Bag five starts to add some structure on top of the walls so you can get to the next floor. You also get some details on the inside to include some chairs with a table, a drink and cookie area, and a guest sign in log. This bag comes with a female minifigure who we can assume is a guest at the lodge. She has a suit case. There is a small gray cat as well.

Bag six starts the next floor with building up the walls. This is where the use of the new-ish rounded pieces comes into play to create a log cabin effect. I like how they did this and overlapped them to make it look like they are stacked on each other. This bag also builds a small bird house with a red bird on the perch outside.

Bag seven builds the rest of the outside (seen in my picture for bag eight) and then details on the inside to include two beds, some night stands, and a dresser. There is a door that goes out to a balcony area and like the dock at the pond, there are two snowy minifigure footprints where a minifigure didn’t wipe their feet good enough.

Bag eight adds more to the chimney and some structure on top of the second floor. As mentioned, you can see how they finished up the log cabin look on the second floor. The light brick is buried in the chimney and my kiddo was concerned he wouldn’t be able to reach it to turn it on. More to follow there.

Bag nine adds the pitch of the roof, some decorations outside, and a Technic sub assembly that allows the roof to be attached on the front section. On the inside, there is a a bed, some furniture and a gift box with some binoculars inside. This bag also completes the chimney. You build up the outer section of the chimney and then a top to the chimney that you can press in to push in the light brick and light up the fire place.

The tenth bag wraps up the build. You add the roof onto the lodge. The front part of the roof attaches to the Technic sub-assembly from the last bag. The rest of the roof attaches to some Technic parts which connect to the lodge. All the roof is made of white pieces to represent snow.

Additionally, this build includes pieces to add a tree skirt and then put decorations on the tree built from bag one. They are just multiple colors of round 1x1 translucent tiles, but they work for decorations.

Not the best picture, but you can see how the light brick lights up a window on the second floor and then the fireplace on the first floor. This is a different from the usual usage of light bricks that light up one section/area of a build.

This build comes with five minifigures. They aren’t super out of the ordinary, but it’s a good mix for playability. For some context, last year’s set had six minifigures and the previous year’s set had four.

Here is the final build. I like where the design team went with the set this year. The price remained the same from the previous year, there are a decent number of pieces, there is some good playability with the set, and it comes with some good pieces. I definitely recommend this one if you haven’t been sucked in by the Winter Village sets already.

Happy building!