The Journey to Billund, Denmark

I went to Billund and the LEGO® House and it was awesome! Over the next few posts, I plan to give some reviews and share my experience to help others who may be planning a trip there. If you missed my post about planning your trip in the early stages, you can see it here.

For most Americans, the experience starts with landing in Billund at the airport. Since I live in Germany, the experience was a drive to Billund through Germany. The total drive for my family was around 10 hours, but we broke it up into a few days. We drove to northern Germany and spent a bit of time there before heading north.

Denmark_sign.jpg

Most countries in Europe greet you with a sign like the one to the left. The border had a checkpoint on the inbound side. We did not have to stop so that was good for us.

And while us crazy AFOLs would love to think that the border has brick built cars and minifigures waving to you as you drive in, I can assure you that it is not the case.

We drove to Vejle, Denmark (highlighted on the right) and established our base camp there for our visits to the LEGO® House (we planned for 2 days) and touring around elsewhere in Denmark.

If you’ve never been to Denmark, it’s pretty expensive. We found that out quickly as lodging in the Billund area is not cheap. People come for LEGO® and then there’s another theme park there, which I had never heard of, called Lalandia. The place we found in Vejle was a townhouse which works for my family as we can cook our own food versus going out to eat a lot.

Picture from Google Maps

Picture from Google Maps

Billund_sign.jpg

The drive from Vejle to Billund was around 30 minutes so not bad at all. Vejle is not a big city and we were on the outskirts. After driving out of Vejle, the drive to Billund was mostly through countryside, farm areas, and small sections of housing.

This was our greeting to Billund… again no LEGO® references yet. Sorry.

Our first greeting to LEGO® comes along the roadside. There were actually a few sets of large 2x4 bricks along the side of the road. Some had cows grazing nearby. There were some buildings nearby so I wasn’t sure if those were owned by The LEGO® Group or not.

roadside_bricks.jpg
LEGO_house1.jpg

And then there it was… the LEGO® House.

There is a lot of new development going on around it (as you can see in the picture) and the roads around it have a bunch of newer looking shops and restaurants. In my excitement to be there, I of course focused all of my pictures on the LEGO items so I apologize for not getting anything on the surrounding areas. We did stop at a bakery there (yum) and my wife found a cool print that said Billund in a shop nearby. Other than that, our visit focused on the brick.

We parked in the parking garage nearby. It’s about 500 meters or so from the garage to the LEGO® House. For each of the two days we spent there, the cost to park was 60 DKK. We paid $8.98 on one day and $8.99 on the second day with the change in exchange rate. This isn’t bad considering we’ve parked in Europe for much worse. In some of the bigger cities such Brussels and Munich, we paid around $25 for the day. My work sent me to Frankfurt and parking there was around $40 for the day (which they thankfully reimbursed me for).

Back to the brick… we were excited to see more and more LEGO® references and we liked how the signs in the garage looked like they could be bricks stacked on each other. Each floor of the garage had a different theme on the wall. We didn’t get pictures of those, but definitely better than some of the plain, boring parking garages I have been in.

garage1.jpg
garage2.jpg

We made it! After seeing all of the videos and blog posts of others, it was very exciting to be there in person. Over the next few posts, I will go through the inside and give some related reviews to the LEGO® House experience.

lego_house2.jpg
Lego_house3.jpg

Planning a Trip to the LEGO® House

I am super pumped to be planning a trip to the LEGO® House in Billund, Denmark. One of the advantages to living in Europe is that we can skip the expensive plane tickets from the US. It’s about a 10 hour drive from where I live to Billund so definitely not a short hop to get there, but we’re in the same time zone and we’re going to make a vacation of it. The plan is to take our time by driving, then doing some touring in northern Germany, and then driving to Denmark. We’ll spend a few days in Denmark before we drive back with another stop in northern Germany to see some sights and not spend all day in the car.

My blog is written towards Americans so talking about driving to Billund probably doesn’t help too many in my audience. Sorry. I’ve heard numerous times in write ups about visiting Billund how you didn’t have enough space in your suit case to bring home goodies. I thankfully will have a vehicle so I am hoping to be able to cram my brick loot into the car.

So what do you need to know about the LEGO® House?

First off, I recommend checking out some of the fan media videos out there. Beyond the Brick has useful LEGO® House tour video out there. There are some others too so feel free the check them out and be inspired.

Picture from Lego.com

Picture from Lego.com

Onto the planning… The LEGO® House web site is very user friendly and informative.

To start off, tickets are listed as 229 DKK. In US dollars that’s a bit over $34 each (at the exchange rate when I wrote this post). Kids aged 2 and under are free. All of that is if you pay at the LEGO® House. You can buy online ahead of time for 199 DKK or just under $30. The site says you have to reserve a time to enter, but our tickets we bought online just have the date. So I assume our date isn’t busy. If you get a season pass, you are not guaranteed entry on every day, but it’s an option if you can go a lot (you are lucky if you can go a lot). The season pass is 399 DKK (just under $60). There are other options as well that you can see on the site like group passes and cheaper prices for arriving much later.

Check the calendar online before going as some days it is closed or sold out. Also the hours vary based on the day that you go. Keep in mind the the experience zones open later than the Square. The square includes the LEGO® brand store in the LEGO® House, a play area, and a few other things.

Parking at the garage is 10 DKK (about $1.50) an hour which for Europe is actually a really good price. The site says there is free parking further away. I’ll be going with my family so being closer would be better for my kiddos.

Why go now? One reason is that my time off from my non-brick job got approved, but in terms of the LEGO® House itself, what’s is there to see now besides the Experience Zones?

-The Fullsize LEGO® Technic™ Bugatti Chiron (YouTube videos from LEGO here and here) will be there from 16 May 2019 until 10 June 2019
-The LEGO® Star Wars™ exhibition (The BrothersBrick Blog did a good article on this here) is scheduled to be there through 2019. It celebrates 20 years of LEGO® Star Wars™ sets.

My goal is to have a number of posts about the visit. There is a lot out on the web already about what is inside the LEGO® House itself and I will provide some of that too, but I hope to cover a bit about where to stay, some things to do in the Billund area, and whatever else I stumble across. So stay tuned…

In the meantime, happy building!

Set Review - #10264-1: Corner Garage - Creator Expert - Modular Building

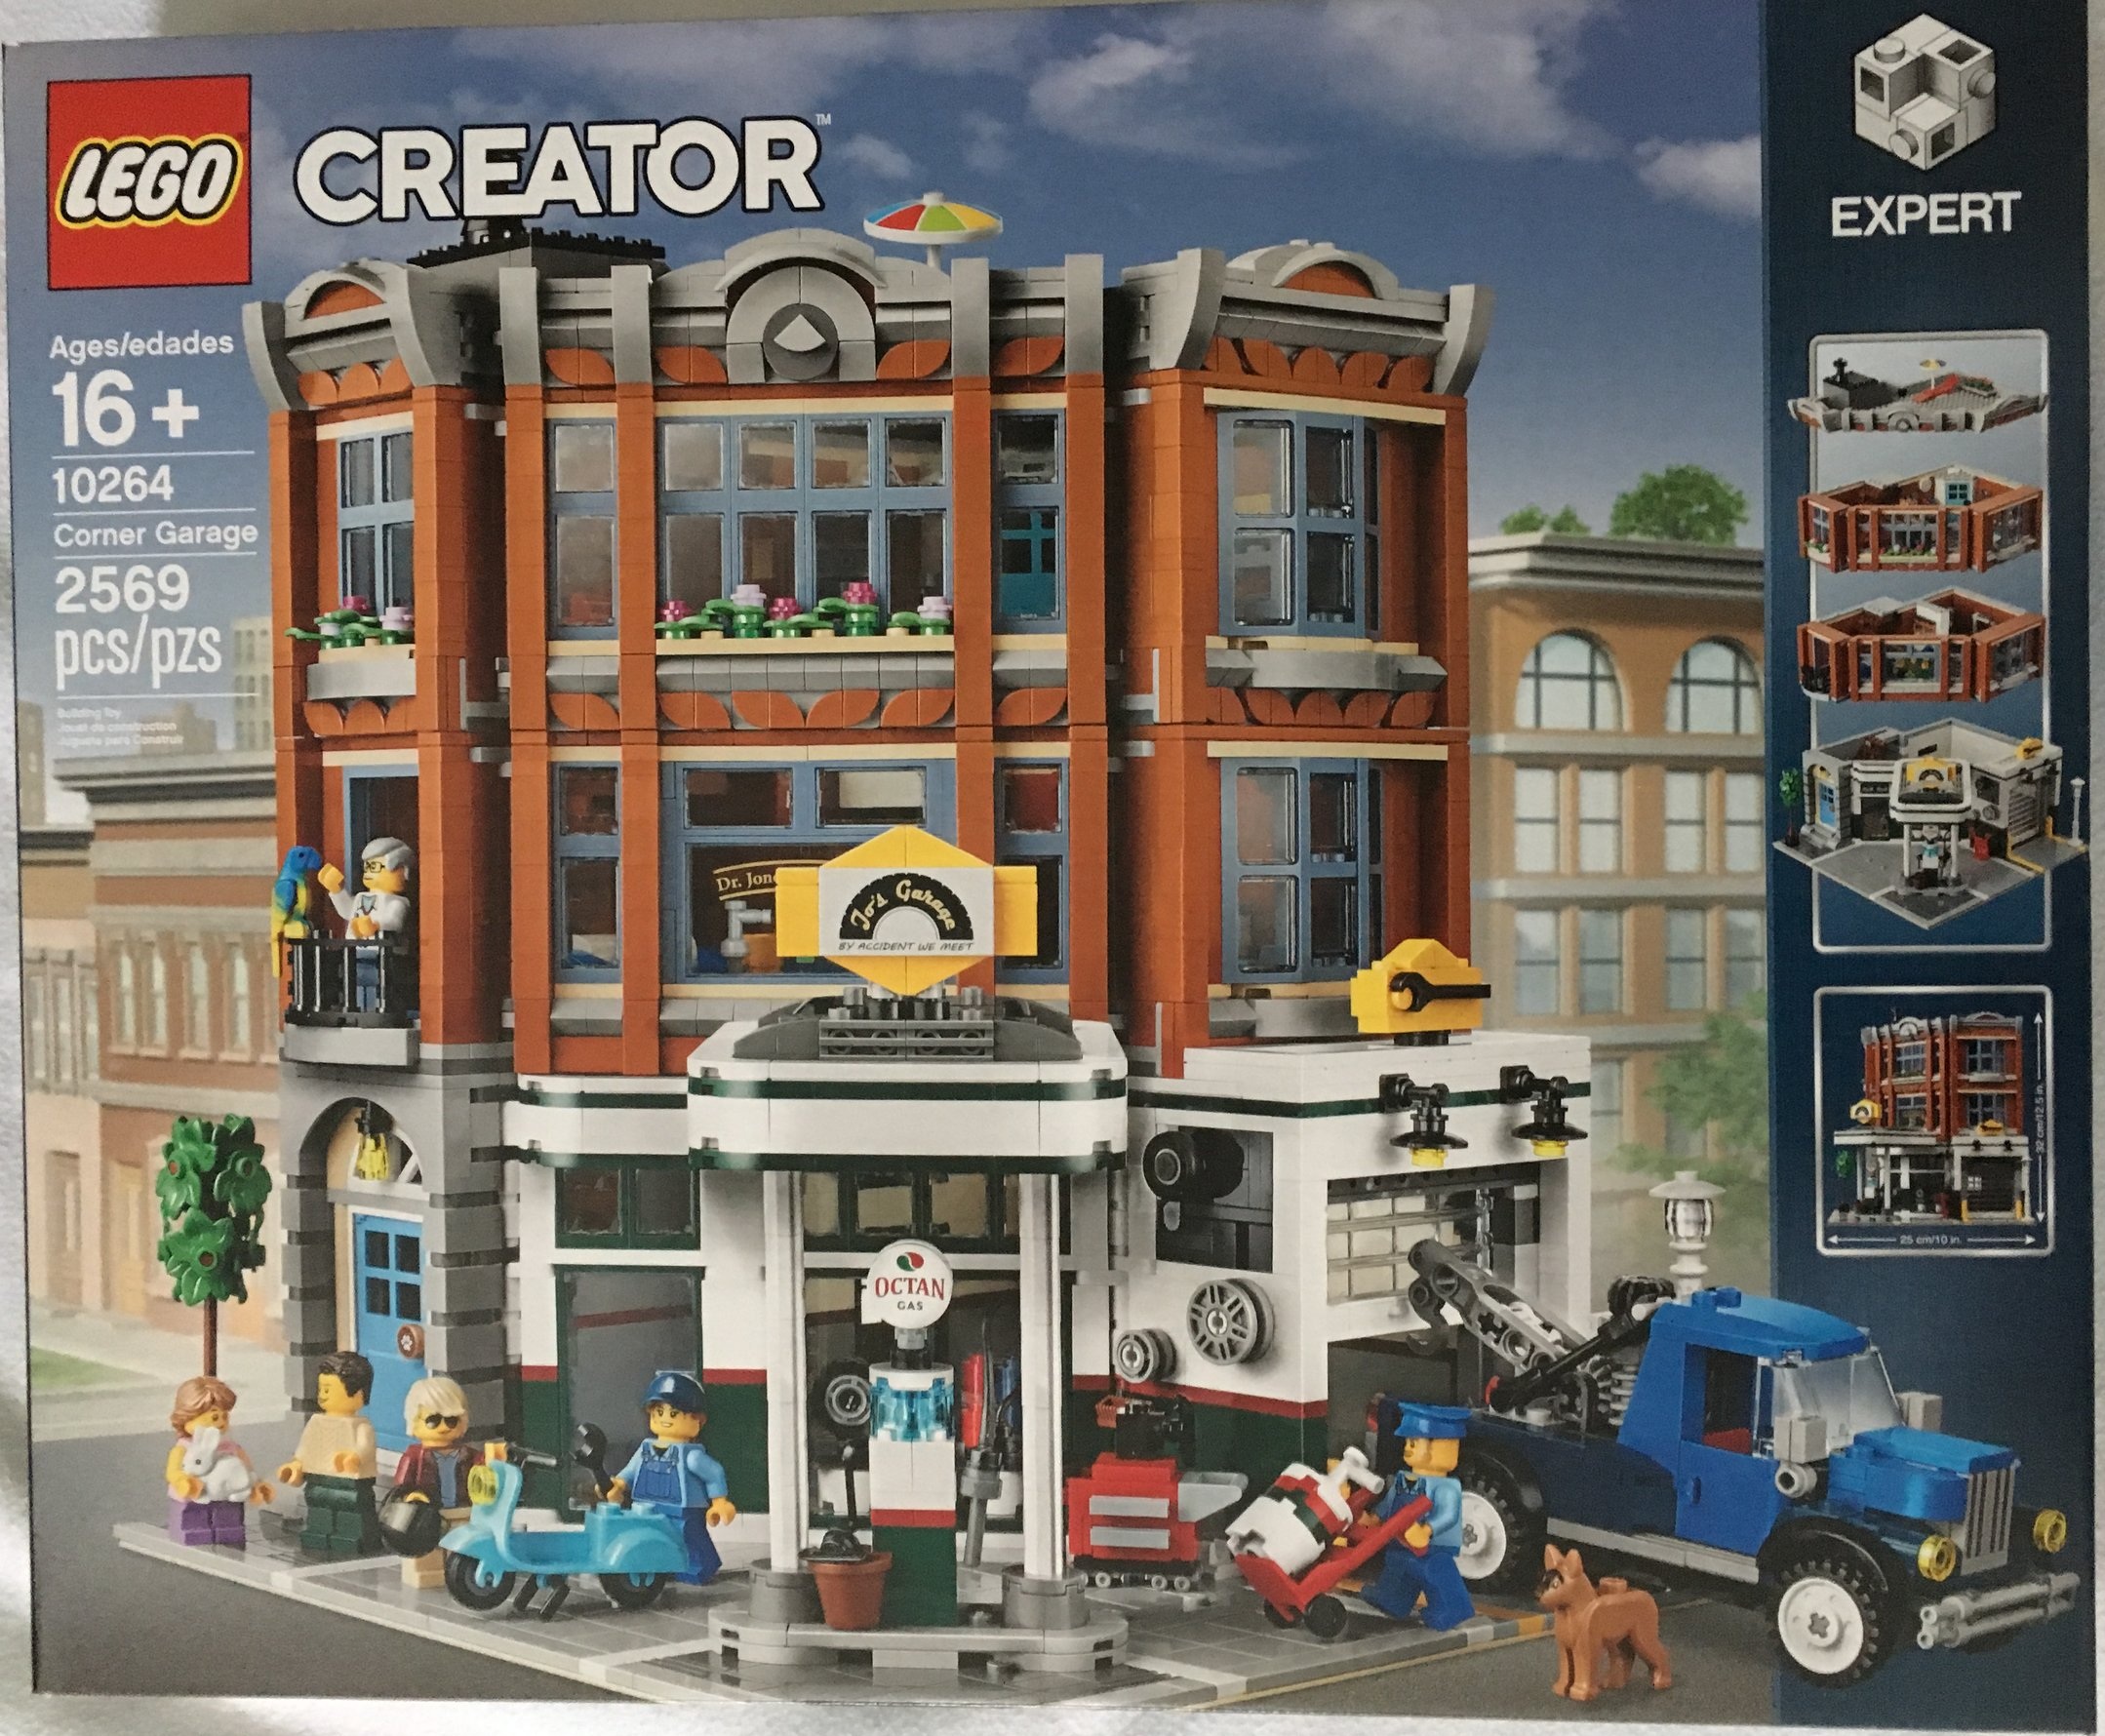
The modular building line for Creator Expert started in 2007 and is back this year with #10264-1: Corner Garage. It was released on 2 January 2019. This one cost $199.99 and with 2,569 pieces, it works out to be $0.078 per piece.

You can see the previous Modular Building reviews at the following links:
#10246-1: Detective’s Office (2015)
#10251-1: Brick Bank (2016)
#10255-1: Assembly Square (2017)
#10260-1: Downtown Diner (2018)

A lot of the reviews I’ve read or watched have been negative towards this modular set. They’ve said it’s rather plain and doesn’t have a lot of the detail others have had. So we’ll see…

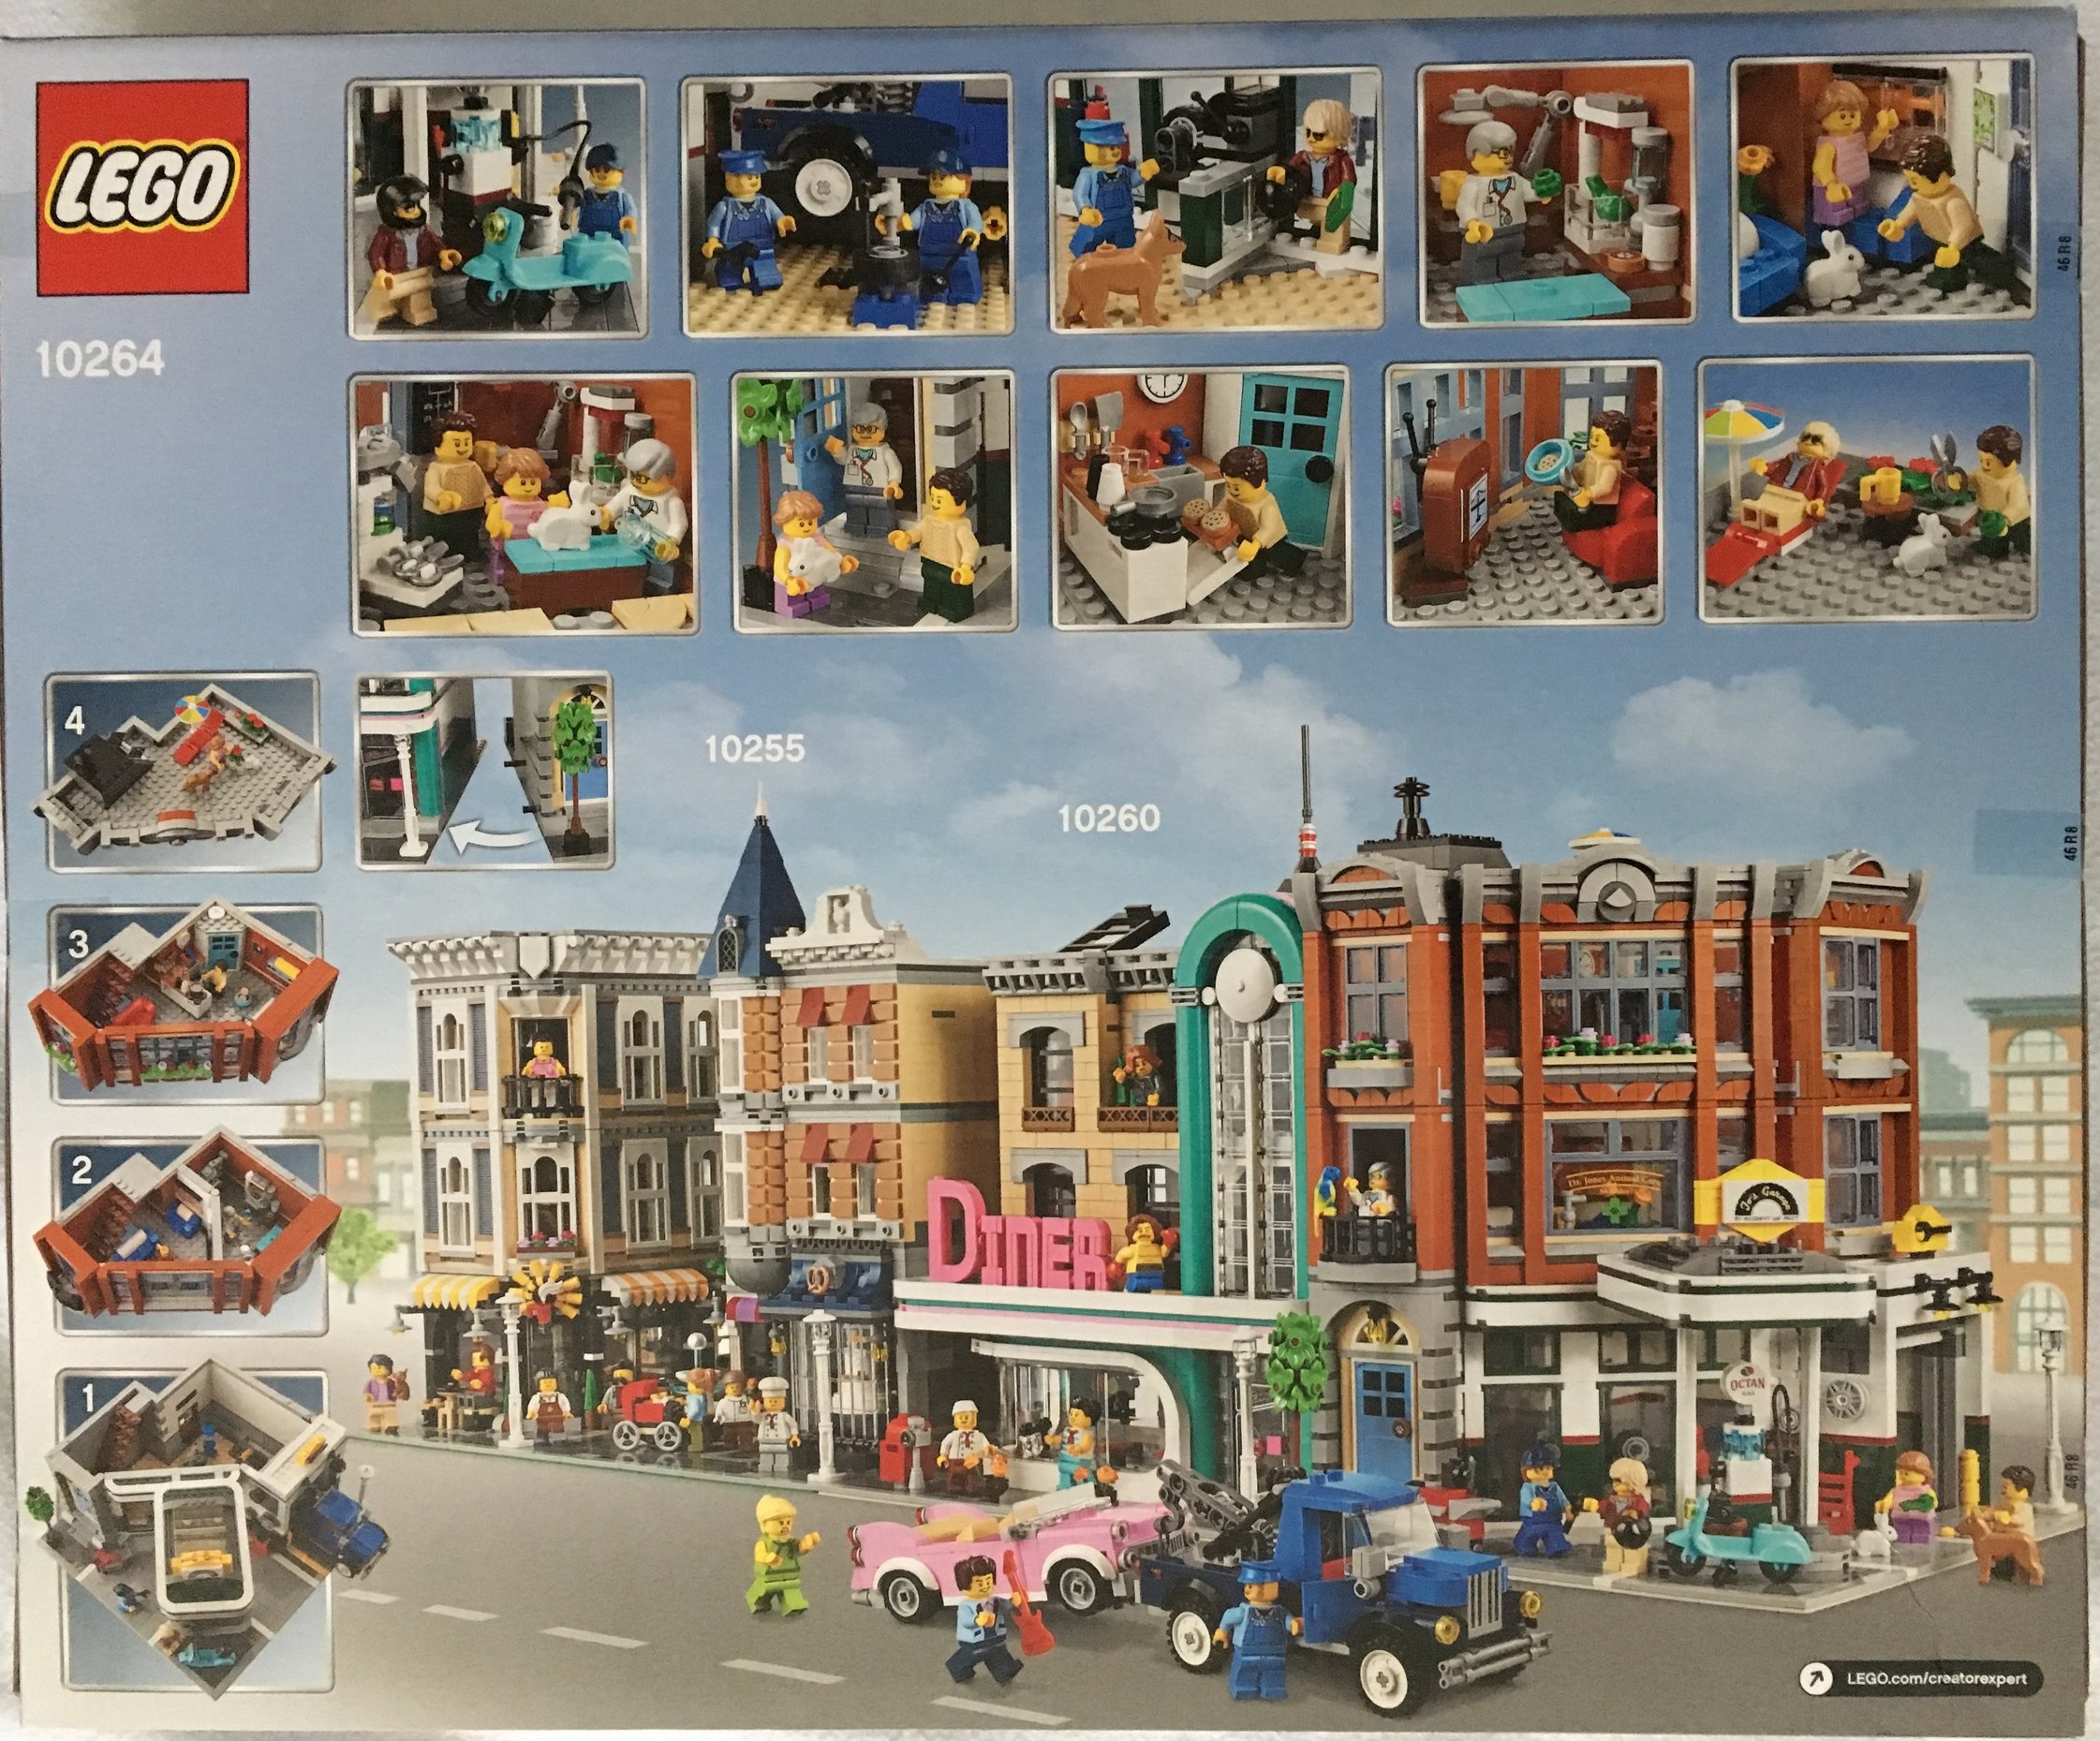
Like others, the front shows the full build with the different floors on the right side. The back shows some of the inner details and then how it looks next to some of the previous modulars. The box shows it next to the Assembly Square and Downtown Diner. I think it looks pretty good there.

10264_box_front.jpg
10264_box_back.jpg

The contents are six sets of bags, an instruction booklet (that comes wrapped), a 32x32 stud tan base plate, and two 8x16 light gray plates. I’m not sure why the 2 light gray 8x16 plates are separated as there are also some in bags too. Oh, and no stickers! Whoo-hoo!

10264_contents.jpg

The first set of bags starts the first/ground floor. It includes quite a few 2x2 light gray tiles for the floor and road portion. You can see the start of the garage as well as the lift. There is a tool box in the garage for the mechanic to use and a broom and dolly outside. This set of bags come with a dog and a male mechanic minifigure (I’ll hit on the minifigures later).

10264_bag1.jpg

One thing out of the ordinary for this portion of the build is the lift. There is a simple function that allows you to have the lift go up and then down. As you can see in the 2 pictures, you slide the piece out and it goes down and then you push it in and the lift goes up. Nothing to challenging, but it is cleverly integrated in the build without taking away from the aesthetics too much. So far I have only tried it with the vehicle that comes with this set and it works with that one, but that one is slightly heavy. I have yet to try it with a lighter vehicle.

10264_lift_down.jpg
10264_lift_up.jpg

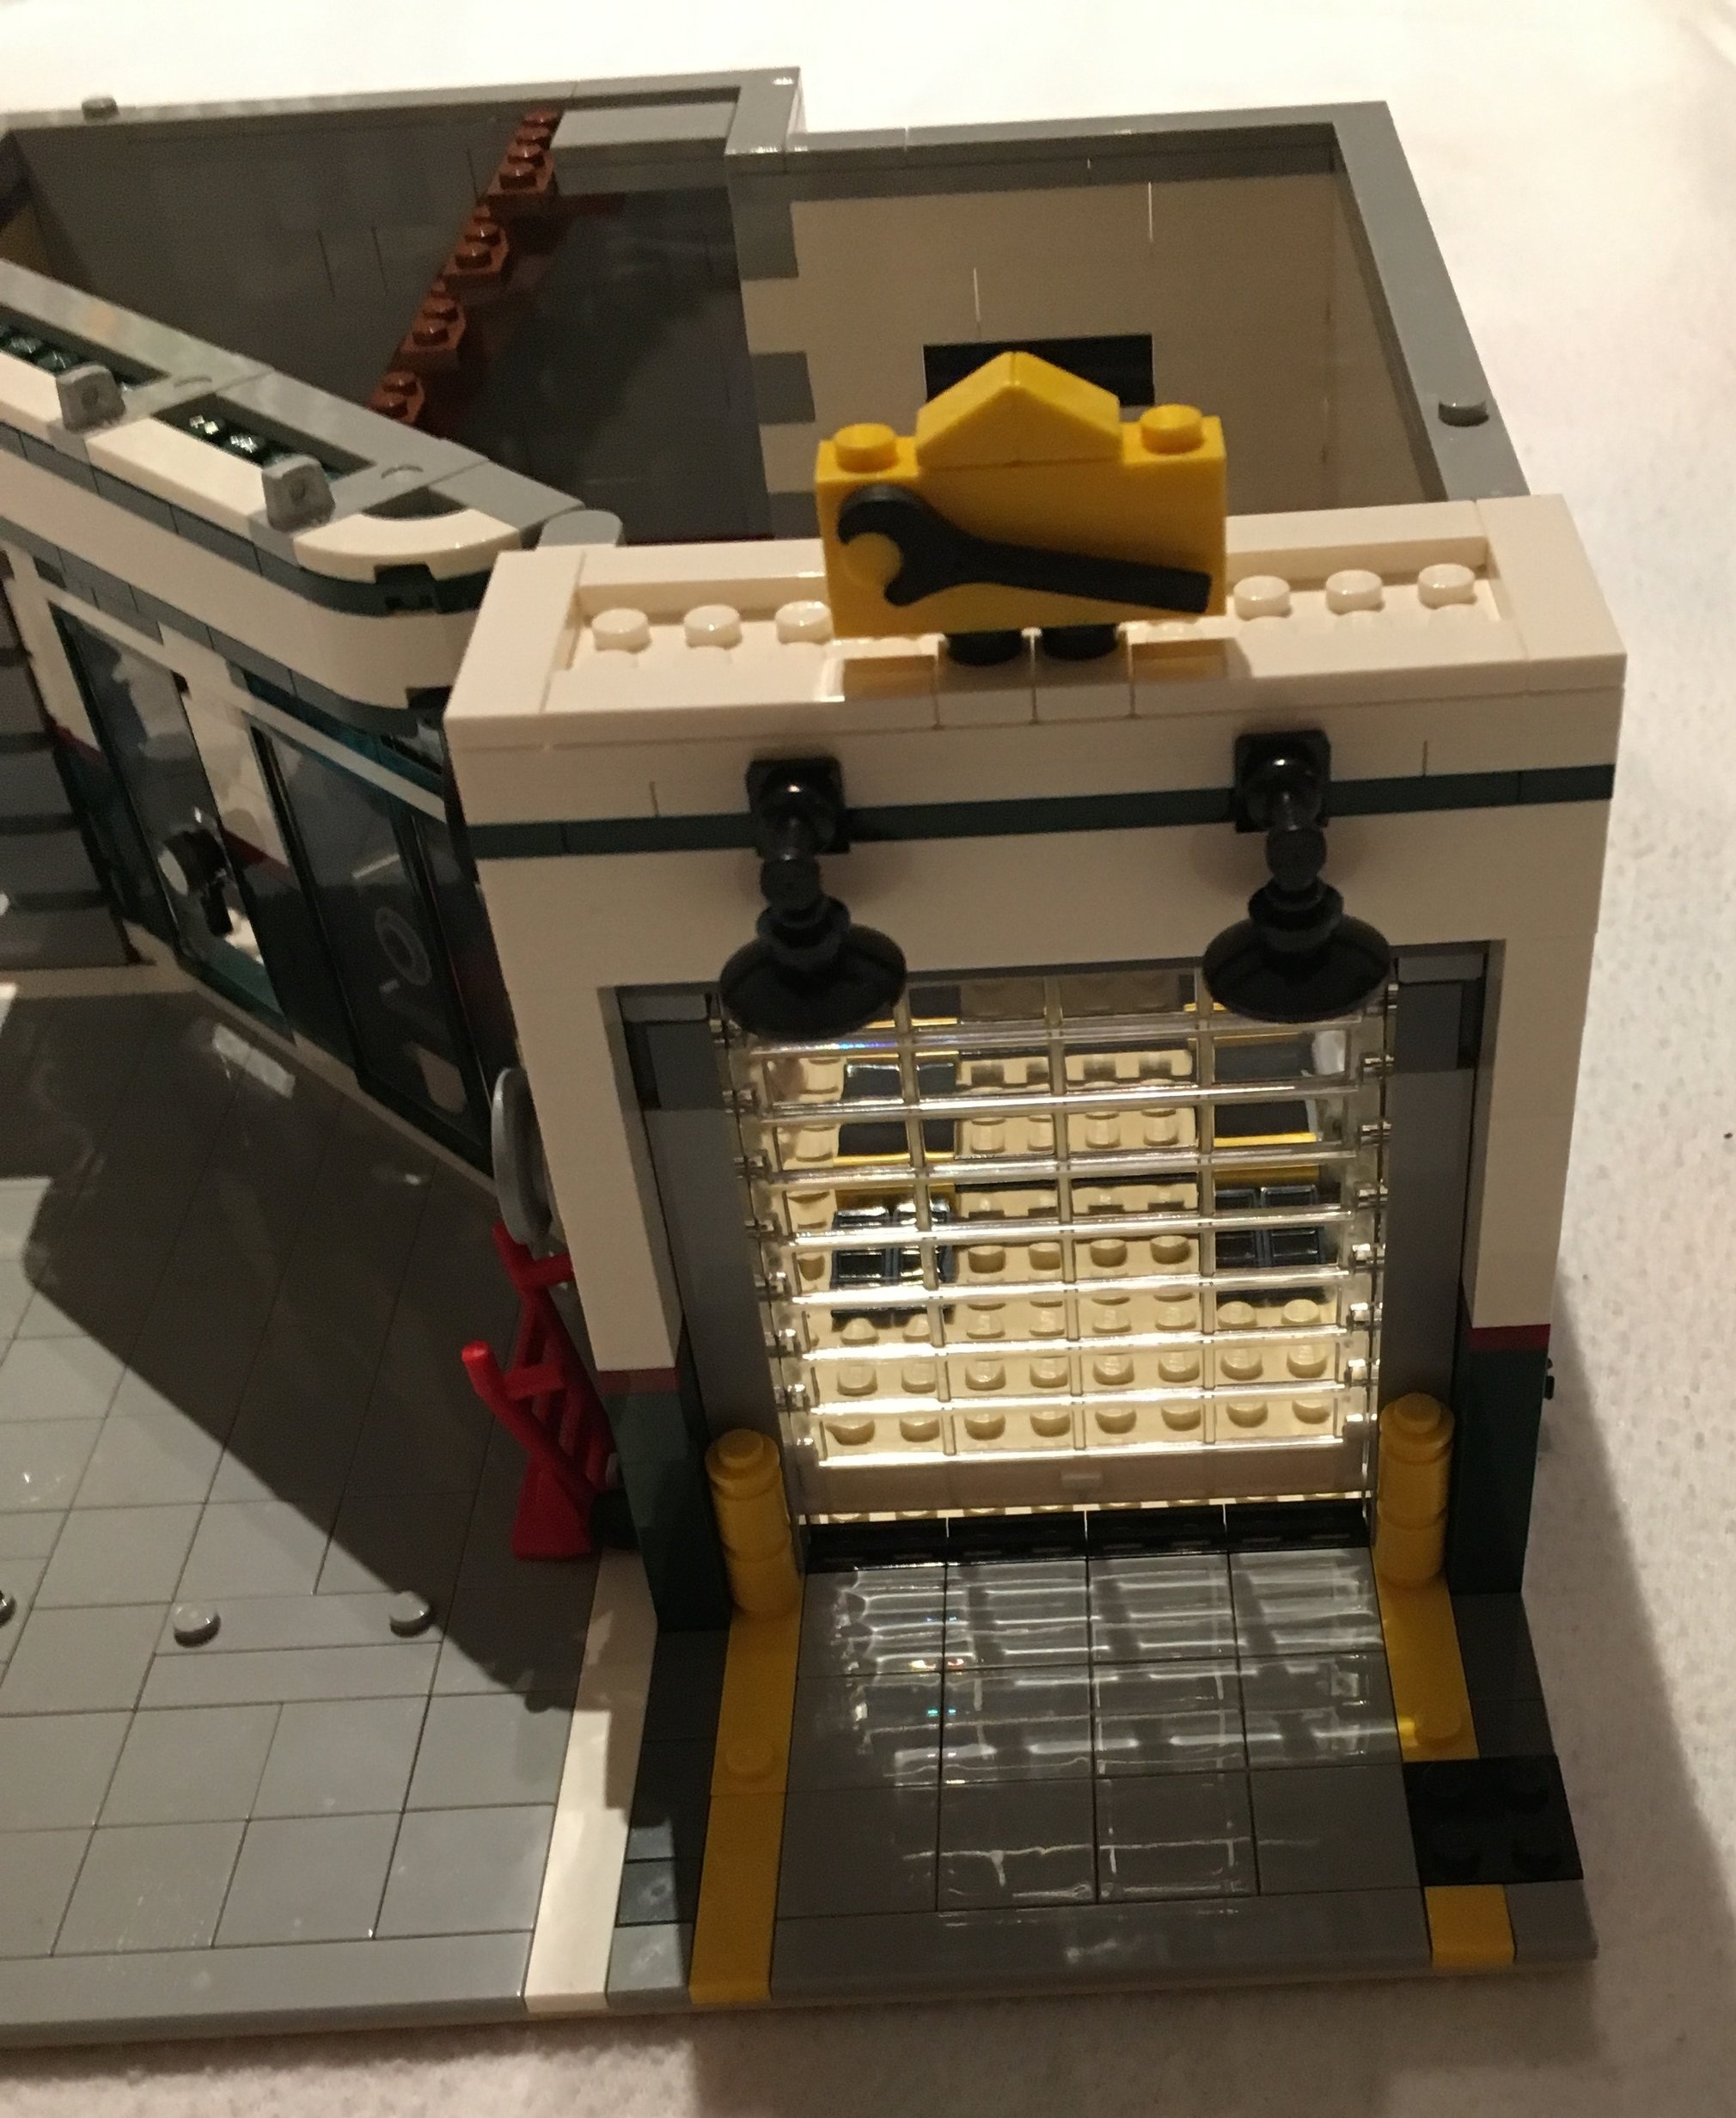
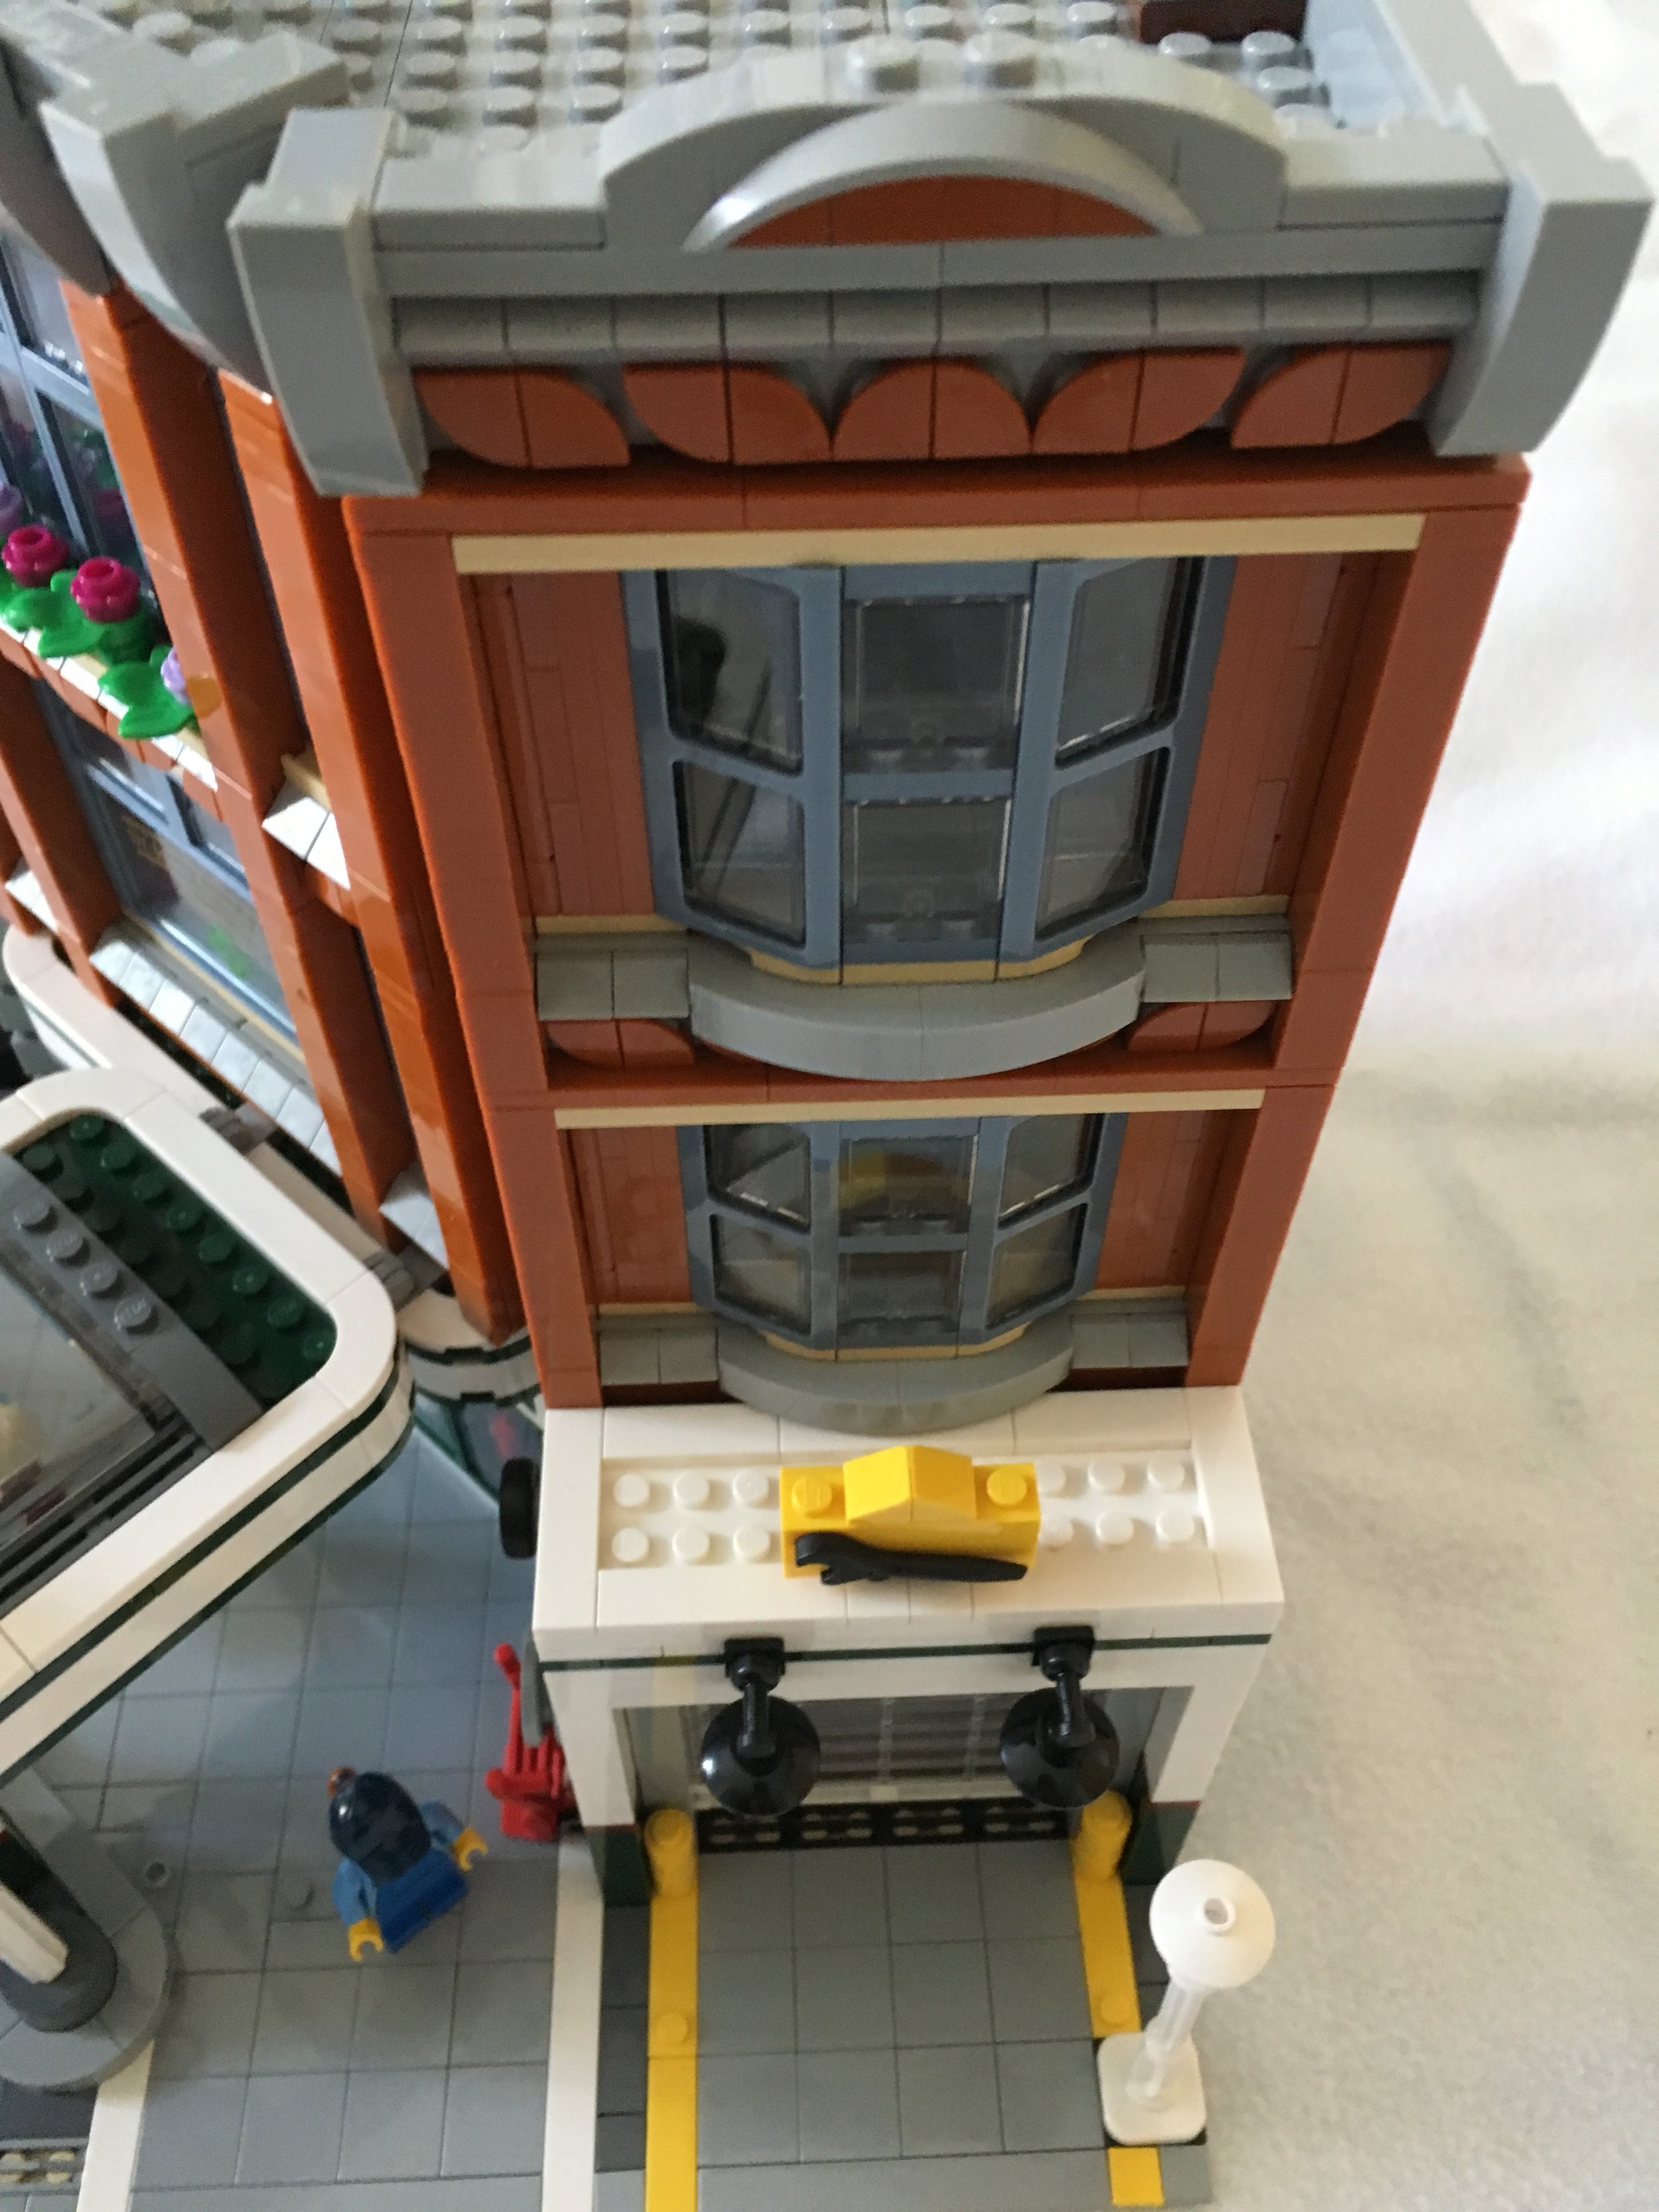
The second set of bags mostly finishes the ground floor. Internally, there are some items for sale to include tires and maybe motor oil. There is also a cash register and counter. Then there’s a door entrance opposite the garage to go up to the higher floors. On top of the garage door is a small sign for the shop with a wrench on it.

This set of bags include a small Vespa type motor bike and a male minifigure who is the rider.

10264_bag2a.jpg
10264_bag2b.jpg

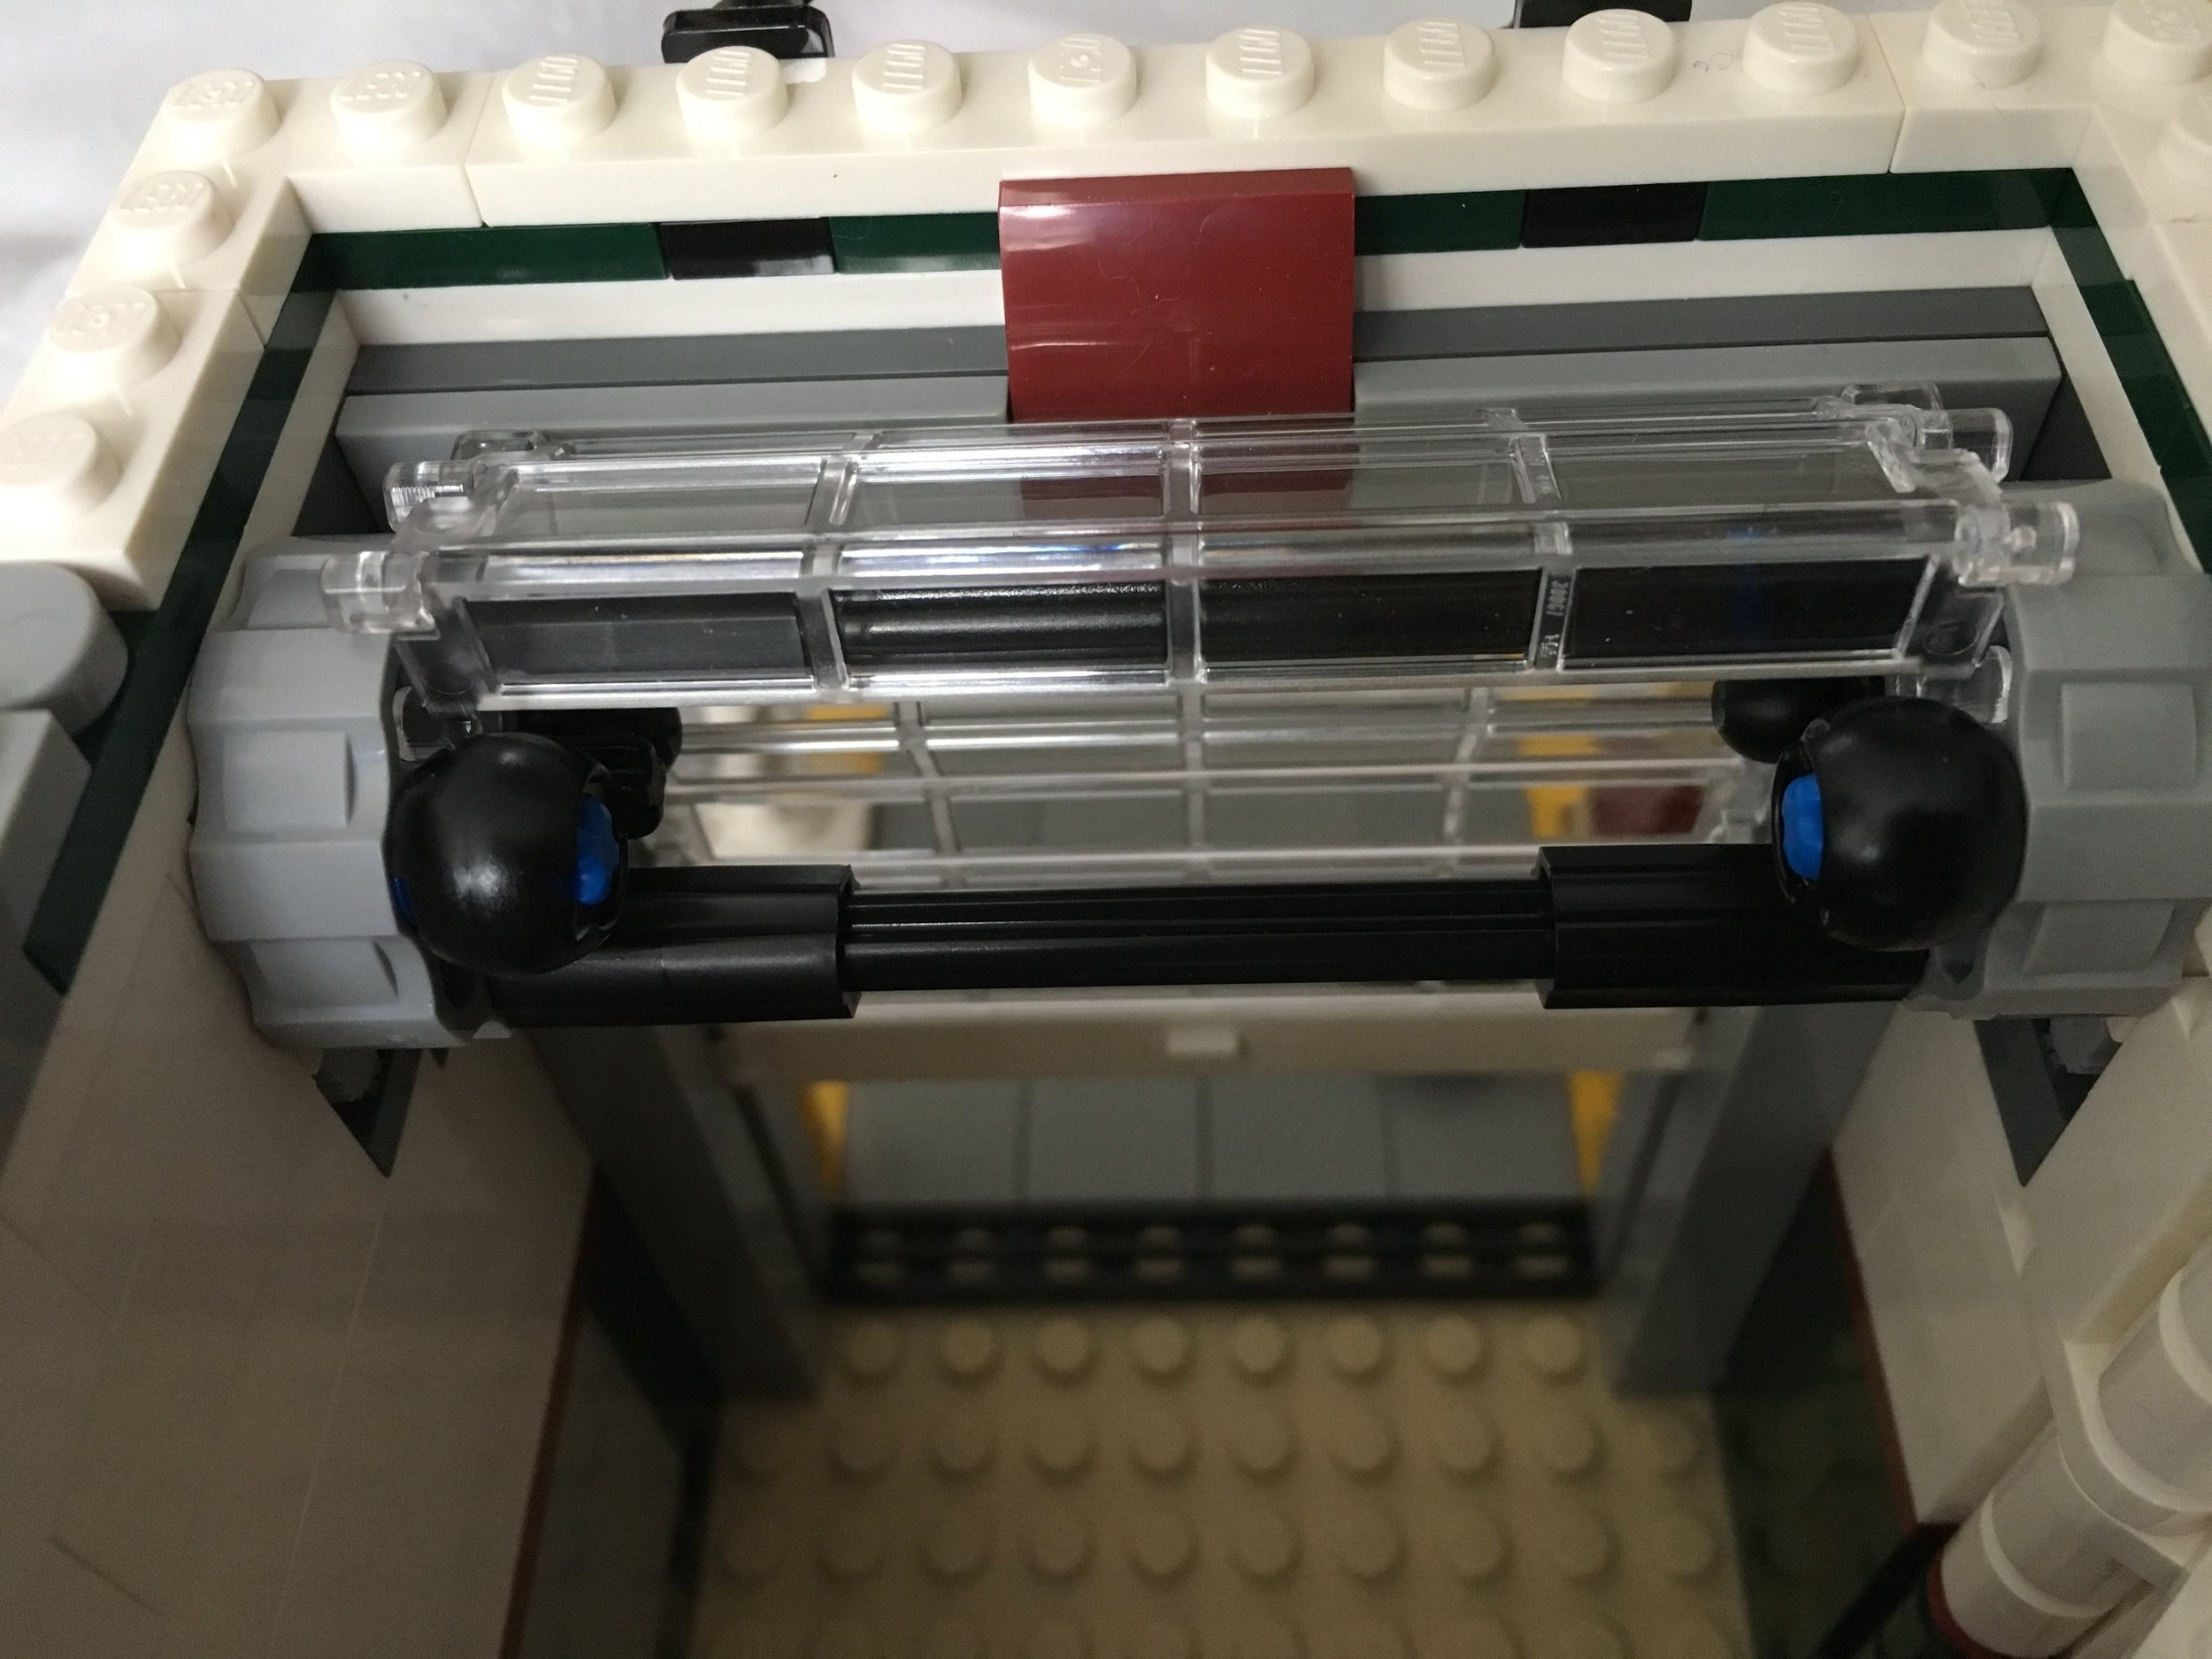
The garage has a door that can be opened and closed. It is the standard door used in some of the CITY sets, but it does not have the same attachment. There is a wheel on the outer wall that you spin to open or close the door. When you open it, the door parts roll up. When it closes the door goes down in a track along the walls. Some of the CITY fire stations just have the garage doors stay on the track the whole time. When the door goes up, it just slides up above the vehicle stall versus rolling up like it does in this set. I had a bit of trouble putting this together correctly, but eventually figured it out so it works fine.

10264_bag2_door.jpg
10264_garage.jpg

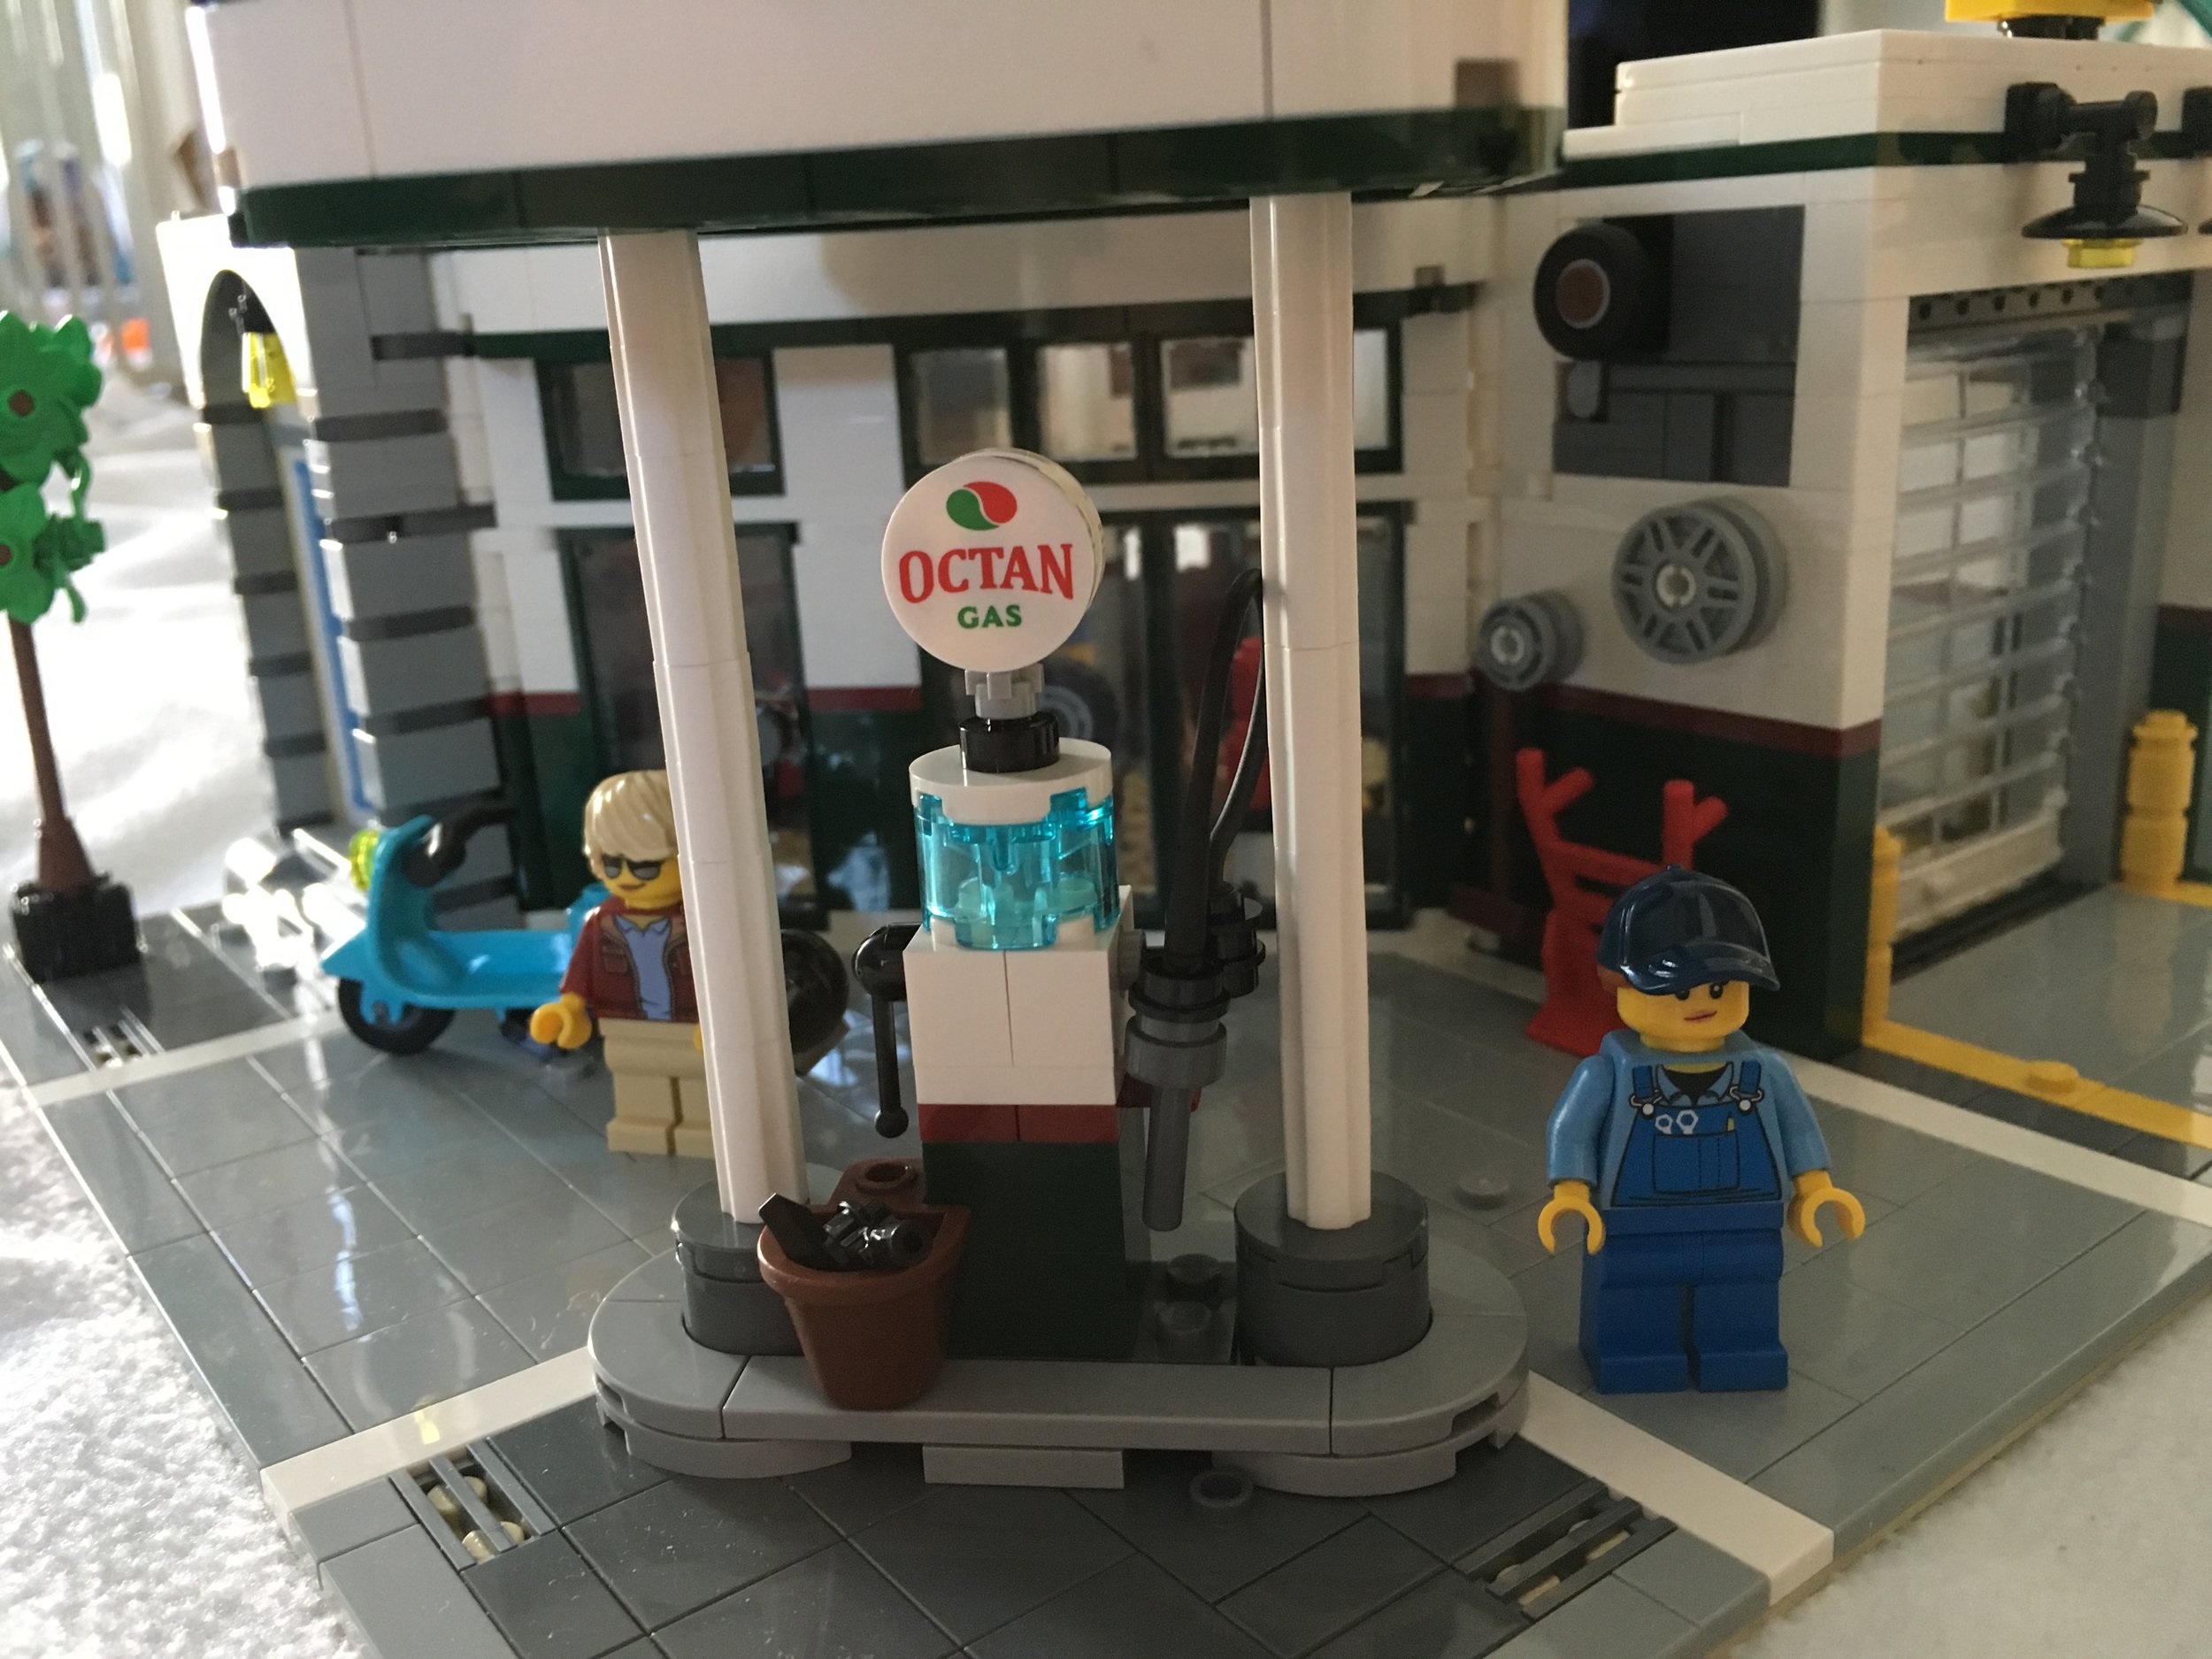
The third set of bags builds the gas pump, the covering over the pump, and the tow truck. The gas pump is an old fashioned pump with a cool Octan logo on it. The covering over the pump has a sign that reads “Jo’s Garage” with the catchy and clever saying of “By Accident We Meet.” A blue tow truck is included too. It’s in the older style… maybe 1930s or 1940s… and has a simple mechanism to raise and lower the hook. This parts bag also has a female minifigure who is a mechanic.

Also included in this parts bag is a small tree that uses one of the newer leaf pieces to make the branches.

10264_bag3a.jpg
10264_tree.jpg
10264_bag3b.jpg

The fourth set of bags builds the second floor which is a Veterinarian’s Office. The front window says “Dr. Jones Animal Care - No Snakes.” Yet another clever graphic by the designers.

10264_bag4a.jpg
10264_bag4b.jpg

The waiting room has a small waiting area to wait for your animal to be taken care of. There is a girl minifigure who can’t actually sit on the couch or chair and a parrot who hangs out there. The waiting room also has a small table with a coffee mug, some flowers, and a fish tank with a fish in it that is build into the wall that divides the office with the waiting room.

The Office has an examining table, a work desk for the vet, a lab station, and a table with some equipment for the vet to use. The instructions have the vet examining a rabbit on the table.

Despite the size of the floor, the designers were able to squeeze a decent amount of detail in. I’m impressed.

10264_bag4c.jpg
10264_bag4d.jpg

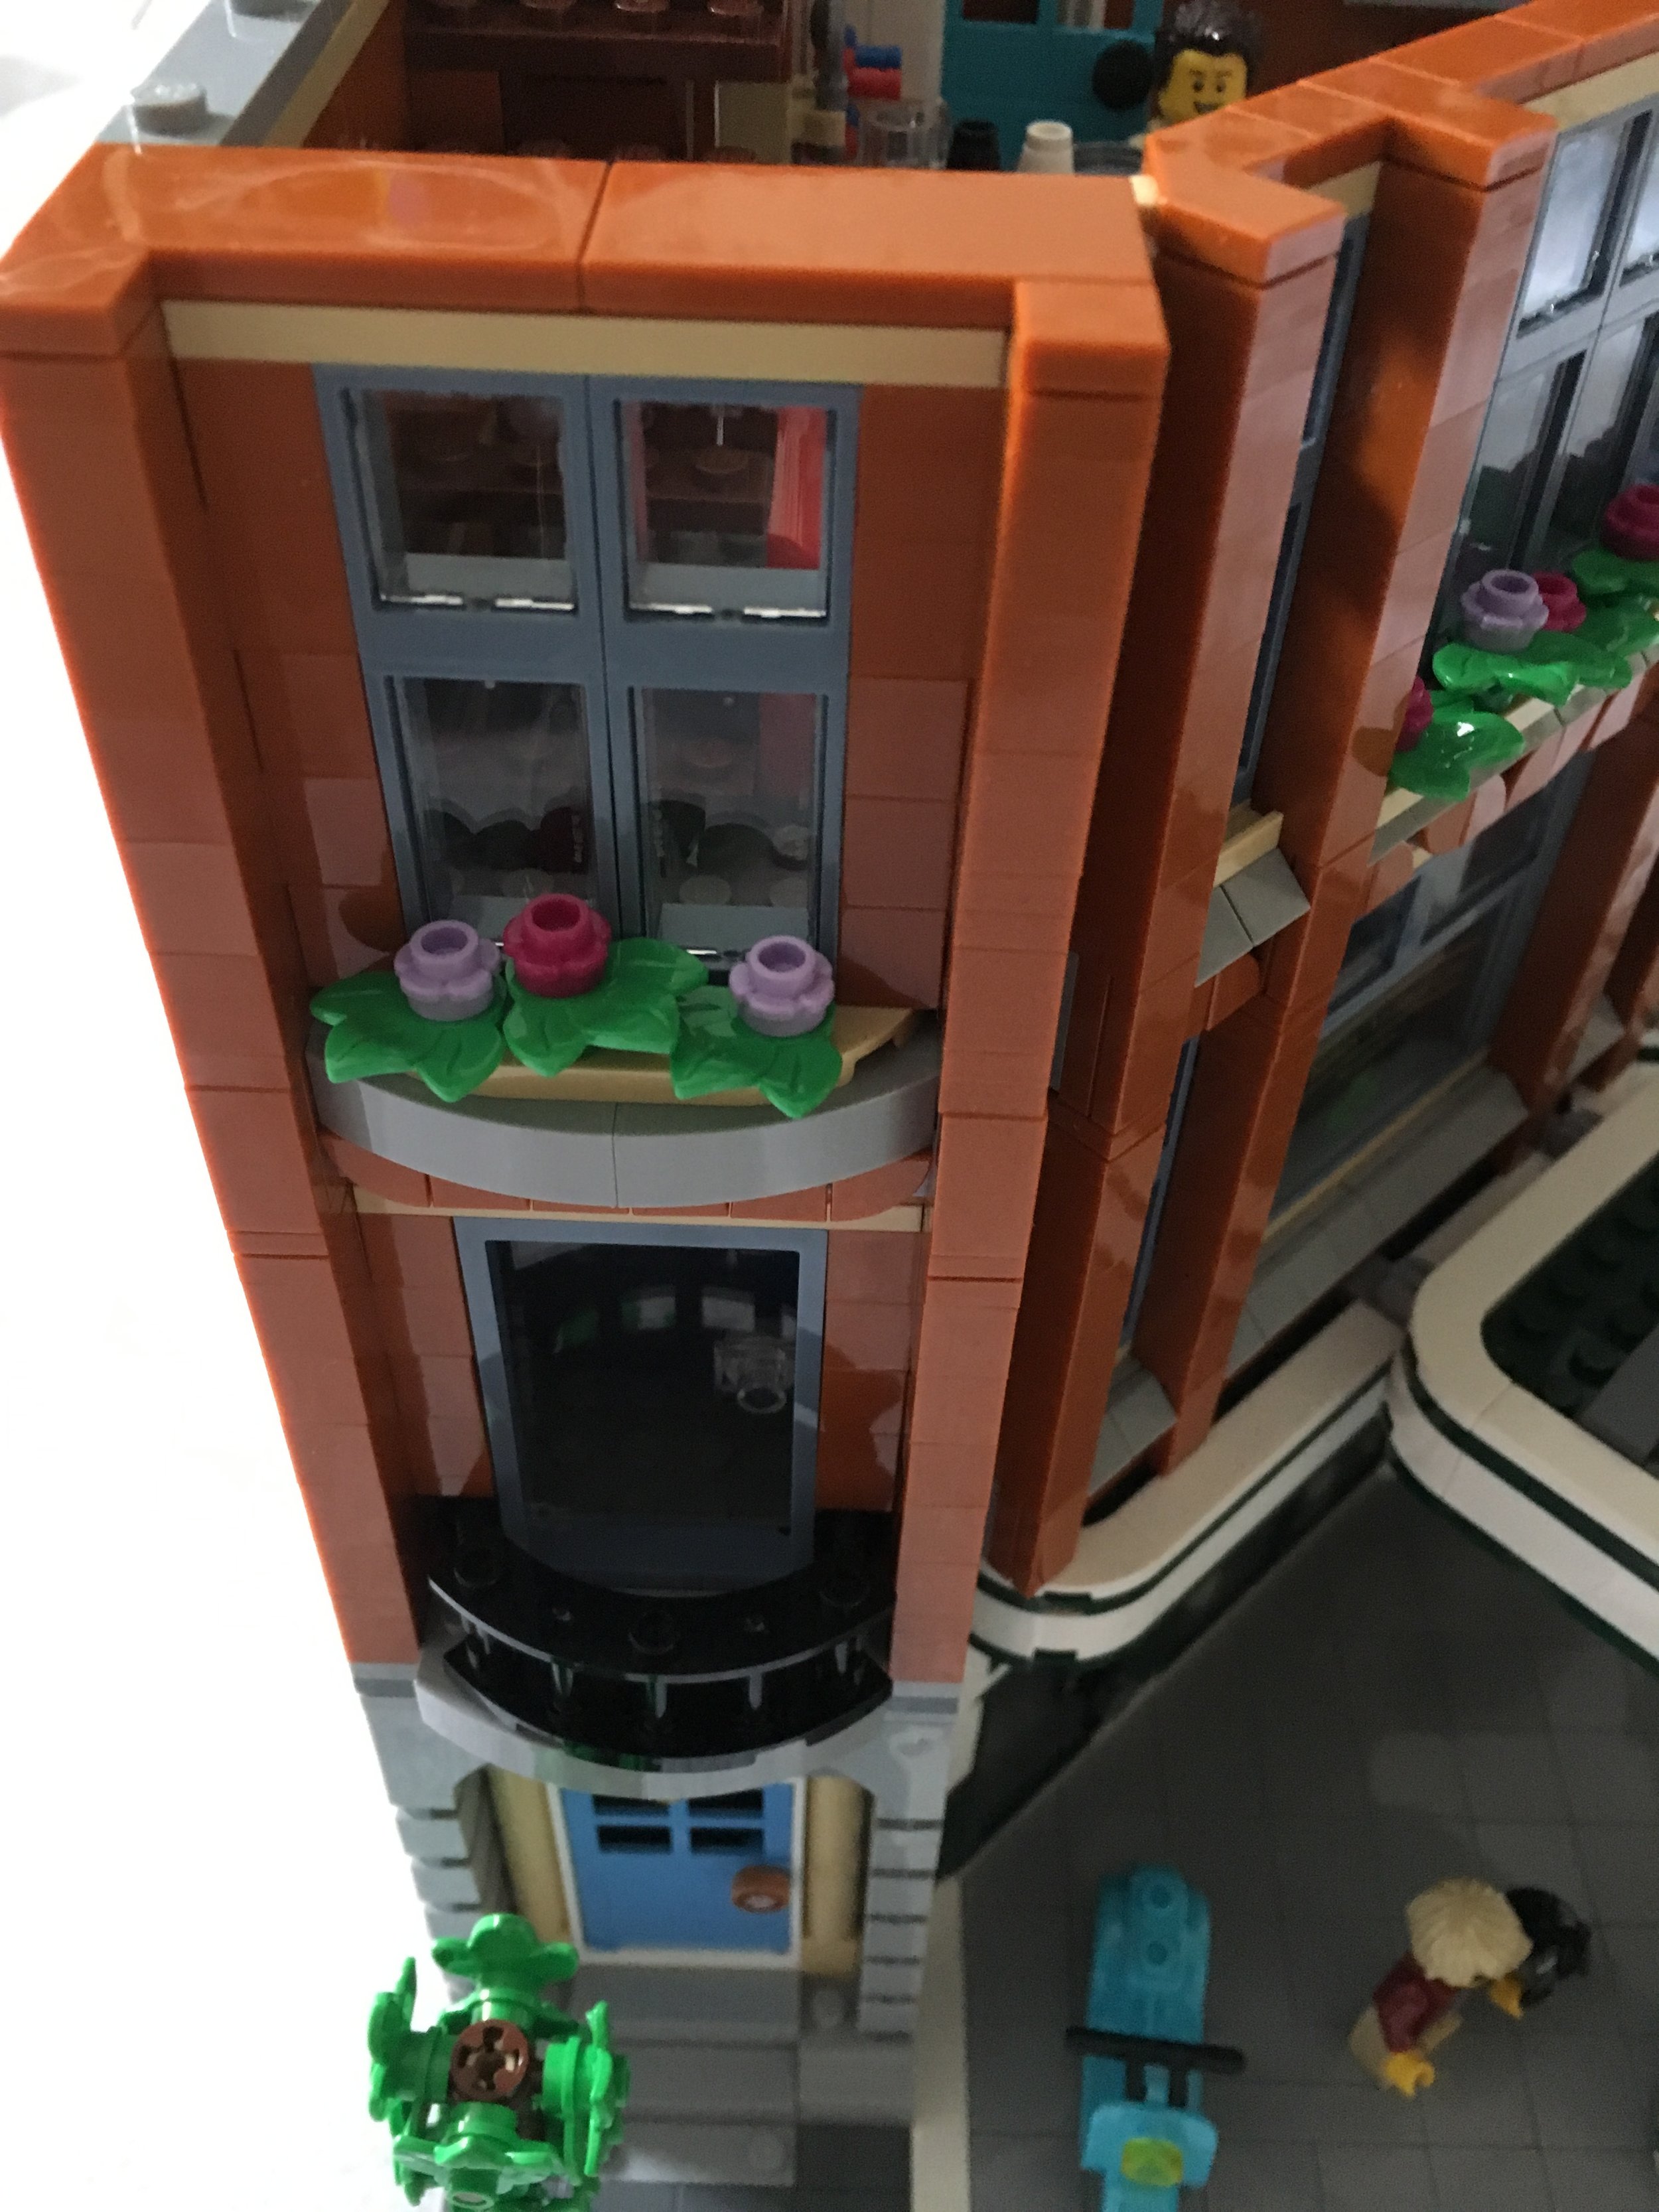
The fifth set of bags completes the third floor. This floor is a studio apartment with one male minifigure that lives there. The apartment has a small kitchenette, a bathroom, a bed, a TV, a couch, and some decorations on the wall (a truck and a record). The front of the building continues with the brownish color (I’m not sure of the official term used by LEGO) with the blue-gray colored window frames. The third floor has some flowers growing on the window sill. You can also see some of the design done by the 1x1 pizza slice tiles (my name, not the official name) on the second floor.

10264_bag5a.jpg
10264_bag5b.jpg

I wanted to make sure the windows get captured because I like the way they were designed. The ones on the second and third floor above the garage door are made using SNOT techniques with one of the clear pieces used for truck windshields. I like that the windshield pieces are still framed by the same blue-gray color as the other window frames. The side above the front door has a balcony on the second floor and a window on the third floor. I’m not sure why the vet’s office needs a balcony versus the studio apartment, but you can always swap them if you want.

10264_bag5c.jpg
10264_bag5d.jpg

The sixth set of bags finishes up the build and completes the roof. The roof has some flowers growing, a lounge chair to relax on with umbrella overhead, and the doorway to get up there from the stairwell. This floor also completes the facade on the front. The facade design is pretty simple, but I still think it makes it look a bit more elegant and fancy versus just a plain corner on the top.

10264_bag6a.jpg
10264_bag6b.jpg

I added pictures of both sides so you can see the designs above each of the side windows. I like the use of the new-ish 1x1… um… it looks like more of an equilateral triangle or isosceles triangle versus a cheese slope… piece.

10264_bag6c.jpg
10264_bag6d.jpg

This set comes with six minifigures. On the top there’s the vet (Dr. Jones we assume) and 2 mechanics (a female and male). On the bottom are the “cool guy” who has a helmet to ride the motor bike, the girl who brings her pet to the Vet, and the man in a sweater who lives in the studio apartment. In my opinion, it’s a good mix of minifigures and I think having facial expressions adds to the set versus the original smiley face they used to have in the original modular building sets.

10264_minifigs.jpg

A closer shot of the vehicles… The tow truck has 2 tones of blue which gives it a nice look and then the motor bike.

10264_truck.jpg

Overall, this is not my favorite modular building, but I don’t have as many complaints as I saw in other reviews. I like how the angled wall in the front was done to create a corner building. There are a lot of pieces in great colors you can use in MOCs if you decide to tear your building down. The signage is clever with some of the humorous clips and the old fashioned Octan logo should become pretty popular on the secondary market. I’m a fan and I can’t wait to add it to my other modular buildings some day.

As for downsides, I think the garage portion could use a bit more detail. Maybe some more equipment for fixing cars or more things to sell. Also, the color transition from the white and green to the tan-ish and blue-gray on the second and third floors doesn’t go well with my untrained eye. I’m not sure what to recommend, but it seems to clash slightly with me. To be fair, if I’m going to complain, why don’t I just redesign it myself, right?

What are your thoughts? Is this modular building really awful? Or maybe just not as good as some of the ones in the past? Or maybe it’s just different from some of the ones we’ve had in the past like the Parisian Cafe or Grand Emporium. Let me know what you think.

Happy building!

10264_final1.jpg
10264_final2.jpg

New LEGO® Shop @ Home Rule for Collectible Minifigure Buys

I went to order some of the new Disney Series 2 minifigures from Shop @ Home. The maximum limit per order was listed as 18. While placing that order, I figured I’d throw in a few more of the LEGO Movie 2 minifigures. I added 5 to my order. A little while later I received an email from LEGO stating that my order was cancelled because I “went above our purchase limits” for the LEGO Movie 2 minifigures. The message went on to state:

“We sometimes put limits on popular sets so as many LEGO fans as possible can get their hands on them. Although you won’t be able to buy those sets right now, we regularly change and remove purchase limits, so it’s a good idea to keep an eye on our website over the next few months.”

WHAT?!?!?!

So I contacted LEGO Shop @ Home customer service. The answer I got was:

“As we want in the beginning to let every LEGO® Fan have the chance to buy the Minifigs without loosing [their spelling, not mine] all stock straight away there is a limit per household of 18 for Disney Series 2 and 40 for THE LEGO® MOVIE 2. So if you reached this quantity in multiple past purchases, every future order which has these sets included will be cancelled by the system.”

Well thanks for letting me know that! I realize not everyone buys that many, but I like to have some extras for my collection and then to sell (when my store re-opens). Apparently I will not be able to use Shop @ Home for that any longer. There are only 18 minifigures in Disney Series 2. What are the odds of ordering 18 and getting the full set? Not very likely is my guess.

Customer service pointed me to LEGO Brand Stores. I was told that I could buy full boxes of Collectible Minifigures (40 in a box) from the stores and that they don’t have limits there. That would be nice if I had one nearby that was easily accessible.

So if you want more than just 18 Disney Series 2 sets, where can you go online from the US (at the time of this posting)?

Amazon.com in the US has the following:
-LEGO MOVIE 2 - Can order up to 30 minifigures for $3.92 each.
-Disney Series 2 - Can order up to 30 minifigures for $3.92 each as an add on (you need to purchase something else and add these to the order)

Walmart.com in the US has the following:
-LEGO MOVIE 2 - Can order up to 12 minifigures for $3.92 each.
-Disney Series 2 - Not Available
-Harry Potter Series - Can order up to 12 minifigures for $3.99 each

Target.com in the US does not appear to sell collectible minifigures online.

Are there any other online locations that you can buy them without a ridiculous mark up?

Obviously you can just go to a physical store to buy them too.

Happy building!

Set Review - #60223-1: Harvester Transport - LEGO CITY

Another LEGO CITY set to take a look at. LEGO has done a farm theme within CITY in the past. A quick search in Brickset found that there was a farm subtheme in 2009. I found it on Brickset here. This set does not seem to be a part of a larger subtheme. Instead, it is more of a one off like the Snow Groomer.

#60223-1: Harvester Transport was released in the US on 1 Jan 19. It contains 358 pieces and retails for $29.99 in the US. That brings it to $0.084 per piece. I picked it up on Amazon.com for 20% off or $23.99.

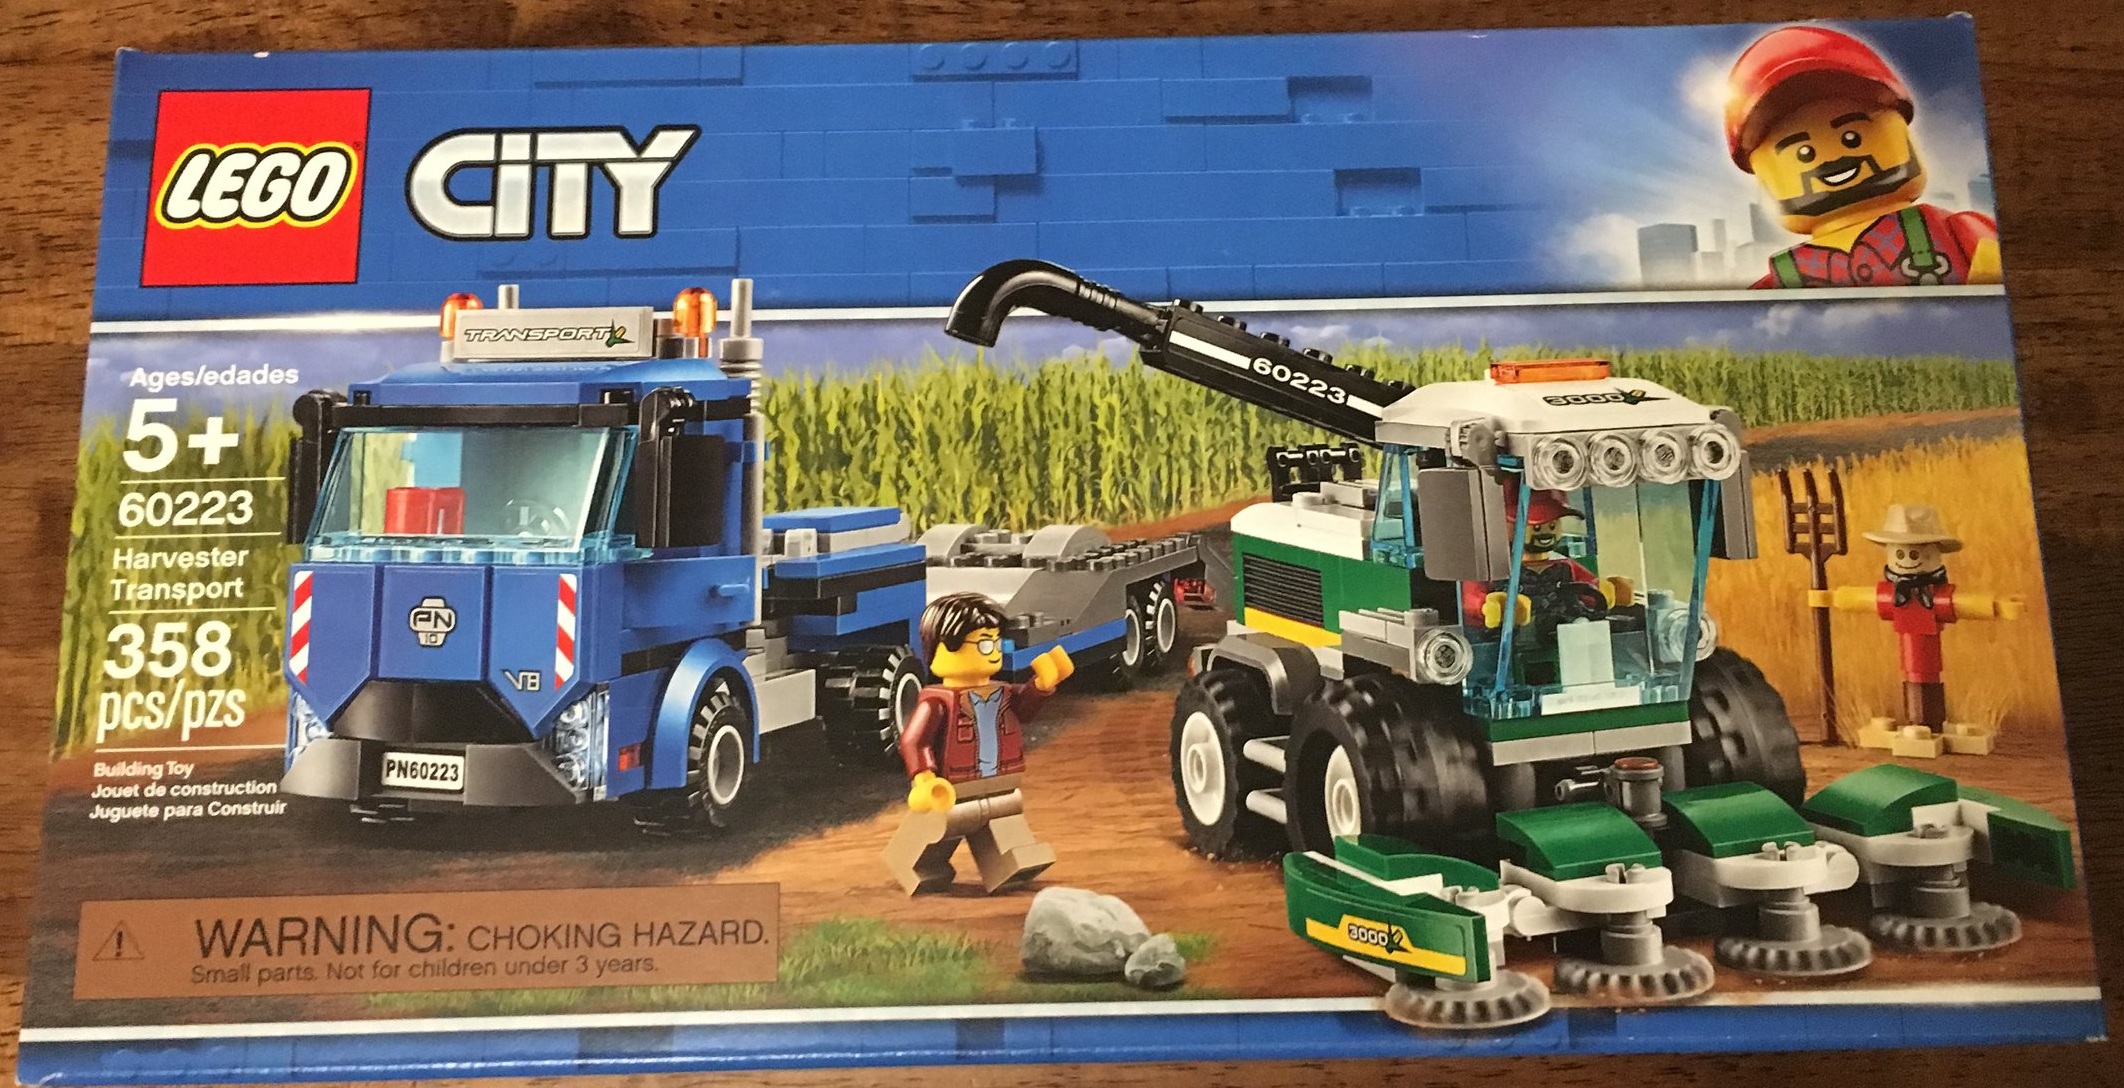
Here’s the box. It’s the standard presentation with the front showing the full set and the back showing some play features.

60223_box_front.jpg
60223_box_back.jpg

The contents are 4 parts bags, 2 instruction booklets, and a small sticker sheet. Besides the instructions being jammed in, I found bags 1 and 3 stuck together by a piece of tape. I’ve never seen this before and I’m not quite sure why it’s like that. Someone within LEGO Quality Control needs to investigate this one. I don’t know how a piece of tape would even get inside of a package like this.

60223_contents.jpg
60223_taped_bags.jpg

Before I continue with the review, I will note that the box says that this set is for ages 5+. At the time I purchased this set, I had a newly turned 5 year-old kiddo so I had some help. I had help building and a photographer to take pictures of what we built.

Bag one builds the truck that pulls the trailer that carries the harvester. The truck isn’t anything too out of the ordinary. I like the use of the shield plates on the front to help create the front bumper. Bag one comes with a minifigure to drive the truck. He has sun glasses and like many LEGO CITY trucks, a coffee mug.

60223_bag1.jpg

The second bag completes the trailer that hooks to the truck. The build is fairly simple although my 5 year-old had trouble with anything that needed to clip on and had trouble installing any 1x1 plates or tiles. On the other hand, the wheels were not an issue and they got properly tested to ensure they spun appropriately prior to moving on.

60223_bag2.jpg

The third bag starts the harvester and has a farmer minifigure and scarecrow. The scarecrow looks more like a scarecrow that would be in a farmer’s field then some of the full up minifigure scarecrows of the past LEGO has made. The build for the harvester starts the main body of the vehicle in this bag.

60223_bag3.jpg
60223_bag3_minifigs.jpg

The fourth and final bag finishes the harvester. It has a fun design for the shoot to deposit the grain into a truck (not sure of the technical term here). The arm rotates back and forth as well as up and down. The rotating pieces in the front that would cut the plant are hooked in using Technic pins. That portion can rotate up and down and the outer blades also fold up. The whole front assembly can be removed and installed on the truck for transport. The cab top comes off so the driver can get in. My 5 year-old required a lot of help to put this together. Also, Dad is a perfectionist when it comes to stickers so I was the sticker placer. My 1 year-old ended up playing with the harvester for a bit. It actually held up pretty well. The only challenge was that he held it by the cab and the cab kept coming off. Other than that it’s pretty solid and 5+ seems like a good age range (with some help from a parent or another adult).

60223_bag4.jpg

Below is a final picture of the set with the harvester stored on the trailer for transport. Overall it is a fun build. Nothing too overly challenging, but a few Technic parts that can be challenging for a younger kid. The set has a lot of moving parts and pieces which are good for play. It also opens up the possibility of building more (a field to harvest, a farm, a barn, etc.). Being able to get the set on sale was an added bonus. I’d recommend this set to any LEGO CITY fan. Even if you don’t have a farm scene, it is a vehicle that can fit on a road or highway you’re building. Definitely pick it up on sale if you’re going to get it.

Happy building!

60223_final.jpg

Set Review - #60222-1: Snow Groomer - LEGO CITY

I tend to avoid some of the repeating CITY subthemes like police or fire, but I find some of the less repeating sets interesting sometimes. The last CITY set I reviewed was #60204: City Hospital (the previous City Hospital was 11 years prior). Today we’ll go through the smaller #60222-1: Snow Groomer. I’m not sure where this set fits in as it doesn’t really fall into the Arctic subtheme and there aren’t any other similar sets in the lineup and I don’t recall there being a skiing set out there unless I’m missing something. It’s an interesting concept nonetheless.

This one was released in the US on 1 January 2019. It contains 197 pieces and retails for $19.99 or $0.101 per piece. I got mine for this review from Amazon.com for 20% off or $15.99 ($0.089 per piece). It definitely pays to wait a few months to save a few dollars as the trend seems to be the Amazon.com, Walmart, and Target run sales soon after release these days versus having to wait for the end of a set’s life to catch it on clearance before it retires.

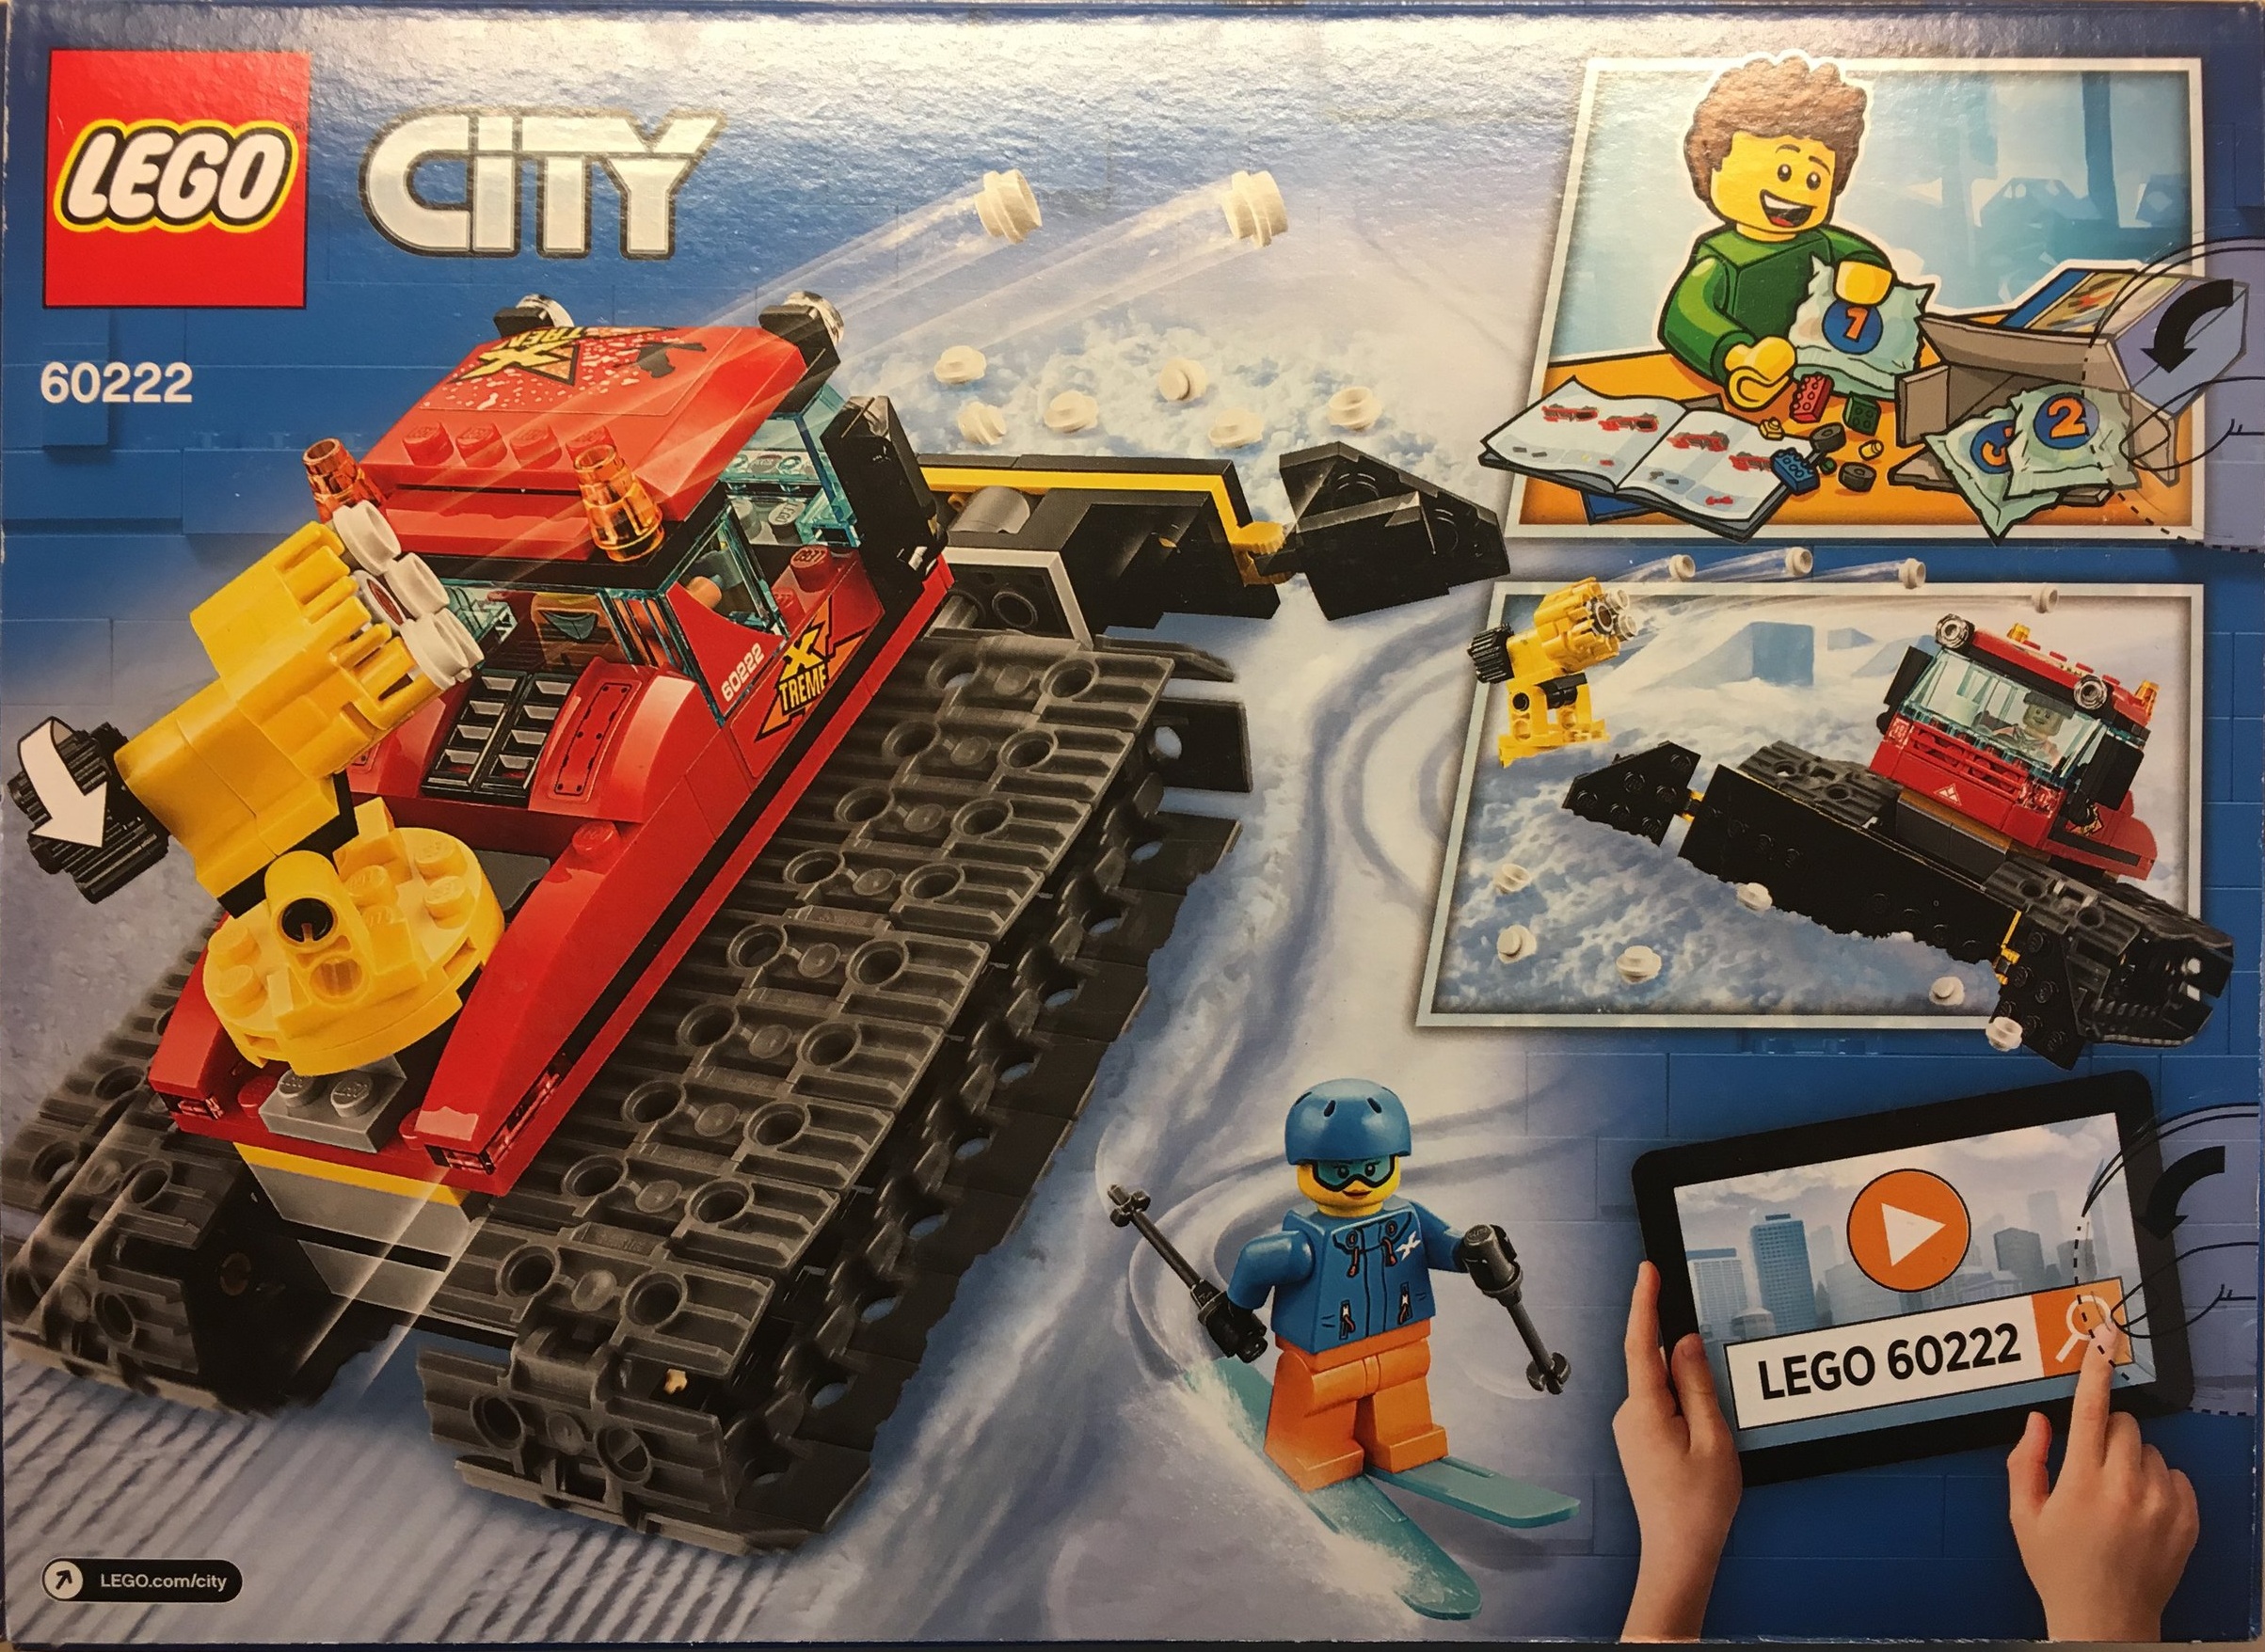
Here’s the box. The front shows the set with its snow cannon feature and the back shows the snow cannon again along with a minifigure happily building the set. It also shows that you can set up the snow cannon on the ground.

60222_box_front.jpg
60222_box_back.jpg

The contents include two parts bags, a small sticker sheet, and an instruction booklet. I was happy to see that the instruction booklet was nicely placed inside and not jammed in with a massive crease in it when you take it out.

60222_contents.jpg

The first bag builds the base. Some Technic pieces make up the main portion and then you attach on the treads. Then there’s a spot for you to attach the cab and the plow. But let’s focus on the wheel in the middle for a minute… I’m not a fan. It makes the set slightly off balance and a little unrealistic in my opinion. However, with an age range of 6+ for the set, I’m pretty sure the concern was that kids would be frustrated that the treads don’t move easily. The table surface I built on is a good example. With the wheel, the treads move great. To be fair, it is easy to build this without the wheel in the middle. It is there for the play factor and that makes sense to me.

60222_bag1.jpg

Bag one also comes with the two minifigures. One is a male in a bright orange jacket with a winter cap and gloves on. He has some long side burns and a mustache too. The other is a female skier. She’s got a helmet, goggles printed on versus attached to the helmet, a ski jacket, two poles, and two skis. Both have no designs on their pants. I remember growing up and playing with LEGO with my sister. We would argue over who got the limited number of female minifigues that we had. Most were male and it made for a pretty lopsided town. I’m thankful that LEGO has changed and we now have a very diverse crowd. My town today has a great mix of the two genders.

60222_minifigs.jpg

The second bag assembles the cab on top and the snow cannon. It also adds the plow in front. The cab is pretty simple and comes with a coffee mug so the worker can drink and plow. The cannon feature has been seen before only this one shoots snow (white 1x1 round plates). I don’t think I’ve ever tested the feature before, but these things go pretty far when shot. I’m sure some parents will be vacuuming up some 1x1 round plates in the near future. You do get a few extras in the set though so a kid hopefully won’t lose them all right away.

The plow needs a redesign. I’m okay with how it looks, but the attachment is very awkward. You can see a lot of the Technic axles sticking out and the plow just slides in and is not held in place. My suggestion for a redesign would be to either modify the attachment of the plow or to cover it up somehow so it doesn’t look so awkward. I would also make it so that it stays on. If a kid is playing with the plow down and decides to back it up, the plow slides off. It needs to stay on. I would think the LEGO designers would have caught that when designing the set.

Overall it is a pretty neat set that we haven’t seen in the LEGO CITY range before. There are a few minor design flaws in my opinion, but an AFOL with a large parts stash could easily refine this set to make some improvements. The option to pick this set up on sale makes it a little easier to swallow so look for it at some of the big retailers at a discount. It may get discounted more closer to the Christmas season.

I think this one is a win. What are your thoughts?

Happy building!

60222_bag2.jpg

Gartenschau Kaiserslautern, Germany - Back with Another Great LEGO Display in 2019

In case you missed it, I visited the Gartenschau in Kaiserslautern, Germany back in 2018. It just opened again for the season back on 1 April 2019 and I had the opportunity to go for a visit this past weekend. The ads for the park highlighted another big LEGO based display, but I wasn’t sure if it was just the same display from 2018 or not. I was pleasantly surprised that Lauter Steine eV put together another awesome display for 2019. There were some returning displays and items, but there were also some brand new ones. I was only able to get a few pictures, but I plan to go back soon and will post more. Here are a few highlights.

Some brick built, larger scale minifigures greet you as you walk in…

big_figs.jpg
santa.jpg

One of the new displays is of the Pfalztheater-Kaiserslautern (link should take you to a Google Images page for the theater).

theater.jpg

There was a classic space focused display last year with a big monorail. While they still have pieces of classic space, there are some changes this year. There is a Ice Planet themed section. The light in the room makes it hard to take photos, but it does make the orange and white of the Ice Planet theme look pretty cool.

space1.jpg

Some classic space and M-Tron sets.

space3.jpg

I was a huge M-Tron fan as a kid. I had a bunch of the sets and thought the magnets were great. Here’s an awesome M-Tron space station.

space5.jpg
space2.jpg

Benny’s Spaceship, Spaceship, SPACESHIP! (#70816-1) from the first LEGO Movie makes an appearance.
space4.jpg

As a kid, I saved up and purchased the Mega Core Magnetizer (#6989-1). Still a great set!

space6.jpg

The first case has some larger scale, brick built versions of various pieces along with the brick art underneath. The next picture is a working minifigure head designed out of bricks clock.

big_food.jpg
clock.jpg

The next two picture are various architecture themed type sets. There are some actual LEGO sets mixed in, but many are fan built sets in the format of LEGO Architecture. There are also a few larger scale buildings.

architecture1.jpg
architecture2.jpg

I took a picture of this display and the sign that goes with it, but the sign that goes with it is all in German and I haven’t translated it yet. So enjoy the picture and I’ll update this post with info on this display once I translate what this is.

26 April 2019: Okay, I had time to use Google Translate… long story short, this is a model of a power plant built in Germany in 1894.

e-werk.jpg

I included a picture of the info sheet so you can try and translate yourself, but this display is of a section of Kaiserslautern that is being re-developed. The buildings are models of what the final area will look like.

bldg1.jpg
bldg3.jpg
bldg2.jpg
display_sign.jpg

A returning display from 2018 is the Cologne Cathedral. I talked about it a bit more during my 2018 post. My family was able to visit Cologne in December 2018 for the Christmas Market. We got to see the cathedral while there. It is incredible on the outside and on the inside! If you are ever there, definitely check it out. Here is the picture I took of the LEGO brick built version and then a picture of the actual cathedral that I took from the nearby Christmas Market.

cologne_cathedral.jpg
Cologne_cathedral2.jpg

I visited with my kiddos so I had to rush through the displays and get the the play area that they have. I didn’t get the pictures that I wanted so I’ll have to go back (oh darn!). Last two I’ll post for now… one is an Elves themed display and the other is a cool looking building that I’ll need to get a picture of the sign and translate. Sorry.

I have never been to a LEGO Fan Convention, but I imagine that going through Gartenschau Kaiserslautern is what it’s like. A ton of cool displays to look at everywhere. Well done Lauter Steine eV! It’s another incredible display this year and they did a phenomenal job putting it all together! If you’re ever in the area, you definitely need to check it out.

Happy building!

elves.jpg
IMG_7774.JPG

BrickLink AFOL Designer Program - Update

In case you missed it, the BrickLink AFOL Designer Program ended its pre-order sales on 15 April 2019. You can see BrickLink’s update here. You can see my post on the original program here. The roll up is:

-13 of 16 sets met or surpassed the limits set to go into production.

-1 set (Löwenstein Castle) is completely sold out (should LEGO bring back the Castle Theme?)

-Sets will begin to ship in May 2019. The box designs were released about a week ago.

-If you missed out on the pre-order period, sets will be available for purchase starting on 22 April 2019. I believe there is a cap on each set so don’t wait too long if you are interested.

If you ordered some sets like I did, you were supposed to see the charges hit your credit card on 15 April. That has not happened for me yet. I’m guessing maybe they will charge me when my sets ship? The web site says they are producing in batches so I am guessing I’ll receive both sets at different times.

I’m looking forward to seeing some of the set reviews on these sets. I’ll definitely be posting reviews of the two I purchased.

Now I just have to wait for them to arrive.

In the meantime, happy building!

Set Review - #71023 - LEGO Minifigures - The LEGO Movie 2

I fully admit, I am way late to the game with this review. All of the major fan sites have released their Disney series 2 collectible minifigure reviews and here I am just wrapping up the previous set. Better late than never I guess.

This set was released on 1 February 2019 in the US. It takes me a little over a month to get small packages (read USPS Retail Ground) over here in Germany so hence the delay. I don’t want to pay the exchange rate and VAT here so I wait for the cheaper minfigures I order from the US. Like previous Collectible Minifigures, these are $3.99 per bag. There are 20 minifigures total in the series.

A few changes this time:
-The size of the bag the minifigures come in is slightly larger in size from previous versions.
-A number of the figures have a clear plastic bag with parts inside the main bag. In most cases, the minifigure itself was in the clear plastic bag. Then that was inside the main bag with the instructions and any accessories on the main bag.
-The instruction sheet and minifigure picture list is folded up much smaller.
-This is just from my limited experience, but in the orders I placed with Shop @ Home, they all arrived with a wider variety of minifigures. In the past, I’d open up the first 10 or so and already have a lot of duplicates. This time I felt like I’d open up 10 and they were all different. I’m curious if LEGO made an effort to disperse the minifigures a little more or if it was just by chance with my orders.
-The base piece is white. While not the first time it’s been different from the black bases, it is the first time it’s been in white.

Onto the minifigures…. and keep in mind that I have still NOT seen the movie as of the writing of this post. Hopefully that doesn’t qualify me for banishment from the AFOL community.

71023_1.jpg

Hula Lula is the minifigure with the light green hair. She has a vinyl record and a microphone. Her grass skirt is a fabric piece that you have to insert into the leg studs while assembling her.

Candy Rapper has pink hair and is holding a microphone and cassette tape. She has the skirt similar to many others. She’s also giving an eye wink. I’m a fan of the different colored hair pieces on both of these minifigures.

Kitty Pop comes with a guitar and microphone. Her hair piece has ears and she has a tail.

Flashback Lucy has a microphone and gold record award plaque for “Everything is Awesome.”

71023_2.jpg
71023_3.jpg

Apocalypseburg Abe has the steampunk look and comes with an ax. His outfit is pretty creative and i like the goggles attached to his top hat.

Sherry Scratchen-Post & Scarfield are repeats from the first LEGO Movie minifigure series only in Apocalypseburg style this time. Scarfield’s mohawk haircut style is great.

Again, I have yet to see the movie yet so I don’t know why the “Wizard of Oz” crew is in this series, but we have the Cowardly Lion with his bravery award and the Tin Man holding his ax and his heart.

71023_4.jpg
71023_5.jpg

And then we have the Scarecrow with his certificate and then Dorothy Gale & Toto.

Awesome Remix Emmet with his overpriced coffee, smart phone, and headphones.

Vest Friend Rex comes with his mini-velociraptor.

71023_6.jpg
71023_7.jpg

Gone Golfin’ President Business has the standard yellow hand and then a hand with what I assume would be a golfing glove. I’m waiting for someone to make a golf course with the club from this minifigure. Or maybe a mini golf putt-putt course

Apocalypse Benny has a mech arm and a tool box. Other than that he looks the same as the last movie.

Battle-Ready Lucy has a brown hood with goggles. She has some arrows in her quiver and is holding binoculars.

Uni Kitty comes in her happy form versus Angry Kitty.

71023_8.jpg
71023_9.jpg

Swamp Creature is holding a whip and has a fun print on his chest. The head piece is pretty cool too.

Watermelon Dude is holding a slice of melon and has an over-sized slice on his head. This one ranks right up there with many of the costumed minifigures from past sets.

And finally, more costumed minifigures!

Giraffe Guy is holding some leaves and has a giant giraffe head costume on.

Crayon Girl is holding a 2x2 tile drawing of a minifigure head.

Both of these are great. I’m a big fan of all of the costumed minifigures. I think it’s partially because you can easily mix them into a larger city scene display as Easter Eggs for people to find.

71023_10.jpg

Overall, I think LEGO didn’t disappoint with this series. The characters from the original series were done up well, the Apocalypseburg style is fun, the costumed characters are a win in my book, and the “Wizard of Oz” gang look pretty good too. My preference is the more free form Collectible Minifigure Series sets versus the ones attached to a licensed theme, but I think this time LEGO did a good job of matching the theme and giving the fans a bit more.

I’ll be back (late) with the Disney Series 2 in a few months!

Happy building!

Heirs to the LEGO Fortune

I saw this online and it didn’t get any traction on any of the other fan web sites so I’ll throw it out there.

Bloomberg.com posted an article on 1 April 2019 titled:

Lego Heirs' $16 Billion Fund Is Bracing for a Bleaker Future

While it is not about building, giving, or LEGO fandom, it does say how much money LEGO has brought its owners through the years.

And apparently if you have a lot of money, you invest in solar energy and wind farms. Or maybe you profit from selling a brick version and invest those profits into a real one?