Set Reviews

Set Review - 2023 Harry Potter Brickheadz Sets - #40616-1, #40617-1, and #40618-1

Three Harry Potter themed Brickheadz sets were released for 2023 on 1 June. Instead of three separate reviews, I decided to combine them all into one. I don’t collect all of the Brickheadz sets, but I do get the ones that interest me. As a Harry Potter fan, I grabbed these during the LEGO “Back to Hogwarts” sale event. Overall, they are in line with the Brickheadz theme. If you aren’t a fan of them or of Harry Potter, don’t bother with these. If you are a fan, look for an opportunity to grab them. Maybe during a double VIP point event or if you can find them on sale somewhere.

The first one is #40616-1: Harry Potter and Cho Chang. These are Brickheadz numbers 207 and 208. The set contains 267 pieces and retails for $19.99 which works out to $0.074 per piece. The box front shows the two characters. The back (not pictured) shows the same and how you can place the characters on a plate as a base. The set comes with four parts bags numbered one and two. There are two instruction booklets included. One for each character.

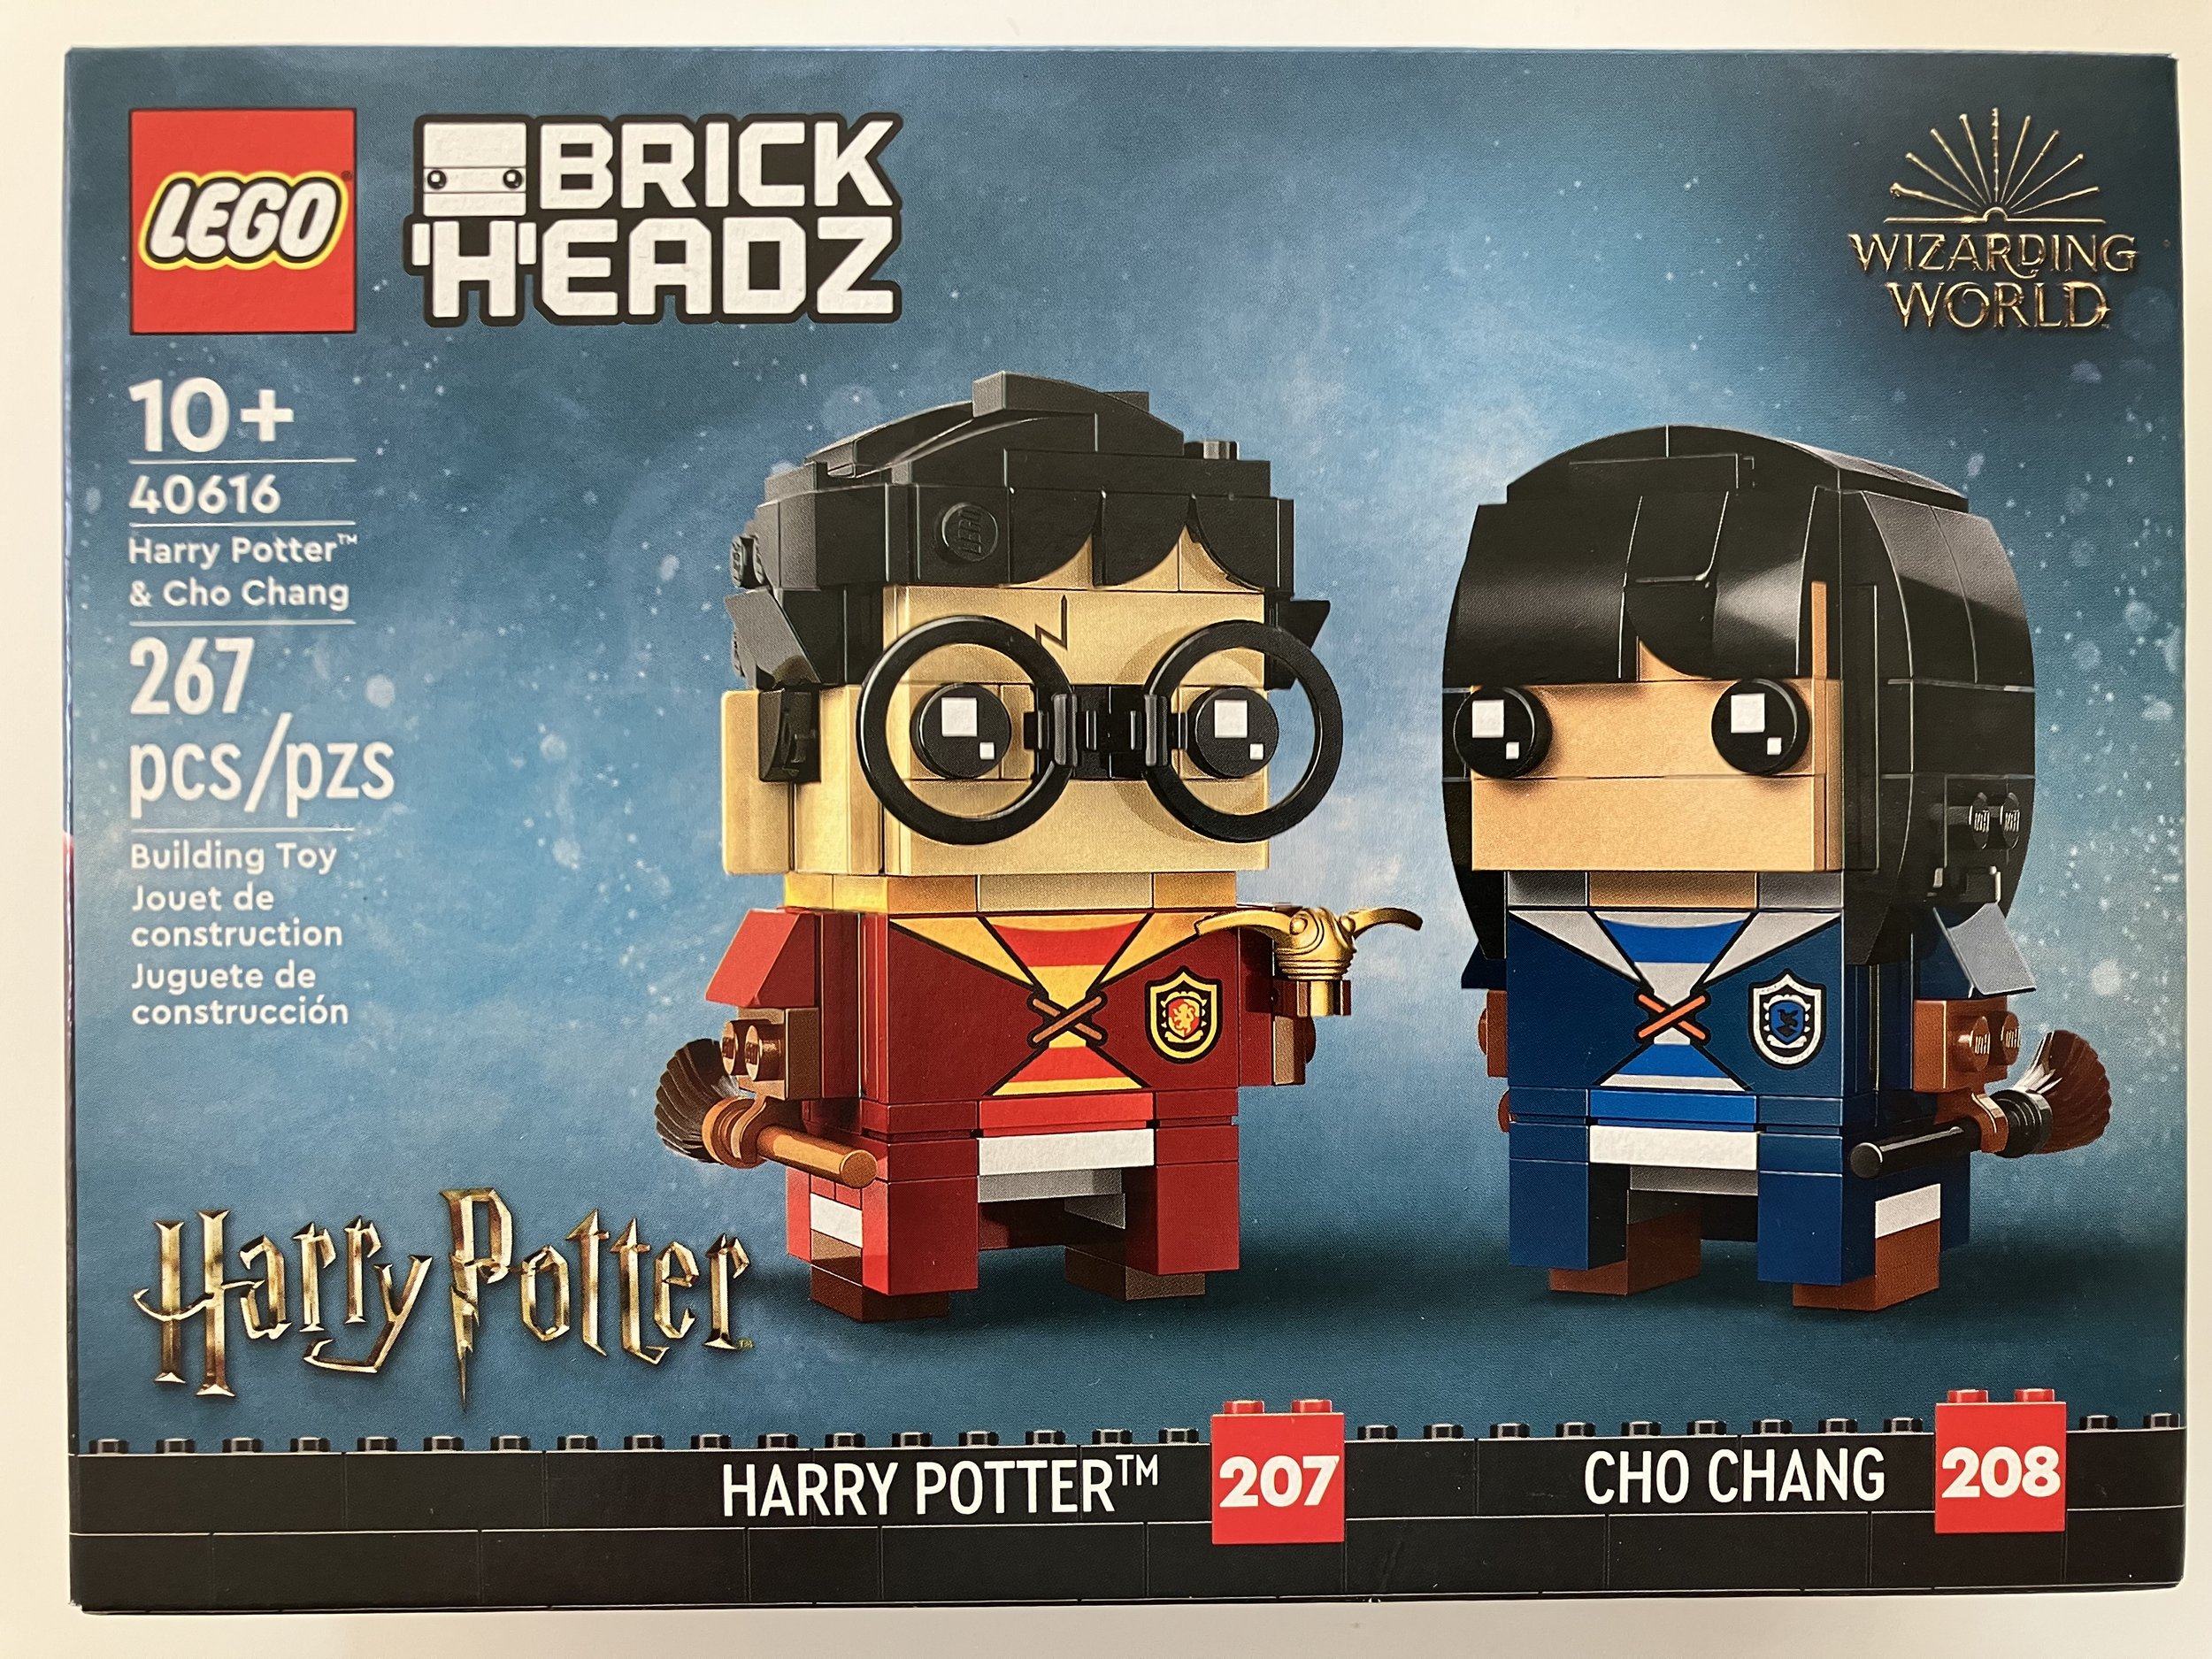
Not too much to talk about for the build. They are the standard Brickheadz build. Both characters come with printed tiles for the eyes and front of the shirt. Harry has a printed tile for the scar on his forehead. Harry’s face is a fun build as you install some pieces that are not clipped in by stud connections. They just rest in place and then other pieces hold them there. A fun little technique. If you don’t like the characters, LEGO always puts a few interesting colored pieces in the center and then I’m a fan of the dark red and blue colors as you get a few of those as well.

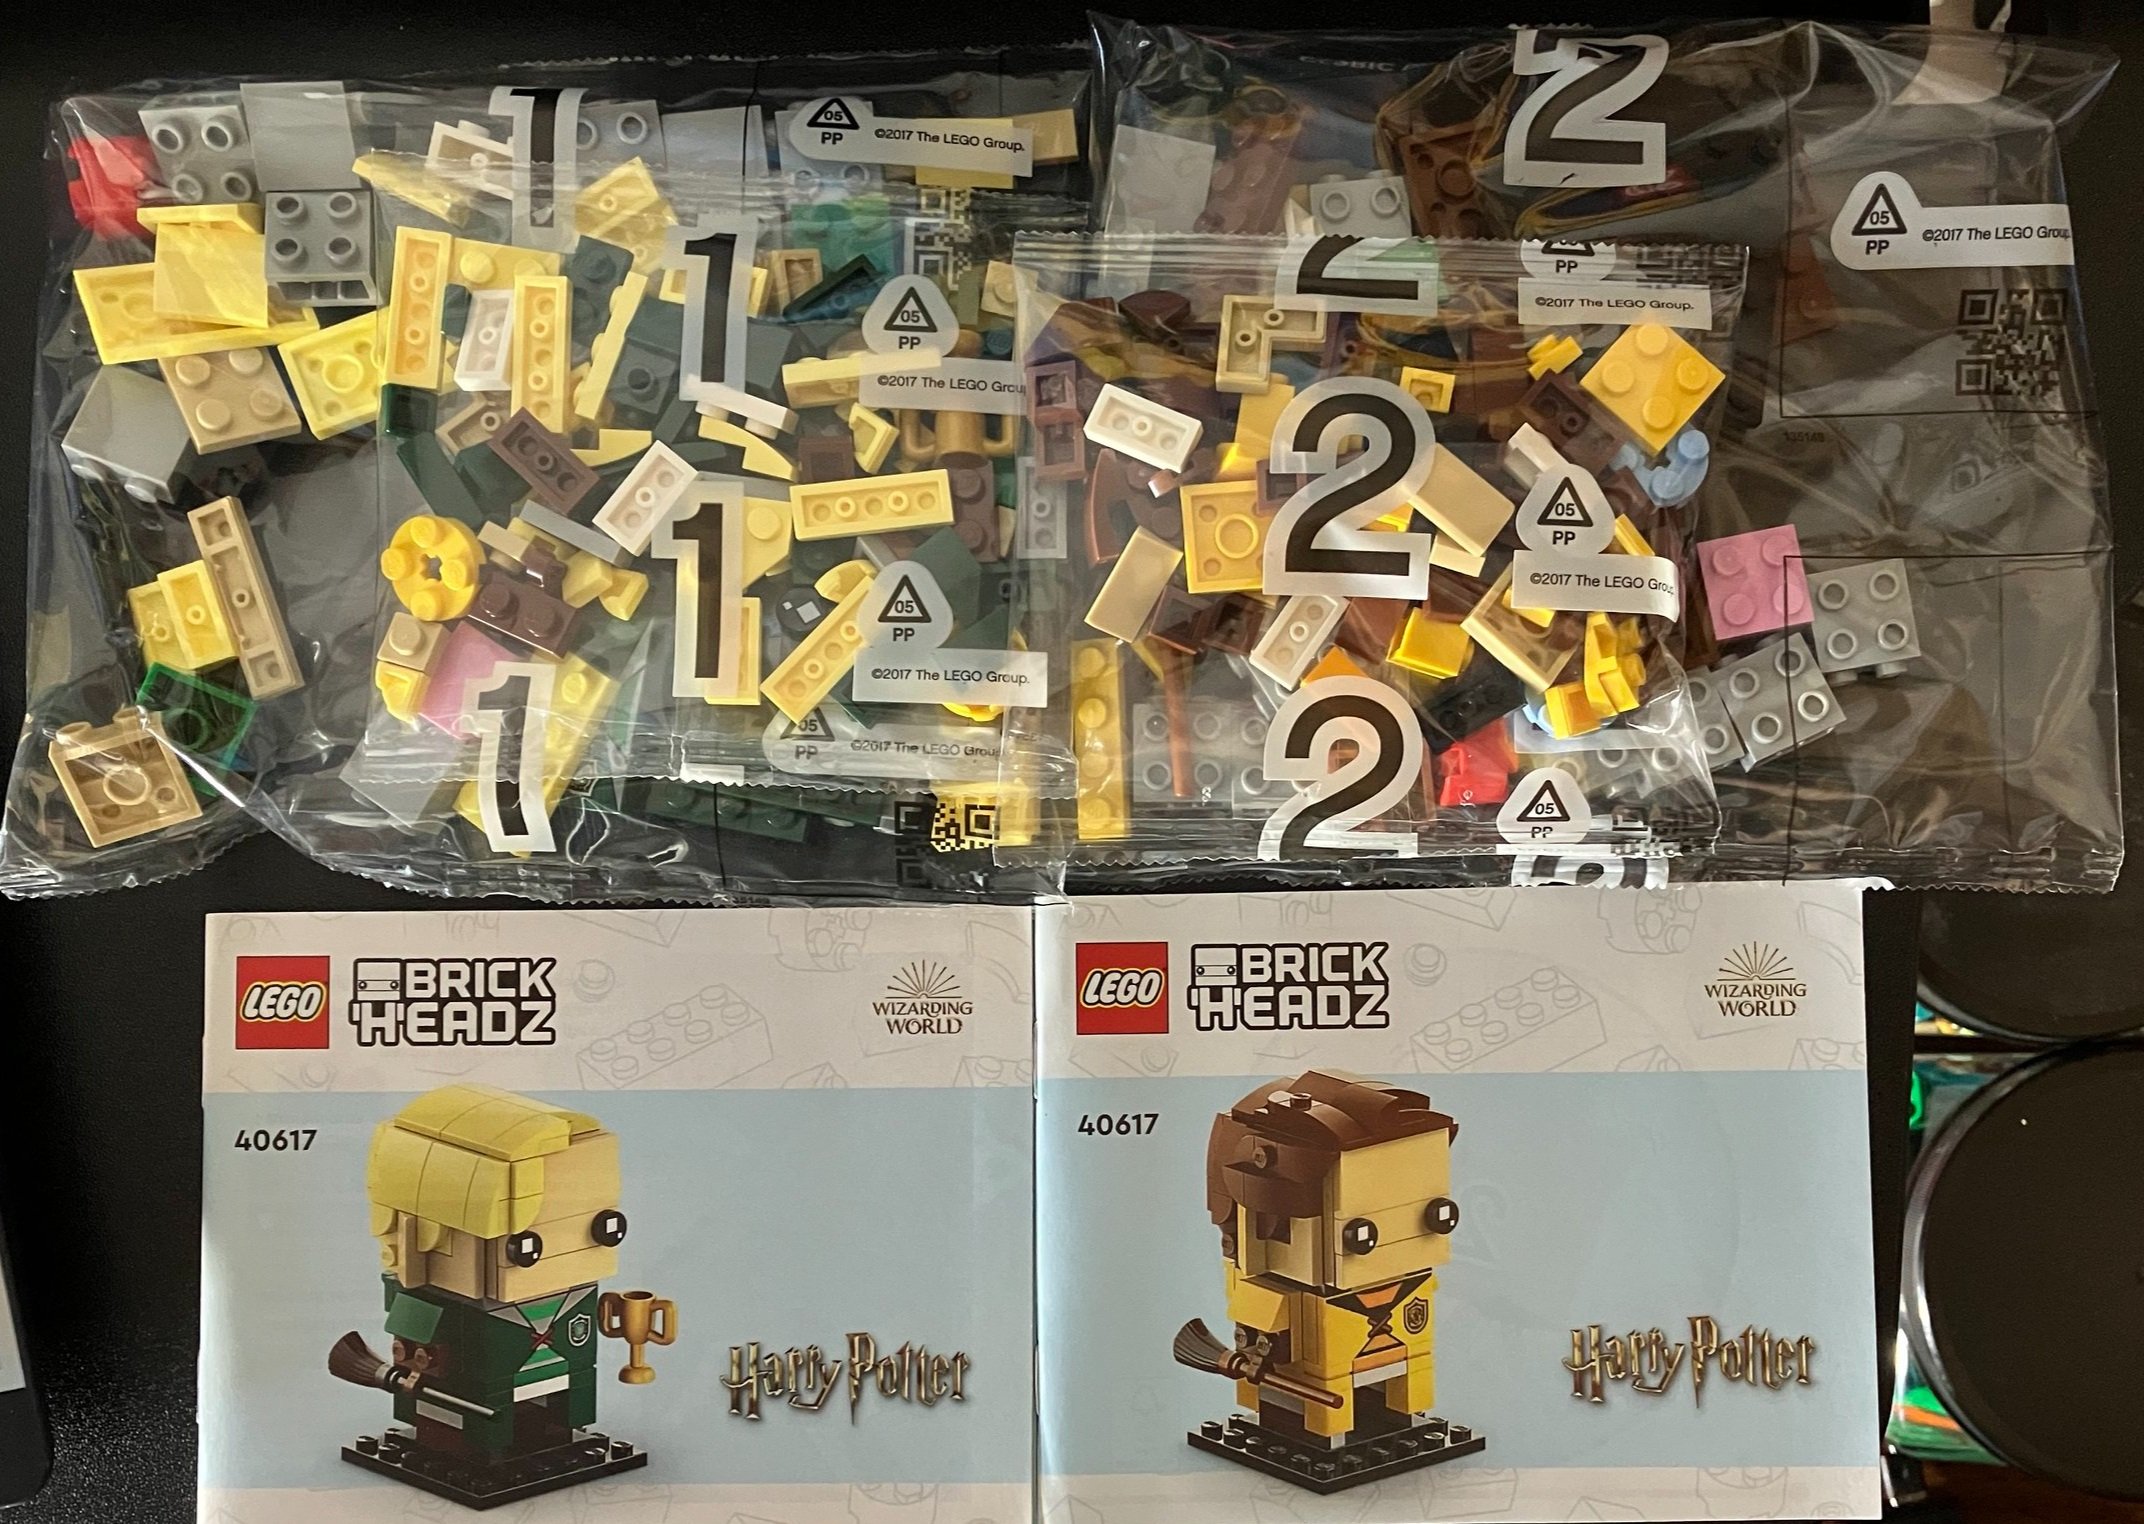
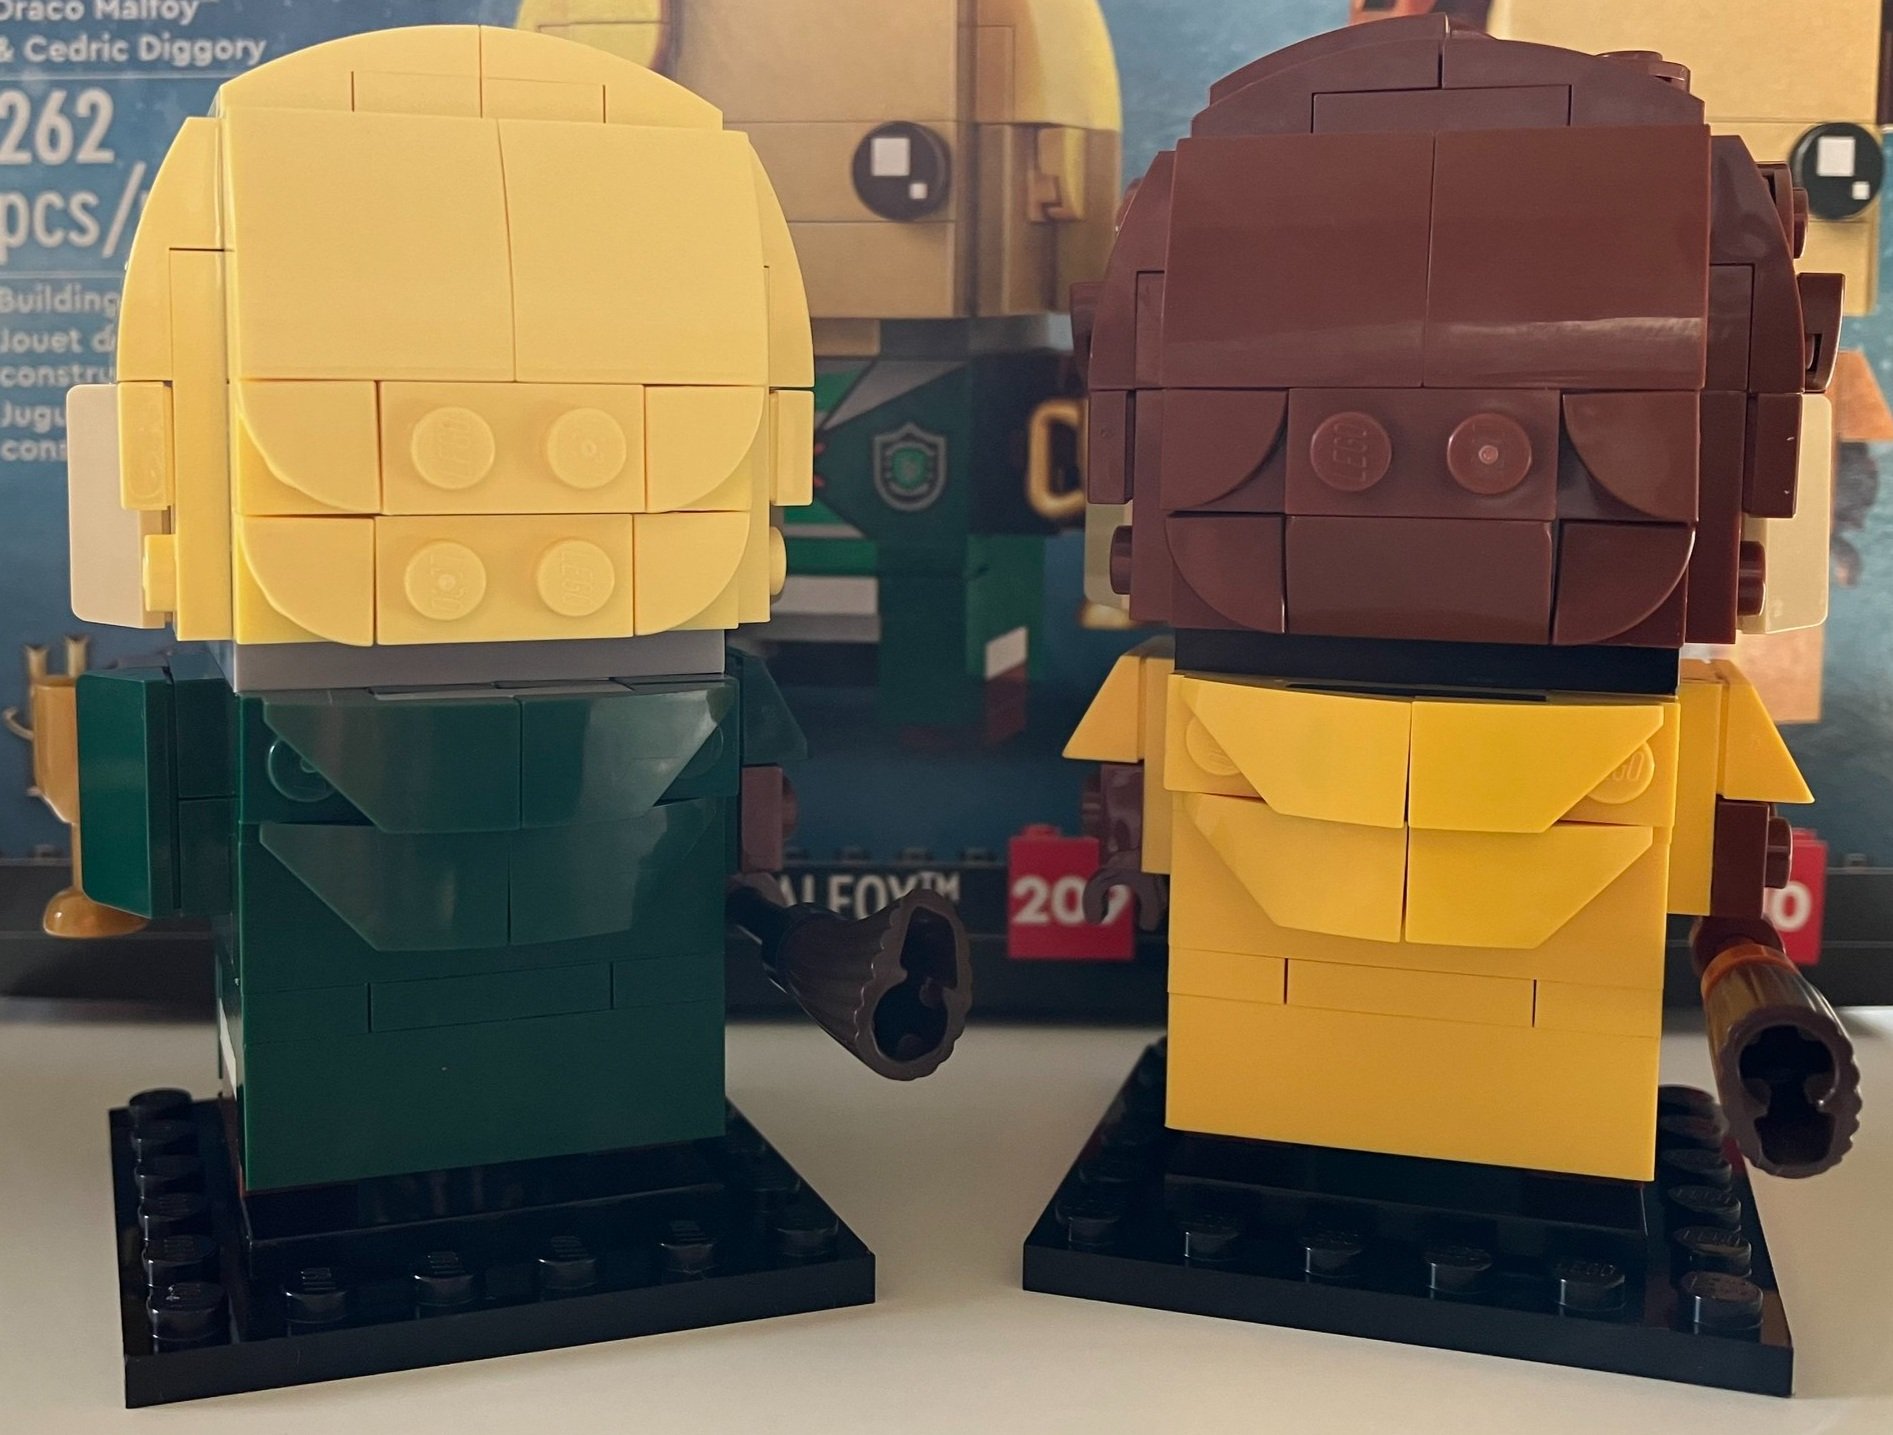
Next up is #40617-1 - Draco Malfoy and Cedric Diggory. Draco is #209 and Cedric #210. This set also retails for $19.99 and contains 262 pieces. This works out to $0.076 per piece. Similar to the previous set, the box has the characters on the front and the numbers and names of each on the bottom of the front. Inside are four parts bags numbered one and two with two bags for each number. There is an instruction booklet for each character.

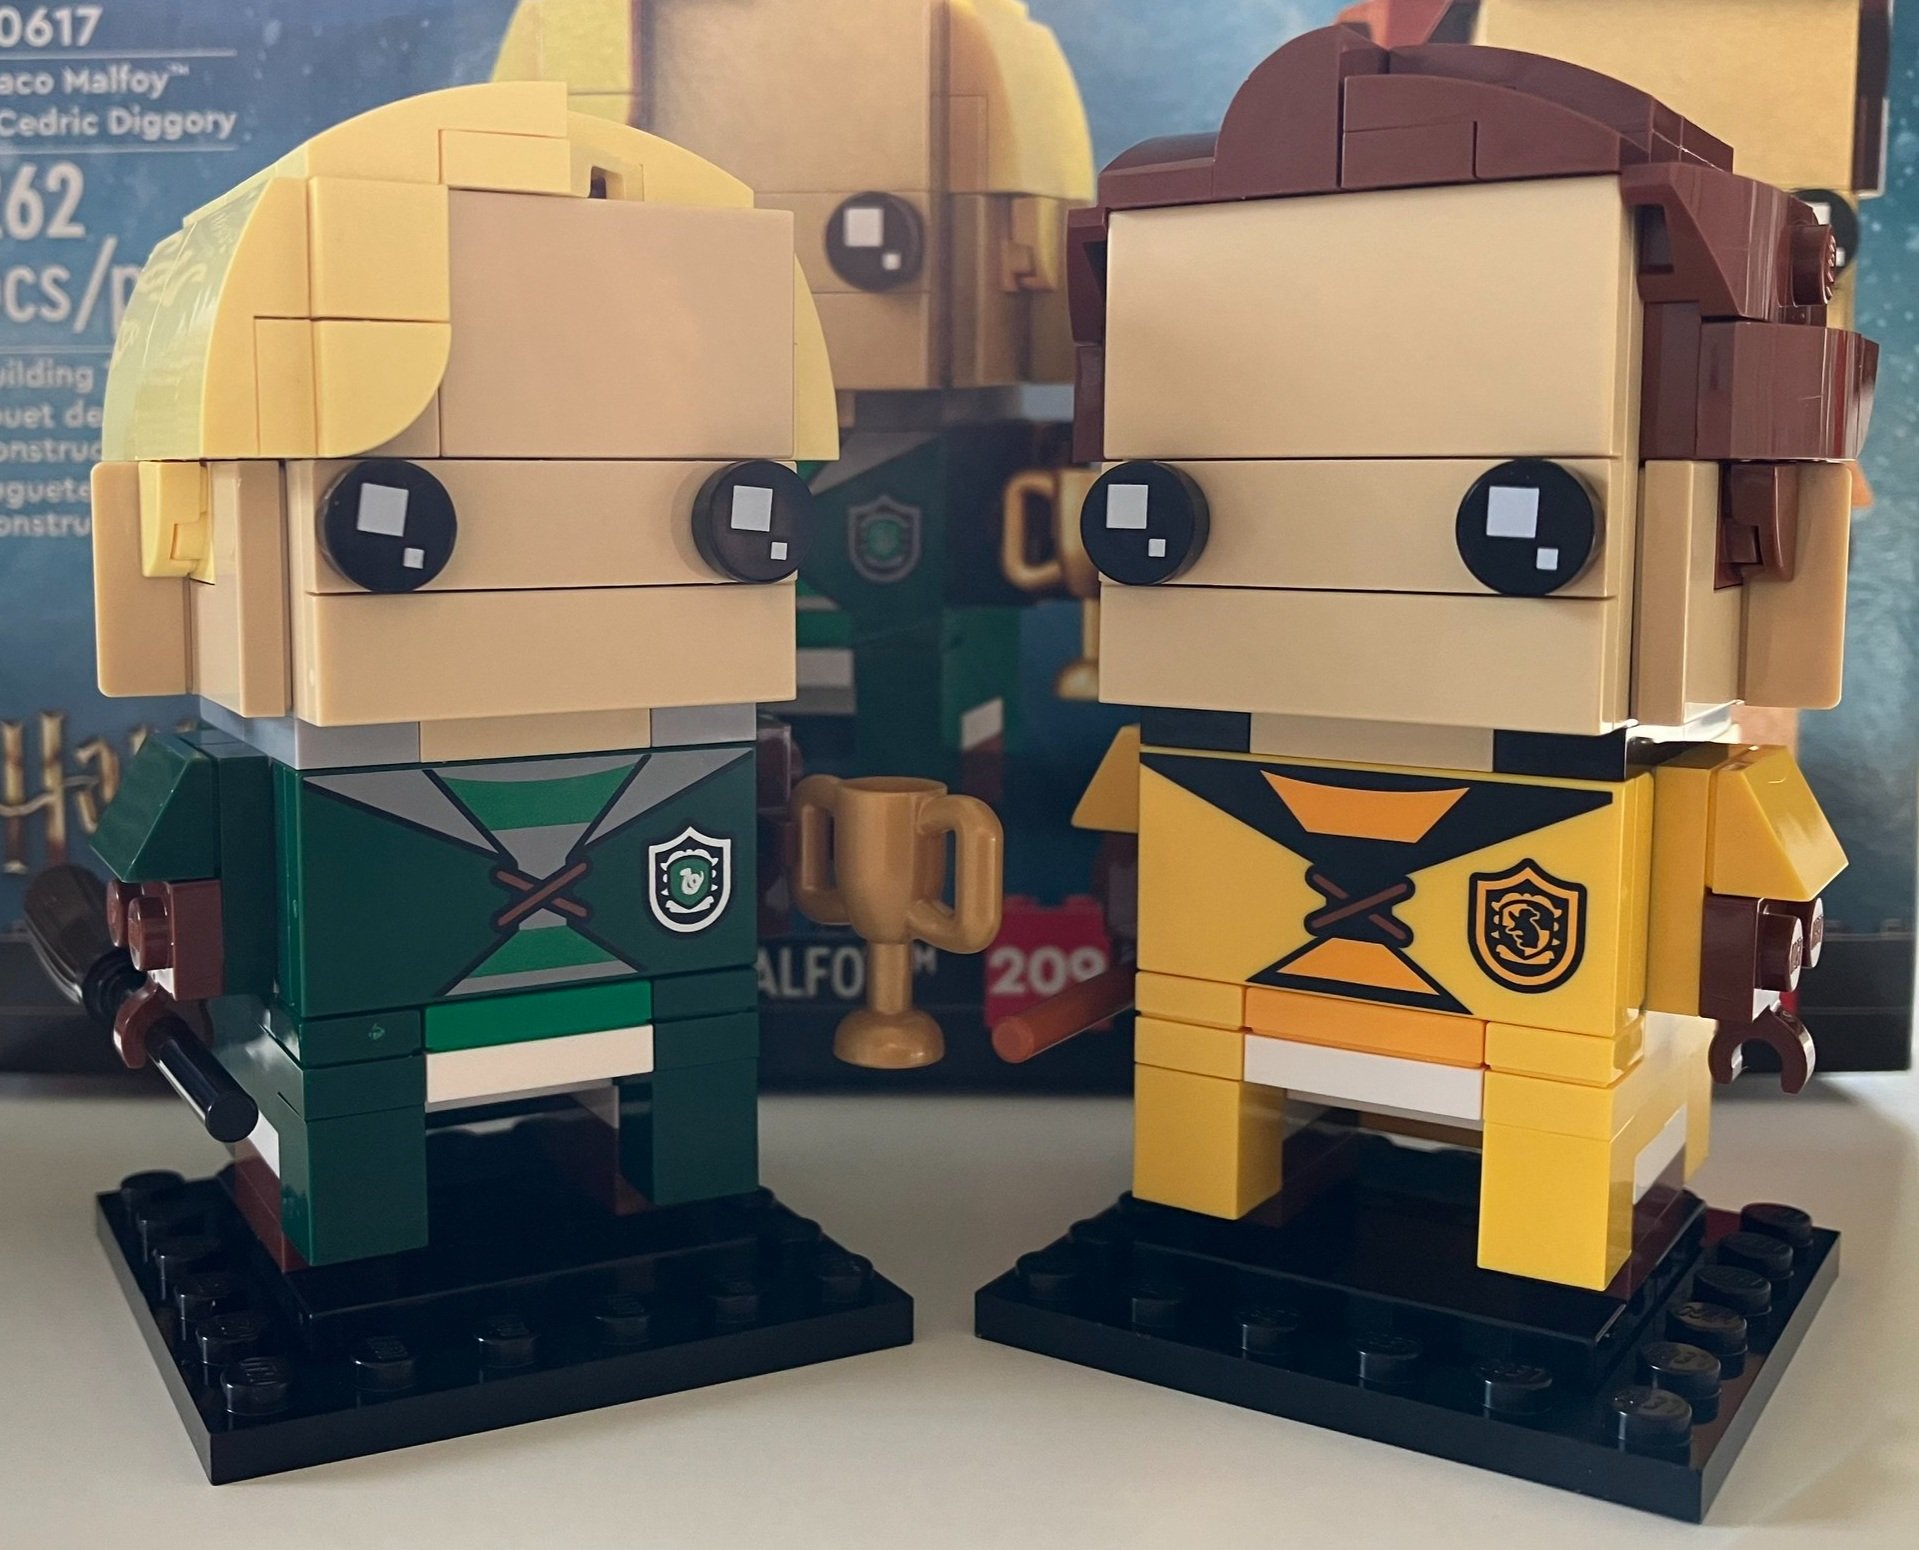
The builds for these are not super interesting. Their hair is slightly different, but beyond that and brick colors, these builds are pretty similar. I guess the goal was to get students from each house so students from two houses in the last set and then the last two houses here. One difference is Draco is holding a gold trophy cup so you do get that additional part. As I mentioned at the beginning, if you’re a Brickheadz collector or a Harry Potter fan, then go get this set. If not, I’d avoid this one as it’s not super exciting to build and doesn’t have a ton of unique pieces.

Last set is #40618-1 - Kingsley Shacklebolt and Nymphadora Tonks. Kingsley is #211 and Nymphadora is #212. This set also retails for $19.99 and contains 250 pieces. It has the lowest piece count of the three sets which puts it at $0.079 per piece. Still not bad, but the worst ratio of the three. As with the other two sets, similar box art and contents inside the box.

Of the three sets, I enjoyed building this one the most. Kingsley has his head cover which is a cool looking printed, sloped piece that goes all around his head. It’s obviously not completely round, but I like how they created that effect. Nymphadora uses a fun lighter colored purple for the hair which was a nice change to see a different color. Beyond these two bits, they still mostly follow the Brickheadz standard so you’re not getting much else super exciting. Like the other two sets, great for Brickheadz and Potter fans, not so much for everyone else. Thankfully, there is a ton of other sets out there you can pick up based on what you like so it’s not a big deal.

Happy building!

Set Review - #76402-1: Hogwart's: Dumbledore's Office - Harry Potter

As we approach the time period closer to Christmas, a lot of retailers are putting more items on sale to include LEGO sets. #76402-1: Hogwart’s: Dumbledore’s Office was released back on 1 June 2022 in the US for $79.99. It contains 654 pieces which works out to $0.122 per piece. I this this is too steep. I picked it up on sale for $64 at Walmart, which works out to a more reasonable $0.097 per piece. Keep waiting and maybe you’ll see it go on sale for even more as it should be retiring at the end of this year.

This set connects to other sets in the line in a modular fashion so if you’ve been collecting them all, you can add this one to the bunch. You get six minifigures in this set and three of the printed collectible tiles. I started the build with 14 of the 16 tiles and picked up one more. I’m still short one tile, but I’m not bothered by this.

The box is pretty standard with the full set on the front, Harry Potter logo, a minifigure line up, and pictures of the movie characters. The back shows some play details and the back of the set along with a note about the printed tiles. Maybe it’s just me, but the box feels kind of small for a $80 set. Onto the review…

The set contains five numbered parts bags. The instructions are bagged along with the stickers. There is also an 8x16 tan plate.

The first bag starts to build where the actual desk of Dumbledore goes. It builds a small platform and includes some clear pieces as two flask type items. This bag comes with a Harry Potter minifigure wearing the cloak of invisibility and holding a wand and lamp. It also comes with Dumbledore.

The second bag wraps up most of the office area. It builds up two book shelves, some props on the desk, and has a place for the sorting hat and a small Fawkes to sit on a perch. This bag comes with a Mr. Filch minifigure and his cat.

The third bag adds another level with the pensieve (bowl you can drop tears into to view memories). This doesn’t quite match the movie as the pensieve is actually in the office and not a level above. On top of this level is another level with the sword of Gryffindor. Again, the sword, when it’s in the office, is in the office and not on a separate floor. From the front, it’s a decent design with the elements you’d expect in a Hogwart’s type build. This bag comes with a Professor Snape minifigure.

The fourth bag builds the bottom layer of the set which is the library. This bag builds the floor and a book shelf. As part of the book shelf, you attach some books to leaf pieces on the outer wall. The leaf is attached to a tile that can slide in and out to make the book pop off the shelf. This is done twice.

The Madame Pince minifigure comes in this set. I had to look up who she is in the books/movies. Apparently she’s the librarian. Shows how much I know…

The fifth and final bag wraps up the build with completing the bottom floor. It adds a few desks in the library and sections of the library that are on plates connected by hinges to the rest of the build. You can fold them in or out depending on how you want to play with the set. A Hermione minifigure comes with this bag.

As mentioned at the beginning, the set comes with six minifigures. They are all pretty common except for Madame Pince so nothing to get too excited over. Harry does come with the cloak of invisibility, but you would already have it if you collected Series 1 of the Harry Potter minifigures (although that Harry is wearing pajamas in the CMF series).

Here’s the final build. I don’t have the other sets built to show the connection, but alone, I wasn’t too impressed by this set. The minifigures were just okay. You do get a few fun pieces like a small Fawkes and the sorting hat. If you’re looking to pick this one up to add to your castle, definitely don’t pay full retail price. Look for a sale or some good deal to cut down on the price.

Happy building!

Set Review - #10320-1: Eldorado Fortress - LEGO Icons - 18+

Pirates!!!!!!!!!! Actually this one should say Imperials!!!!!!!!!!! First time we’ve had new Imperial Soldier minifigures in a while. This set is a re-make of #6726-1 from 1989. It is #10320-1: Eldorado Fortress. It contains 2,509 pieces and retails for $214.99 in the US. This works out to $0.086 per piece which isn’t too bad. The release date in the US was 4 July 2023 and it’s still available at the time of this post.

The box is in the old school style of boxes similar to #21322-1: Pirates of Barracuda Bay and #10305-1: Lion Knight’s Castle. The front has the yellow stripe in the upper left with the set name. and then a full picture of the set. The back has various scenes of the build with a map background.

Here are a few pictures on the sides of the box. One shows all of the minifigures and the monkey. Another shows the set and how it is modular so you can connect the pieces in different ways to change around the fortress.

The set contains 10 sets of numbered parts bags with most numbers having more than one bag. There is an unnumbered bag with some larger plates. You also get the instructions in a paperboard envelope and an envelope with the sails. I had one sail with a slight fold in it, but I was able to undo the fold without any issues. They showed up in good condition otherwise.

There are four instruction booklets in this set. The first booklet contains some information about the set to include history of the Pirates line and the old set and how some of the previous sets inspired this set.

The first bag builds a row boat for the pirates and includes to pirate minifigures. One minifigure is a female and the other is a male. You also build a small ship. This ship is modeled after the ship from #6277-1: Imperial Trading Post that was released in 1992. The ship comes with a female officer figure. The tricorne hat has long hair attached to help show it’s a female.

Bags two and three start the base of the first section of the fortress. Unlike the original version which had a large baseplate to build on, this set connects numerous plates as a base and then you build on top. This does mean you connect a lot of dark grey pieces to get the side of the fortress and its textures, but you also get the sea color and land colors separated versus the single colored base plate. The second bag builds a ramp which was just part of the printed baseplate on the original set. I like how this was done to achieve the angle and to capture the look of cobblestones.

I failed to get a picture after the fourth bag, but bag five wraps up this section of the build. You add a palm tree, an entryway with doors, a stand for a cannon on the upper level, an office for the governor, and you get a large Imperials flag. There’s also another section that is lower with another cannon that can be rotated. Behind the walls is a small stove and clips to hang numerous extra weapons.

The set has a bunch of hidden sections to include a small container with a printed 1x2 tile letter piece and a barrel with coins in it. The coins are 1x1 round printed tiles versus the old gold coins LEGO used to produce (which were much cooler in my opinion).

The sixth bag adds another section. This one is also three stories. The lower level is a cave section with wine barrels above an empty treasure chest. The tapped barrel leaked some with the small 1x1 tile that is partially rounded to be the “drop” on the floor. The next level contains a small space where another barrel is stored (empty), and sack of loot, and a broom. There’s a ladder here that goes up to another cannon. There is also a parrot included in this section.

The front of this section contains two palm trees and a small sandy beach.

This bag came with a soldier. It’s a female soldier with a rifle and back pack of gear.

The seventh bag builds a dock section. The dock has four supports that can then be connected to the rock section which can connect to other parts of the fortress. The top of the dock has a small table with seats. The table has a few bowls, cups, a glass bottle, and a lamp. Built into the dock is also a trap door. There is a Technic built mechanism that lets you slide a piece over and the trap door opens up with gravity. Two minifigures come in this section. One is another female officer. She doesn’t have a weapon, but there are plenty of others to give her in the set. The other is a male soldier. He is similar to the last one only he has a mustache. Lastly, you get a small monkey in this set. I liked the original ones from back in the day with the minifigure hands, but this one works too.

The eighth bag builds another section. This one is most notable for the crane on top. The crane section spins around 360 degrees and can raise and lower the cargo. This section of the build comes with a chest with pistols. The instructions say to put two pistols in, but my set came with three pistols so I included them all. There’s a ladder up to the top level with the crane, but I’m not sure how a minifigure can get to this crane given it’s size.

The mid level of this section has a walkway and storage area with another empty barrel, a bag of loot, and some extra cannon shells (1x1 round bricks). Below this level is a tunnel section with water flowing through.

The ninth bag starts the last section of the fortress. You build the rock section over water with some hidden compartments. There is a trap door over a section with some gold bars (1x2 tiles) and a sack of loot. There is also a pathway with a pirate skeleton. Not sure how he got stuck in there or when. Also there is another trap door which ends up being a trap door in the prison cell to escape.

The last bag adds the top section to the ninth bag. This includes a prison cell with some straw on the floor. There are also a few windows with a cool roofing technique using some rounded parts. There is a ladder on the jail cell to allow soldiers to climb up above the cell.

Here are the minifigures minus the skeleton (which I forgot to take out of the build for the picture). You get three soldiers (two male, one female), two female officers, a male governor minifigure, and two pirates (one male, one female). Along with the skeleton, monkey, and parrot, there are a decent number of characters in this set. For comparison, #21322-1: Pirates of Barracuda Bay had eight pirate minifigures and two skeletons. This set has eight minifigures and one skeleton.

Here’s the final set arranged how I decided to arrange it. I like the modular option for this set where you can connect it how you want or split it apart as desired. It also allows you to add on other sections as you want since there are numerous openings to expand. I had a few Pirates and Imperials sets back in the day and it was fun to see these return. The price point is fairly reasonable. I would have preferred $200, but I understand LEGO is adjusting for inflation I recommend this one to adults looking to relive their childhood or to kids interested in playing with LEGO Pirates as there are a lot of great play features. Look for opportunities to pick this one up with double VIP points or interesting GWPs.

Happy building!

Another Set From the Pirates Theme to Build

It’s been out since 4 July 2023 and I broke down and put my order in for it. Yesterday, #10320-1: Eldorado Fortress arrived at my home. I didn’t have the original set from back in the day, but I did have some of the smaller Pirates sets and I enjoyed playing with those as a kid. I’m looking forward to building this one and maybe even pulling out my #21322-1: Pirates of Barracuda Bay set, rebuilding it, and making a Pirates scene. I won’t do my full review yet, but I’ll give my first impressions. I like that the box has a similar look to the sets from the 1980s and 1990s with the yellow stripe saying the set name in the corner. I’ve seen a few folks say they are disappointed to not have the raised base plate like the original set. I’m okay with not having it. I’d rather have the pieces.

There are a bunch of great looking minifigures too. I’m glad to see the return of the Imperial Soldiers and to get some new ones to include females. I haven’t opened the box up yet, but from the box pictures, it looks like there are two female officers and the tricornered hat has hair attached which is cool.

The other one listed is shown on BrickSet.com as the Imperial Soldier, Governor. I never had one of these as a kid so this is a fun addition.

I’m looking forward to the build and the completed product. Now I just have to find the time to put it all together.

Have you built this one already? What was your take on it?

Happy building!

Set Review - #910008-1: Modular Construction Site - Bricklink Designer Progr

It took a while for me to get to this one, but better late than never. This one is #910008-1: Modular Construction Site. It was from the Bricklink Designer Program that ran in 2021, but the set wasn’t released until 2023. This set contains 3,371 pieces and retailed for $319.99 which puts it at $0.095 per piece. The fan designer was user name ryantaggart which also happens to be his name, Ryan Taggart.

I’m a fan of the modular buildings and I thought this one would be something different to spice up the street with a building under construction. I had a blast building #910002-1: Studgate Train Station so I figured I’d jump into this one next.

Speaking of Bricklink, a quick plug for the Bricks for Bricks Bricklink store. 15% of our profits up through the end of November will be going to Creations for Charity so thanks in advance for your purchase. Onto the review.

The box is similar to the other Bricklink sets with the white packaging and pictures of the set. The front shows the full set assembled. The back shows the modularity of the set… which isn’t a whole lot. You can remove one partial floor off the top, but the rest is still attached. I guess it’s modular in that it can connect to the other modulars only it doesn’t have the usual Technic pin attachments to link up to other buildings.

Inside the box are three smaller boxes and a 32x32 baseplate. Inside those three boxes are 22 numbered bags (most with more than one bag per number), a few un-numbered bags, a 16x32 baseplate, and a card telling you to get the instructions online or in the app. I prefer the paper instructions over the electronic version as I can get away from screens and just build. I think that’s why this build took me a while to complete. I had to get my device set up instead of just opening the instructions and building right away.

The first bag starts off with some of the inside of the building. You build some of the outer wall foundation and then some of the tiling inside. A construction worker is inside with a jackhammer. Nearby are some “extra” tiles to put down and a bucket.

The second bag finishes off the base with the sidewalk outside, more flooring, and the rest of the foundation of the building. There are a few planters outside. One has plants and the other does not.

Bag 1

Bag 2

Bag three adds the 16x32 baseplate. This one is mostly covered in tiles and it contains the base of what will become the crane. There’s also a gate to allow entry into the construction site.

Bag four starts to build up. You add the first section of the base of the crane, you start a stairwell, you add a few beams for the main structure of the building, and you add some tiling inside the building. At this point of the build, I was curious to see how strong the building would be given it’s height. Would it just be stacked bricks or do the long yellow beam pieces really add support?

Bag 3

Bag 4

Bag five adds some windows and structure around the stairwell. You also add some bricks around the tall yellow beams and a few on their own. So far it seems structurally sound. As you build up, Technic pieces are incorporated connecting the beam to the rest of the build.

Bag six adds more beams, more windows, and more building up bricks around the beams. It’s an interesting way to build as most of LEGO’s modulars are just brick built. This one seems to follow what an actual building would have with framing followed by building up around the frame.

Bag 5

Bag 6

Bags seven and eight continue to build up the sides of the building. The main supports get some architectural detailing which is nice besides just having bricks stacked.

Bag 7

Bag 8

Bags nine and ten continue to go higher with more structural beams on top of the previous ones and then stairwell is also built higher. There were a few challenges where higher sections weren’t anchored down well, but they eventually are locked into place with bricks or plates.

Bag 9

Bag 10

Bags 11 and 12 add in arches over the window areas and then some additional detail in bricks. There are a lot of smaller plates used to create the shapes. Then there are tiles added to the top of the walls with bag 12.

Bag 11

Bag 12

Bag 13 starts another floor. It includes another worker set up to paint. There is also a work table with a drill and table saw along with a board to help cut the floor boards. It also continues the stairwell up in a different location.

Bag 14 adds in more windows only these are black. A few of the windows do not have clear panes to help create the look of a building under construction.

Bag 13

Bag 14

Build 15 tops off this floor with tiles and some jumper plates to allow for the floor above to connect to it.

Build 16 assembles the floor of the top floor.

Bag 15

Bag 16

Bag 17 adds some tiles, a few windows, and wall supports. It includes a minifigure with an ax. There’s also a recycle bin, a bucket, a small, portable cement mixer, a table with a coffee cup on it, and then some additional bricks that need to be added to the build.

Build 18 continues the build with some additional framing around the windows, a ladder going up, and some fencing around the edge so workers don’t fall off.

Bag 17

Bag 18

Bag 19 adds in the tower where the crane is attached. The tower works okay, but the ladder in-between the structure doesn’t attach well. It falls off pretty easily whenever you move the tower or shift the building around. You also add in a few containers of… I’m not sure what… oil? There’s a small sink as well. You also build a small structure with supports. I’m not sure what it is supposed to be for. Maybe a future addition to the building? There’s a minifigure as well. This one is a female that looks like a building inspector. She has a camera and briefcase.

Bag 20 starts building the actual crane section. It contains a lot of Technic pieces. It is also on a larger turn table so it can pivot all the way around.

Bag 19

Bag 20

Bag 21 continues the crane build with a cab and minifigure to operate the crane. It also adds in some supports for the top of the crane and then connections to hold up the front and back of the crane.

Build 22 is the final section of the build which adds in the string and “hook” for the crane. You then build a small porta-potty that the crane can then lift up. The crane holds up okay, but it is not very sturdy. I’m not sure how to make it better, but the crane comes off pretty easily as you turn it and move it around. Maybe construction in full Technic pieces instead of using both System and Technic? I’m not sure.

Bag 21

Bag 22

Before we wrap up, there are six minifigures. There are four males and two females. Five are construction workers and one is the inspector or an engineer. It’s a small crew considering the size of the building, but I can’t complain too much. Construction minifigures are fairly easy to get in CITY sets.

Here’s the final set. I enjoyed the build. It’s a challenging build with some great details. It’s a good display piece, but not great for playability as it comes apart pretty easily and parts aren’t really stable. The cost was rather high, but thankfully there are a decent number of pieces. It’s a great option too if you’re looking for parts. The back and one side of the building aren’t finished off with anything. They look like more work needs to be done. It’s hard to say if an additional wall should be added or if the building should be larger. It’s okay to display from the front for a front facing MOC.

Overall, it’s a great build. A little pricy, but it works. There are some areas that could use a re-design. I’ll add it to my long list of sets I’d like to redesign.

This one is off the market now so your chance to get it is on the secondary market at a higher price. The good part is the instructions and bill of materials are online so you can use your own pieces or buy some to re-create this set.

Happy building!

Set Review - #43217-1: "Up" House - Disney

Disney themed LEGO sets have been releasing all year long for the 100th Anniversary. I normally don’t buy Disney themed sets, but I enjoy watching Pixar movies and I thought “Up” was a fun one. This set is #43217-1: “Up” House. It was released on 2 March 2023 in the US for $59.99. It contains 598 pieces which works out to an even $0.10 per piece. Not a great deal, but you can’t complain about it being overly expensive either.

The box is about the size of a breakfast cereal box and is shaped that way as well with it being printed to go the tall way. Not really a big deal, just different from most sets. It probably helped them capture the height of the set. The box shows the set on the front with the Disney and Disney 100 logos. It also has some silver colored bricks which sadly are not a part of the set. The back shows some additional details and play features.

The set contains four numbered parts bags, an instruction booklet, and a sticker sheet.

Here are the stickers. While I always prefer printed tiles, the stickers here do add a bunch of detail to the house and give it some extra life. I guess I can’t complain too much here.

Bag one starts the build with the first floor. My kids built it while I supervised for this review. I had to help them on a few steps and I caught a few steps they didn’t quite follow correctly, but overall they did a good job. The first floor adds the front door and a small portion of the porch. It builds out some of the living room with a few items including a lamp, a record player, and some pictures.

Russell comes in this bag. He has his giant back pack full of gear and it is built so that it touches the ground, but it keeps him upright due to a jumper plate positioned upside down. The torso is printed with all his badges which is a fun detail and I like how his hat is on his head, but you can still see a bunch of his hair on the front of his cranium.

Bag two finishes up the first floor and starts on floor number two. I like how they captured the design of the window space on the front of the house on the first floor. It’s a fun, colorful build and it’s a great shape without a ton of gaps. I added a picture of the inside so you can see some of the details and how the stickers really do fit in well. Just about all of the references are there from the movie to include the change jar with the Paradise Falls label.

The Carl Fredricksen minifigure comes in this bag. I think it matches the movie character well while still being in LEGO form. I’m also glad to see that they were able to replicate his cane. Sadly, it doesn’t have the tennis balls on the bottom, but it’s still pretty close with the roller skate piece.

The third bag finishes up most of the second floor with some interior details, the roofing, and the chimney. Inside you build a bed, a TV, and the adventure book which goes in a crate. The roofing is a fairly simple build, but it still seems to capture the shape of the house from the movie. The chimney is built and then attached to the house with Technic pins. It looks ugly from the back, but you can’t tell from the front.

Dug comes with this bag and he is molded in one piece. I like how they captured his form. Well done designers!

The last bag is mostly balloons. You do add one last window to the second floor and a weather vane with a blue chicken on it. I like how the balloons were done. There definitely is not as many as in the movie, but cost is a consideration here so it’s just about right I guess. Additionally, you get a section of the yard with some air to blow up more balloons, a box of what I assume are balloons, a squirrel, and the mailbox.

Here’s a closer shot of the three minifigures. Again, I think the designers did a good job capturing the likeness of all three characters while still keeping them looking like LEGO minifigures and Dug compatible with studs. If you look close, the clear piece on Russell to hold up the back pack is a bit awkward, but not a huge deal in my opinion.

Here’s the final set and why the box looks like a tall cereal box. You need to be able to show the full set on the front of the box and it’s tall. Overall, it’s decent set. There are some good pieces, some different colors, and the minifigures were well done. The price is okay, but hopefully it will go on sale near the end of its shelf life. I picked it up during a GWP offering so I can’t complain. I recommend this one to Disney and Pixar fans or someone looking for a fun small scene to build. Beyond that, it you could add it to a city scene if you wanted to or maybe a Friends scene with the bright colors. I look forward to seeing pictures of what the fan community does to re-build this set into other things or to see what gets added.

Happy building!

Set Review - #40619-1: EVE and WALL-E- Brickhead

Another Brickheadz aet for review… This one is #40619-1: EVE and WALL-E. It contains 155 pieces and retails for $14.99 in the US. This works out to $0.097 per piece. It was released on 31 January 2023 in the US and so far I have only seen it from LEGO, but not at Walmart or Target. Maybe that will change? This one is not branded for the Disney 100 anniversary, but its release happens to coincide with the anniversary. For those of you not aware, this is not the first WALL-E set. The first was #21303-1: WALL-E from the LEGO Ideas line.

The box is rather small, but this is to be expected for a set containing 155 pieces. The front of the box shows the two Brickheadz characters while the back gives the same shot and shows that there are bases for each character. Also of note, WALL-E is #193 and EVE is #194 in the Brickheadz line.

The set contains three parts bags. Two are #1 and one is #2. There are also two 8x8 black plates which are separate. Instruction booklet one is WALL-E and goes with bag one. Instruction booklet two goes with bag two and is EVE.

And here are the two. WALL-E has his lunch box and the plant in a boot. I think the designers capture the shape well and did a good job making decisions on the details to include or not. The eyes and sockets have the same shape, but they do not move around. Also the neck joint is there so you can have the head look up/down. The tracks are a good representation of the character and they are attached to the side while clear plates are used to keep WALL-E attached to the display plate. Besides the printed eyes, he also has a printed brick with the WALL-E logo.

EVE “floats” on a clear brick and captures the character well. White Nexo Knight shields are used for the arms and she has no printed piece. Interestingly, they added a small plant piece inside to be the space where she is supposed to store plants that she finds which is a fun detail you only know about if you build the set.

I included a picture of the side and back just for awareness, but there aren’t a lot of details you can see there.

Overall, they are good Brickheadz representations of the two characters. I recommend getting them if you are a Brickheadz collector or a fan of the movie or Disney stuff in general. Otherwise, I’d avoid this one as it doesn’t offer a whole lot else.

Happy building!

Set Review - #21338-1: A Frame Cabin - LEGO Ideas - #46

How are we at the 46th set in the LEGO Ideas line? Where has the time gone? This one is #21338-1: A Frame Cabin. It was released back on 14 January 2023 in the US. It contains 2,082 pieces and retails for $179.99. That works out to $0.086 per piece which isn’t too bad. The set is jammed with a lot of details, but still has a lot of playability too. Plus it’s not just a front façade of a building like many sets are as the roof pieces come off for access if you want to play instead of accessing the back of the build. Before getting into the build, I thought this set would go well with #21318-1: Tree House if you wanted to build an outdoor scene or just a MOC of a scene in the woods. I’ll have to add that to my list of things to try someday.

Onto the review…

You get the standard box with the 18+ greebling and Ideas logos. The front shows the full set while while the back gives some additional details and dimensions.

The contents are 15 numbered parts bags with one unnumbered bag of larger pieces. A few of the numbers have more than one bag. You also get two instruction books in a paperboard envelope.

Here’s the envelope with the instructions and the two books. The instructions have some details on the designers, fan designer, and the model itself to read before you get into the build.

Bag one builds the base of the cabin and includes two minifigures.

Bag two adds in some tiles and studded tiles that end up as the front porch. You also add in some Thor’s Hammers for the masonry work in front of the cabin which is a cool building technique.

The third bag starts to pack in details. There is a small kitchen area with a sink, stove, extra wood to burn, storage for dishes, and then the start of some stairs. The other side of the room has a record player and a 2x4 printed tile that says “LEGO” as your floor mat. I believe this is the tile from #10290-1: Pickup Truck.

Bag four builds up the walls and support section for the second floor. The kitchen area gets a few more items to include a stove, chopping blade, and fire extinguisher. There are stairs put in above the kitchen area with a LEGO plate on a step for a minifigure to accidentally step on.

The other side adds in a guitar, shelving, and you can see a printed tile above the front door.

The fifth bag adds in tiles, jumper plates, and some plates as the outer siding of the cabin. Some are offset and they aren’t in any particular order which helps to make it look more like a cabin in the woods than a manufactured building. The front side of the cabin gets one of the newer butterfly pieces above the front door which is a nice addition.

Bag six decks out the front porch with a rocking chair, a small stove to fry an egg, steps up to the porch, a small bench with a lantern and mug, and railings for the porch. Then in the back you get a shower, bathroom materials (shovel, toilet paper), and what appears to be gas hookups for the stove (maybe).

Bag seven adds a tree which comes with a small storage area for extra logs to burn and a bucket with tools. The coloring of the tree is fun with the yellows and reds of a fall like tree. This section can connect to the main cabin with a small Technic axle into a Technic pin hole. This allows it to stay there, but it can easily be removed and placed elsewhere as we’ll see later. This section comes with a small blue bird to sit in the tree.

Bag eight builds the second floor which is a small sleeping area with a bed. It still has a bunch of details to include a book shelf, a map on the floor and some lamps.

Bag nine attaches the second floor to the first floor, adds the siding to the upper level similar to the lower level, puts a peak on the roof, builds up the chimney from the stove, and adds in a little more detail on the second floor.

Bags 10 and 11 build the large sloped roof. Each side is built the same per the instructions (if you want to follow them). Both come with a skylight and a printed tile with wood grain. Bag 11 adds the tiles and studded tiles to finish out the roof and then each piece easily slides on top of the cabin. There aren’t any actual connections which is fine. Gravity keeps it on and I’ve been able to pick up the cabin and move it around without losing the roof.

Bag 12 builds another section of the build that can either be a piece attached to the corner of the cabin or placed separate. It starts with some greenery, a small stream section, and a rock piece. These pieces are assembled with some various plant pieces around them. There is also a small… um… animal… it’s not a squirrel… is it a woodchuck? rat? I’m not actually sure. The set comes with birds and a spider… but I’m not sure on this one.

Bag 13 assembles the stems and branches of the two trees. They are built in a similar fashion, but you can change the angles as desired to make them look different.

Bag 14 adds leaves/color to one of the trees. You get some great fall colored pieces to fill out the tree on this one. There’s dark orange, yellow, gold, and a bright yellow. They make a pretty good color combination for my untrained eye.

Bag 15 puts greenery on the second tree with sand green, dark green, and an olive type color. I like how all three trees in the set have different colors. You can obviously change them as you want, but I just followed the instructions. I’m also a fan of the wildlife with a red bird and butterfly with these two trees.

Below the trees you get a spot to rest the canoe on some Technic parts. Underneath is a crate with some life jackets and a bottle of some sorts. There’s a barrel to the side of the one tree where you can place the oars.

This set comes with four minifigures. I don’t think any of them are unique or have any rare attributes, but they’re a good mix for this set. I’m okay with four adult minifigures versus including minifigures with the kid legs.

Here are some pictures of the final build with the different tree sections attached and then separate. Overall, this was a great build. I enjoyed assembling the set between the different build techniques and all of the little details. It wasn’t super hard to assemble, but it also wasn’t just stacking bricks on top of each other which was good. You get a lot of great pieces as well if you like to break apart sets for MOCs. Lots of printed pieces too and no stickers which was a bonus. I would price this set around $160 instead of $180, but look for opportunities to get it with gifts with purchase or double VIP points or on sale at some other retailer if you can find it on discount.

Another great addition to the Ideas line in my opinion. What did you think?

Happy building!

Set Review - #76407-1: The Shrieking Shack & Whomping Willow - The Wizarding World of Harry Potter

I’m not sure why, but I’ve gotten into collecting the Harry Potter sets. I’ve never read the books, but I have seen the movies a few times. They used to be a bit more reasonable in price, but with the price increases last year, they seem over the top to me. This one is #76407-1: The Shrieking Shack & Whomping Willow. It was released on 7 May 2022 in the US for $89.99. With 777 pieces that works out to $0.116 per piece which is a bit high in my opinion. LEGO recently had it on sale for $72 and with two GWPs being offered at the same time, I couldn’t complain although $0.09 per piece isn’t the greatest either.

The good part is that my little guy is getting into LEGO and he enjoys building with me now. We built this one together… or maybe he built it and I supervised and applied stickers. We sat at our beat up kitchen table so the pictures aren’t the greatest, but it was easier than moving to take pictures as he wanted to build on his timeline and not my blog pictures.

Nothing spectacular about the box. If you’ve purchased a Harry Potter set in the past, you are familiar with how they look. Of note, the back includes a note that you get four Wizard Tiles in this set (Still? I wonder how long they will include them in sets?). All four of the tiles I got were duplicates. I have 14 of the 16, but I’m not rushing out to find the remaining two.

The set contains six numbered parts bags, an instruction booklet, and a sticker sheet.

Here are the stickers. There are a bunch, but they weren’t too bad. My daughter is a pro at putting them on and tackled most of them for us. She was good at applying the stickers on the curved surfaces and getting them to line up easily. I’m somewhat good at applying to flat tiles, but I’m not so good at curves.

Bag one builds a small fence section and then the area where the whomping willow will attach. This section has a rock piece set up so it can rotate along with a cloud. As shown on the box, when the moon comes out (3x3 round, glow in the dark tile), Professor Lupin turns into a werewolf. This is a fun play feature. This bag comes with Ron Weasley and Hermione Granger minifigures… yet another set with the three main characters.

Bag two builds the whomping willow. It’s not an overly detailed build, but for the size and price point of the set, it gets the job done. #75953-1 - Hogwarts Whomping Willow from 2018 was the last time it appeared and I like this one better. This one is at an angle and there is a small gear in the back of the stand where you can make it rotate which adds to the playability of the set.

The Harry Potter minifigure comes with this bag in case you haven’t gotten a set with him in it before.

Bag three starts to build the shrieking shack. I wasn’t optimistic about this part of the build, but it actually wasn’t too bad. It’s not just stacking bricks to make a building, but instead offsetting bricks, using different colored pieces, adding in slopes and textured parts, and making it look like the old building that it is. Along with some of the white pieces to make it look like winter time, I can’t complain here.

This bag comes with Sirius Black and a dog which if you haven’t seen the movie or read the books, Sirius turns into a dog to hide.

Bag four finishes up the first floor. I will show the inside later, but the first floor has multiple boarded up windows, an interesting porch awning, the start of a chimney, and then on top, two pieces to allow rotation which was odd. My kiddo and I both were curious how these pieces would be used later in the build. Professor Lupin comes in this bag.

Bag five starts the second floor in a similar fashion as the first floor. It uses slopes, textured pieces, different colors, and tiles to create the old and abandoned effect.

The Peter Pettigrew minifigure is included here along with Scabbers, the rat belonging to Ron that ends up being Peter in hiding (spoiler alert?). I don’t think he appears often so this is a good addition to the set.

Build six finishes up the set. I like the way the roof was done with the slope, snow effect, and the two smaller windows on each side of the main window. The bottom of the second floor has round plates which connect to the turn table pieces on the top of the first floor. The second floor doesn’t spin. This instead allows you to connect the two floors so they are offset. This makes it look as if the second floor has shifted off of the first floor and is more crooked. A cool feature and interesting way to design this. The chimney is offset slightly as well which bugged my kiddo, but he understood after I explained it.

Here’s my picture of the inside. The designers did a good job decorating with a chair, piano, chest, table, and a few other items. The stickered tiles make up some busted blinds and damaged glass photos/paintings which adds to the scene.

Bag six comes with Professor Lupin as a werewolf. The molded head piece and werewolf legs are a nice touch.

While I think this set is overpriced, you have to admit that it’s not too bad to get seven minifigures and two animals. Plus the werewolf minifigure is something new.

Here’s the final build. Overall, I was more impressed than I thought I would be. It’s not a pretty looking set and to have LEGO put it on sale makes me think it isn’t selling well. I thought the build wasn’t bad and it captures the scene from the movie quite well considering the size and piece count. With seven minifigures and two animals, it’s not that bad. If you’re reading this close to when it posts, take advantage of the sale at LEGO or look for it on sale at one of the big retailers like Target, Walmart, or Amazon as it gets closer to Christmas. This one is scheduled to retire at the end of this year so don’t wait if you are interested. If' you’re not a Harry Potter fan, I’d stay away from this one unless you are looking for pieces or you want the werewolf minifigure parts for a MOC.

What are your thoughts on this one?

Happy building!

Set Review - #910002-1: Studgate Train Station - Bricklink Designer Program

Round Three sets of the 2021 Bricklink Designer Program arrived in 2023. The sets have been delivered for a while, but I had a backlog of builds and then it took a while to put this one together. #910002-1: Studgate Train station contains 4,062 pieces and retailed for $399.99. That worked out to $0.098 per piece so very close to the average of 10 cents per piece that everyone quotes. I’m sure I could have sold it for a significant mark up, but I really wanted to build this one as a train fan and my overall excitement for how the structure looked when the design was released. The fan designer is Pablo Sánchez Jiménez. You might remember him as the fan designer behind #21322-1: Pirates of Barracuda Bay.

I watched a video from Tiago Catarino a few weeks back and someone asked him for his impression of the Bricklink Designer Program sets. He responded that he didn’t like them as they didn’t get the full treatment that LEGO goes through for it’s design process. My response is that he should build this set. Wow! It was an incredible build and was very challenging. I enjoyed the process and I think the end product looks great. There are a few things that wouldn’t pass the LEGO designer test, but nothing major. Let’s dig into the review.

The box matches all of he previous Bricklink Designer Program designs with the white box, Bricklink logo, and LEGO set identification in the bottom left corner on the front. The front also lists the fan designer’s name which is cool My set came well packaged and the seals were all fully attached.

The parts are mixed between three separate boxes on the inside and then there is a large 48x48 stud light gray baseplate. Opening the boxes reveals 23 numbered bags with some numbers having more than one bag per number. There were also a few bags of larger pieces that weren’t numbered.

Like previous Bricklink Designer Program sets, there are no printed instructions. You can either download a .pdf from Bricklink or use the LEGO® Builder app. I used the .pdf. I still prefer printed instructions, but I managed. After working with a computer all day, it’s nice to turn off the electronics and use paper instructions and bricks.

This set comes with a small sticker sheet. While I would have liked printed parts, I can’t complain about 9 stickers total.

The first bag assembles the base of both train cars. You use two of the large train plates and the standard buffers and wheels. Everything else is custom built.

Bag two builds up the train to include seats and windows. Bag three completes the trains with a roof and front wind shield. Overall, it’s a fairly simple train and you can use them as individual cars or combine the two for a longer train. There are no doors on the cars so you either have to modify them on your own or just live without doors. If you want to motorize the train, you’ll have to do some modifications to add a battery box, but it’s possible. Or just use a 9V motor and track if you have it. I would have liked a more detailed train and more cars, but I understand the limitation of the program and realize that the focus of this build was on the station. The train is just an added bonus.

Build four begins the station build with the sidewalk in front of the station and part of the first platform. The sidewalk is pretty simple, but the use of the light and dark gray along with the Nexo Knight shields helps to improve upon the design.

Build five adds the front wall of the station with some windows, stairs leading up to an arched doorway, and a wheel chair ramp.

Build six is already to the second story of the platform. You add in some decorative wall designs and a few seats and a newspaper stand. The front of the station by the sidewalk uses black lamp post poles to hold up the upper level. The pieces are a little awkward as the back section is well attached and it can stay up without all of these pieces attached. I found they came out of place often.

Build seven adds in some details on the upper level to include some tables with umbrellas, lamps, and a clock on the front. The first two minifigures are included which are a younger male passenger with a guitar and a male worker.

Bag eight adds in some decoration on the front of the station to include a sticker with the name of the station.

Build nine adds in some details on the platform to include a bench and ticket machine. You also start the build of the stairs that will allow the minifigures to go to the other side of the platform. This bag comes with two minifigures. One is a janitor cleaning off the station platform. The other is a traveler with a bag and ticket. You then add in the rails. The set comes with eight straight rails, but you only install six so you have a few extras. Then you start to build up the other side of the platform.

One note of the design is the ramp across the tracks for minifigures in wheel chairs. some of the pieces used have studs sticking up. This is good if you want minifigures to pose on the tracks, but it doesn’t allow the engine with the buffer that has a plow-like piece on it to easily clear the tracks there. If you intend to add this set to you train setup, you’ll need to add in some different pieces to allow train clearance.

Bag ten adds in the other side of the platform with a wall with windows, a station sign, a bench, a trash can, and some lights. There are two more minifigures. One is a male with a winter cap, sun glasses, a poofy jacket collar, and 2 bags. The other is a female worker with a purse/bag.

Bag 11 builds the bridge that connects the platforms. It’s not a super sturdy bridge, but it holds up okay. The design is all black pieces, but it works. Bag 12 finishes the bridge, adds the stairs to the upper level, and a support arch to hold up the upper level and dome.

Bag 13 builds the base of the top level. It is put together with plates connected to bricks connected with Technic pins. It’s pretty solid. Bag 14 finishes up the upper level base and starts to add in some detailing.

Bag 15 continues to add in detailing of the upper level with a fence around the outside, two center sections that are a little taller for aesthetics, and then some lounge areas for your minifigures to sit while waiting for their train.

Bag 16 adds in some parts around where the stairs connect and then an embellished section where a clock is placed. This section is cool as there are a bunch of brick arches and you build an assembly for the clock that connects via clips to parts behind the clock. Definitely a cool design choice I wouldn’t have thought of. Also along the outside are some open studs which are used as design throughout the build. Maybe it’s part of the reason why it’s called “Stud” gate.

Bag 17 wraps up the upper section. You add in some umbrellas for shade by the couches, some flowers for decorations, two lookout stands to get a view, a hot dog stand, and a few more decorations along the edges. This section gives you two minifigures. One is the hot dog vendor who comes with a blue baseball cap or a chef’s hat. The other is a female traveler with a camera.

Bags 18 through 21 build the dome like covering of the station. This part got a little repetitive, but I understood why. You start by using Technic pieces to build a piece of the outer frame, then you connect the clear garage door pieces together and connect them to the outer frame, then you build more frame pieces to connect to the clear garage door pieces, and so on. Eventually you get two larger sections of four sections of this type of build.

After each section is assembled, those sections are attached to the top level completed at step 17. This part was very challenging for me. You have to connect the Technic pins into the base of the top level and there are clips to attach the clear garage door pieces. This was not easy to do as the top level has a lot of details already installed. I ended up removing a lot of pieces and then fighting to get everything attached. I’m not sure if there would have been a better order to do this all in, but I eventually managed to get it all together and re-assembled. Whew!

The whole section is then attached to the rest of the station. I use the term attached loosely as it really rests on it. The only true connection is with the stairs. One side of the platform has two small pins that stick up into the Technic holes, but this is more to keep it from sliding as opposed to being a structural support. It works though as I’m able to pick the entire build up and move it around and it stays in place.

The original submitted design used a large single clear piece for the very top dome. Apparently LEGO didn’t agree with the piece choice so it was re-designed with multiple clear pieces. This section starts off with an octagon type shape connected by hinge pieces. Then you clip on some larger windscreen pieces to go around the outside while some clear rod pieces are in the inside to support what will be the top of the dome in the next section of the build.

The final bag, #23, is some smaller wind screens attached to the clear rods from the previous bag. You then use these pieces to hold up the very top spire. There are no actual connections, it just rests there with gravity. From there, you build a chandelier which connects to the top spire by a chain piece. My picture of the chandelier isn’t the greatest, but it was hard to get a picture of it alone as it needs to hang freely to see what it looks like.

This whole dome section was an impressive engineering feat and while it has some gaps and weird angles, I think it looks okay.

This set comes with ten minifigures. There are a good range of travelers and workers and they come with a bunch of different accessories. Overall, it’s a good mix.

Okay, I lied… There are 11 minifigures. The minifigure in a wheelchair rolled off the set in my building area when I took the original picture. Whoops! This is a female minifigure with short hair and a hoodie. She gives you the opportunity to test out the ramps for those that need them.

Here are some pictures of the final set assembled. I think this one looks awesome! Despite some minor design issues and assembly challenges with the upper level, it’s a great set that would look great in any city set. I think it would be a bit small for a larger passenger train to stop at, but one with one or two cars works. I’m glad I picked this one up when I did as I’m sure it’s going to a hefty price on Bricklink or Ebay. Not sure how much it would be to assemble all the pieces and build it on your own, but the instructions are available for free online so you can assemble it if you’d like. Overall, it was a great build and I look forward to adding this to a train layout someday.

Happy building!