Set Review - #71033: The Muppets - Collectible Minifigures

Lego sucked me into Collectible Minifigures back in Series 10 which was back in May of 2013. Here I am almost 10 years later still trying to collect them all. This series is The Muppets, which is a first for LEGO from what I can recall. It was released on 1 May 2022 in the US for $4.99 each. You can also buy boxes of six minifigures for $29.94 from LEGO while numerous other retailers sell them for $29.99. Gotta make that extra nickel of profit!

There are 12 minifigures in total. LEGO Shop @ Home will let you buy 16 individual packages and then three of the boxes of six for 18 meaning you can buy 34 in total. I did this and really hoped to get all 12. I only got eight… LEGO Customer Service will tell you that it is all random and that’s how it works, but I say they need to do a better job randomizing. I sell collectible minifigures in my BrickLink store and do my best to load up on each series knowing that they are only out for three to four months at a time. I placed another order through Walmart and received two boxes of six each. With 46 now, I was at nine total. Definitely a good profit item for LEGO and something I would definitely not do unless I had a BrickLink store.

So here is my review on the first few and I’ll add to it as I go. Overall, I like the minifigures in this series and I think LEGO did a great job capturing the likeness of each one. If only I could collect each one…

Here is what the boxes look like that give you six minifigures each.


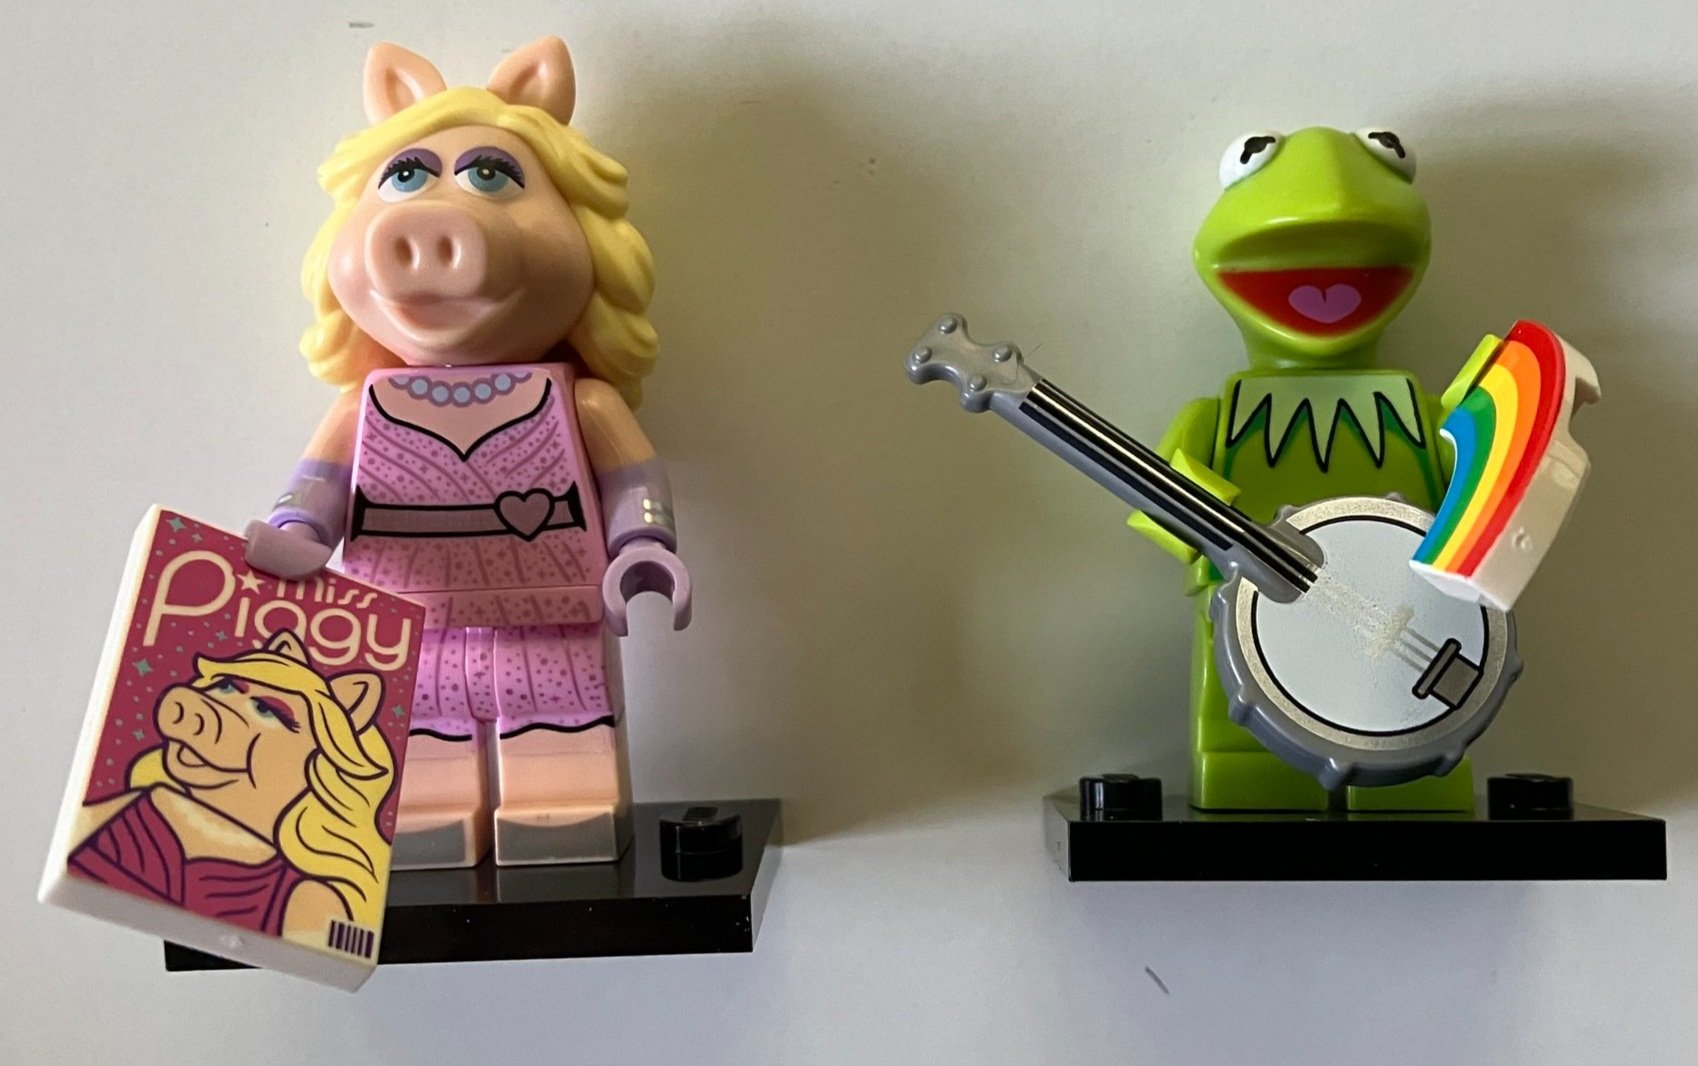
I have not counted yet, but I think these first two were the most prevalent in my purchases. Miss Piggy comes in a printed dress and holding a printed tile of one of her glamor shots. I wonder what the decision was to go printed versus the cloth dress versus a skirt piece that fits over the legs or using a slope piece as a dress

Kermit the Frog looks pretty good other than being a little bigger scale wise. He comes with his banjo/ukulele (which is it?) and a tile of a rainbow.


I got a bunch of these two as well. Our two favorite hecklers, Waldorf and Statler join this series. Waldorf has a tea cup and saucer along with a tile to hold up with ZZZZs on it. Statler has a laptop with a connection to Scooter over a video connection app. Both seem to match their Muppet likenesses really well in my opinion.


Fozzie Bear comes with his usual get up of hat and scarf item around his neck. He comes holding a banana as part of a joke maybe and then has a microphone on a stand.

Animal comes with a brick built drum set and uses two Harry Potter wands as his drum sticks. I’m a big fan of this one. The minifigure looks like he is doing his famous laugh… “Ha Ha Ha Ha!”


Dr. Bunsen Honeydew is next with a conical flask for his next experiment.

Gonzo comes with printed pants and a Hawaiian style shirt with Chile peppers on it. He comes with a chicken who we can only assume is Camilla.


So I did get Rowlf the Dog, but will wait to add a picture until I get another minifigure to put next to him.. Rowlf comes with a sheet of music and a bust of a composer. The bust comes with a minifigure head with two expressions and a hair piece.

Beaker… finally got this one. You don’t want to know how many I went through until I got it. Beaker looks pretty accurate with this blank stare and the mouth open. He’s holding a control switch to start an experiment or blow something up.


Janice matches the character well with the hair and red lips. She’s got a guitar which is similar to others in shape, but has different printing on it.

The Swedish Chef also looks great. I like how they did his facial hair. He’s got a whisk and is holding one of the Muppet vegetables which is made up of a minifigure head with some greenery on top. This minifigure is great! It stinks that I only got one after all of the purchases I made. Thanks for the “randomness” LEGO!

Set Review - #60326-1: Picnic in the Park - CITY

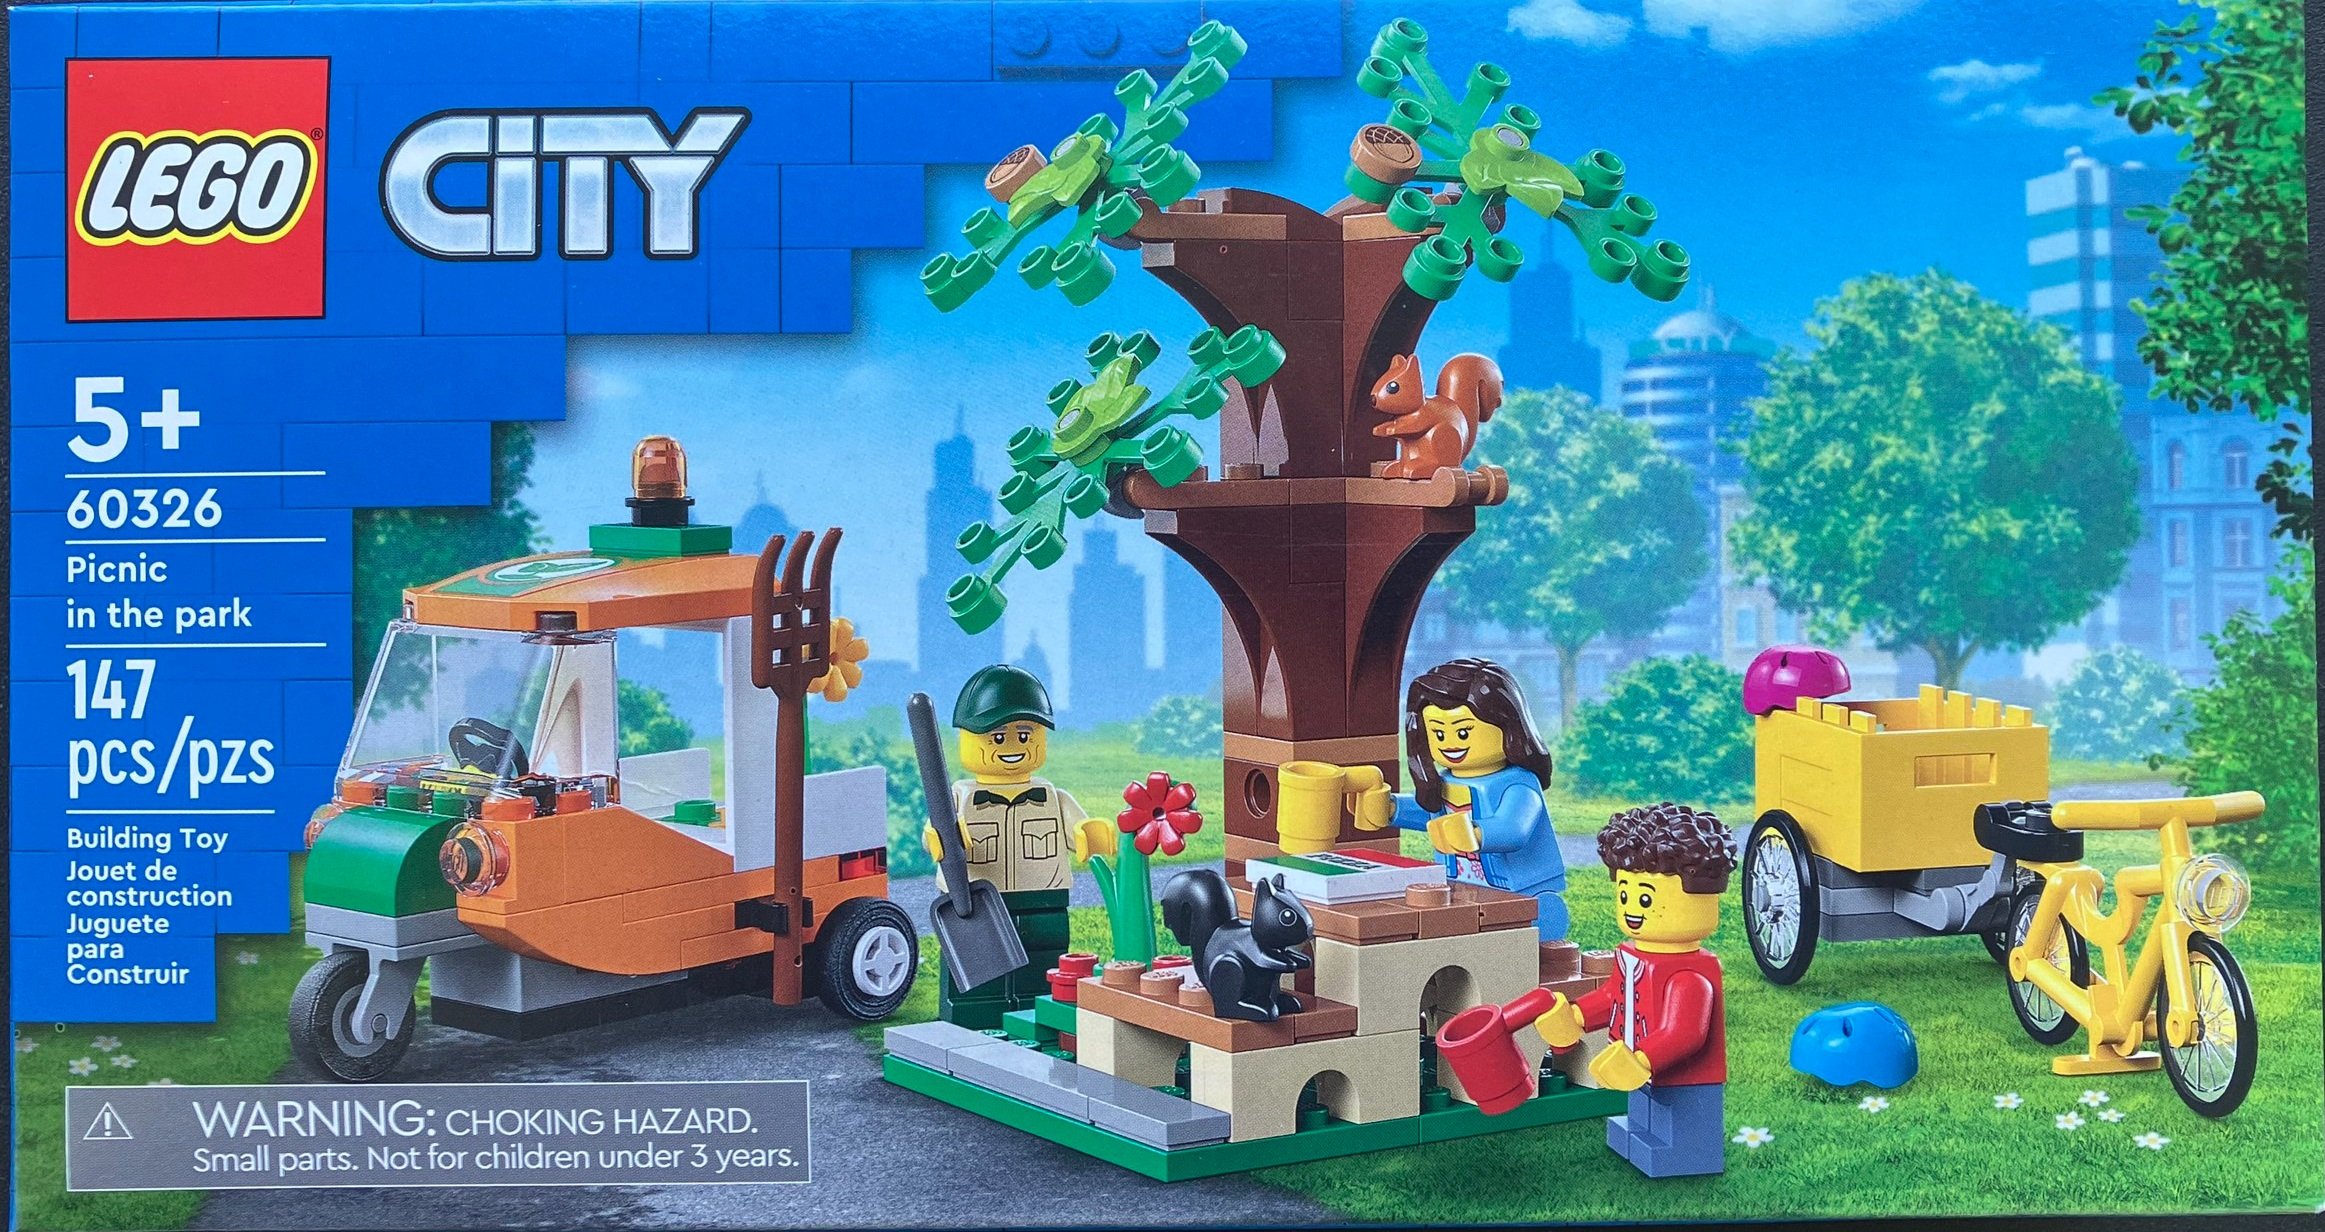
I don’t often purchase or review CITY sets, but every once in a while a set comes out that interests me. Set #60326-1: Picnic in the Park was released on 2 January 2022 in the US. It contains 147 pieces to include the first LEGO squirrels. I don’t know why I was so interested in LEGO squirrels, but I thought they would make a good addition to a future LEGO City scene I hope to work on some day. This set retails for $19.99 which works out to $0.136 per piece. I think this is a bit high, but I did find it on sale (after purchasing it… go figure).

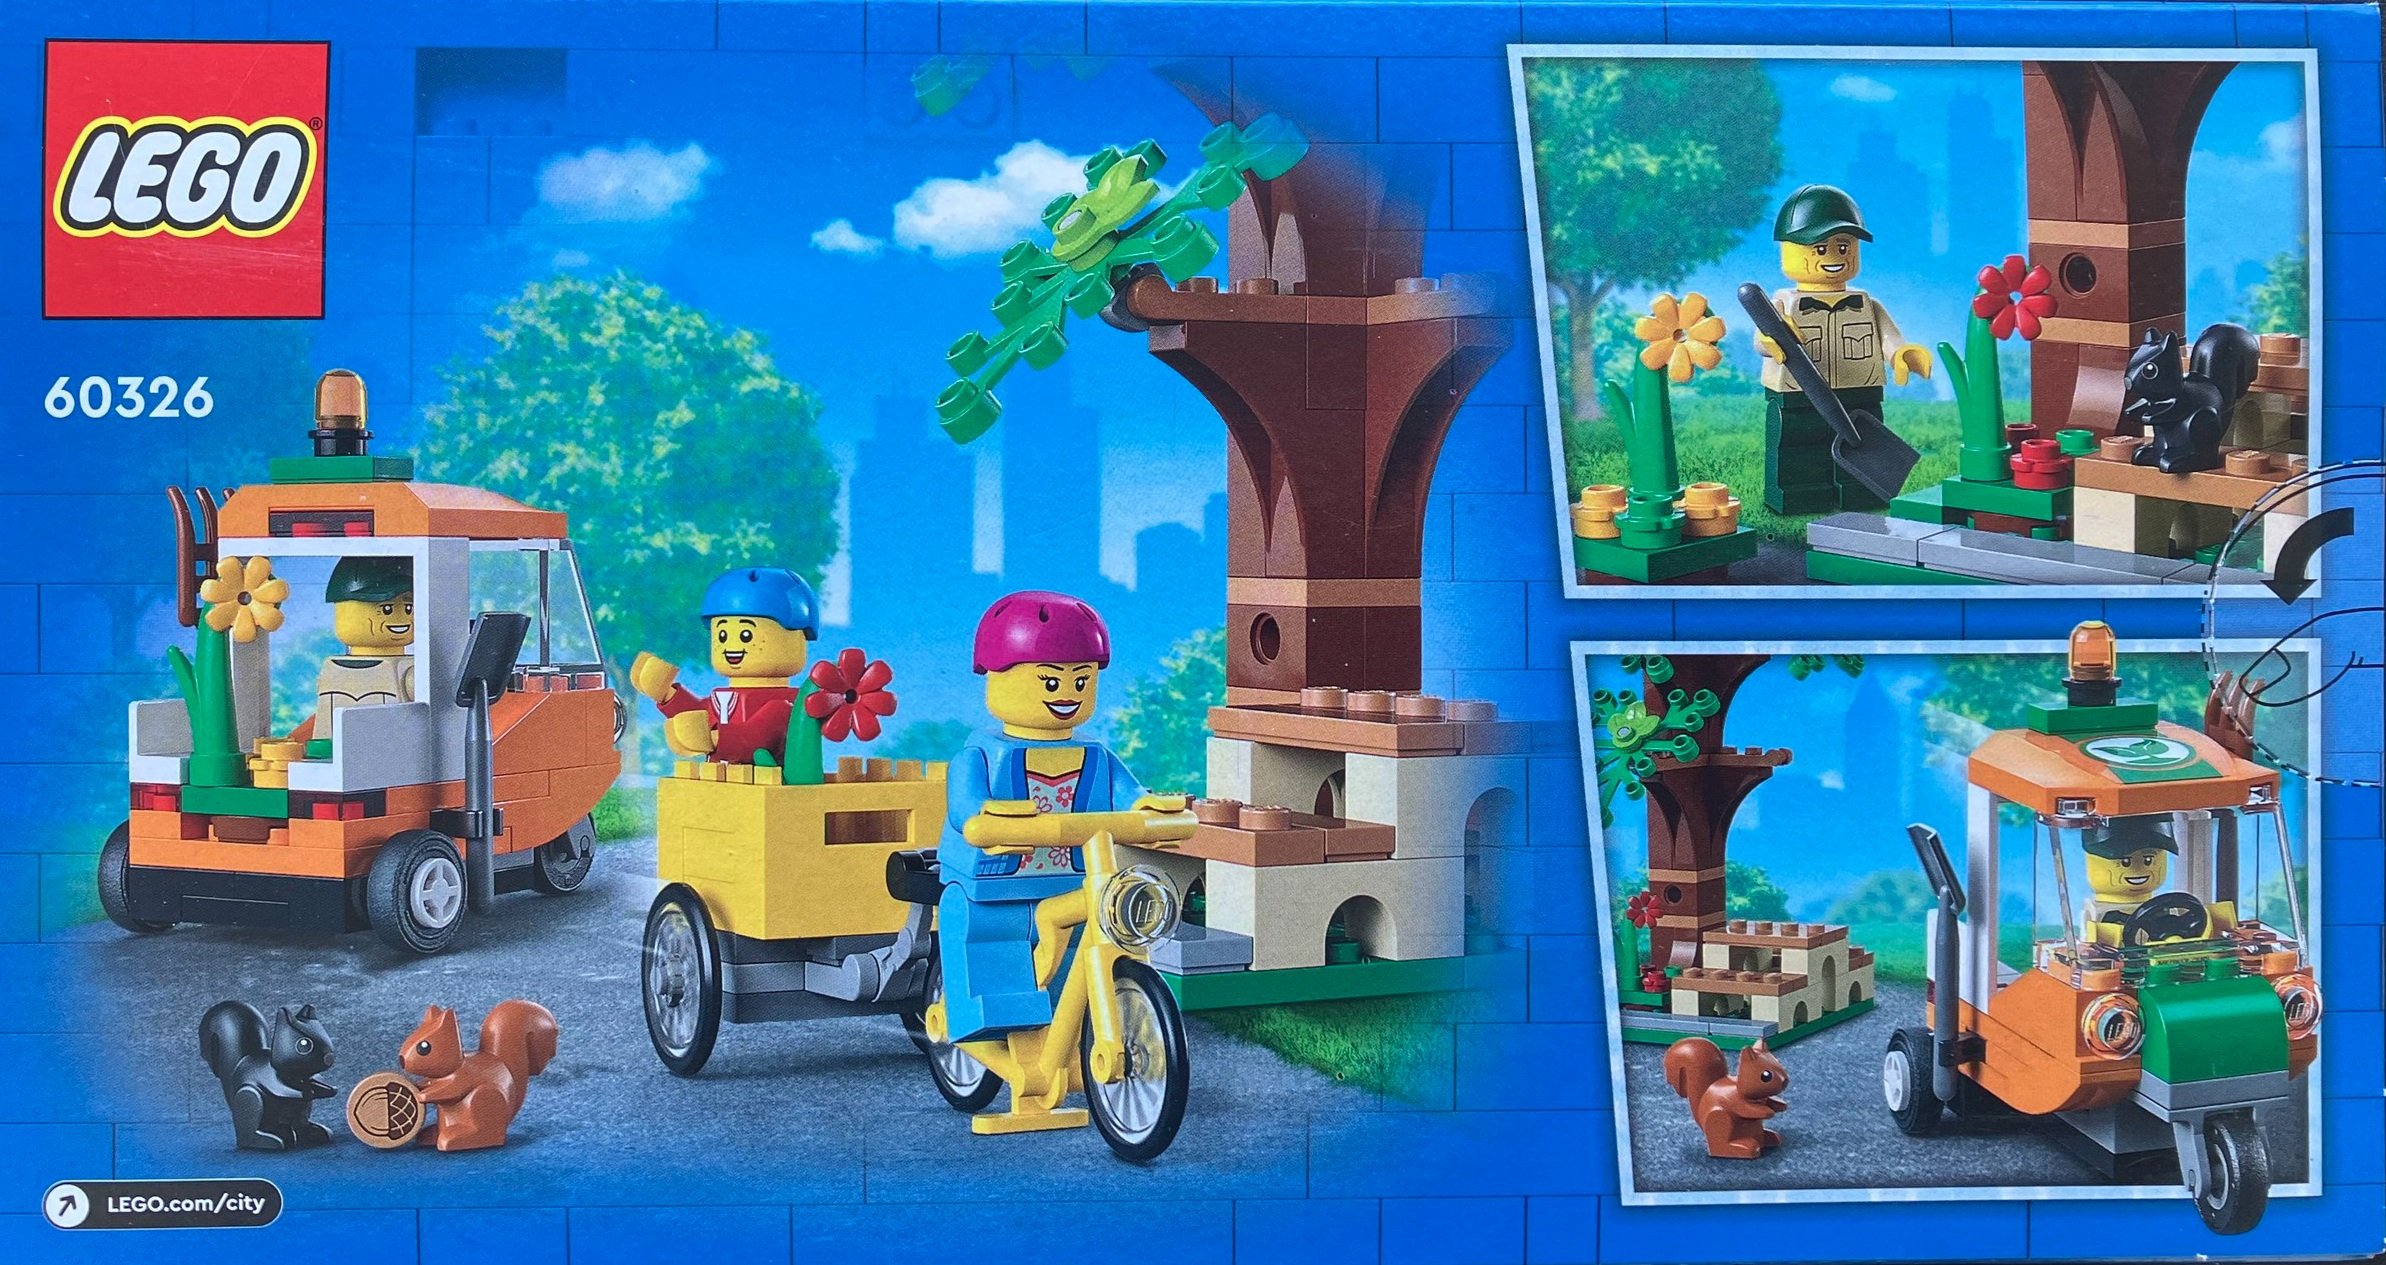
Like most sets, the front of the box shows the full set while the back shows some of the play features to include two bike helmets so two of the minifigures can use the bike and cart.

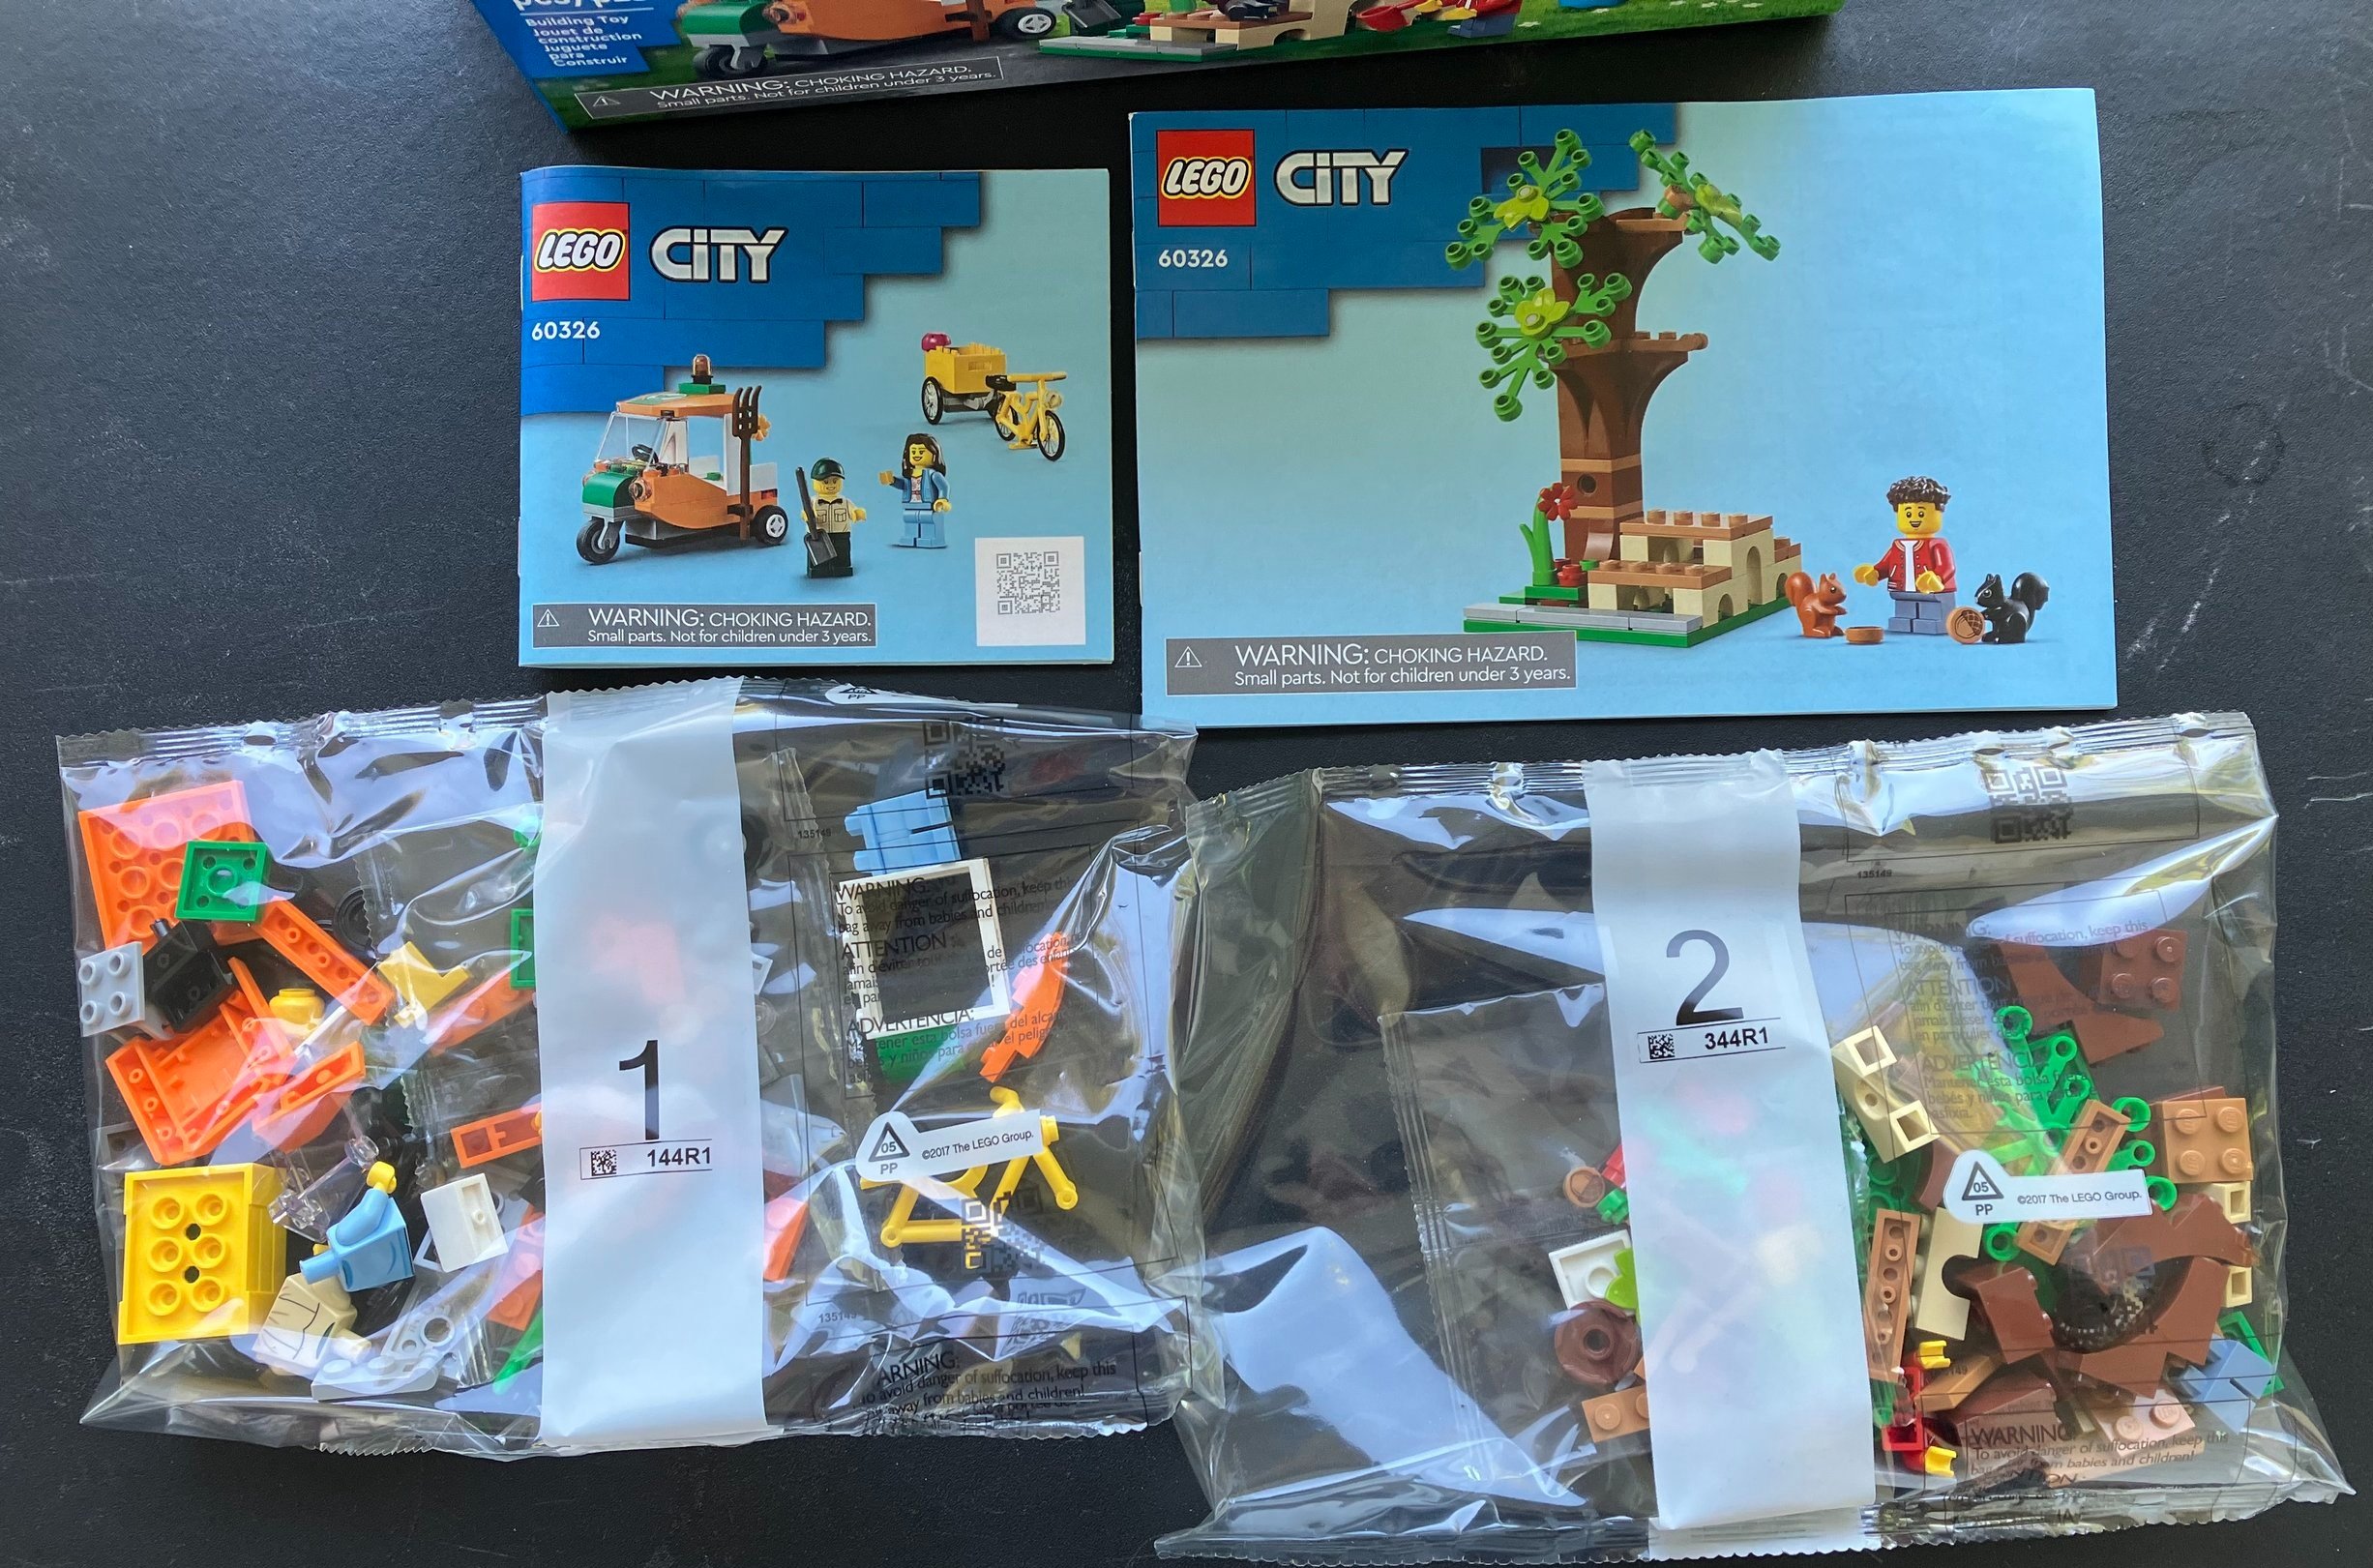
The contents are two numbered parts bags and an instruction booklet for each bag. The set also contains a sticker sheet with one sticker.

The first bag builds a bicycle with a cart behind it. The cart is almost as large as the bicycle, but given the scale of LEGO parts, it works. Next is a small cart for a maintenance worker in the park. The cart has space for one minifigure to ride in it, has clips for tools, and space in the back to carry a load. The vehicle comes with two tools, a shovel and pitch fork and then some plants..

There are two minifigures in this bag. One is an adult female and the other is an adult male. The female is the bicycle rider and comes with two helmets (one for the minifigure in bag two). The male minifigure has what could be a uniform on. His face has some wrinkles which makes me assume they meant for him to be an older minifigure.

The second bag builds a small picnic area. It has a tree and then a picnic table. The tree is simply built, but comes with some greenery pieces great for future MOCs so no complaints there. You get the acorns in this bag. They are 1x1 round printed tiles. You can attach them to the tree or have them on the ground. The two squirrels are in this bag. One is brown and one is black. I placed them both on the picnic table, but you can see the brown one in the box behind the set (poor placement on my part). They have a spot to slide on a stud on the bottom so you can set them wherever.

There is one minifigure in this bag. It’s a younger male minifigure who can ride in the cart from bag one. You also get two beverage holders and a 2x2 tile printed to be a pizza box. I don’t normally take a pizza on a picnic in the park, but I guess you could.

Here are the three minifigures. I’m not sure if they have new outfits or not, but they are a decent addition to a CITY scene.

Overall, not a bad set considering the age range and theme. It’s a bit overpriced, but watch for sales. The addition of squirrels is fun and I hope to see LEGO continue to add more animals into the future. I’m not sure how many CITY sets I’ll be building in the future, but it was a fun change of pace from the usual sets I build.

Happy building!

#76398-1: Hogwarts Hospital Wing - Harry Potter

Harry Potter themed sets have been arriving in the summer time in the US. Set #76398-1: Hogwarts Hospital Wing has bucked the trend and was released on 1 March 2022 in the US. It doesn’t have the anniversary logos on it, but it still contains two of the collectible tiles. The set contains 510 pieces and retails for $49.99. This works out to $0.098 per piece. I picked this set up at Target. They had a buy one get one 40% off sale. So if you buy two sets at the same price, it’s like 20% off each. Keep on the look out for sales like that one in the future if you want to pick this set up.

To my knowledge, LEGO has not done the Hospital Wing yet or at least in the recent past so it’s good to see something new. The set has four minifigures and comes with Technic pins and holes so you can connect it to other sets from 2021 and we can assume to the summer 2022 wave.

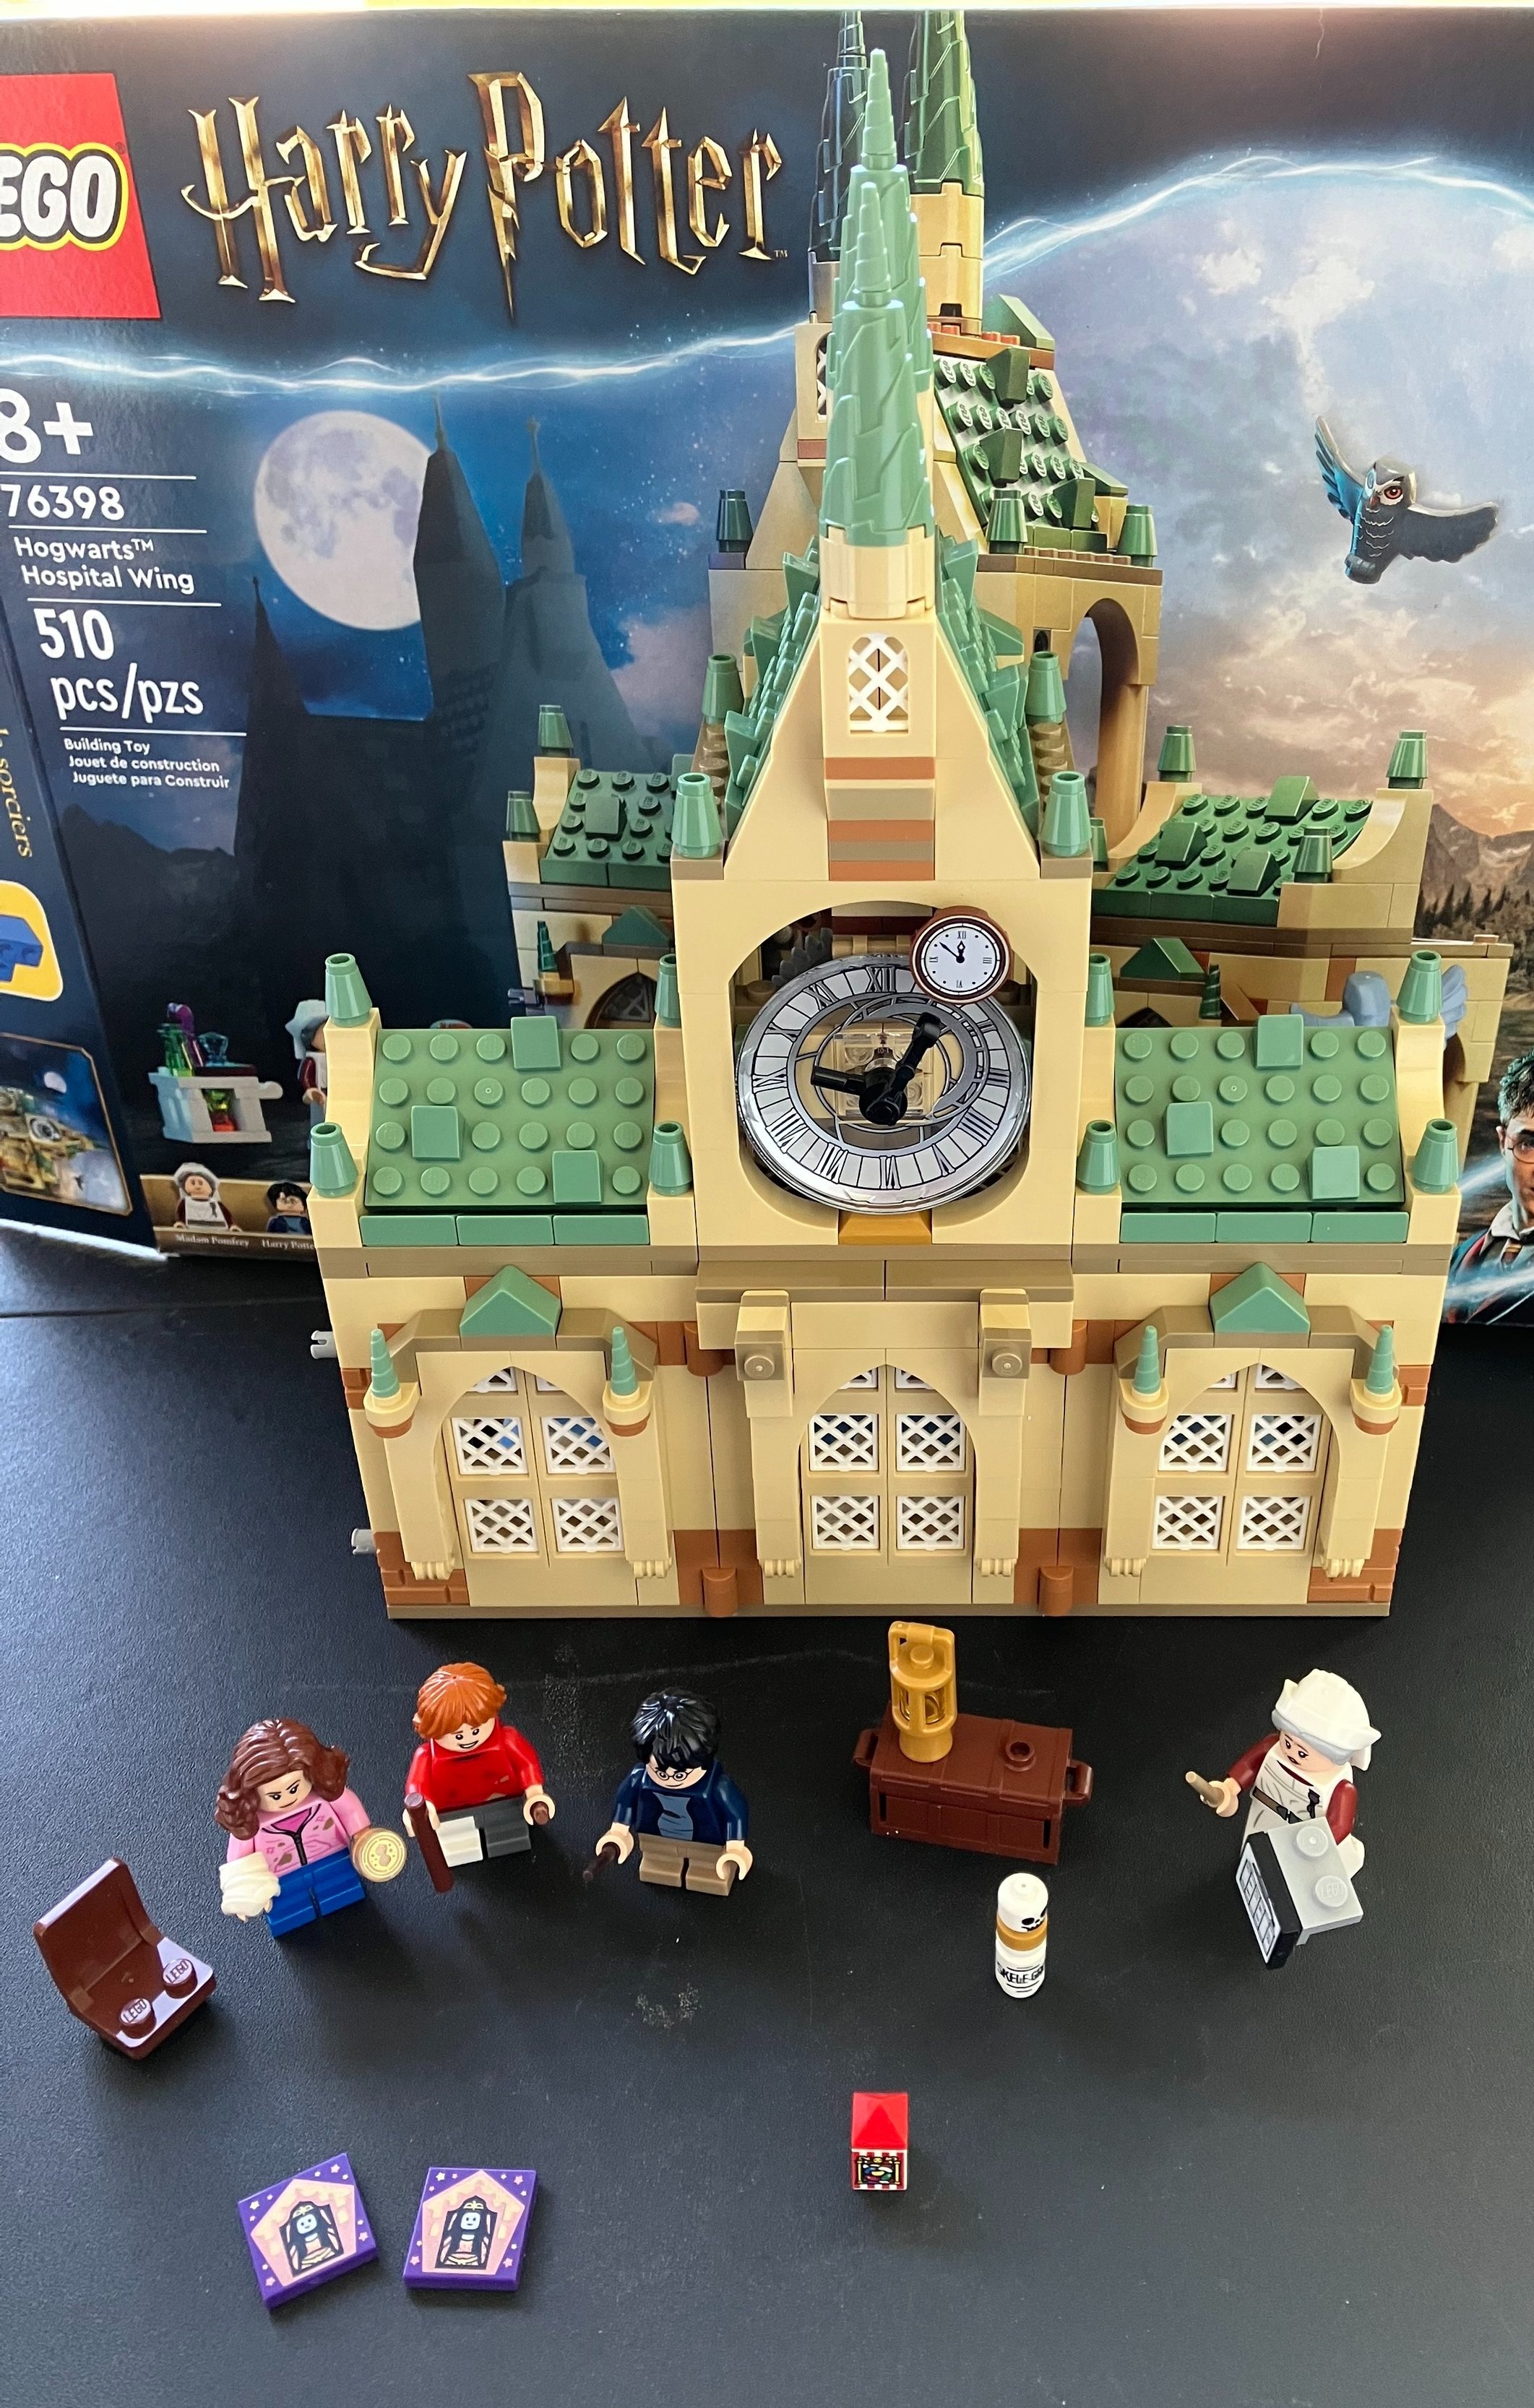
The box is pretty standard. It has the full set on the front with the Harry Potter logo, pictures of the actors from the movie, and a highlight of the included minifigures. The back shows some of the play details.

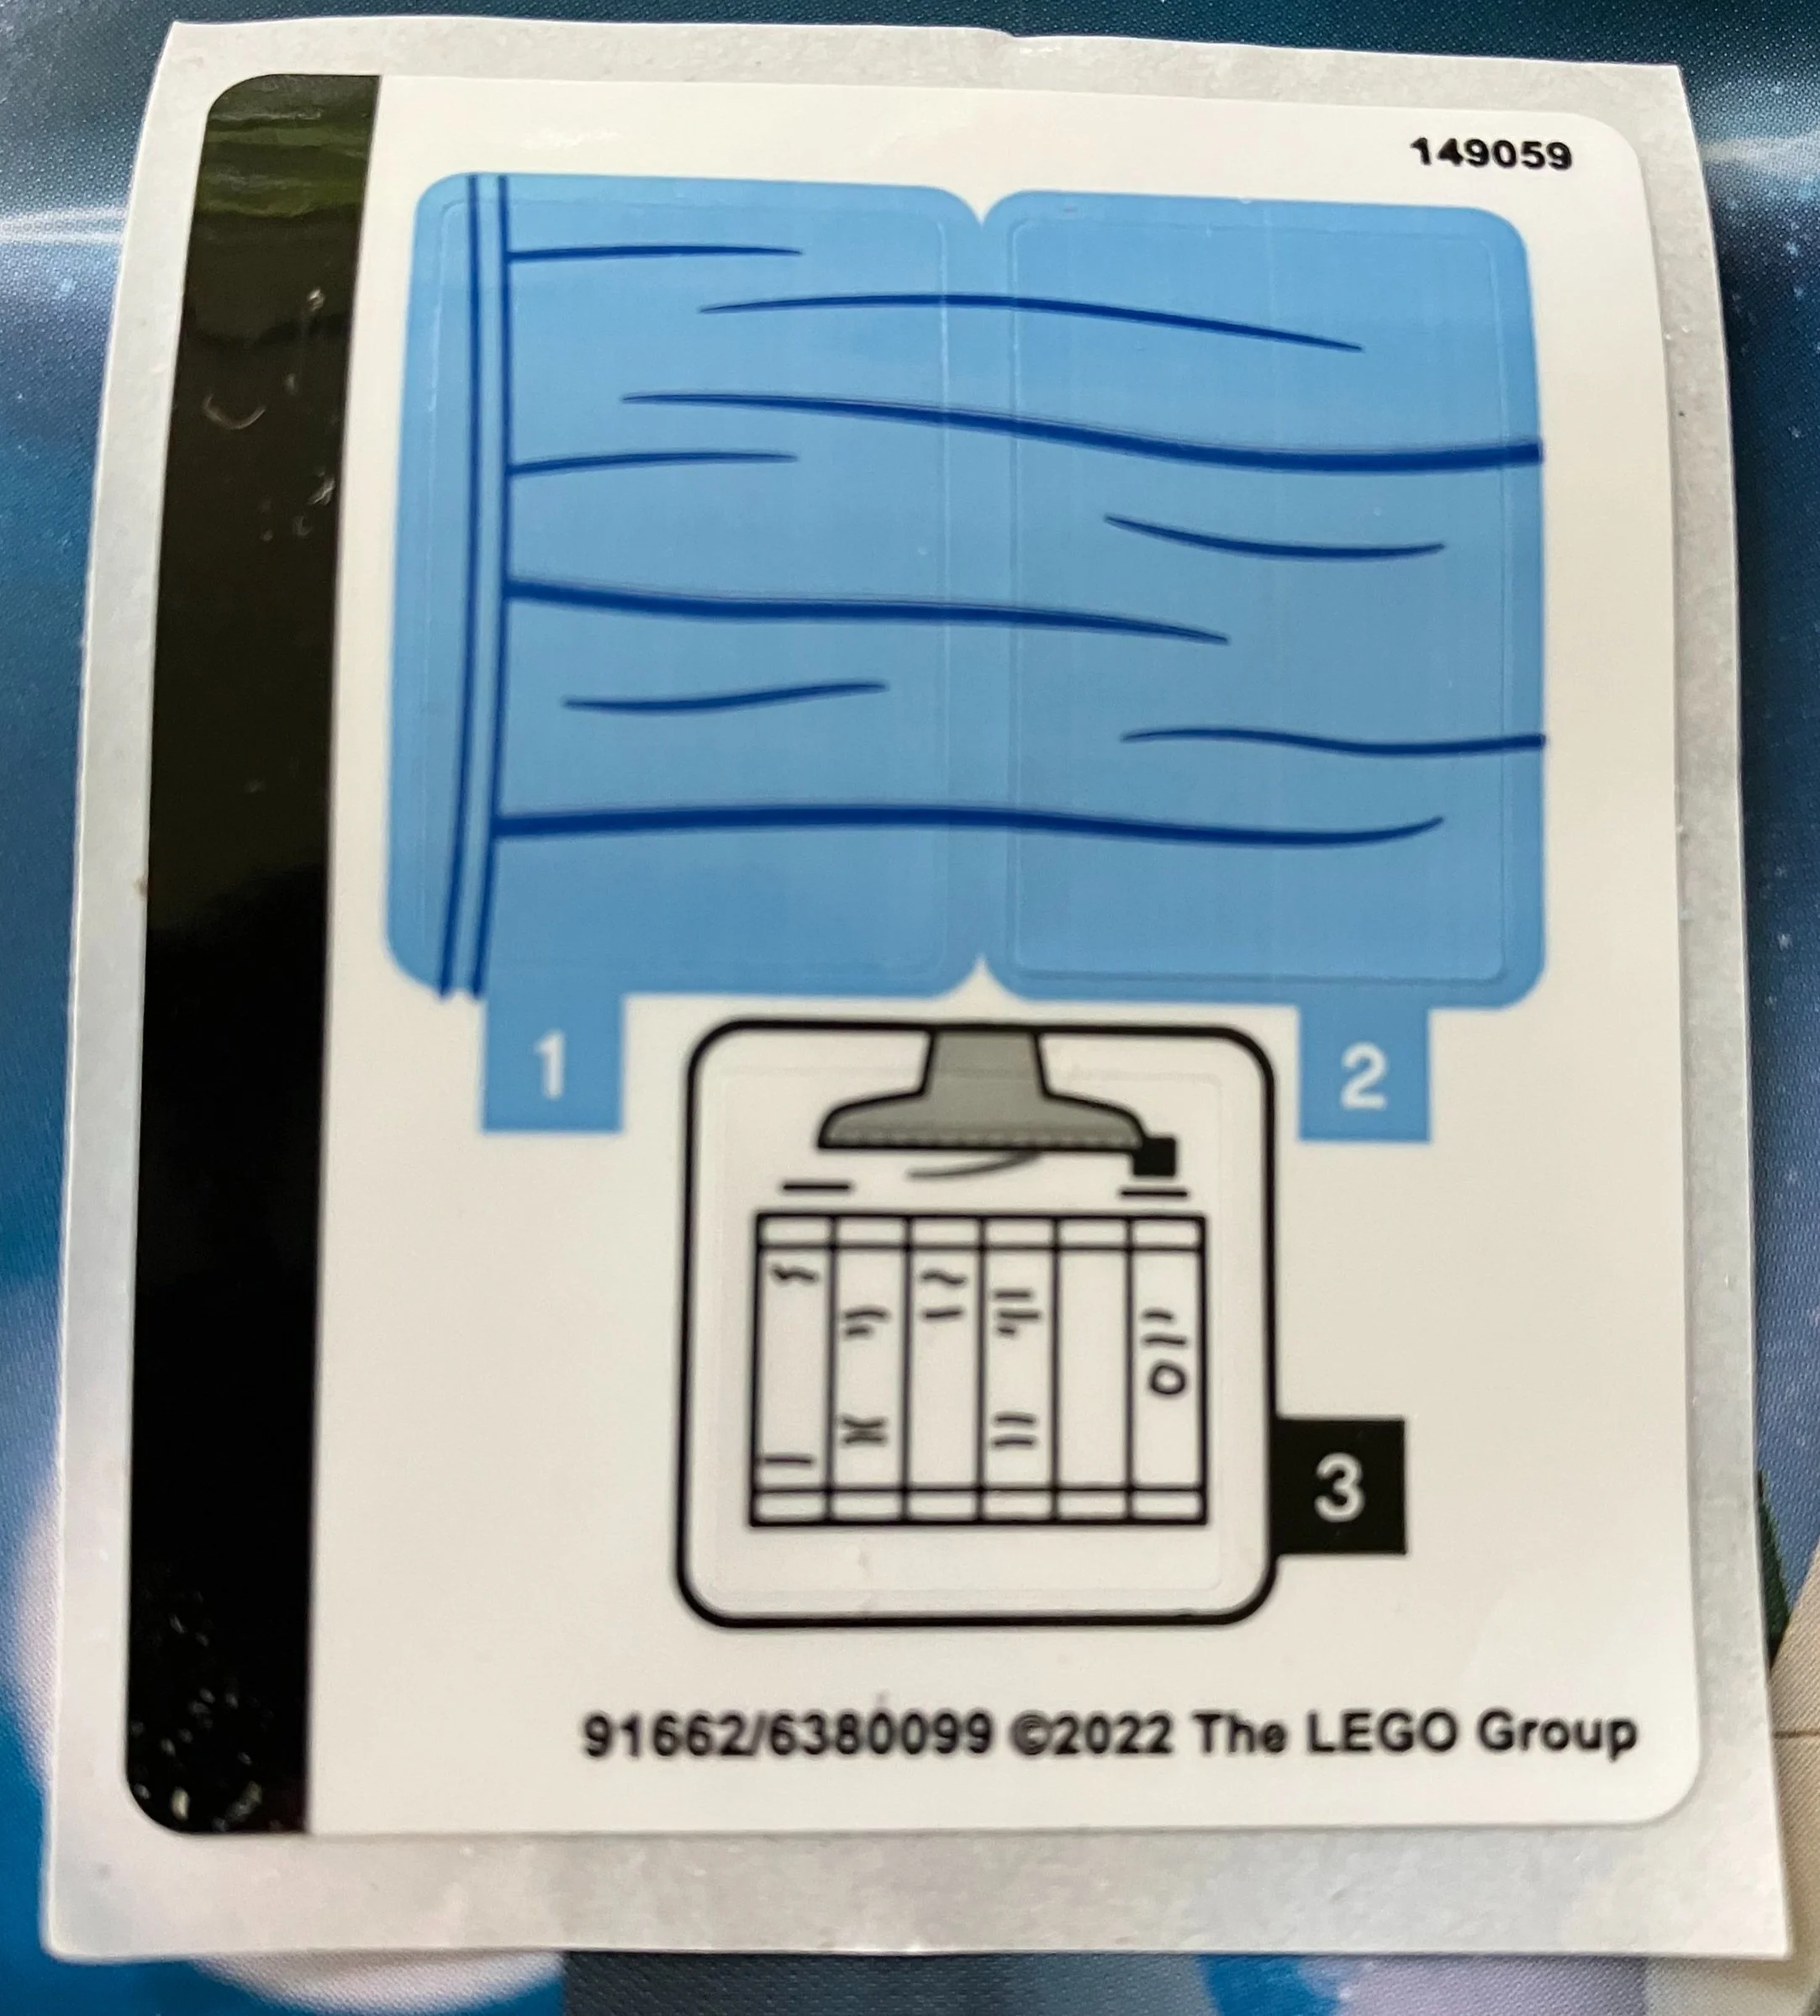
The contents are four numbered parts bags and an instruction booklet. As I got through the build it asked for a sticker and I didn’t see a sheet. Could LEGO have forgotten the sticker sheet? I went back to the box and the width of the box is about the size of the sticker sheet so it was stuck in the corner of the side I didn’t open. Whew! You get three stickers, which isn’t too bad.

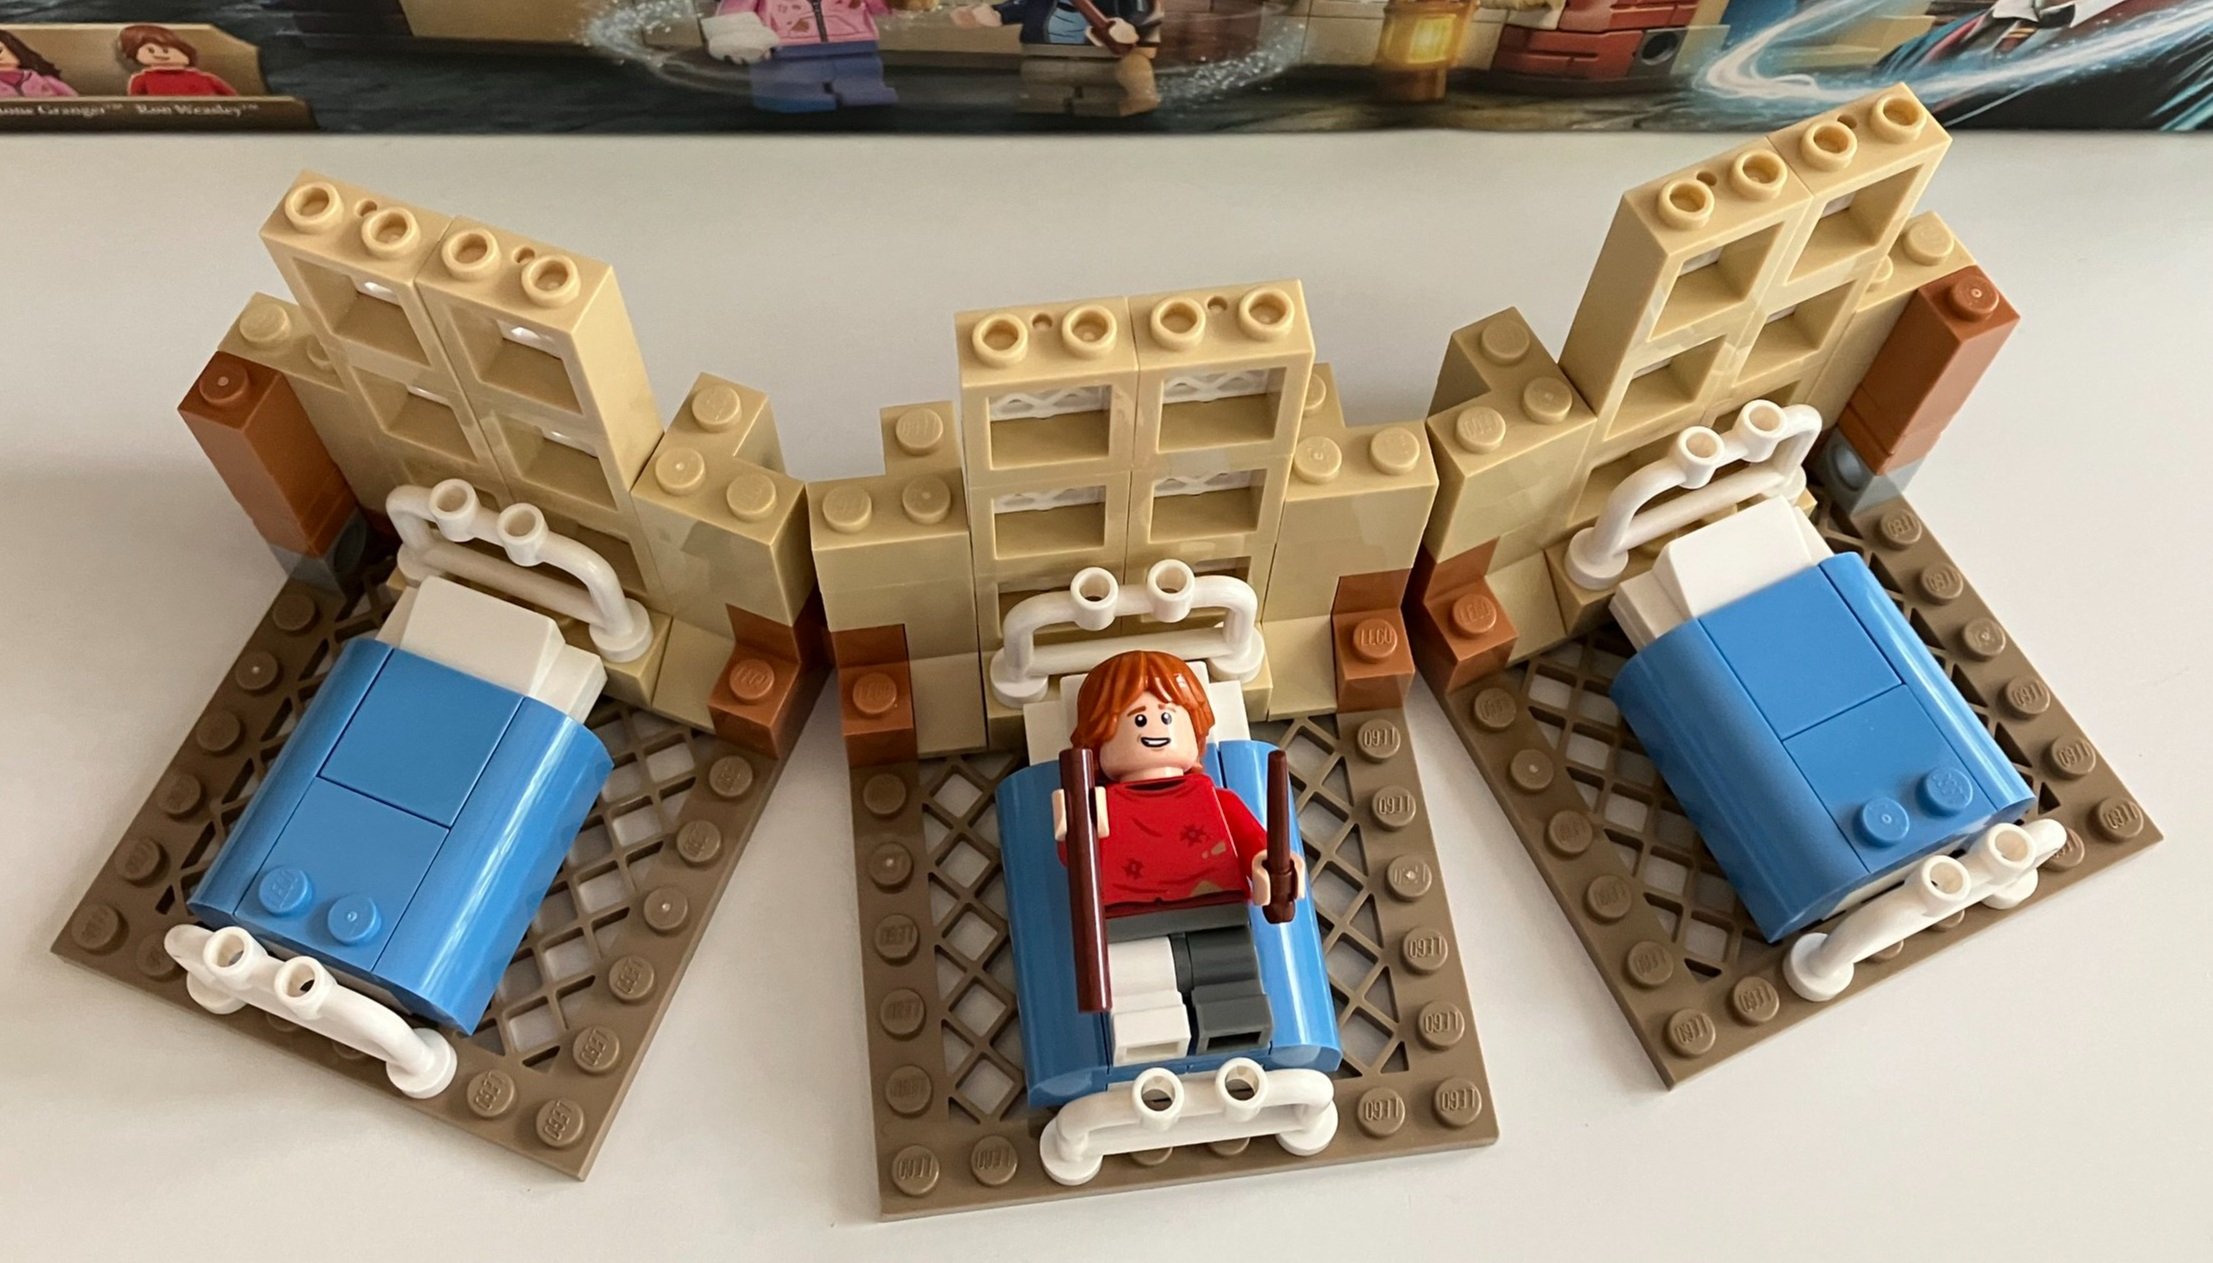
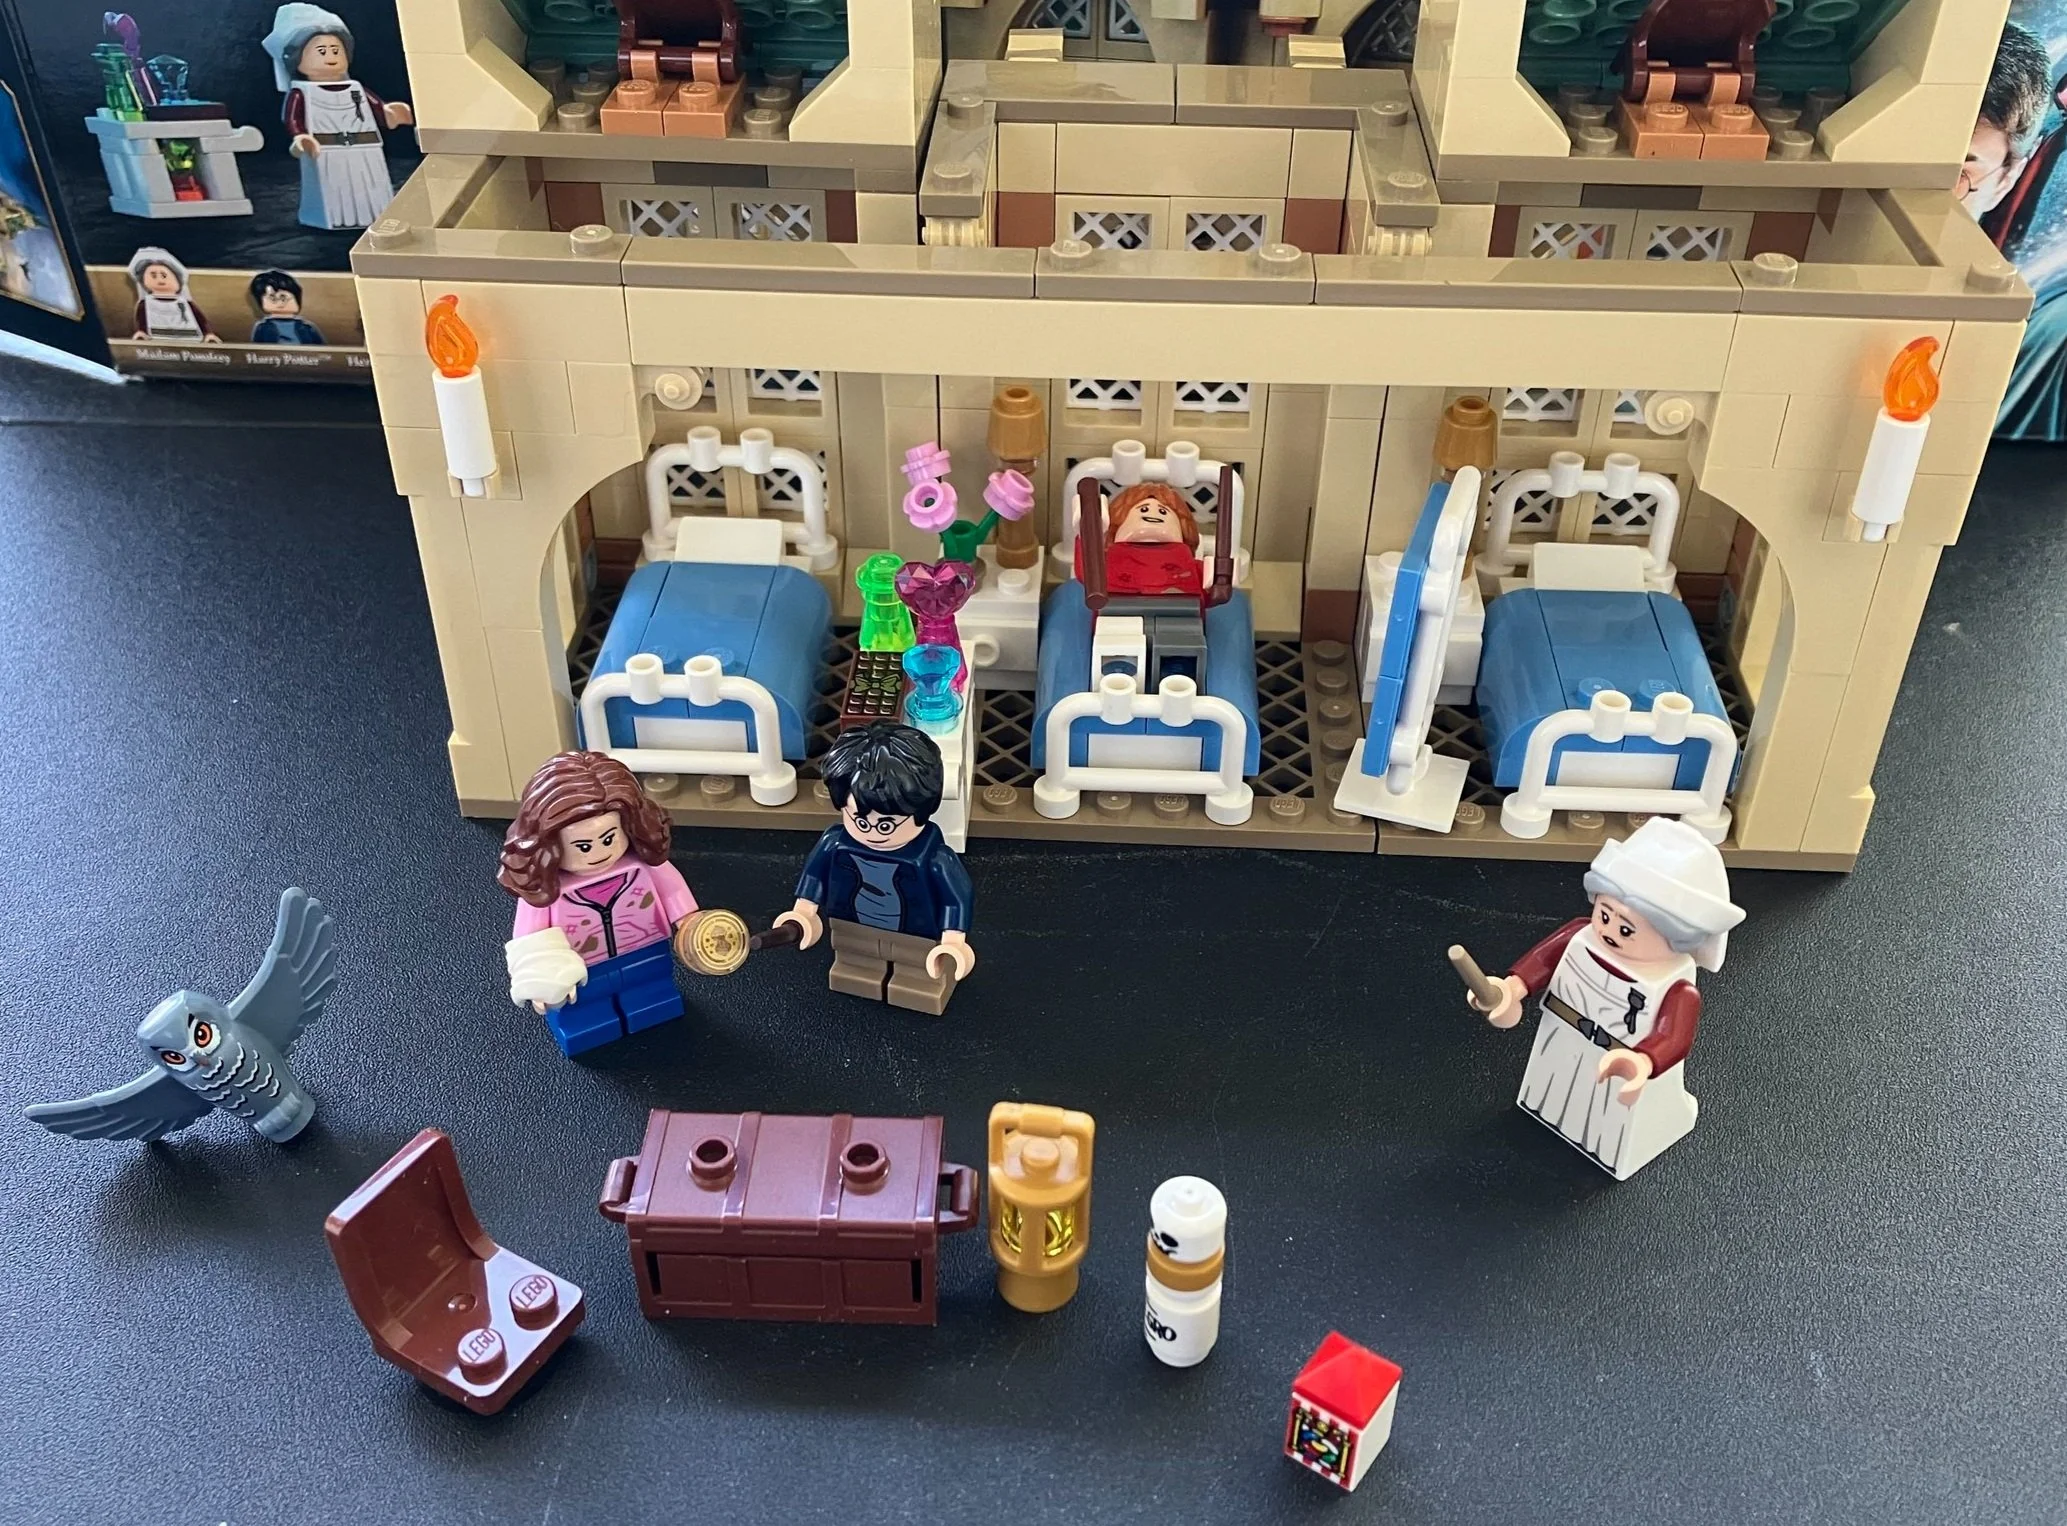
The first bag starts the infirmary area. You connect three 8x8 plates with grates using hinges. Then you build up some of the wall section and add windows. On the inside you build three beds.

The minifigure in bag one is Ron. He comes with a wand and a cane. His legs are two different colors to reflect the cast on one leg which is a change from the usual matching legs.

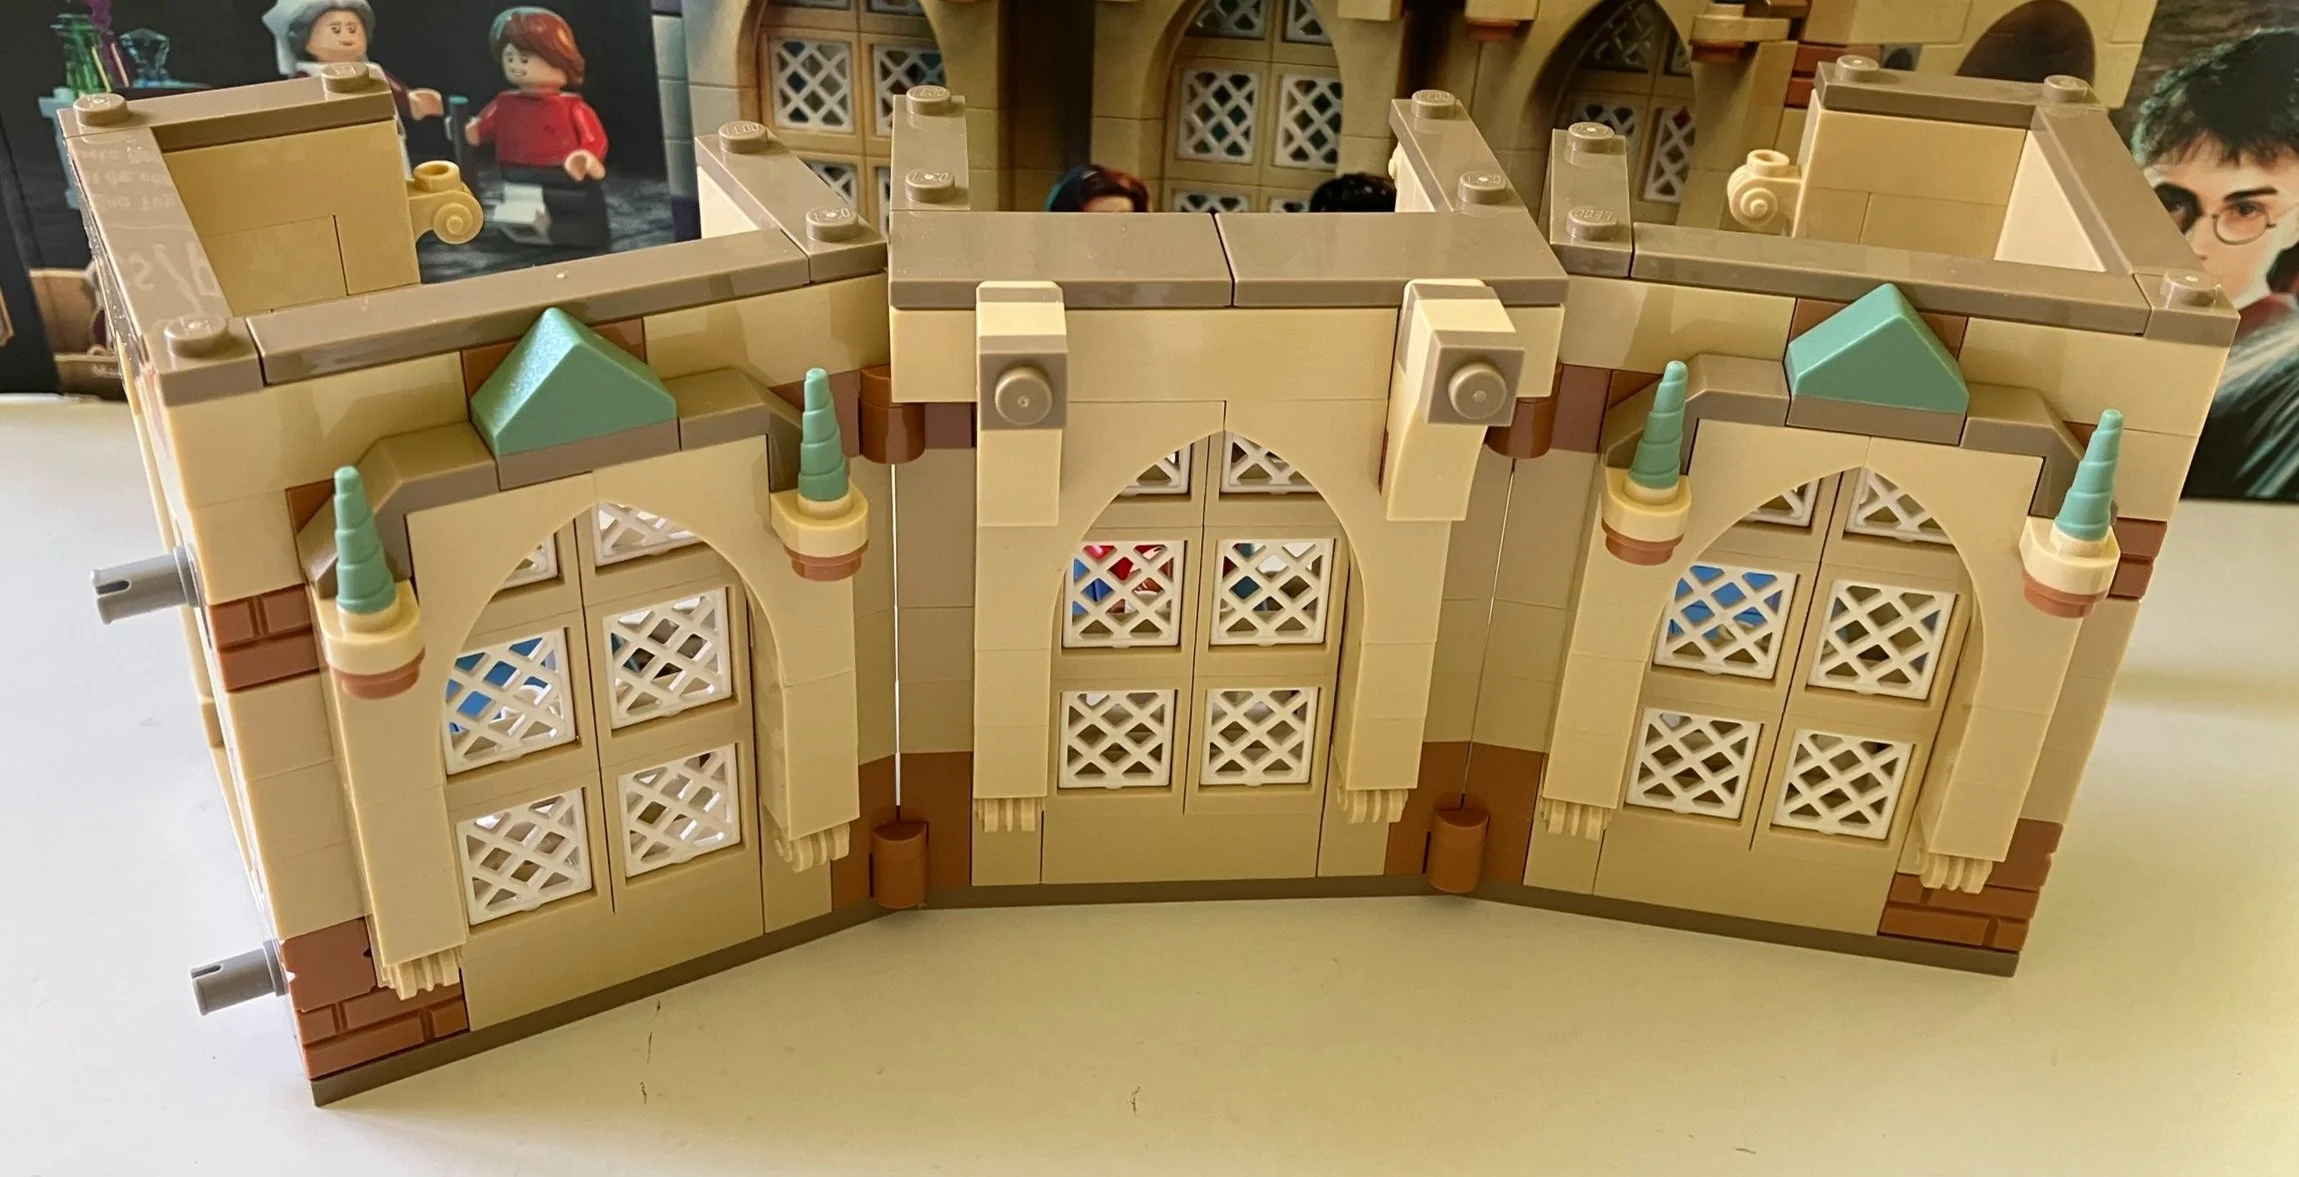
The second bag finishes up most of the walls for this level on the build. There isn’t much detail on the inside, but the outside is in line with previous Potter sets.

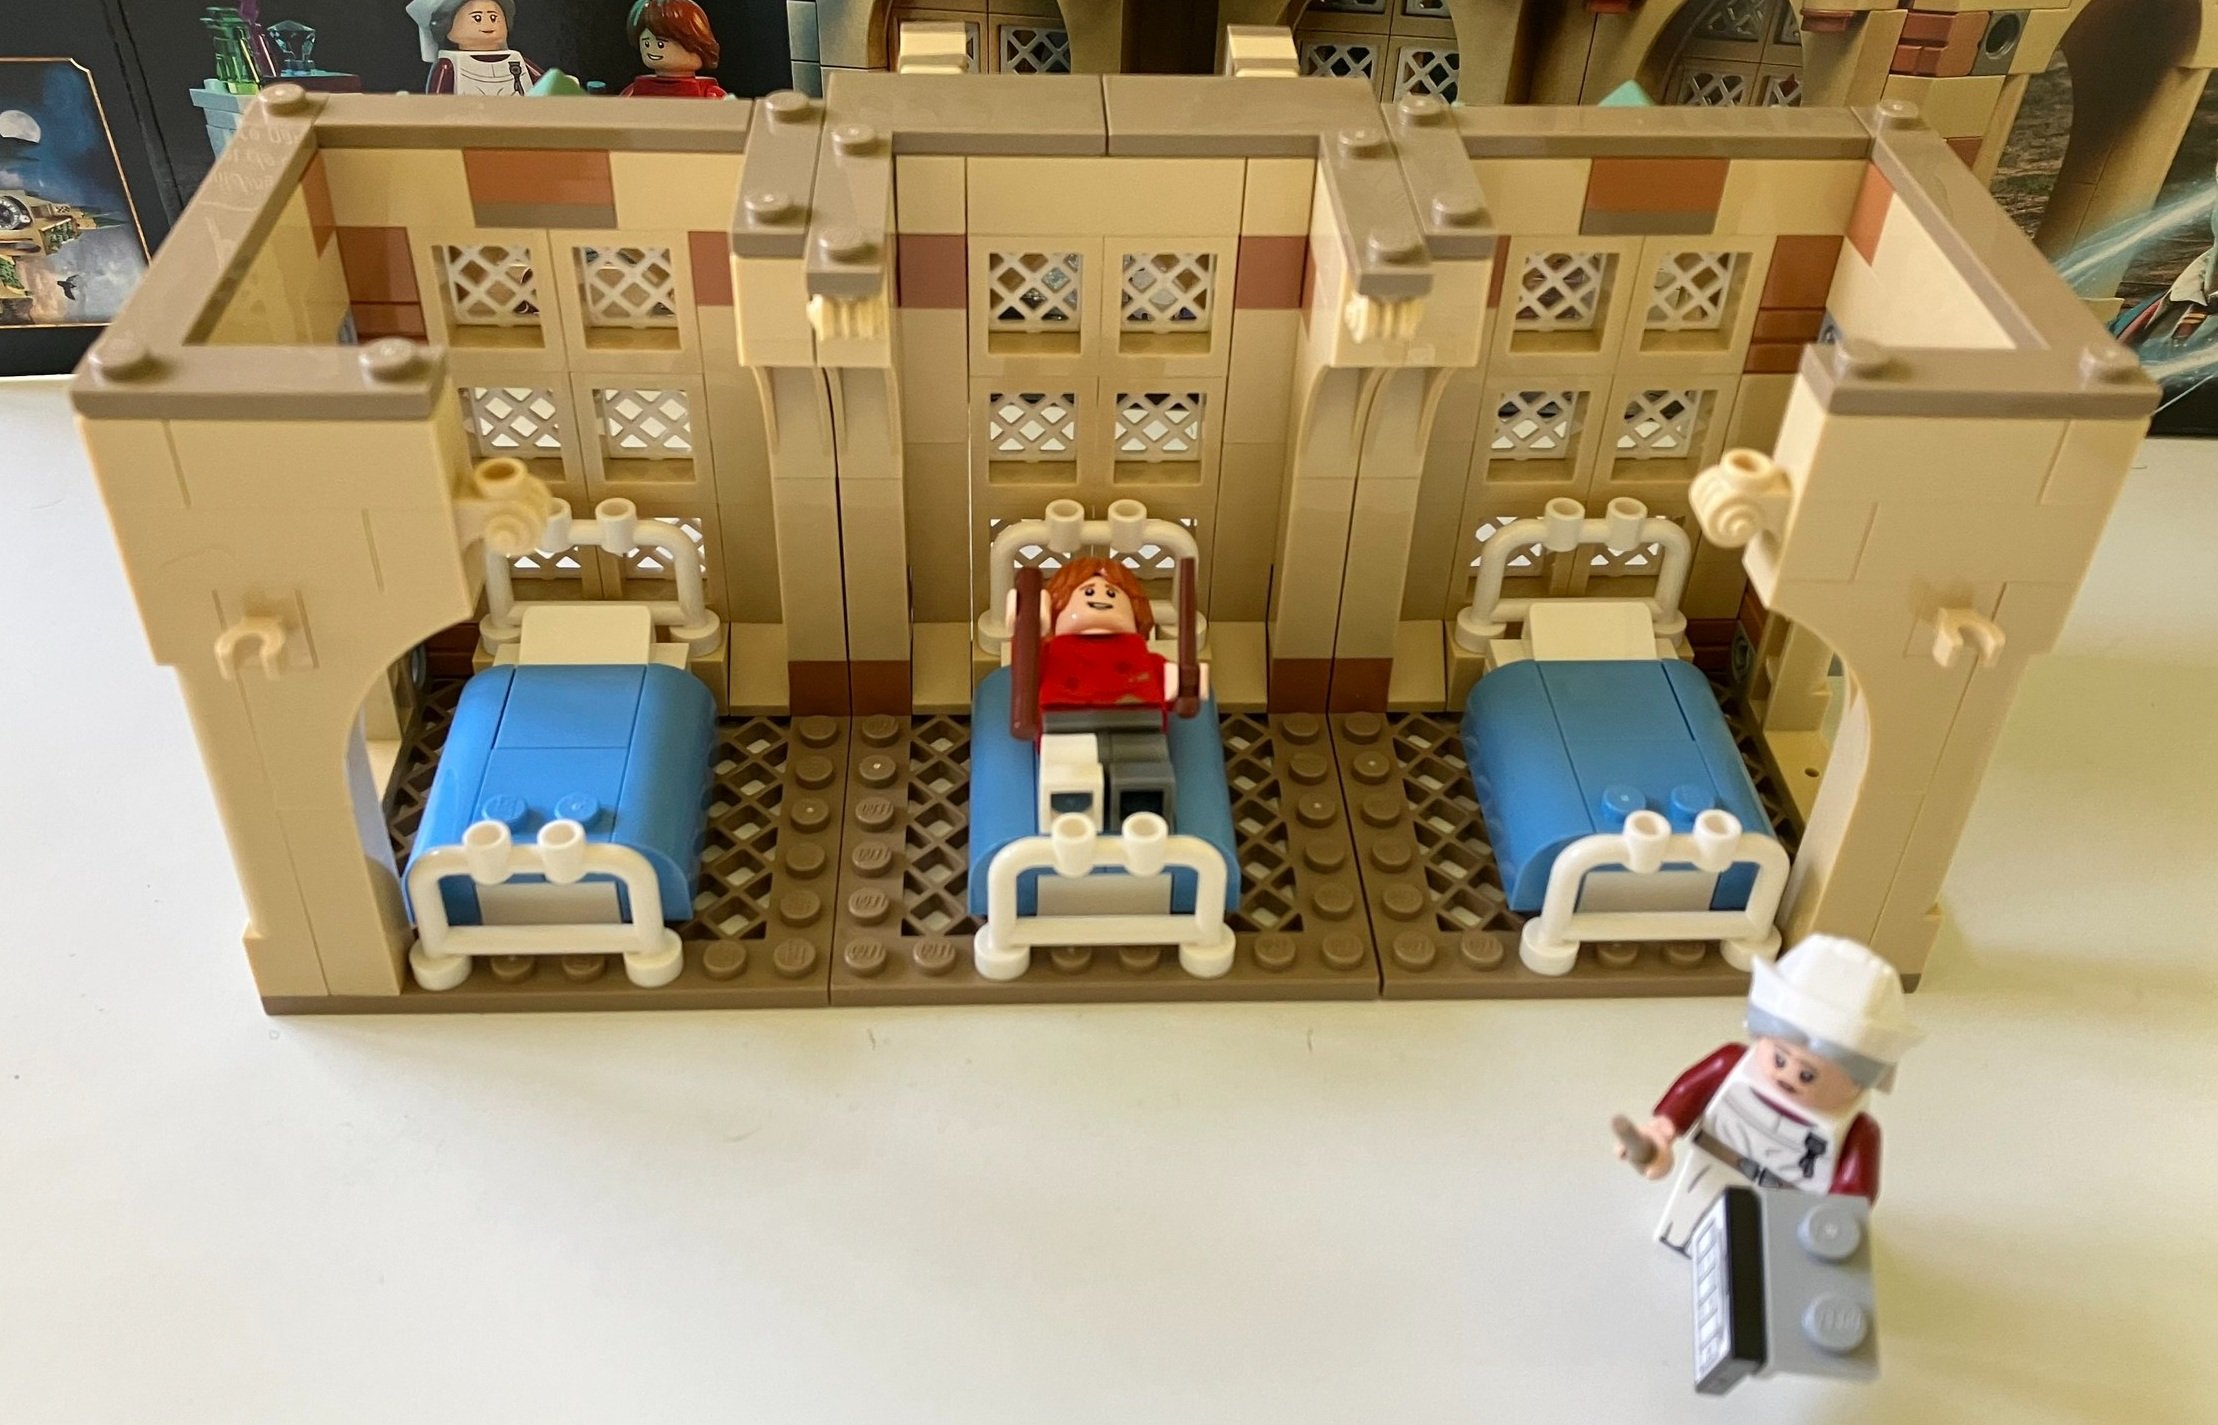
The minifigure in this bag is Madam Poppy Pomfrey. I’ve seen the movies and didn’t know that was her name so don’t feel bad. This is the first appearance of this minifigure. She comes with a wand and a medical chart.

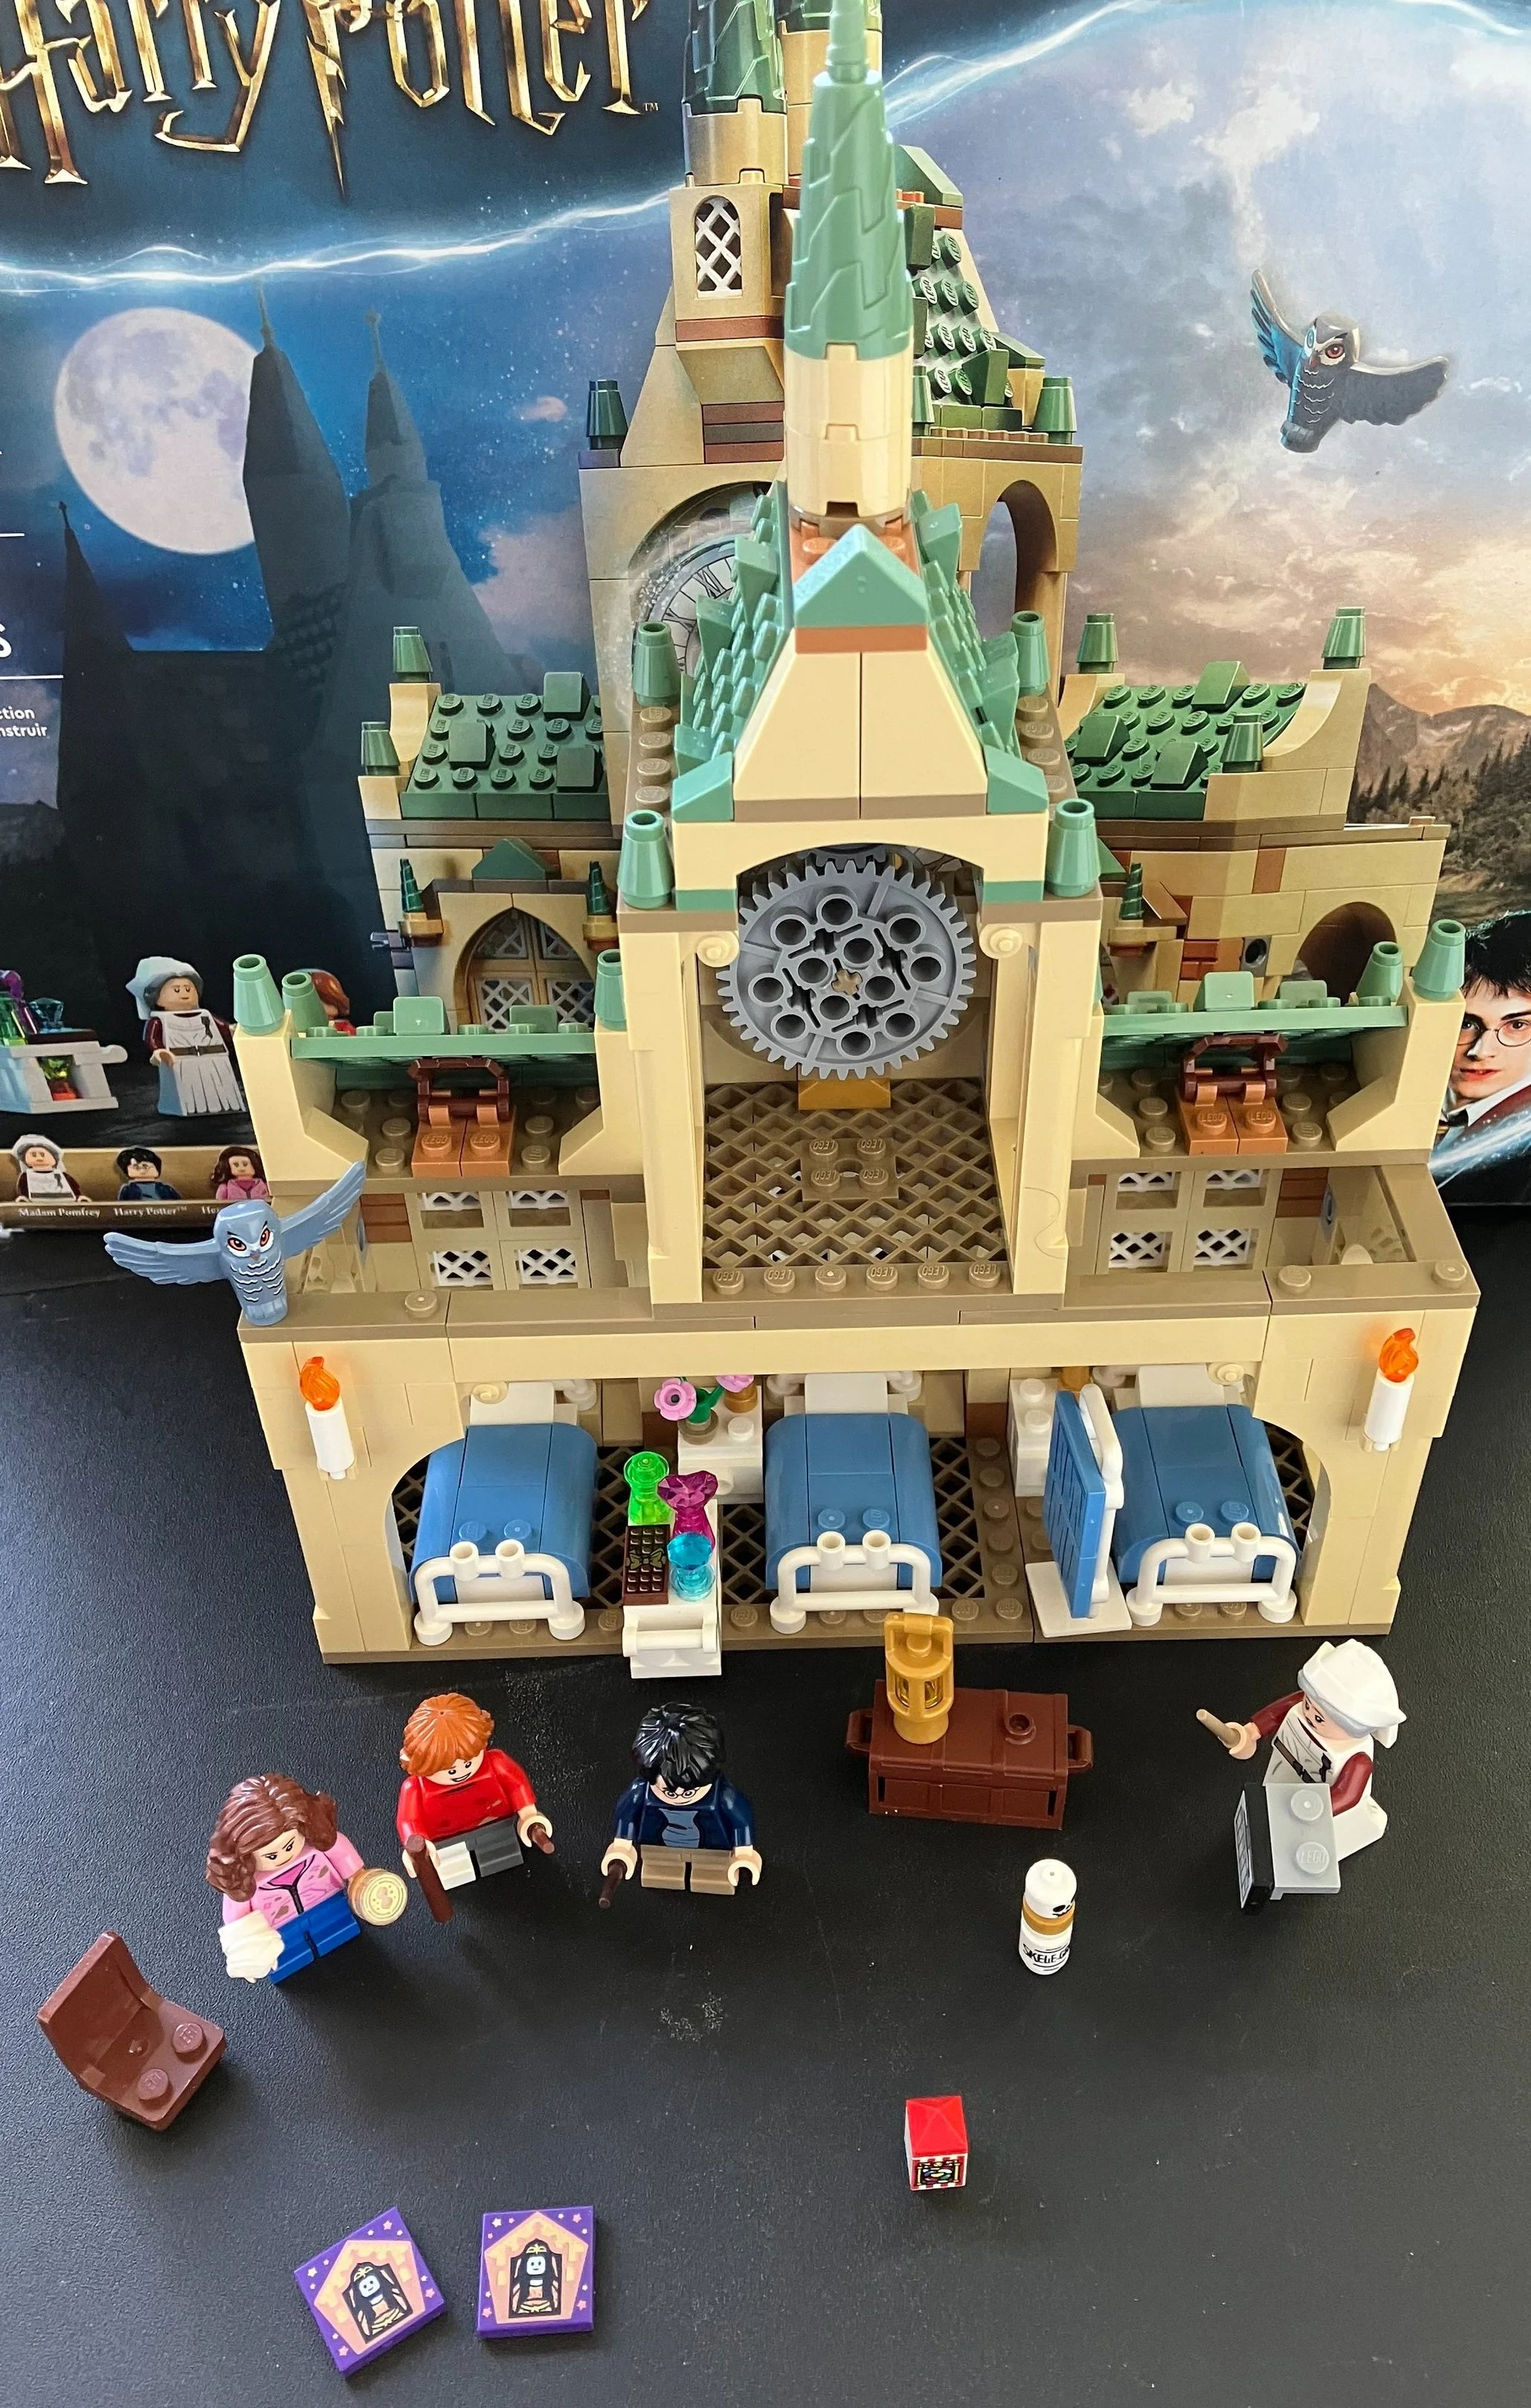
The third bag finishes out the details on the first floor with some candles, night stands with lamps by the beds, a cart near Ron’s bed with some of the well wishes he received, a divider for privacy, a chair, a trunk, a lamp, some medicine/potion, and a box of jelly beans (1x1 brick with printing). Harry and Hermione come in this bag. Hermione has her wand, a bandage around her arm, and her time turner (printed 1x1 round tile). There is also a grey owl in this bag.

The bag starts the second floor. You’ll see it better in the next set of pictures.

The fourth bag finishes up the set. You finish up the second floor which really is just the roof and clock tower. The roof build doesn’t have much to it, but the clock tower has some technic functions where you can spin the steeple on the top and it spins the clock. This is a fun play function of the set and while simple to build for experienced builders, adds a bit of challenge for younger builders.

You also get two of the collectible tiles in this set. I think this will be the last set where you can get these, but I’m not 100% sure. I got two of the same (Rowena Ravenclaw) which also happened to be a tile I already had. Anyone want to trade? I’m looking for Albus Dumbledore with the gold frame and Seraphina Picquery.

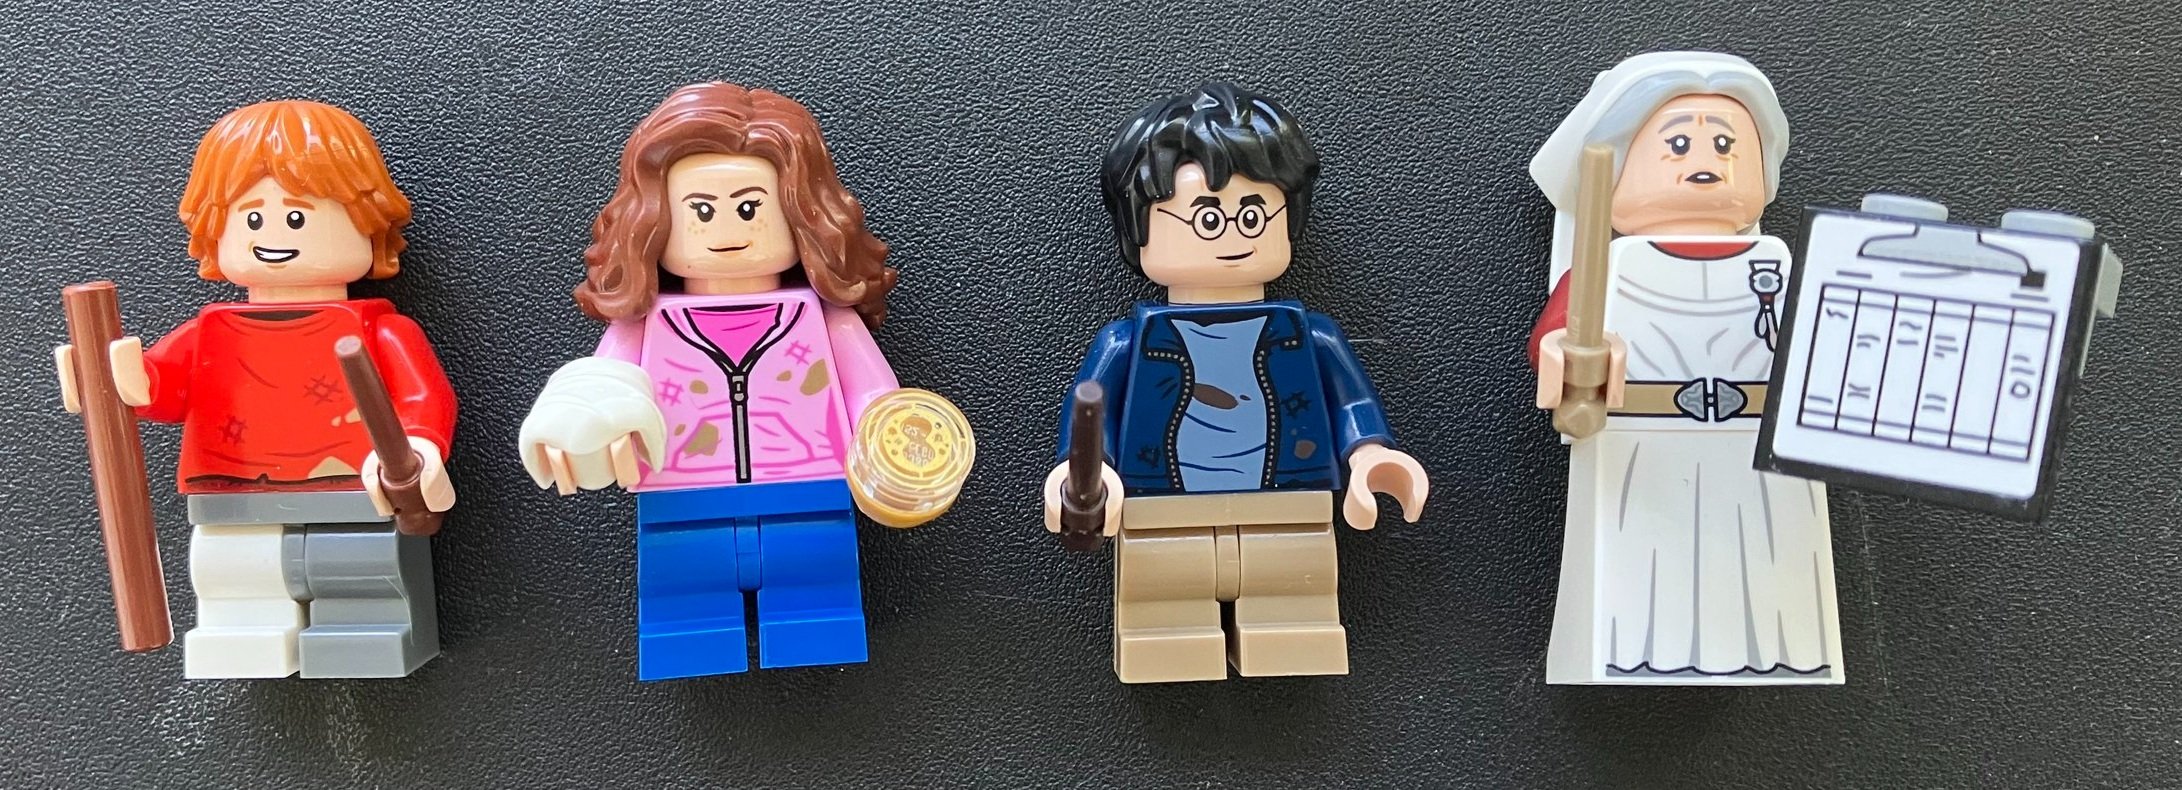
Here are the four minifigues to wrap things up. It’s the main three yet again only with different outfits. They are a bit beat up/dirty so I guess that is something different. There are some different accessories as well. Madam Pomfrey is new so that is a bonus. The different legs on Ron are a nice change that I suspect we’ll see more of in the future.

Overall, not a bad set. It’s 8+ so you have to cage your expectations, but good to see LEGO capturing a different part of Hogwarts besides the usual. I’m glad I found it at a discount and I recommend you wait for it to go on sale as well. If Target put it on sale, I suspect it will go on sale again at other retailers. Maybe around Christmas time?

Happy building!

Set Review: #910010-1: Great Fishing Boat - Bricklink Designer Program

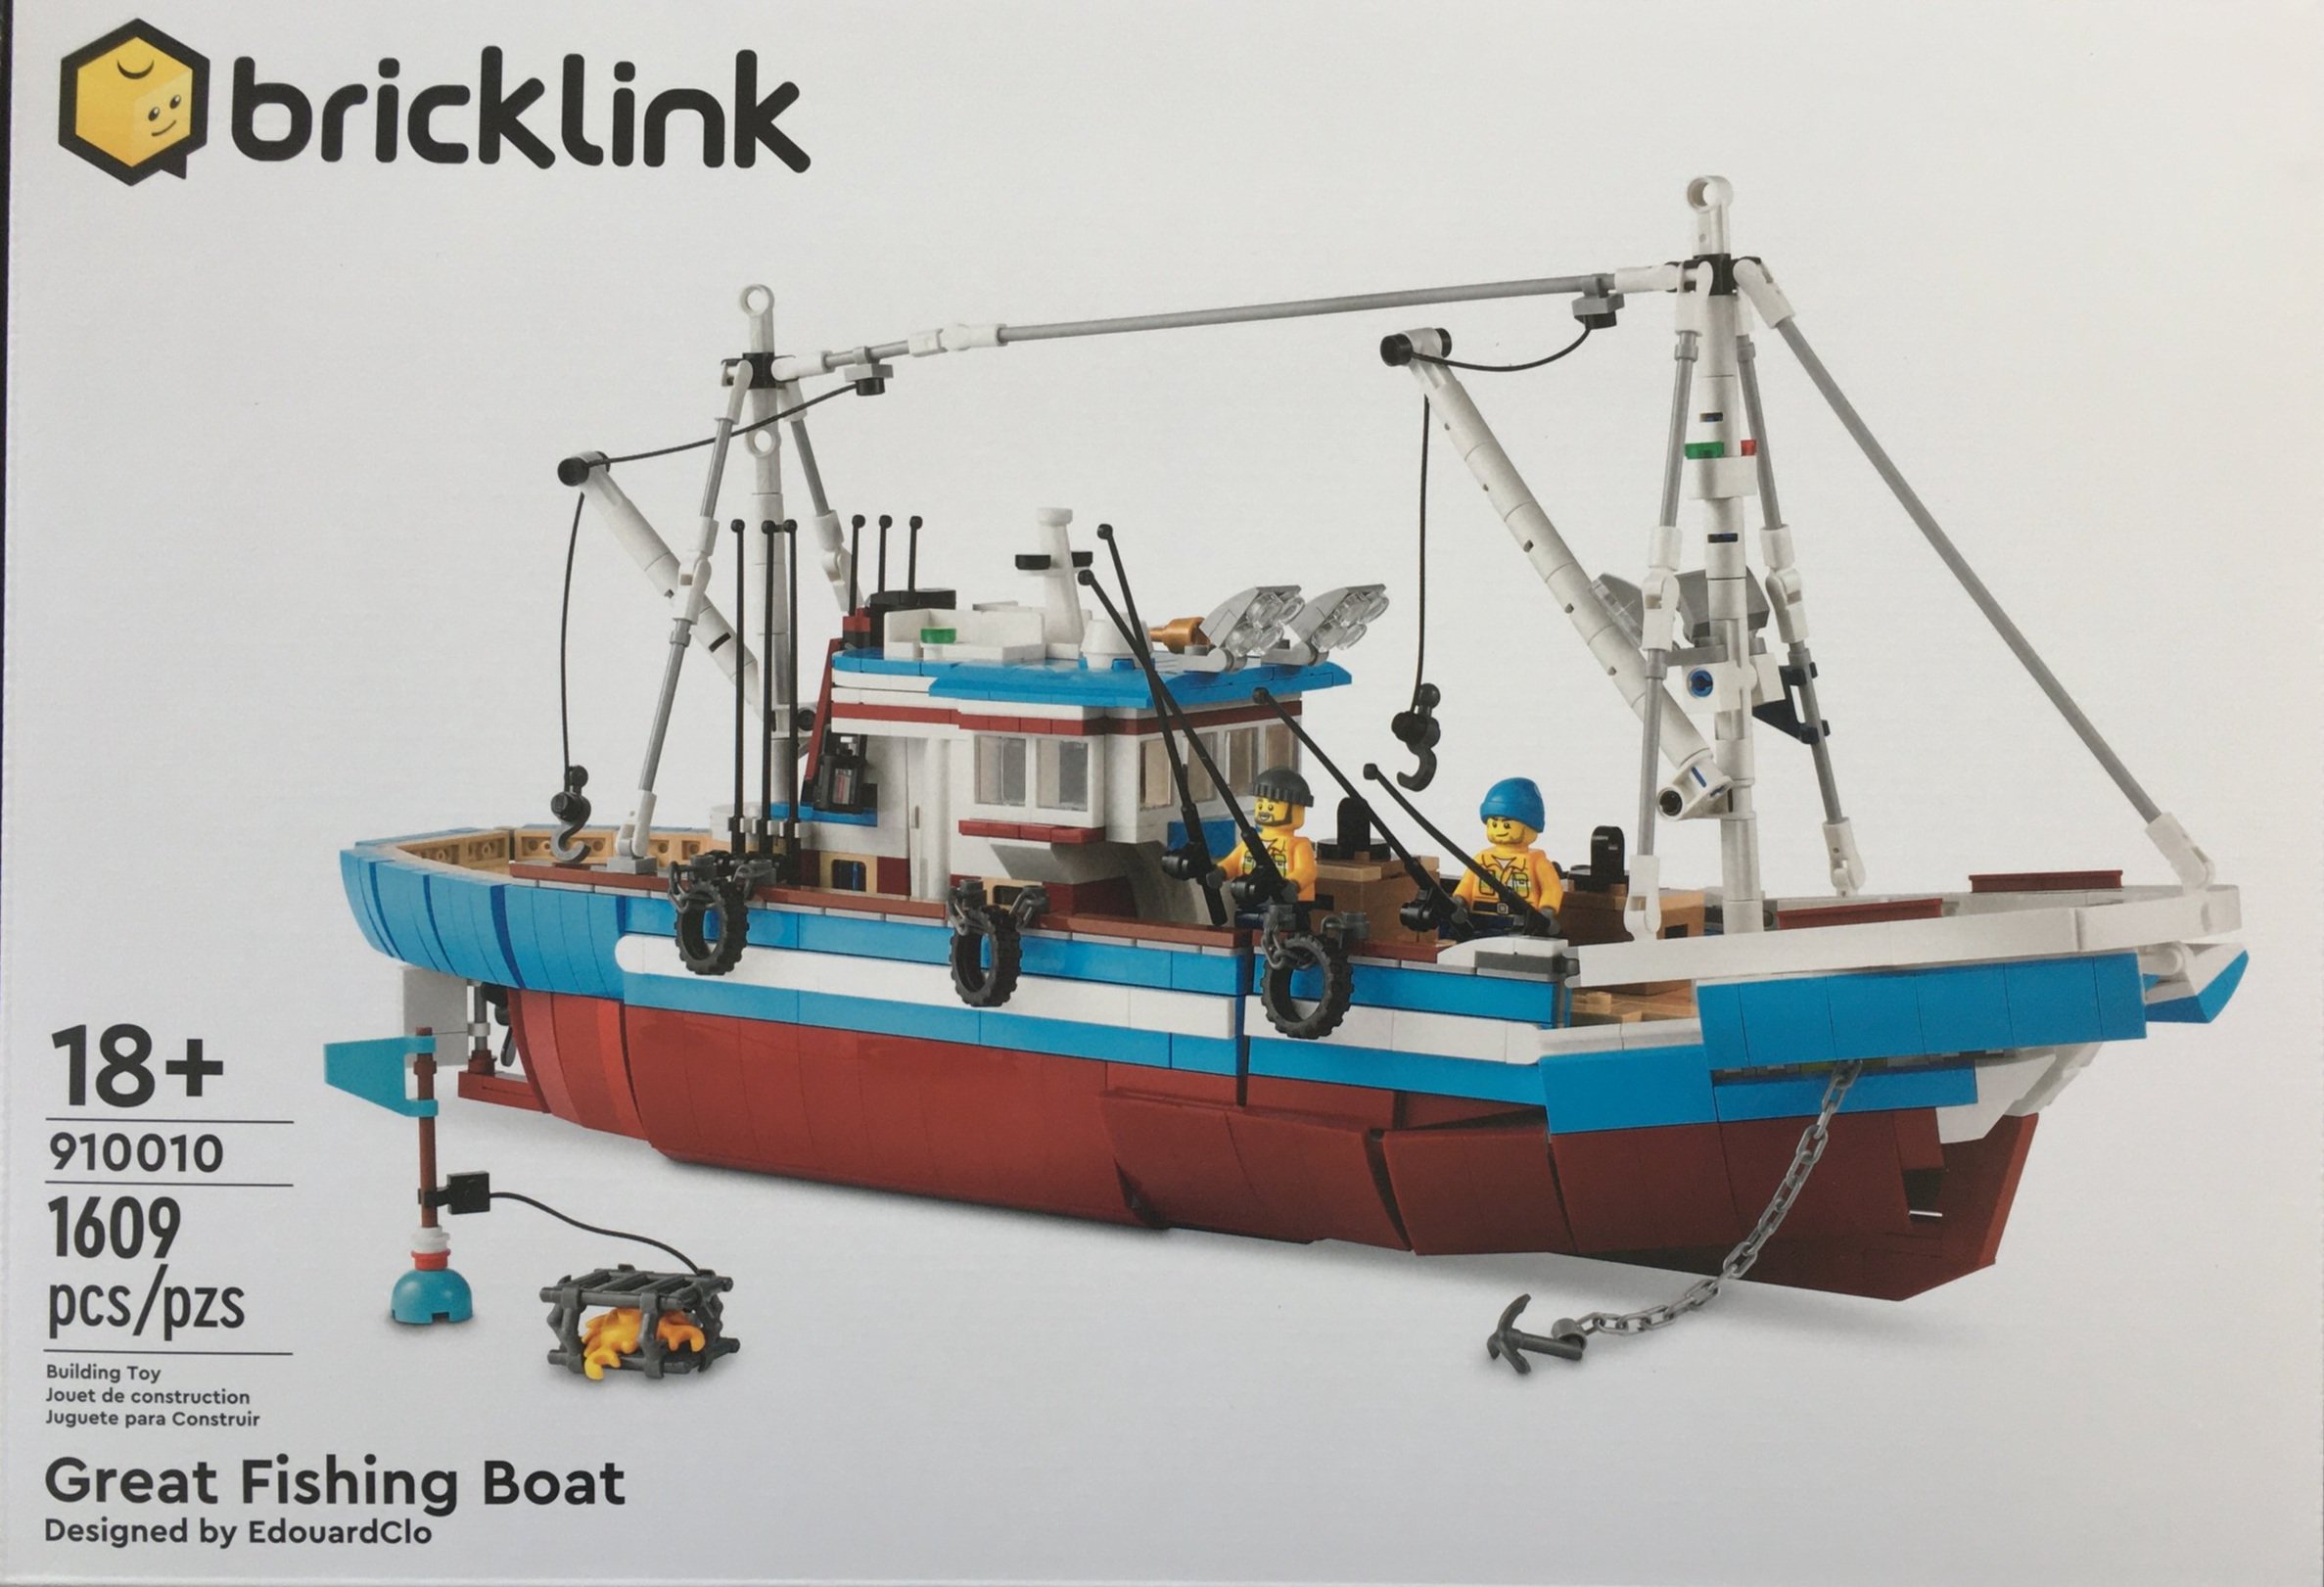
Here’s another set from Round 1 of the 2021 BrickLink Designer Program. This one is #910010-1: Great Fishing Boat. It contains 1,609 pieces and retailed for $129.99 during the crowd funding round. This works out to $0.081 per piece.

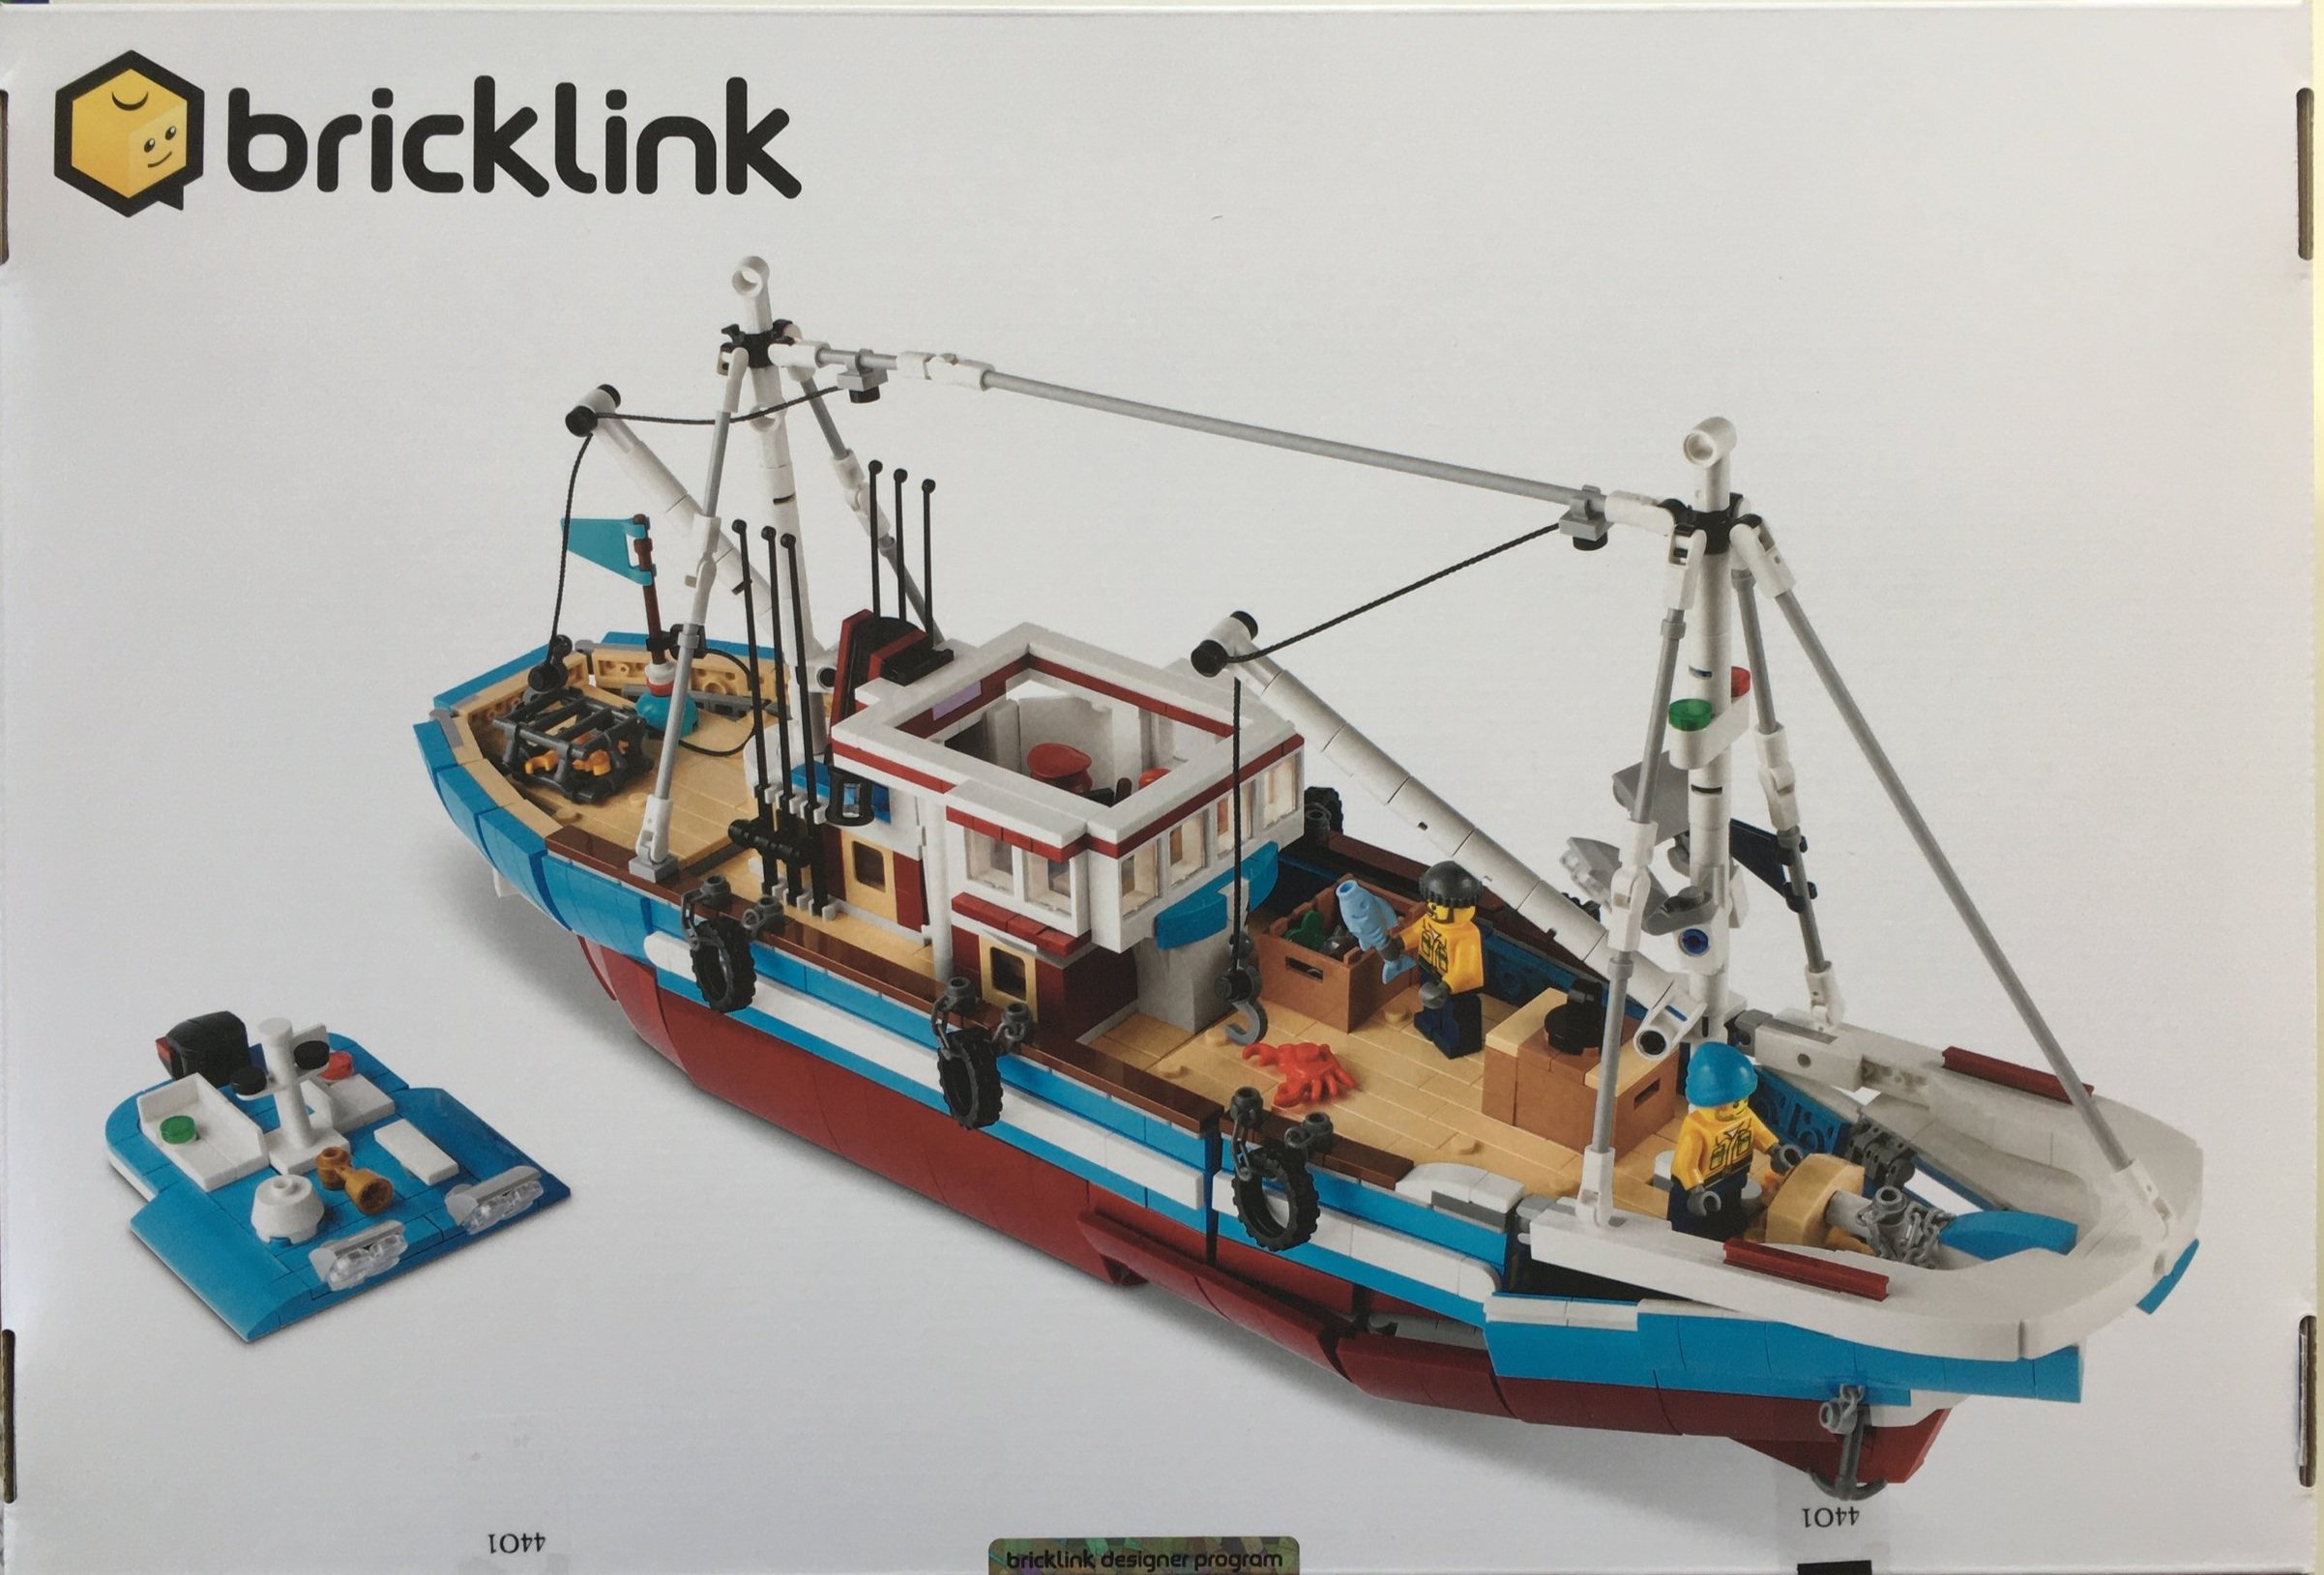
Similar to #910028-1: Pursuit of Flight, this set has a white box that has the BrickLink logo as well as the LEGO logo. I like the 18+ white branding over the black branding, but just a personal opinion there. This set was designed by EdouardClo. He is a fan from France and you can read an interview of him here.

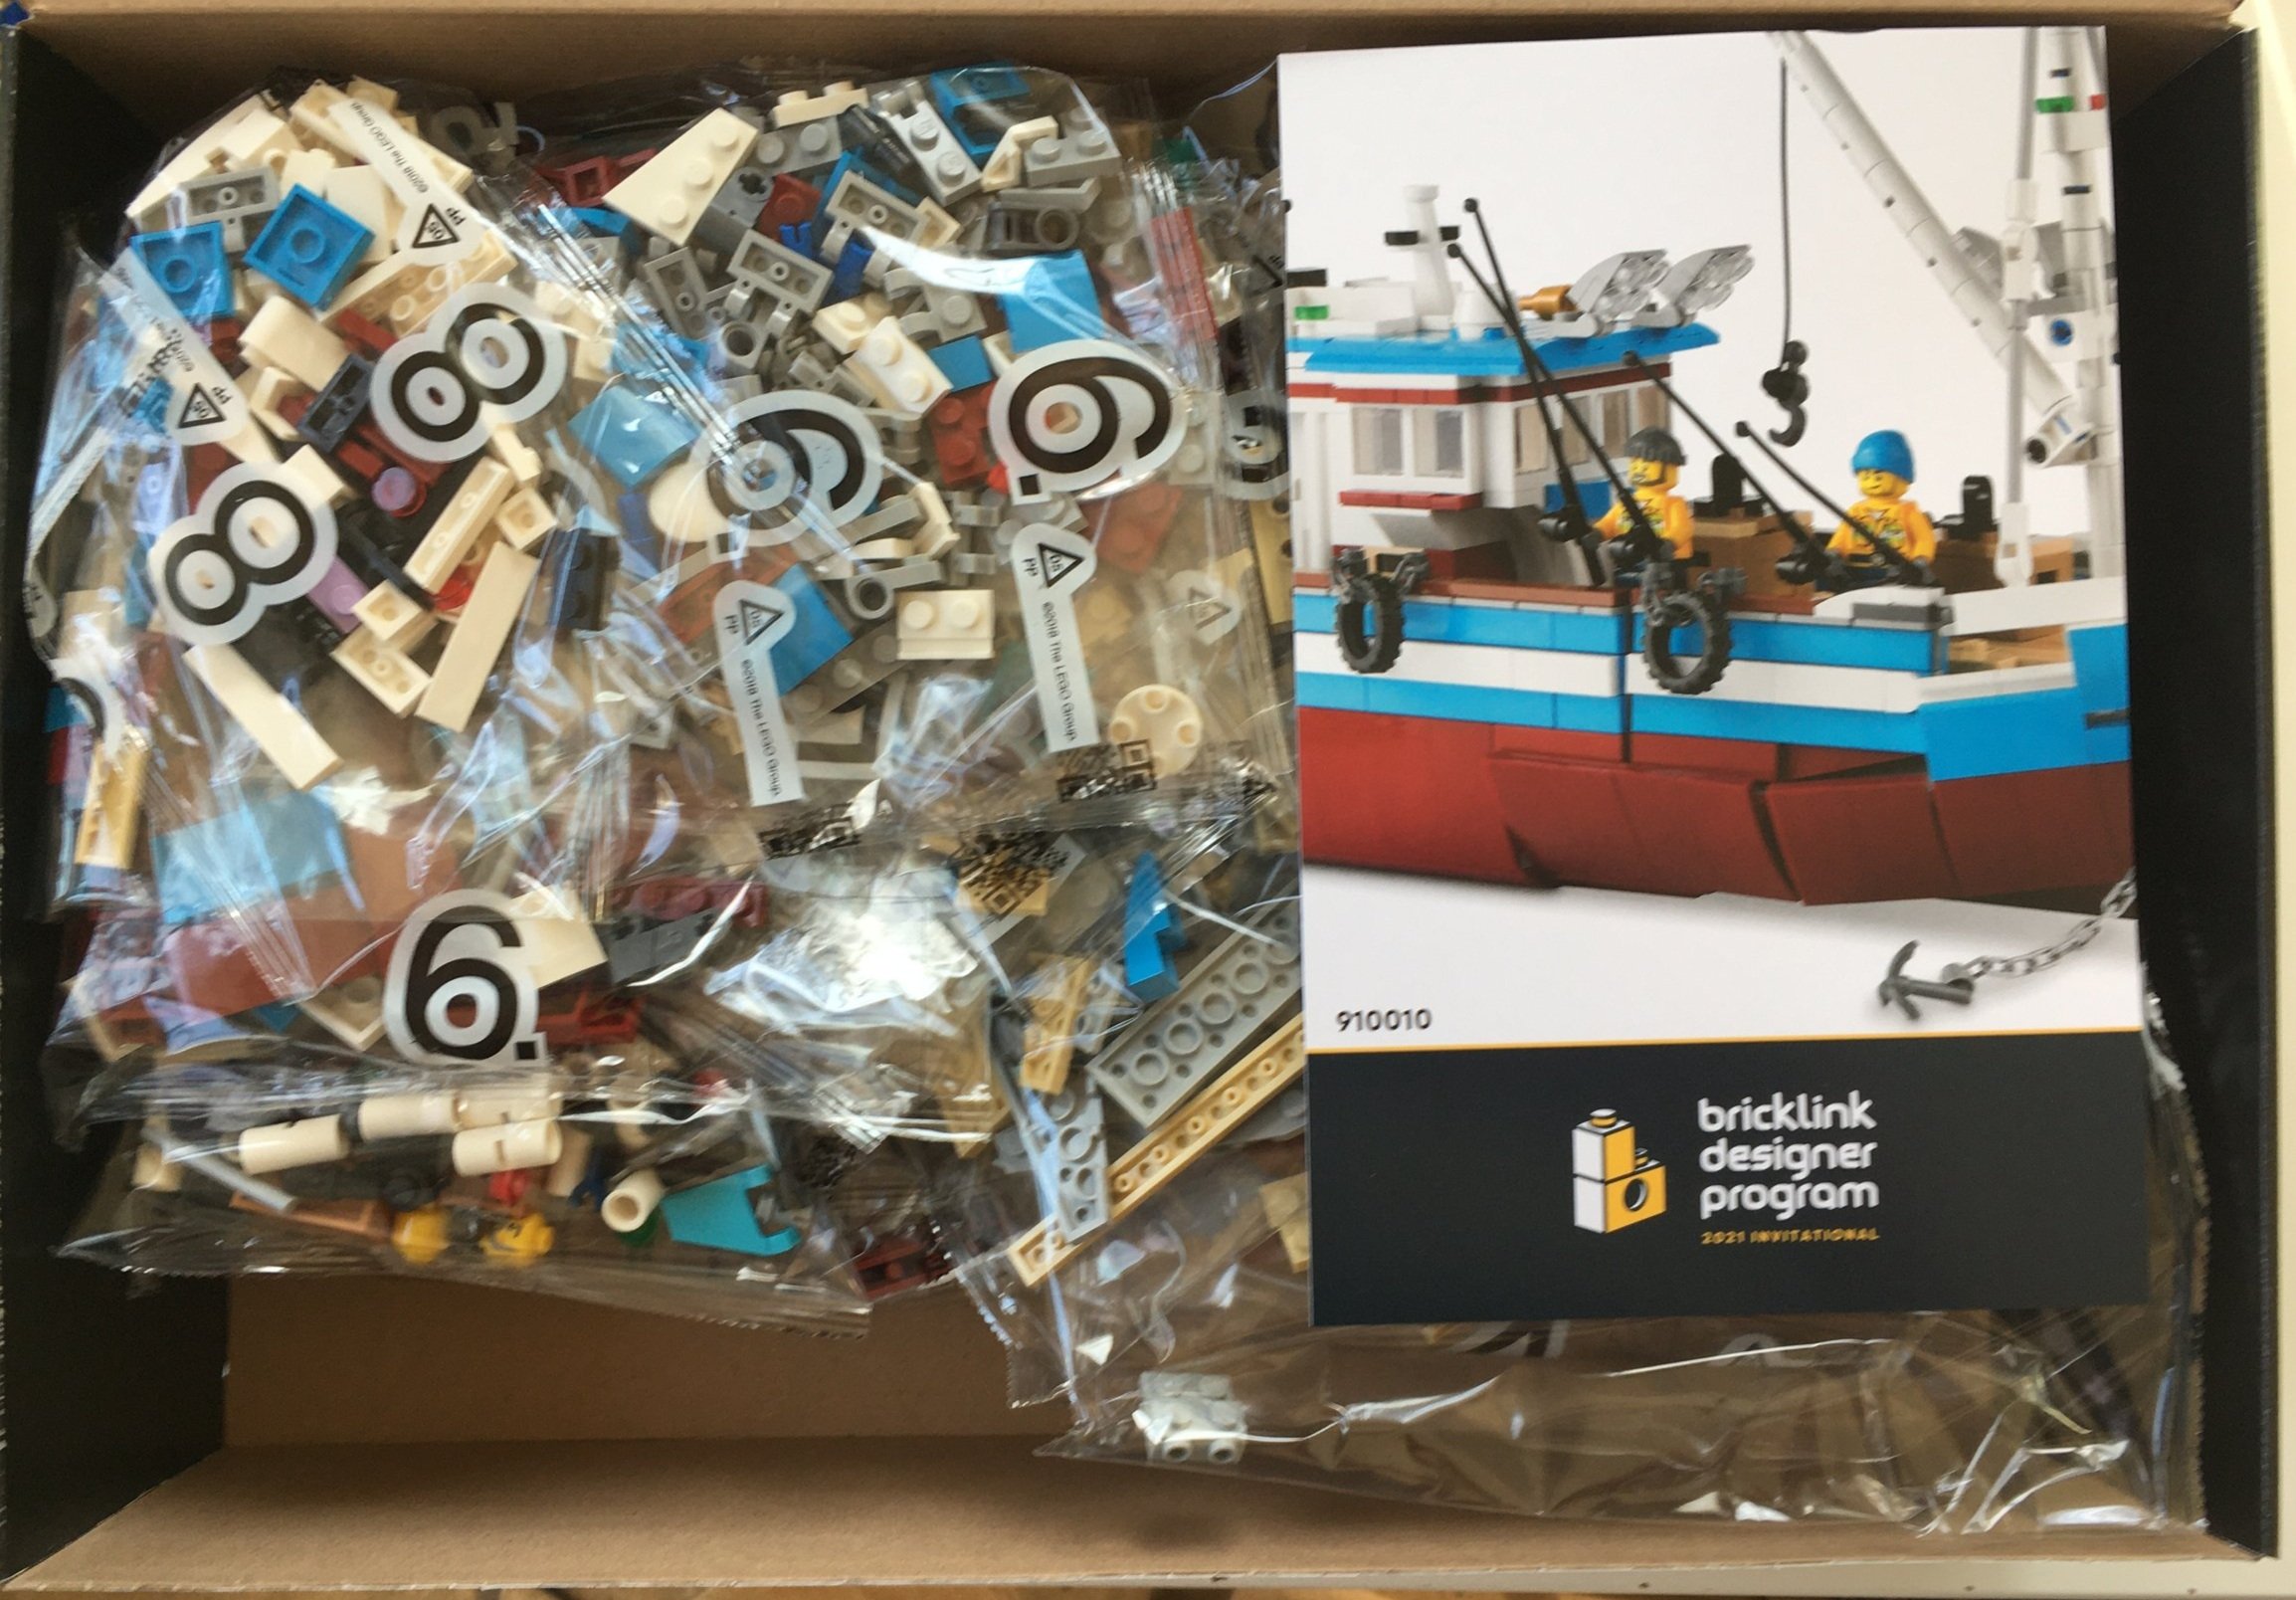
The box opens to reveal the parts bag and the card stating you have to get the instructions online. The set contains nine numbered sets of parts bags and then an unnumbered bag. I used the app to build #910028-1: Pursuit of Flight. I found the .pdf instructions for this set on BrickLink’s site and built using them to see if it was a better option.

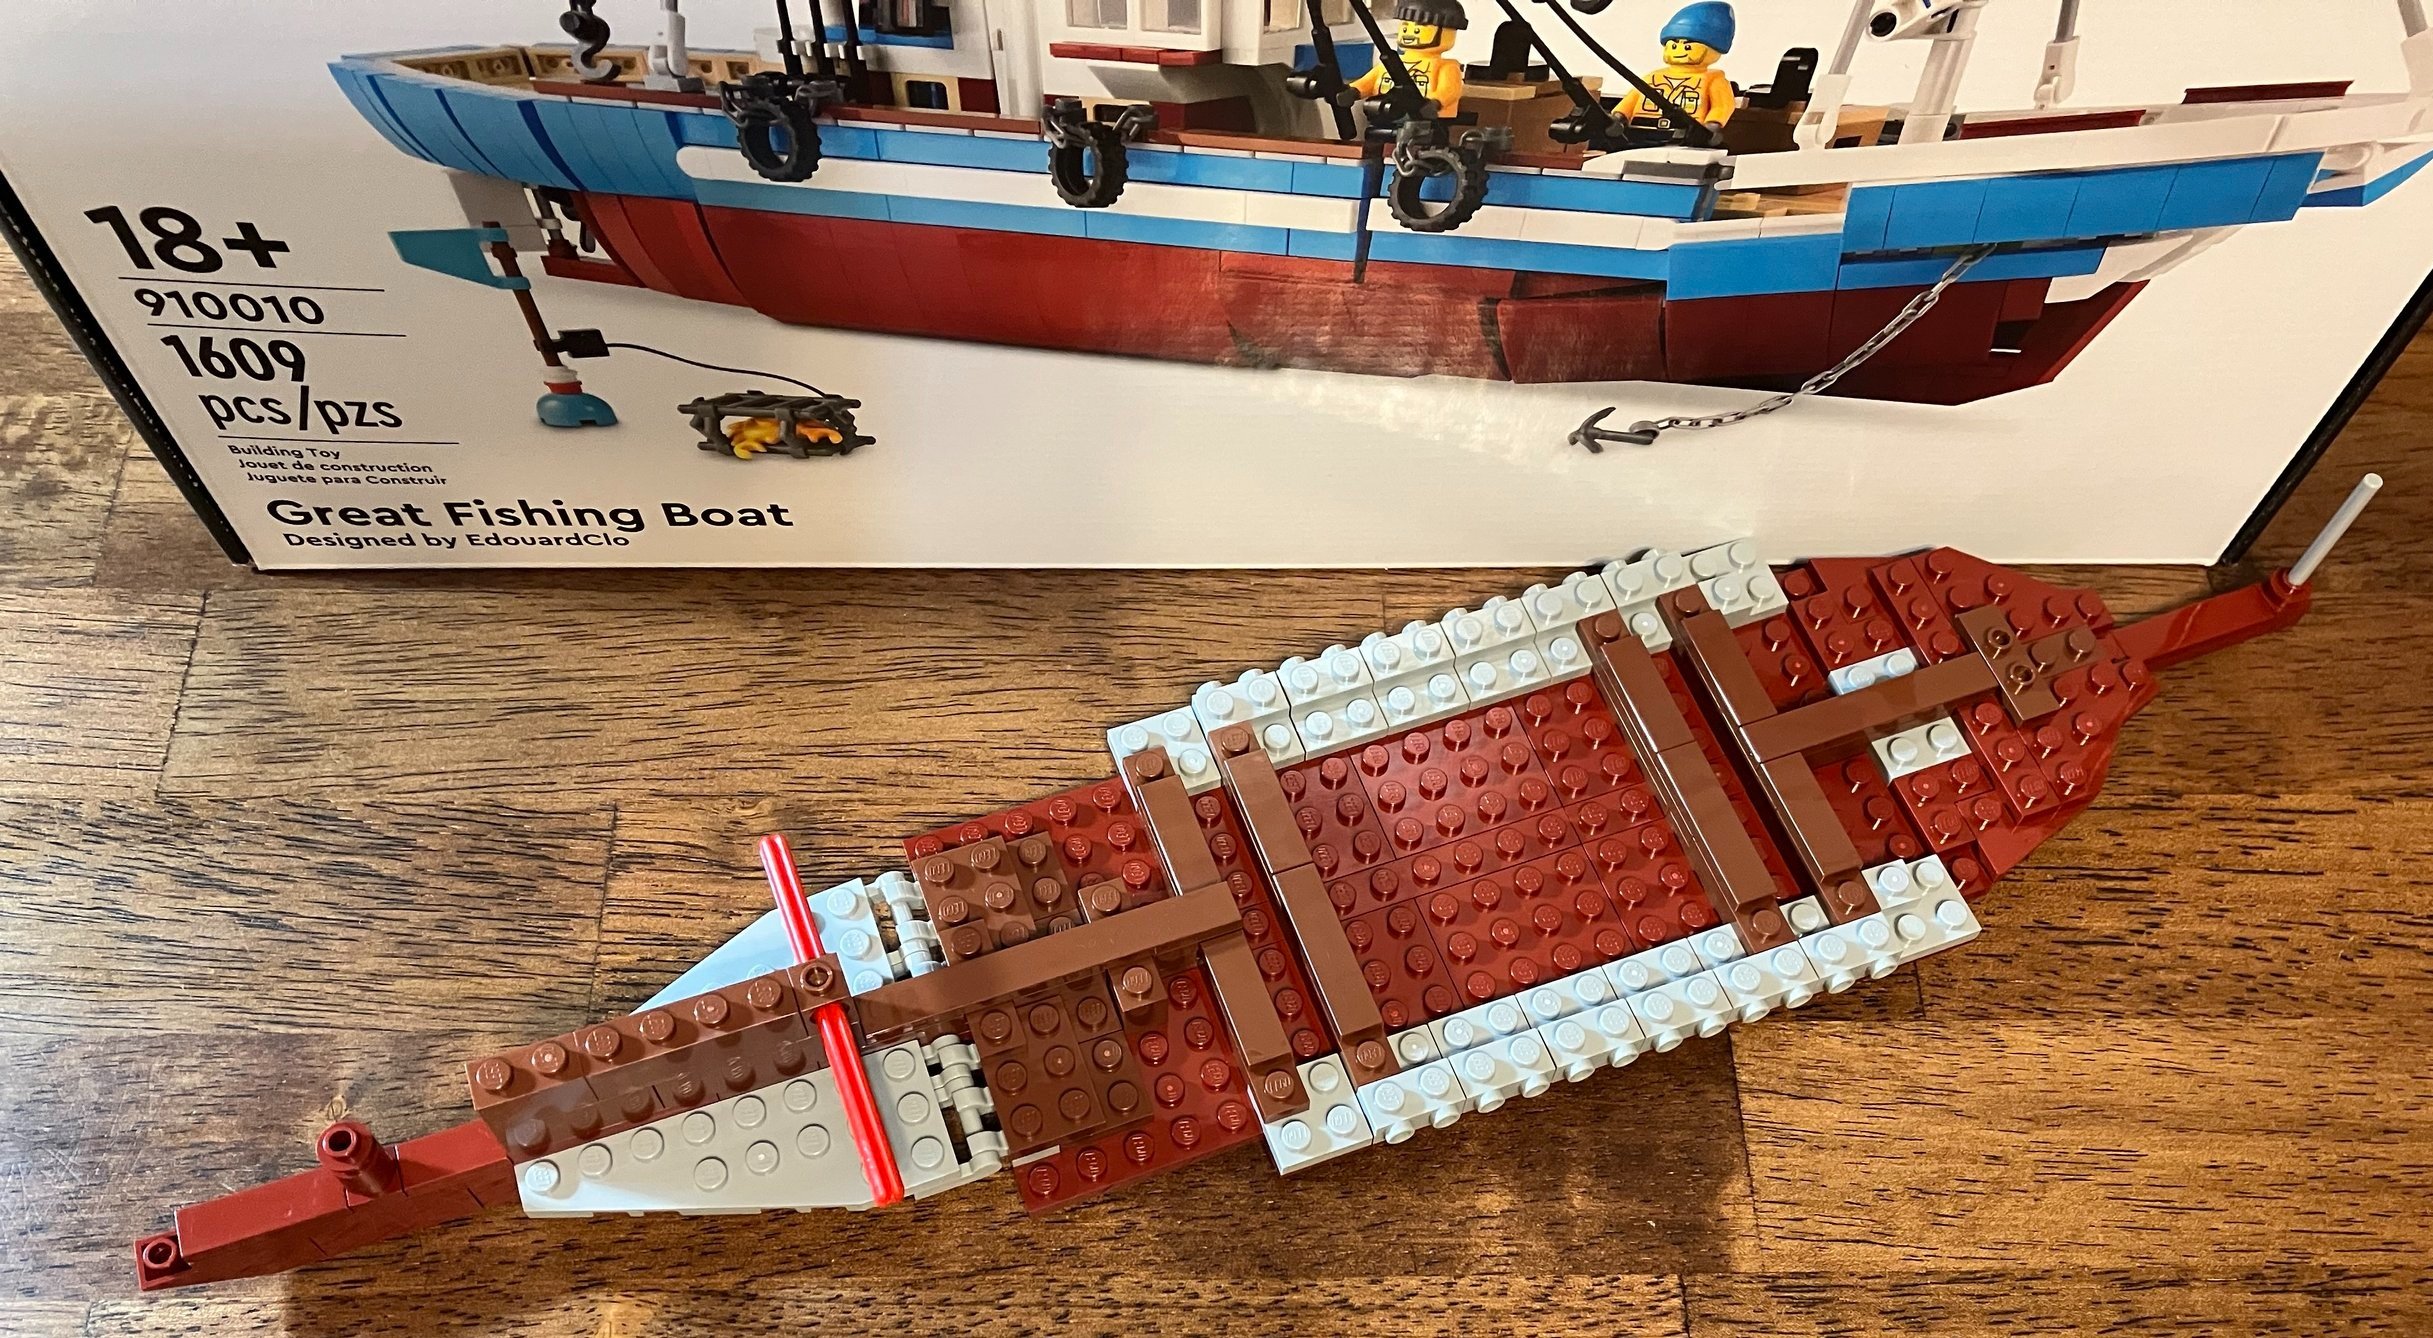
The first set of bags builds the base of the boat (or maybe the proper term is hull). This part is mostly stacking plates and tiles on top of each other. Nothing too out of the ordinary here.

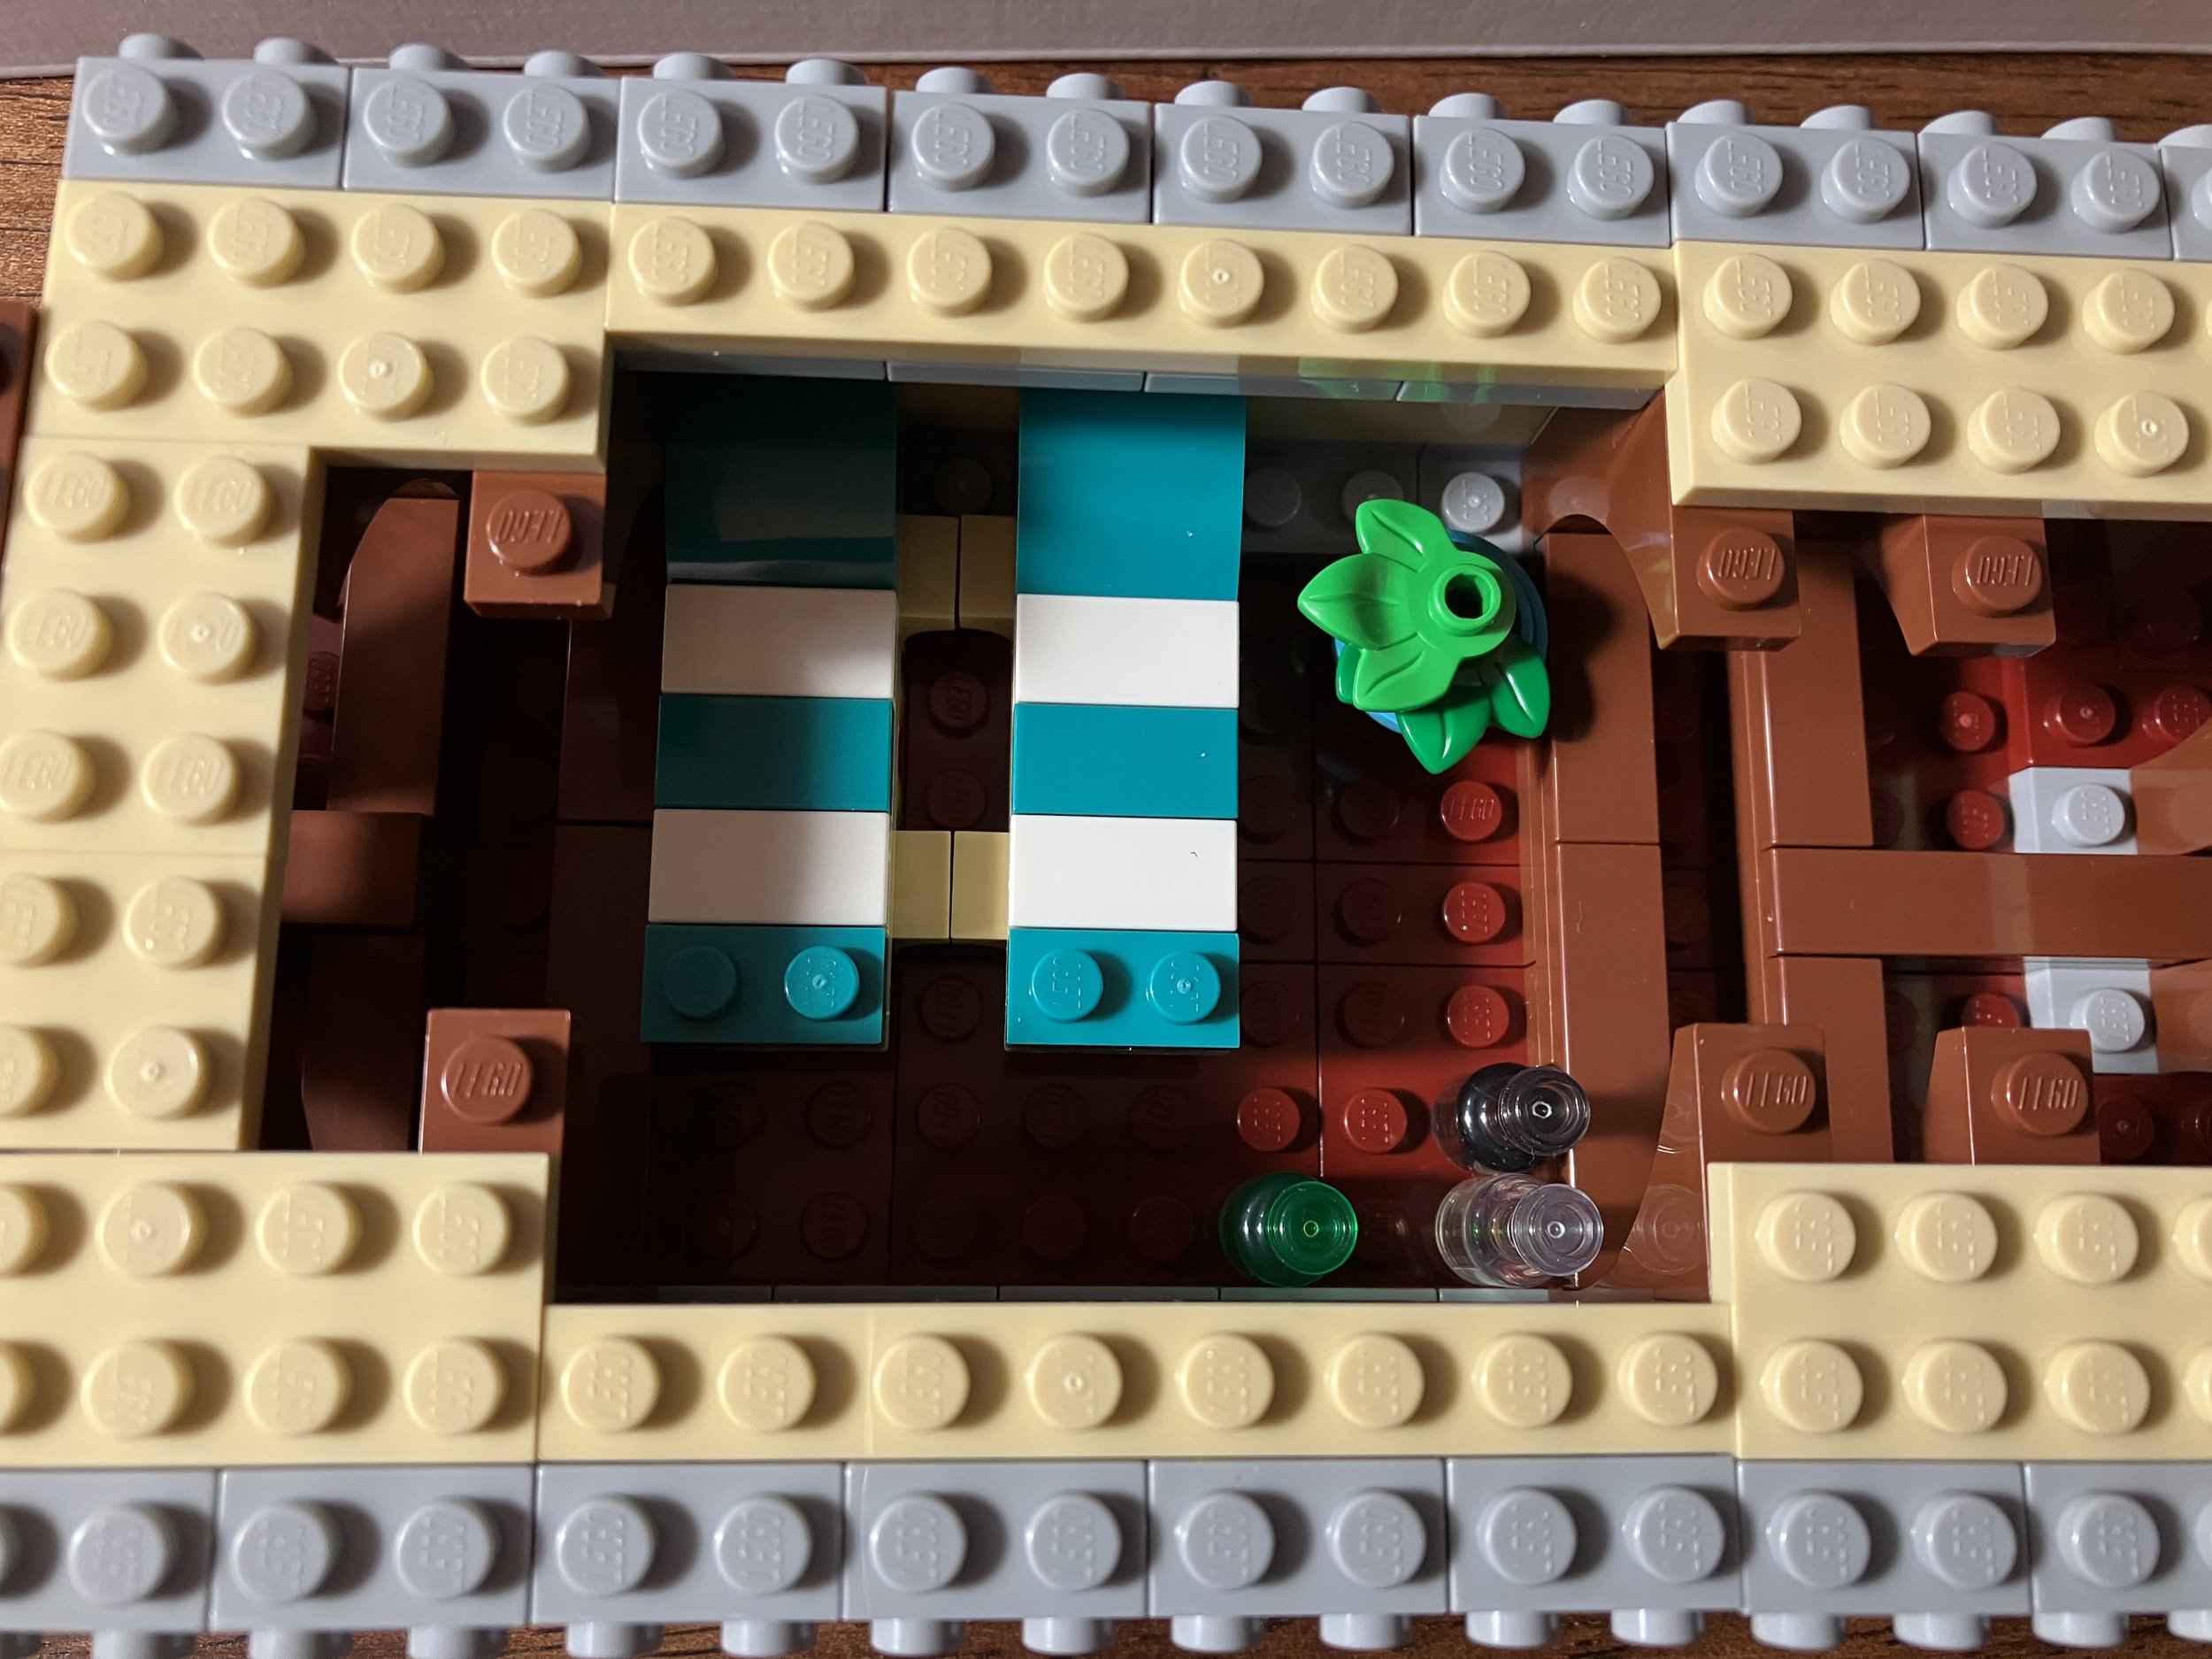
The second set of bags adds to the hull. It also adds a small crew compartment with two beds, some beverage containers, and some greenery.

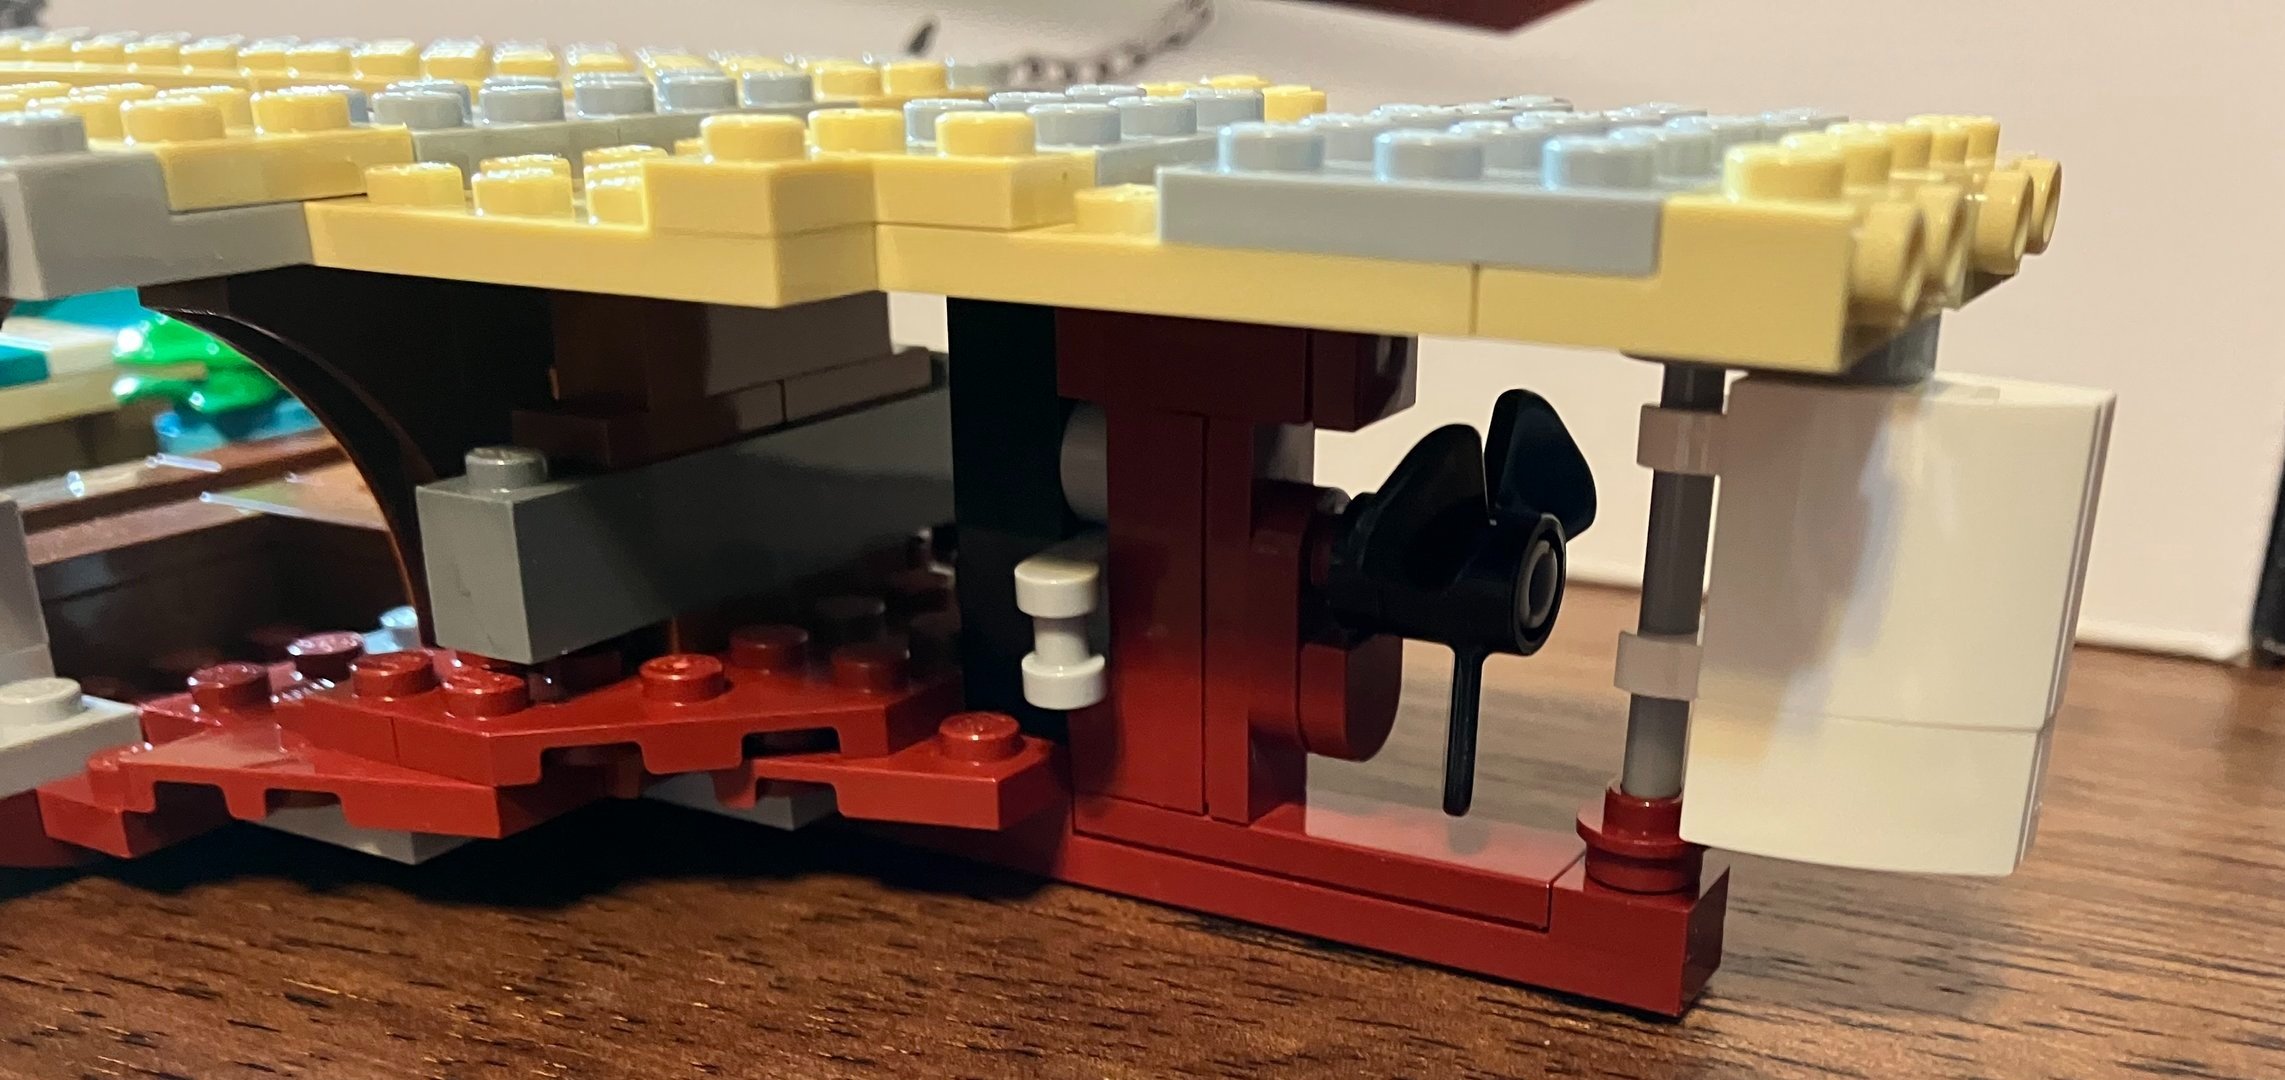
Here are some closer pictures from the second set of bags. You add in a propeller and rudder at the stern (right term?) of the boat. The propeller spins and can you can adjust the rudder as desired. I also added a closer look at the crew compartment.

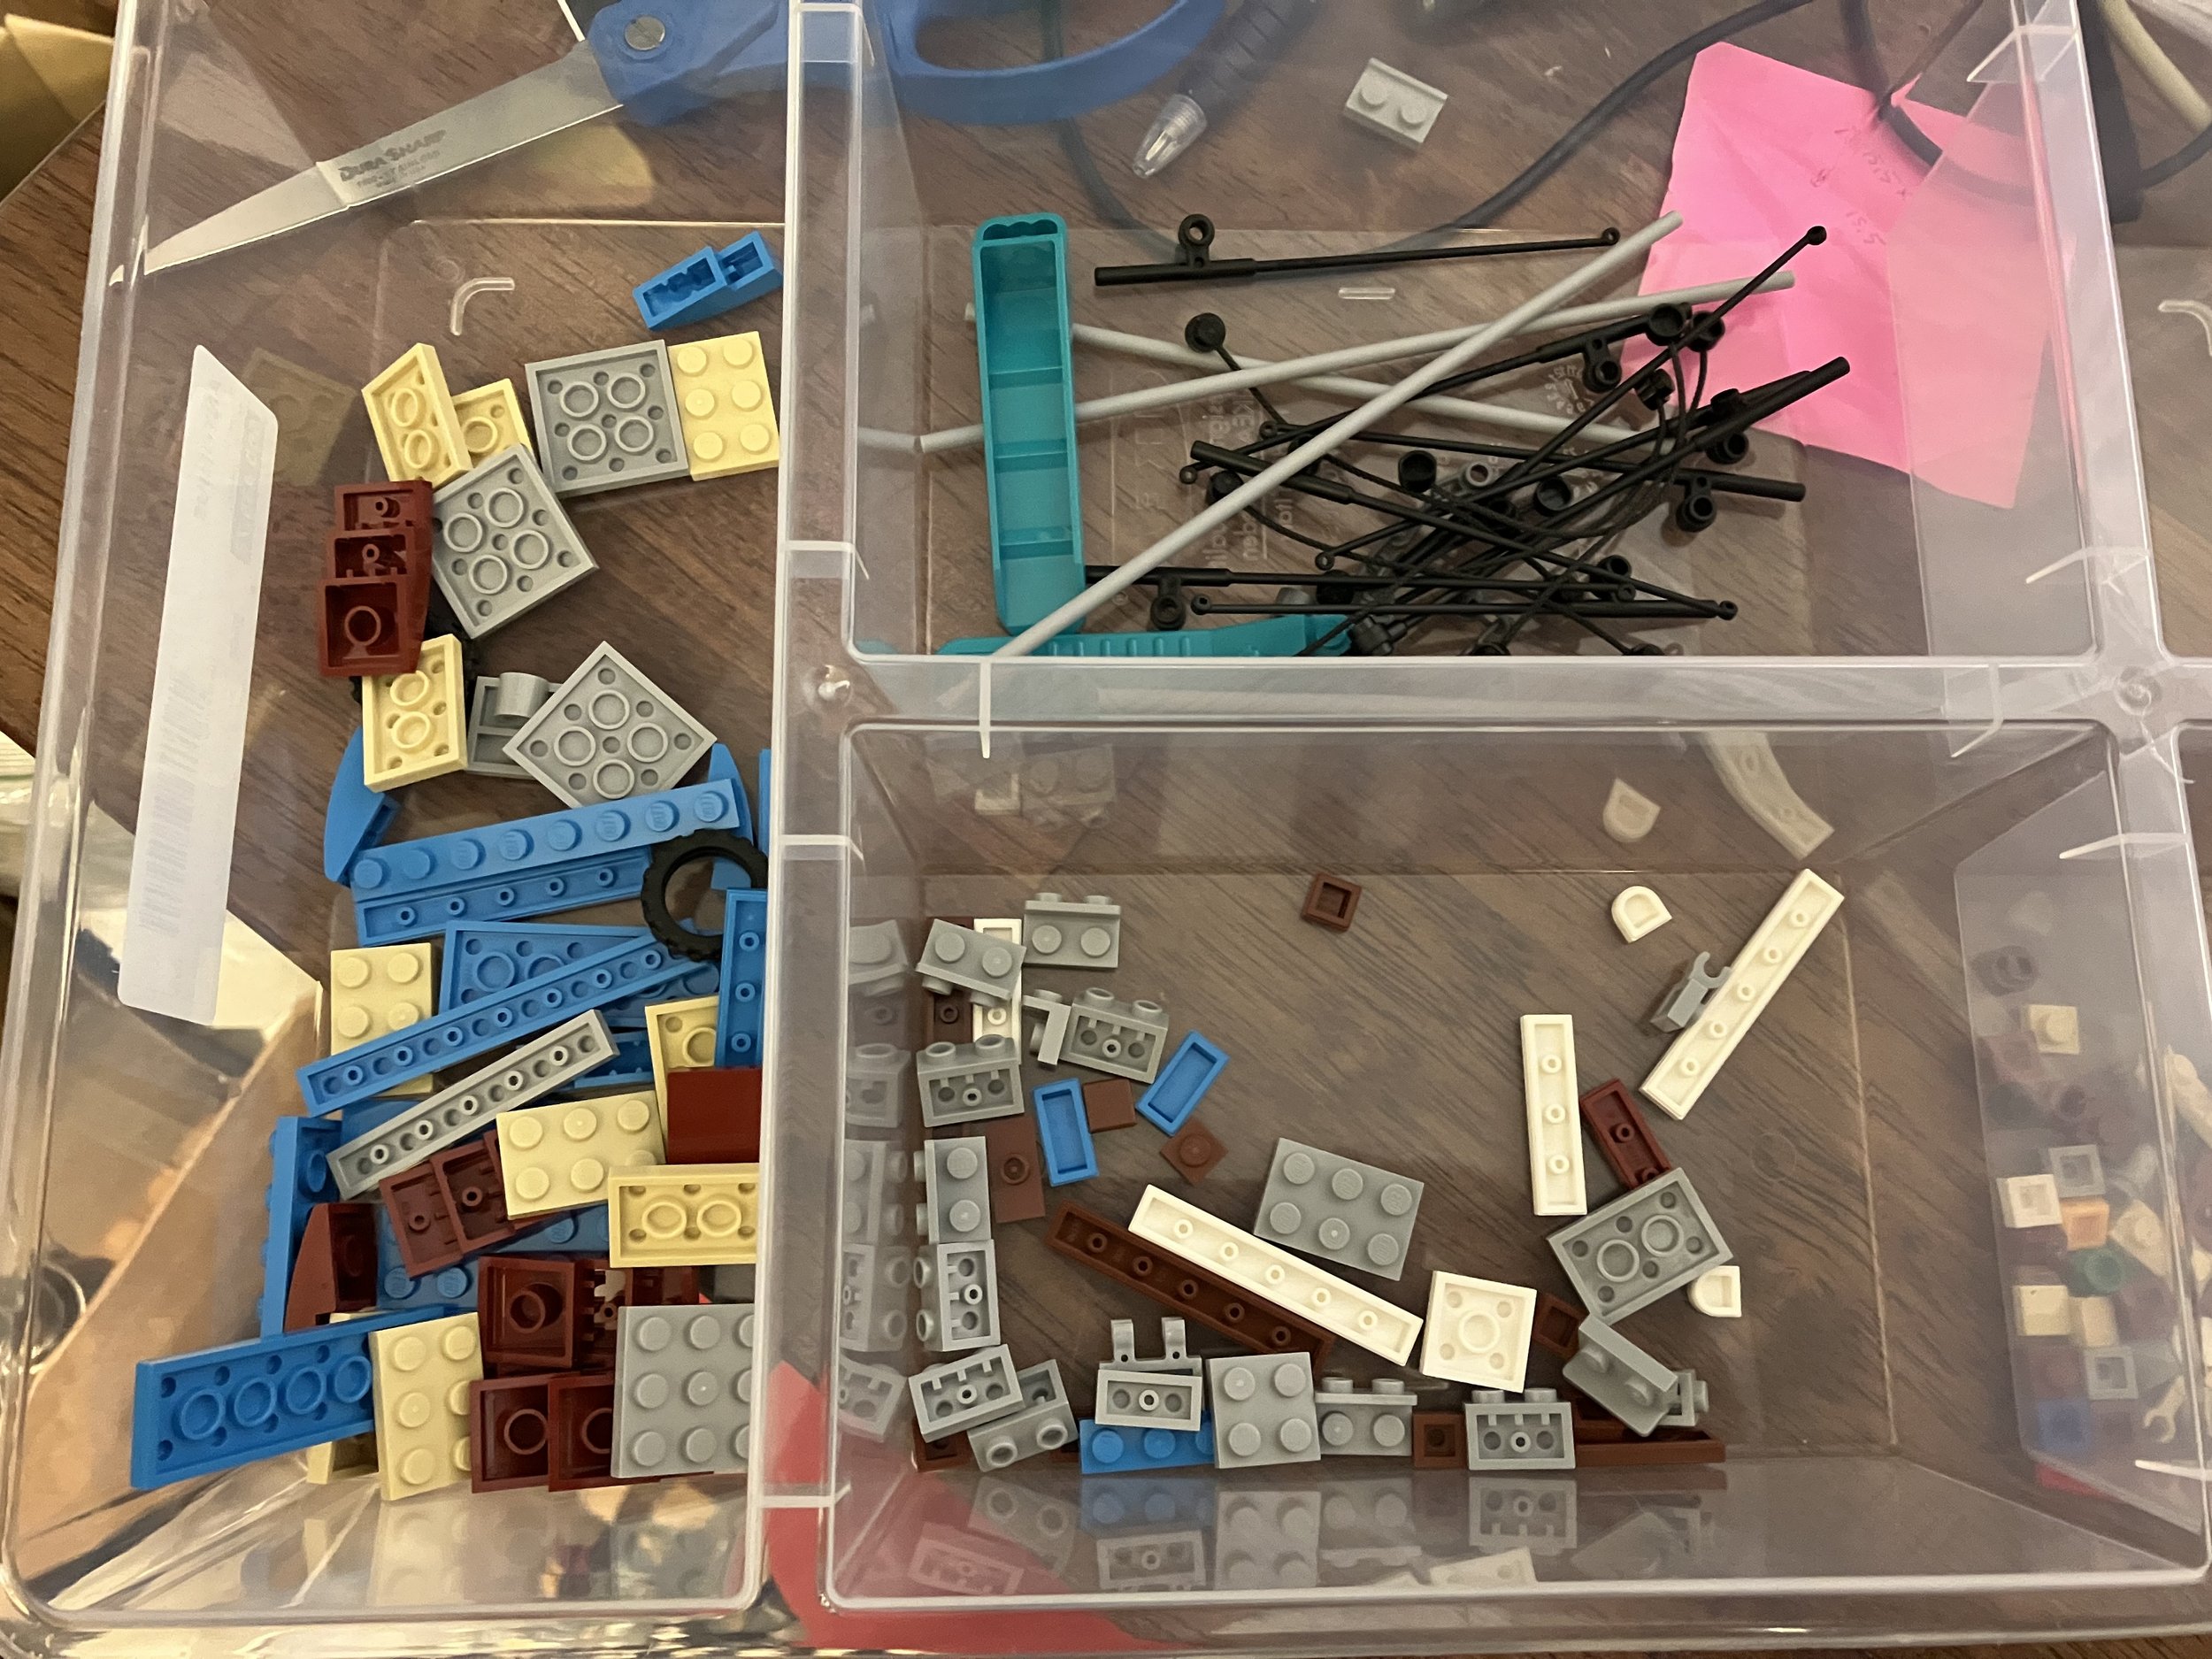
And then I finished the instructions for the second set of bags and had these pieces leftover. I went back and checked multiple times to see where I missed them and couldn’t figure it out. Typically the extra pieces you get are like 1x1 tiles or cheese slopes. I have never had a 1x8 plate as an extra piece.

Despite the pieces leftover from the second set of bags, I pressed onto the third set of bags. And wouldn’t you know, those pieces got used up during the instructions for the third set. I haven’t had this happen before with a Lego set so I wasn’t quite sure what to do, but I went with it.

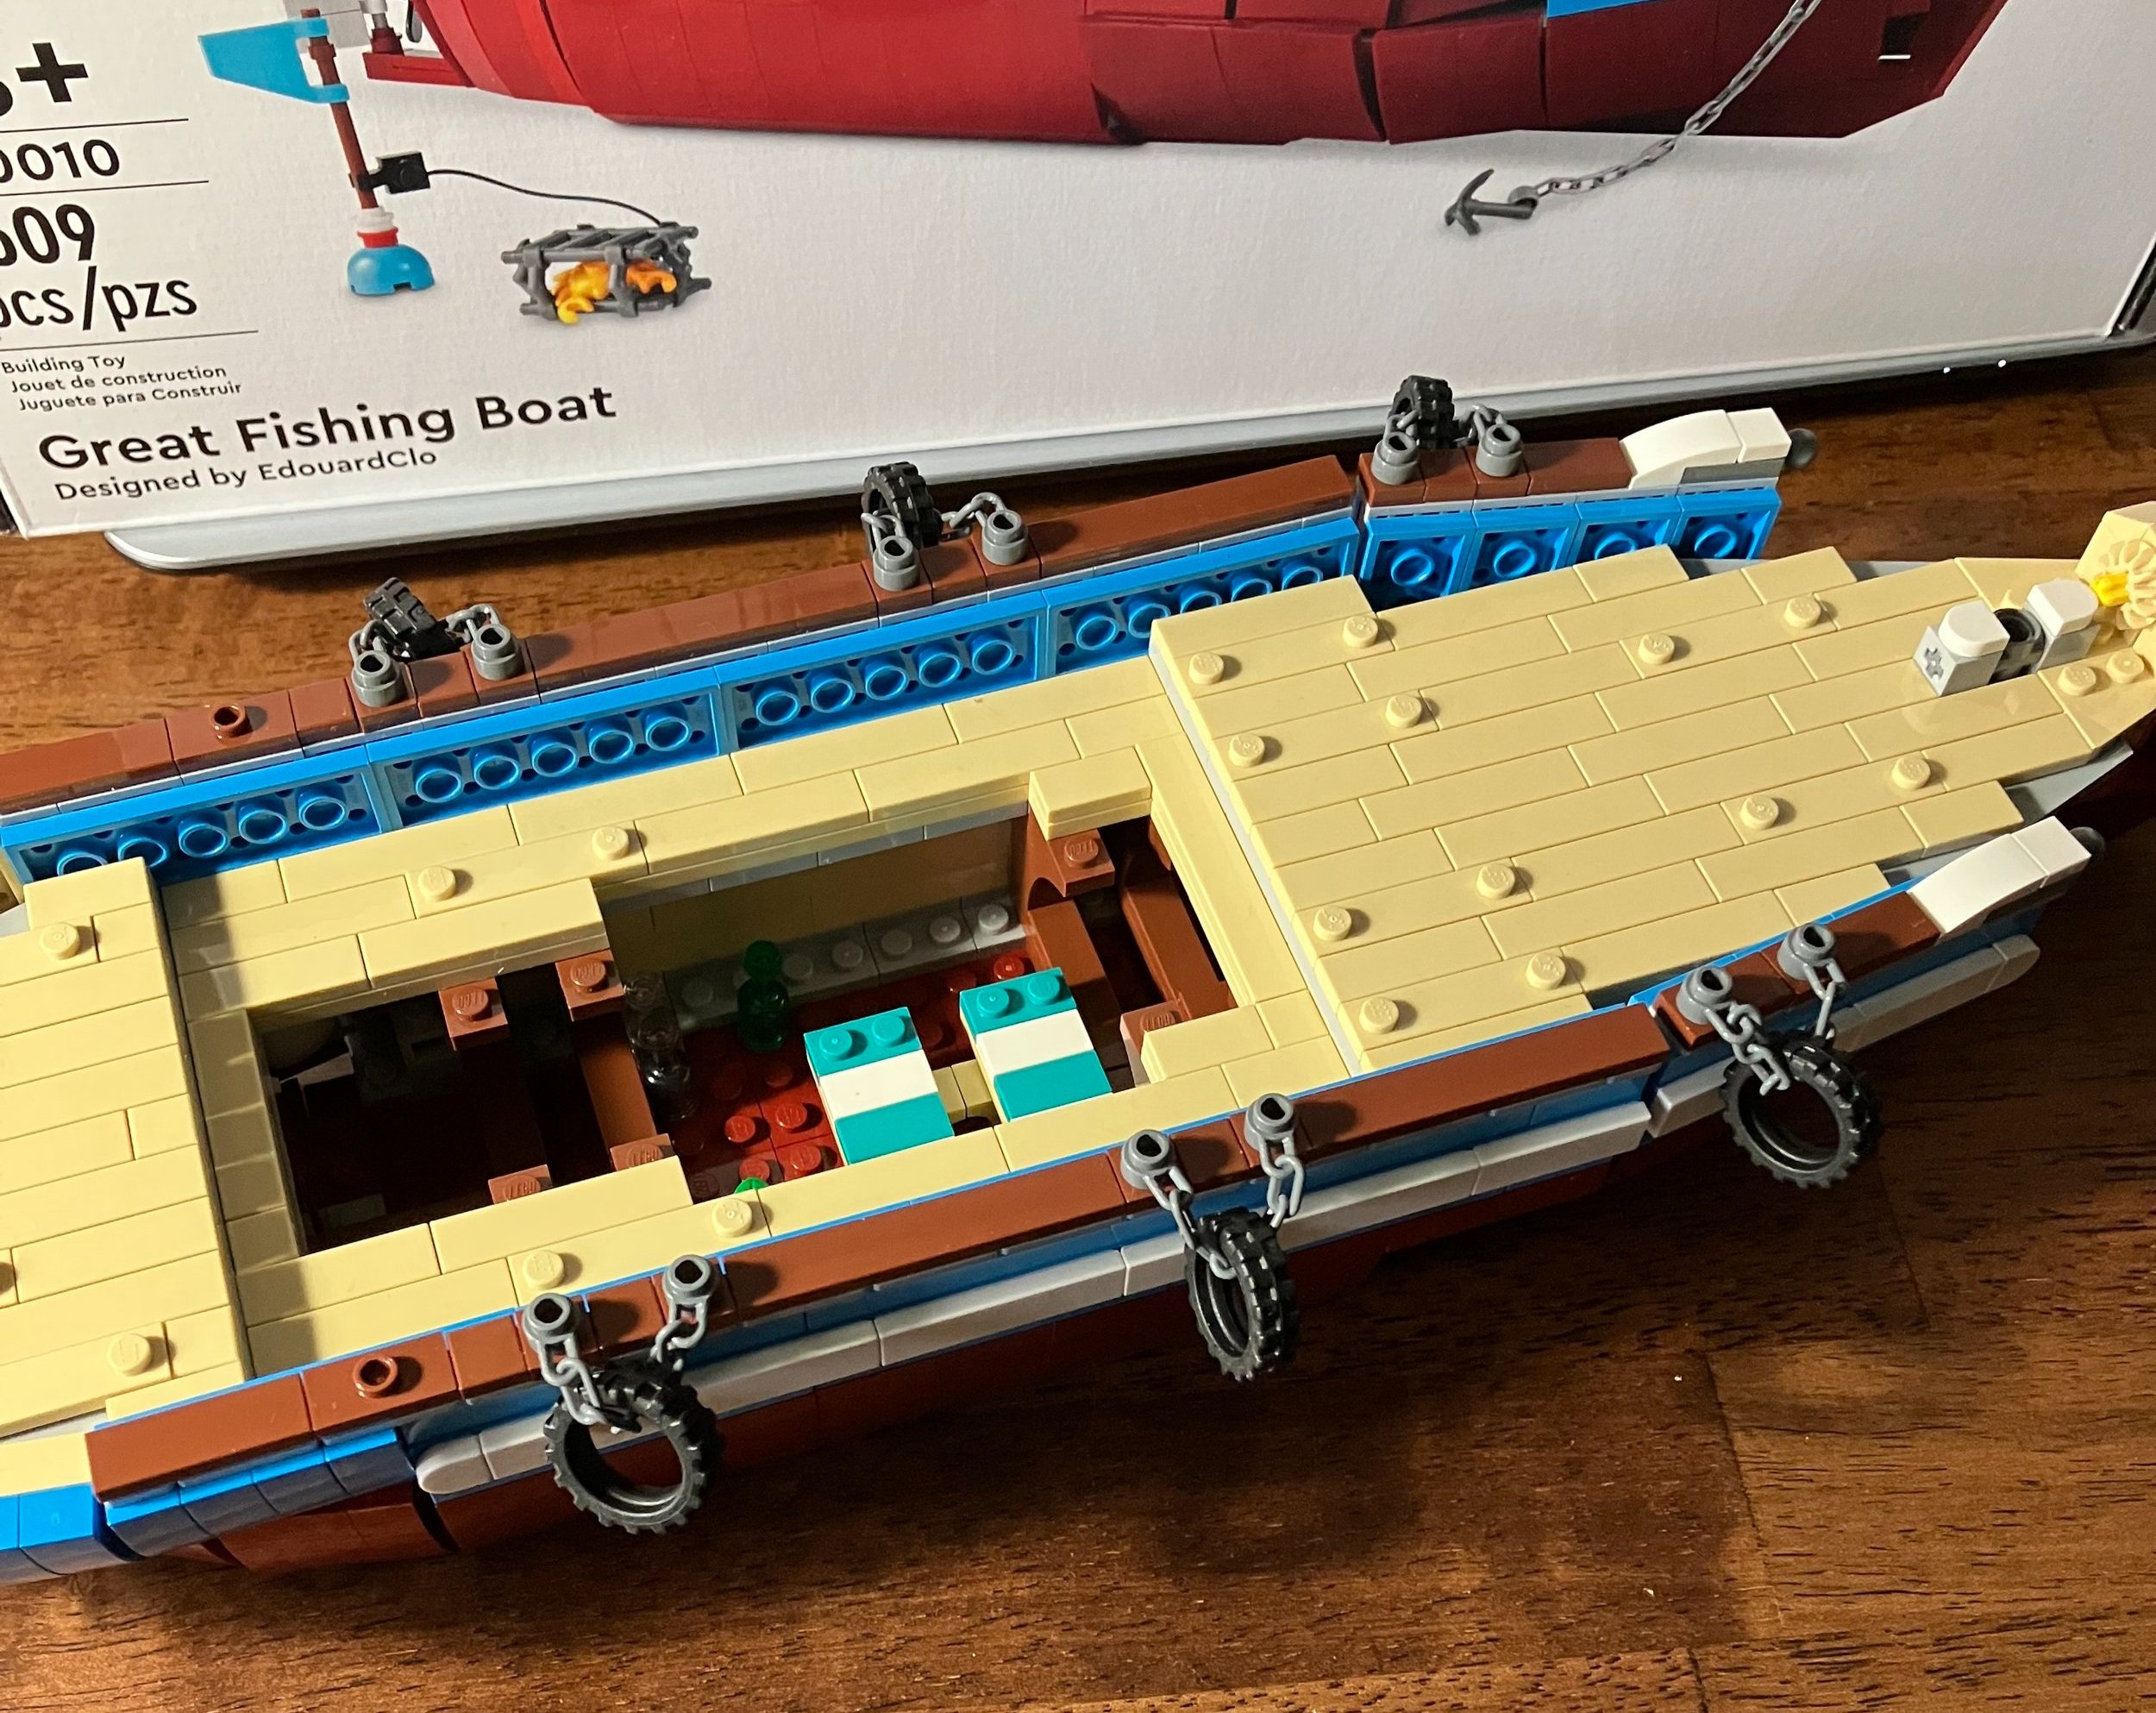
The third set of bags finishes up more structure for the hull and then puts the decking on the boat.

In the picture of the plastic tray/container you’ll see the pieces I had left at the end of the third build instructions. Exclude the pieces in the top right slot as those are from the bag without a number. After seeing this, I just went with it. Not sure why they made this choice, but okay.

I used the .pdf instructions posted online. I wonder if the app gives you a different building experience without pieces leftover when finishing up a set of bags?

The fourth and fifth sets of bags build the sides of the hull. You mix in the leftover pieces from the third set of bags too. There was a section here that isn’t exactly the strongest to stay together, but it holds. I guess that’s the difference between a BrickLink fan designed set and a Lego designed set.

The sixth set of bags builds all of the sides of the hull in the front and the back that require curves. While the techniques used create some gaps between the pieces, overall it achieves the effect. You build a section, clip it to the next section and then after you have a few sections built, you clip them to the hull. The stern wasn’t too bad and it all fit on pretty easily. I had a challenge with the bow sections as the .pdf instructions don’t allow you to see the sizes of pieces well (in my opinion). I put some Technic pieces on incorrectly which caused some errors. For the bow, you attach the sections for each side that come to a point by sliding some Technic pieces onto the long axle you added in build 1. Then the two connect to each other. After I found my error, it worked okay. It’s definitely a fragile section of the build and it’s not a good idea to hold the boat there.

The last thing to do here is add in the anchor and chain. I would have put the chain on before I attached the top part of the hull as the instructions have you placing the chain through the slot between the pieces. This wasn’t the easiest thing to do, but I figured it out. The instructions have you adding the anchor piece on later, but it was in this bag so I just added it now.

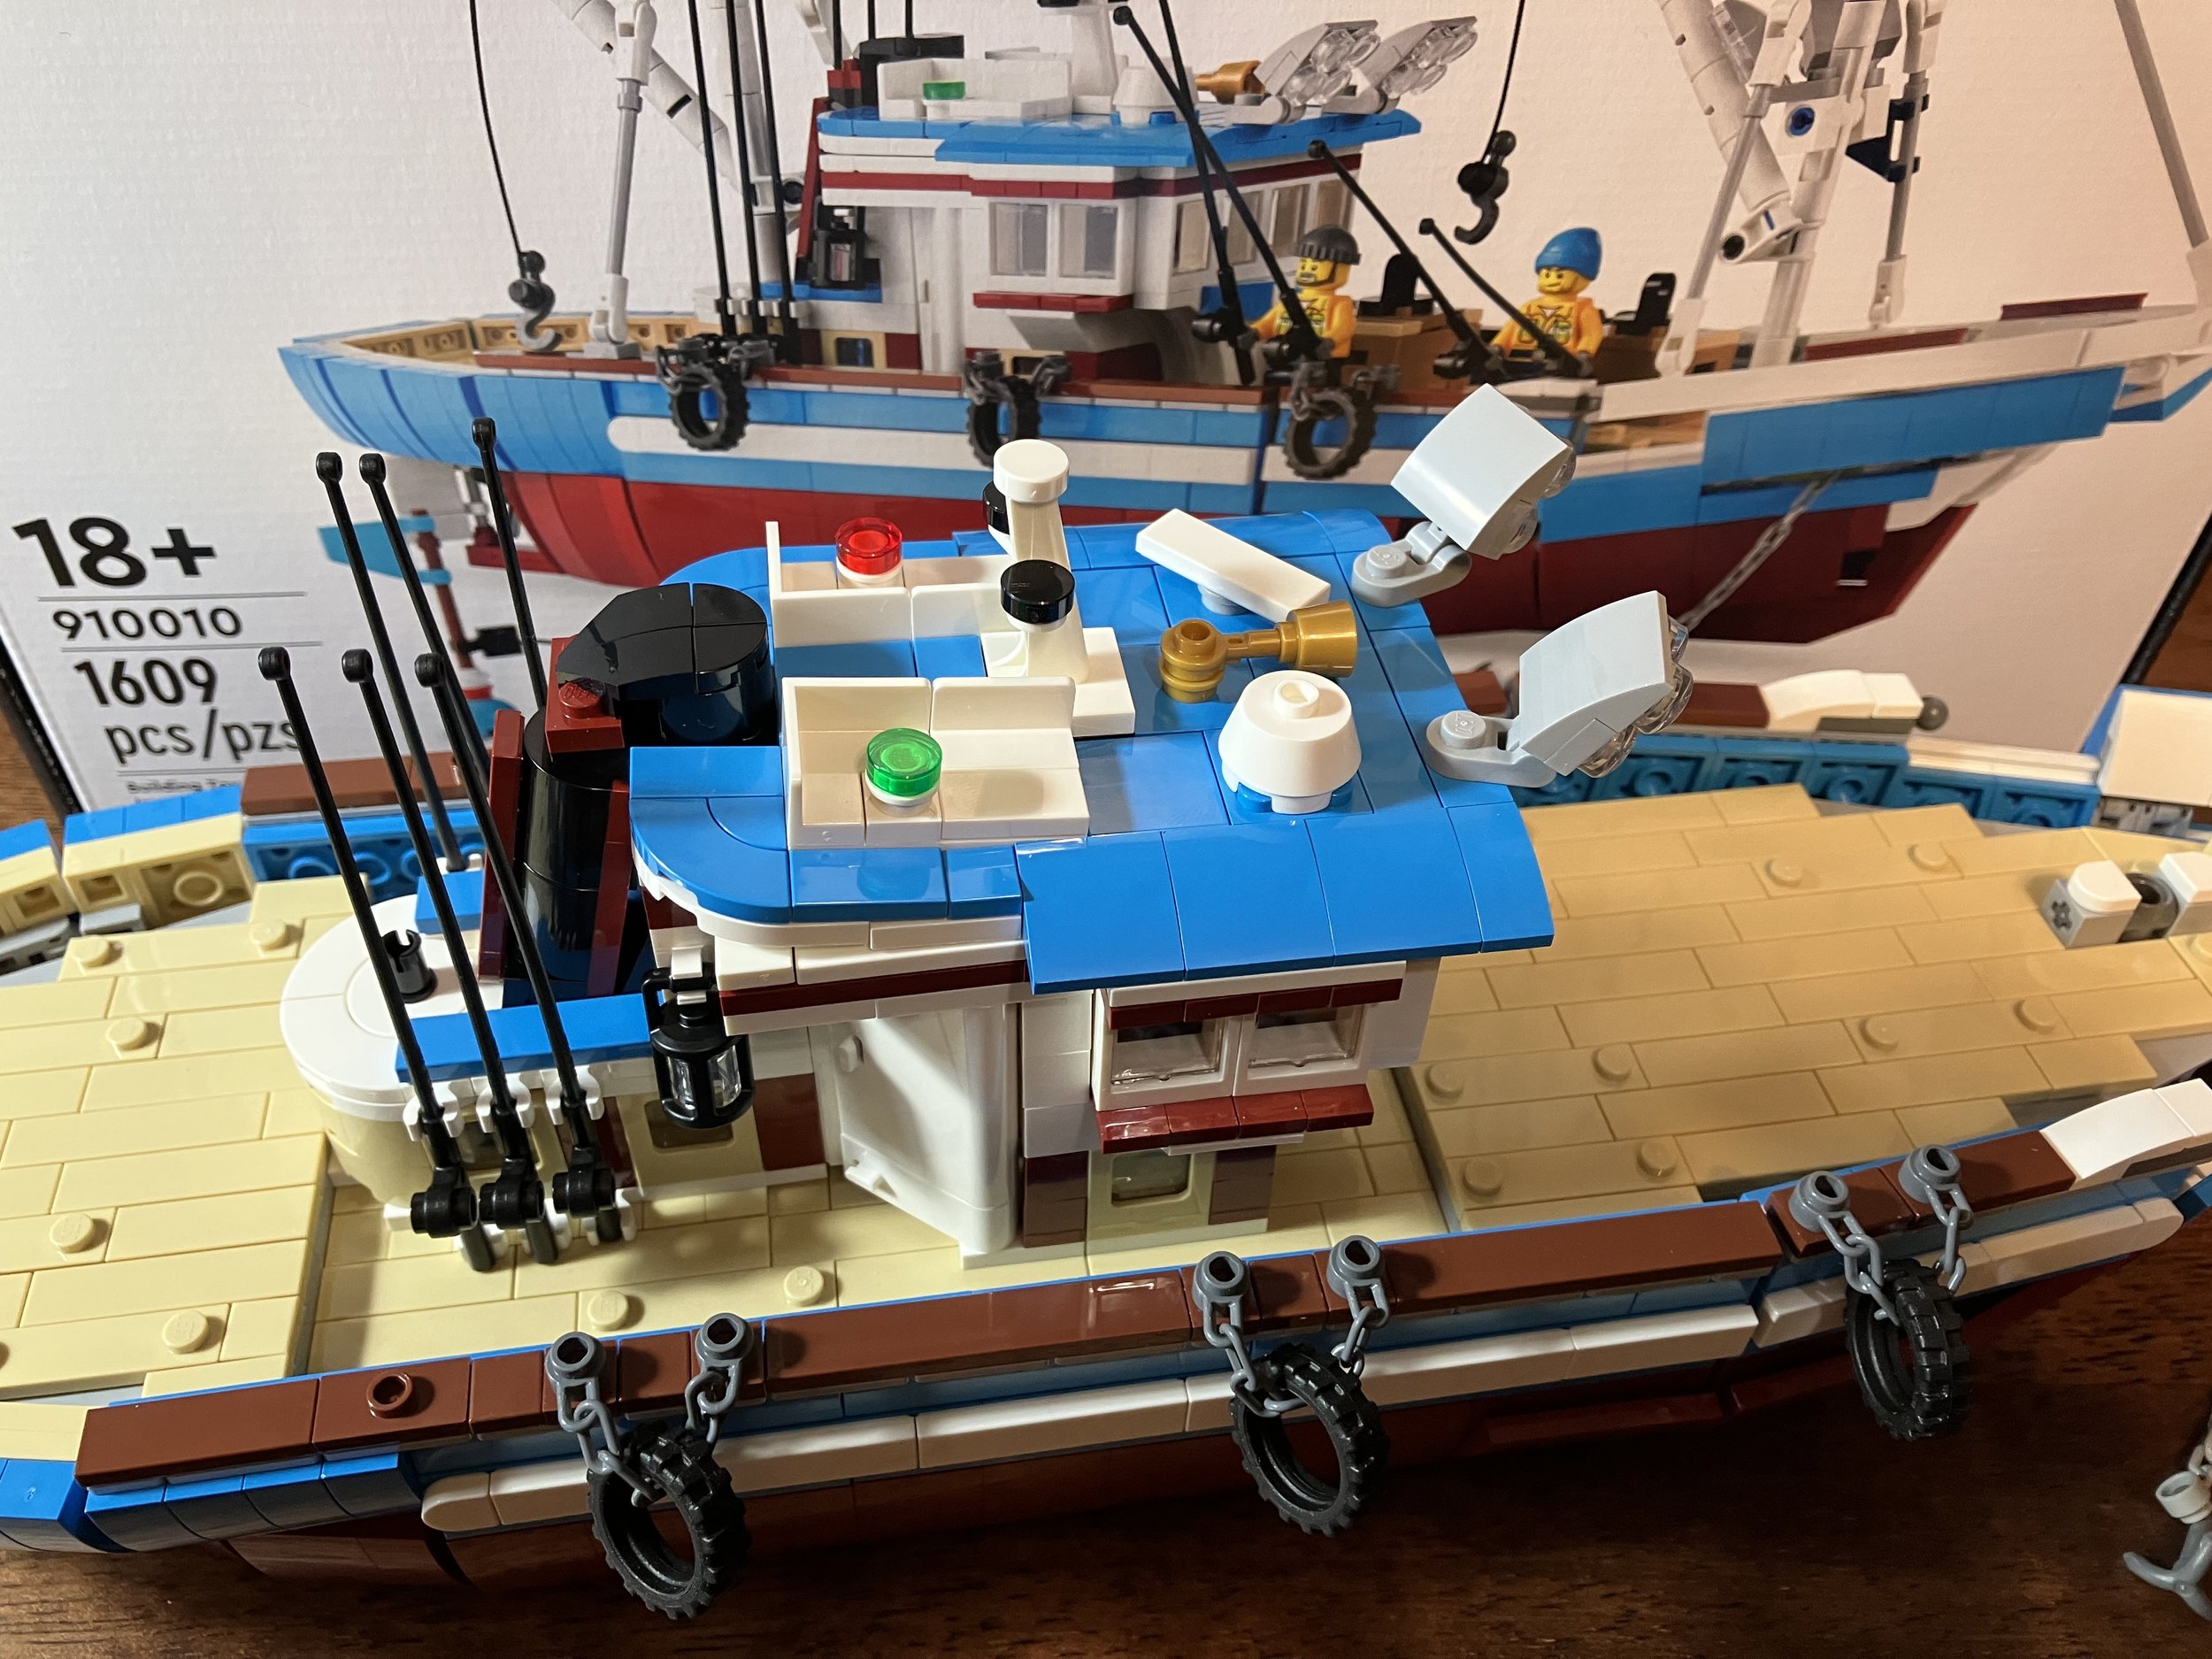
The bags numbered seven and eight build the… is it the bridge? I don’t know. It’s the compartment where you control the boat. The seventh set of bags starts it off and then the eighth finishes it. I had the partial picture and the insides, but must have deleted it somewhere in the process before building my post here. Sorry. The inside has a wheel to steer the boat, a compass, a phone, and a tile as a screen for (maybe) radar. Behind the control area on the inside, you have a few boxes where you store printed tiles with food.

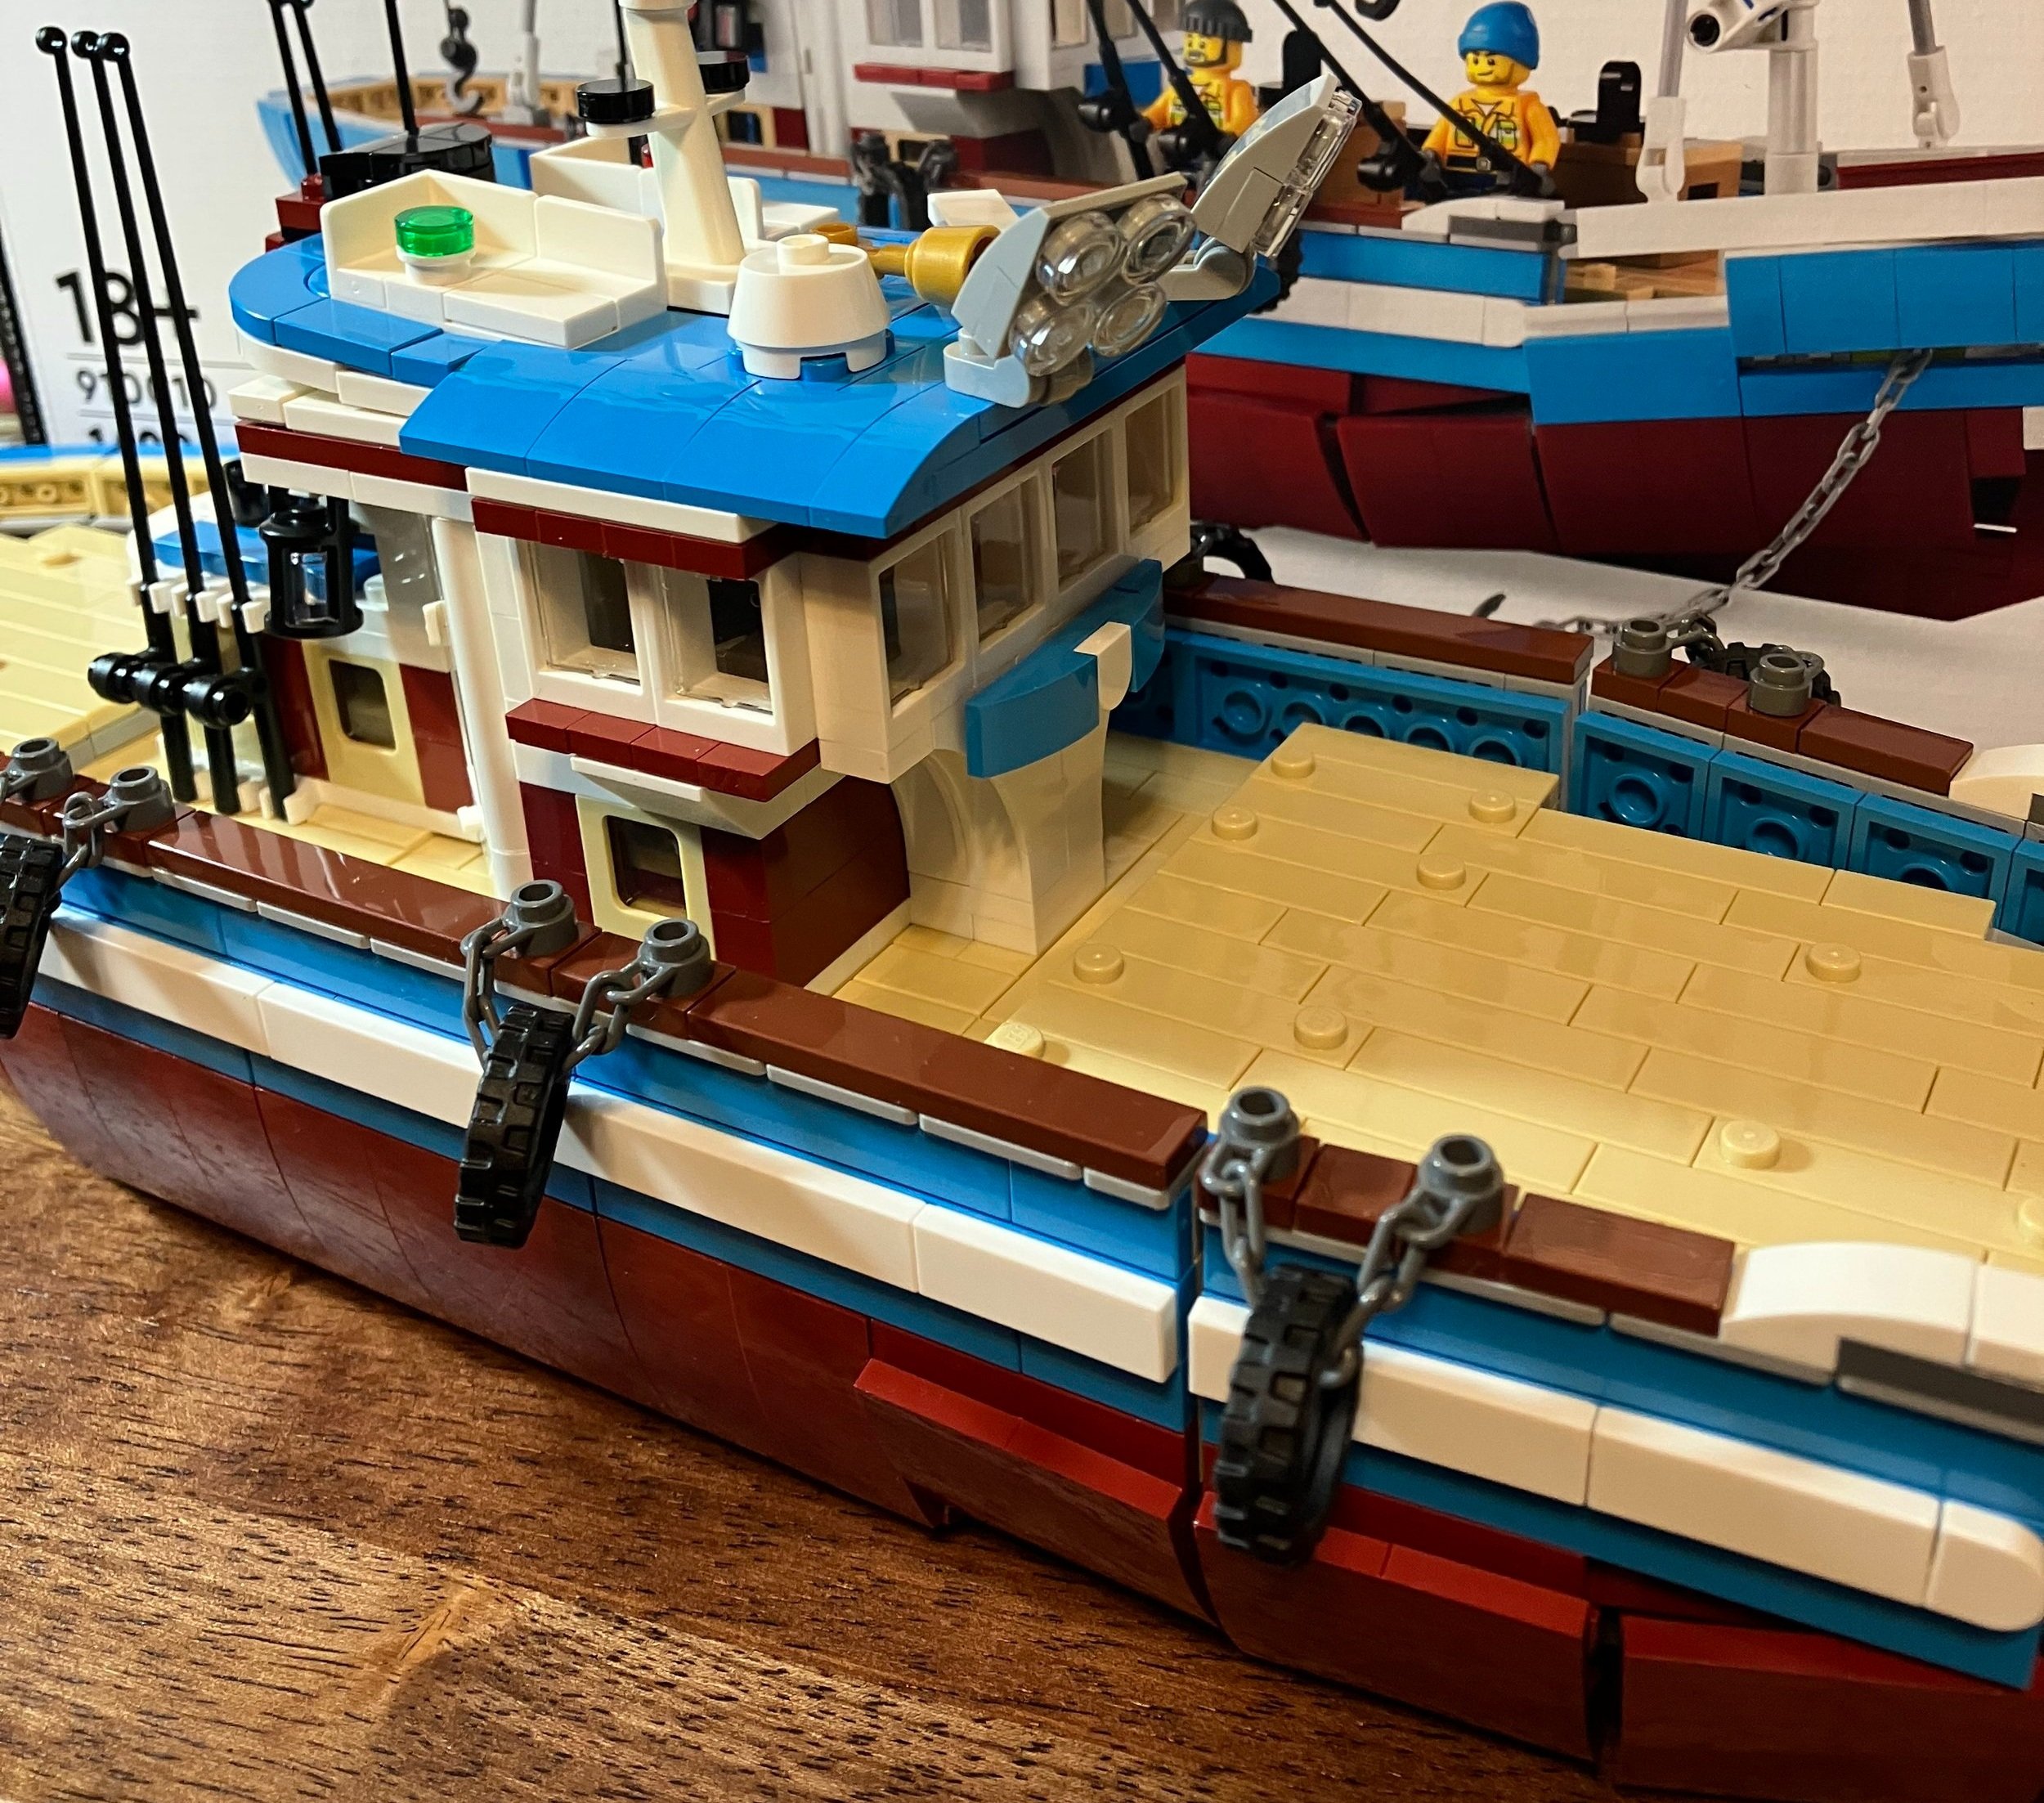
The outside of the compartment has a funnel on the back, three fishing poles that can be attached to each side, lights for fishing at night, and some various gear like a radar, a horn, and possibly an antenna or something for a communication system. The roof detaches pretty easily so you can put a minifigure inside as desired.

This set comes with three minifigures. All of them are adult males. None of the parts seem new to me and they all have faces with facial hair. All of the minifigures have only one expression which is fine by me.

The last bag builds out some rigging, a crab trap with a crab still in it, some crates of fish, adds a few fish to put on the deck that the crew just caught, adds a front part to the bow, and a small crane with a hook that you can move the boxes around with on the deck.

I wasn’t so sure about the rigging at first, but it seems to work. There are some strings used, but it is mostly the thin plastic tubing. It seems to hold up pretty well so I can’t complain.

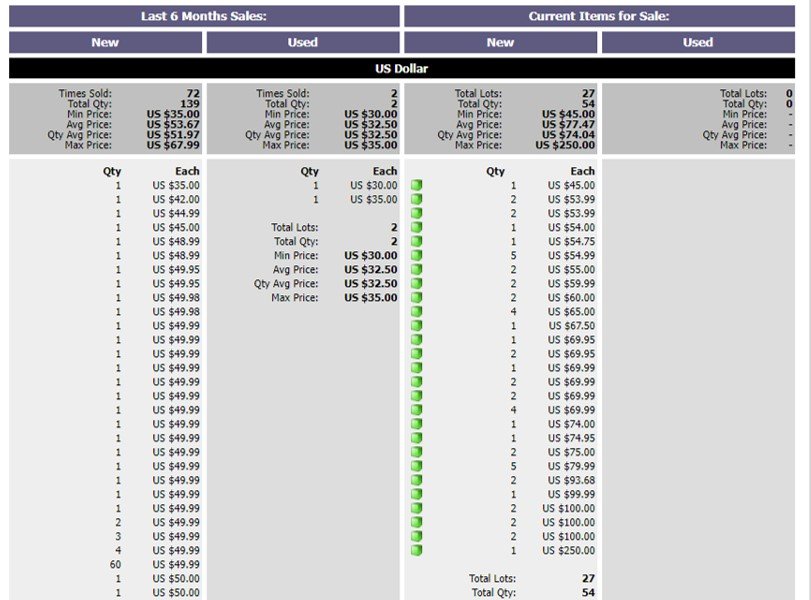
Overall, it’s a cool set. It’s something out of the ordinary that we have not seen from Lego before. The fan design is not as structurally sound as a Lego produced set would be, but it’s fine for an 18+ set. The price wasn’t too bad, but now it’s at least twice as much or higher on the secondary market. I haven’t looked to see what it would cost to source the parts from BrickLink or elsewhere.

I am not a fan of electronic instructions. I’ve used the app and the .pdf versions and I can say I much prefer the paper instructions. To me, it is easier to see the steps and easier to assemble the Technic parts (you can line up axles to ensure sizing). I’m sure it is a function of cost for these sets, but would prefer instruction books going forward. Plus, I use building as an opportunity to not stare at a screen.

In the meantime, I’m looking forward to the round 2 sets.

Happy building!

A Walk Down Modular Building Lane

I’ve reviewed a bunch of the modular buildings since the start of my site in 2014 and I have most of the sets. Sadly, I do not have #10190-1: Market Street or #10185-1: Green Grocer. Maybe some day I will see if I can piece them together with my collection and BrickLink orders. I do have the rest and they are awesome sets!

If you’re a modular building geek like me or just want to learn more about them, Jamie Berard, who many folks know from the LEGO Masters USA TV show, did a 40 minute walk through of the history of the modular building line for LEGO on YouTube. Hopefully you can find that chunk of time to watch it or watch it over a few sittings like I did as it’s an interesting video where you learn about some of the insights that went into each design. You can check it out below.

Why You Should Use BrickLink

Did you miss out on a specific set release by LEGO? Are you looking for a specific minifigure to complete your build? Do you need a bunch of bricks or plates to complete a building or vehicle?

How can you get these items?

There are a lot of marketplaces out there that you can turn to. You can try EBay, various sellers on Amazon.com, Brick Owl, FaceBook Marketplace, Craigslist, but in my opinion, there is only one place to turn.

Full disclosure… I have a store on BrickLink with a bunch of retired sets and minifigures. So while BrickLink isn’t sending me money for this article, I do make money selling on BrickLink.

BrickLink was founded in June 2000 by LEGO fan Dan Jezek. Dan sadly passed away in 2010 after working to build up the marketplace. It was continued by Jay Kim and a team of folks until the LEGO Group purchased BrickLink in 2019. There was some minor turmoil with LEGO buying the secondary marketplace for its product, but it has mostly remained the same marketplace. BrickLink currently boasts over 10,000 sellers from 70 countries with over a million registered members. The total number of items for sale is… I have no idea. Probably in the millions.

So why should you join into the group?

1 - Fans selling to Fans

Many of the sellers on BrickLink are fans of LEGO themselves. They care about the product and aren’t going to send you something they wouldn’t want (usually). That’s not to say there aren’t a few bad apples in the barrel of BrickLink sellers, but overall I have never been disappointed. Read feedback ratings, check on the store terms page, and then see #2.


2 - Ability to verify items, check in on sellers, and select shipping

We’ve become used to placing online orders at Amazon.com, Walmart, Target, or other retailers. We click on the buy button and we expect our order to arrive in a certain period of time as advertised. You can do the same for BrickLink, but you also have the ability to do your research. If you want to buy that old modular building, Series 1 Collectible Minifigure, or 500 1x2 black plates, ask the seller for details. Get a picture of the item. Ask if it is used. What are the details that concern you and get them worked out before clicking on the buy button.

Then verify their feedback. What are other buyers saying about them? Do they ship promptly? Do they pack items well? Do they respond to questions?

And while BrickLink has an instant shipping function, take the extra time to get real shipping quotes. My instant checkout is set up to go from FL to WA (most expensive option). If you live in GA or TN or another closer location to a seller like me in FL, odds are shipping will be less. Ask and save yourself a few dollars while waiting a day or two.


3 - Wanted lists

I don’t build too many MOCs, but when I do, Bricklink is a great place to turn to for parts. I appreciate the Wanted List function. While it may take a bit to insert it all in if you have a lot of different pieces, It can save you in the long run. The system will tell you where you can buy the parts from. Does one seller cover everything you are looking for? While that seller may have a slightly higher price, you save by not having to pay for shipping from multiple buyers. You can also update it when you have acquired some of the pieces you need or maybe you’ve found some in your own collection.


4 - Ratings matter

You often see stories about Amazon.com ratings and how vendors often pay people to write reviews. I’m pretty sure no one on Bricklink has done that. Besides, you don’t get a lot of space to post feedback. If the seller has hundreds or thousands of positive reviews that all seem to say the same thing, you will probably say the same thing too. Yes, there is always that person who leaves a neutral or negative rating, but what do the vast majority of people say?

If the person is new to selling and doesn’t have a lot of feedback, then take the time to ask them questions. Send a message to ask what you are concerned about and to verify how the order will go. If the seller doesn’t respond or doesn’t give you the answers you are looking for, check in with another seller.


5 - You can see all the prices people are charging and work to find the best one

BrickLink will show you a price guide for each set/part/minifigure/item. You can see the last six months of sales and then what is available for sale at the current time. This is pretty useful if you’re trying to find the lowest priced option or to find someone who has 80 1x4 red bricks.

With this information, you can also negotiate if you want to take the time. The seller with the lowest price may have a higher cost to ship. Another seller may have a higher cost, but have a lower shipping cost. Ask the sellers if they can match prices. Will the one lower the shipping cost to make the sale? Will the other lower the item cost to make the sale? If they say no, but you still want the item, you can still purchase it.


6 - Low fees equal lower prices than some other marketplaces (usually)

I’ve had a few potential buyers complain about the price I’m charging for a set. I will then look the set up on EBay and Amazon to see what it’s going for. More often then not, the price is much higher. Some EBay sellers include shipping so that can cut down on the price difference, but look around if you want the best price. BrickLink charges a 3% fee to the seller on top of PayPal or Stripe fees. EBay charges 10% to 12% or so. Amazon can be a fee in upwards of 20%.


7 - If you can’t find it on BrickLink, it might not exist

The stock on BrickLink is pretty extensive. You can find just about any part, minifigure, or set produced. If you can’t find it there, it might not be anywhere else either.


8 - Studio 2.0

BrickLink has its own digital building program. You can build with endless amounts of digital bricks and create whatever you want. Then you can upload it for the world to see or buy all of the bricks you need to make the MOC into reality. While I prefer building with physical bricks, this is a great option if you want to build something large and don’t have all the parts or you don’t have space to build.


9 - Custom sets to piece together

Once you’ve built a MOC in Studio, you can upload it for the world to see. The digital instructions are not LEGO set quality, but you can re-build what someone else designed and it will let you buy the parts as well.


10 - Become a seller

Do you have a bunch of sets lying around you want to sell off? Maybe you have a whole bunch of bricks you no longer want. Well you can apply to become a seller. When I became a seller, I don’t remember the application process so it is either new or wasn’t a big deal a few years back. I don’t know how that works, but once you are in, you can start to sell. I fully admit that it will not lead to instant riches, but I can’t complain about the extra income and my NLS is happy that my store funds my personal brick addiction.


Anything I missed?

Happy BrickLinking!

Set Review: #910028-1: Pursuit of Flight - Bricklink Designer Program

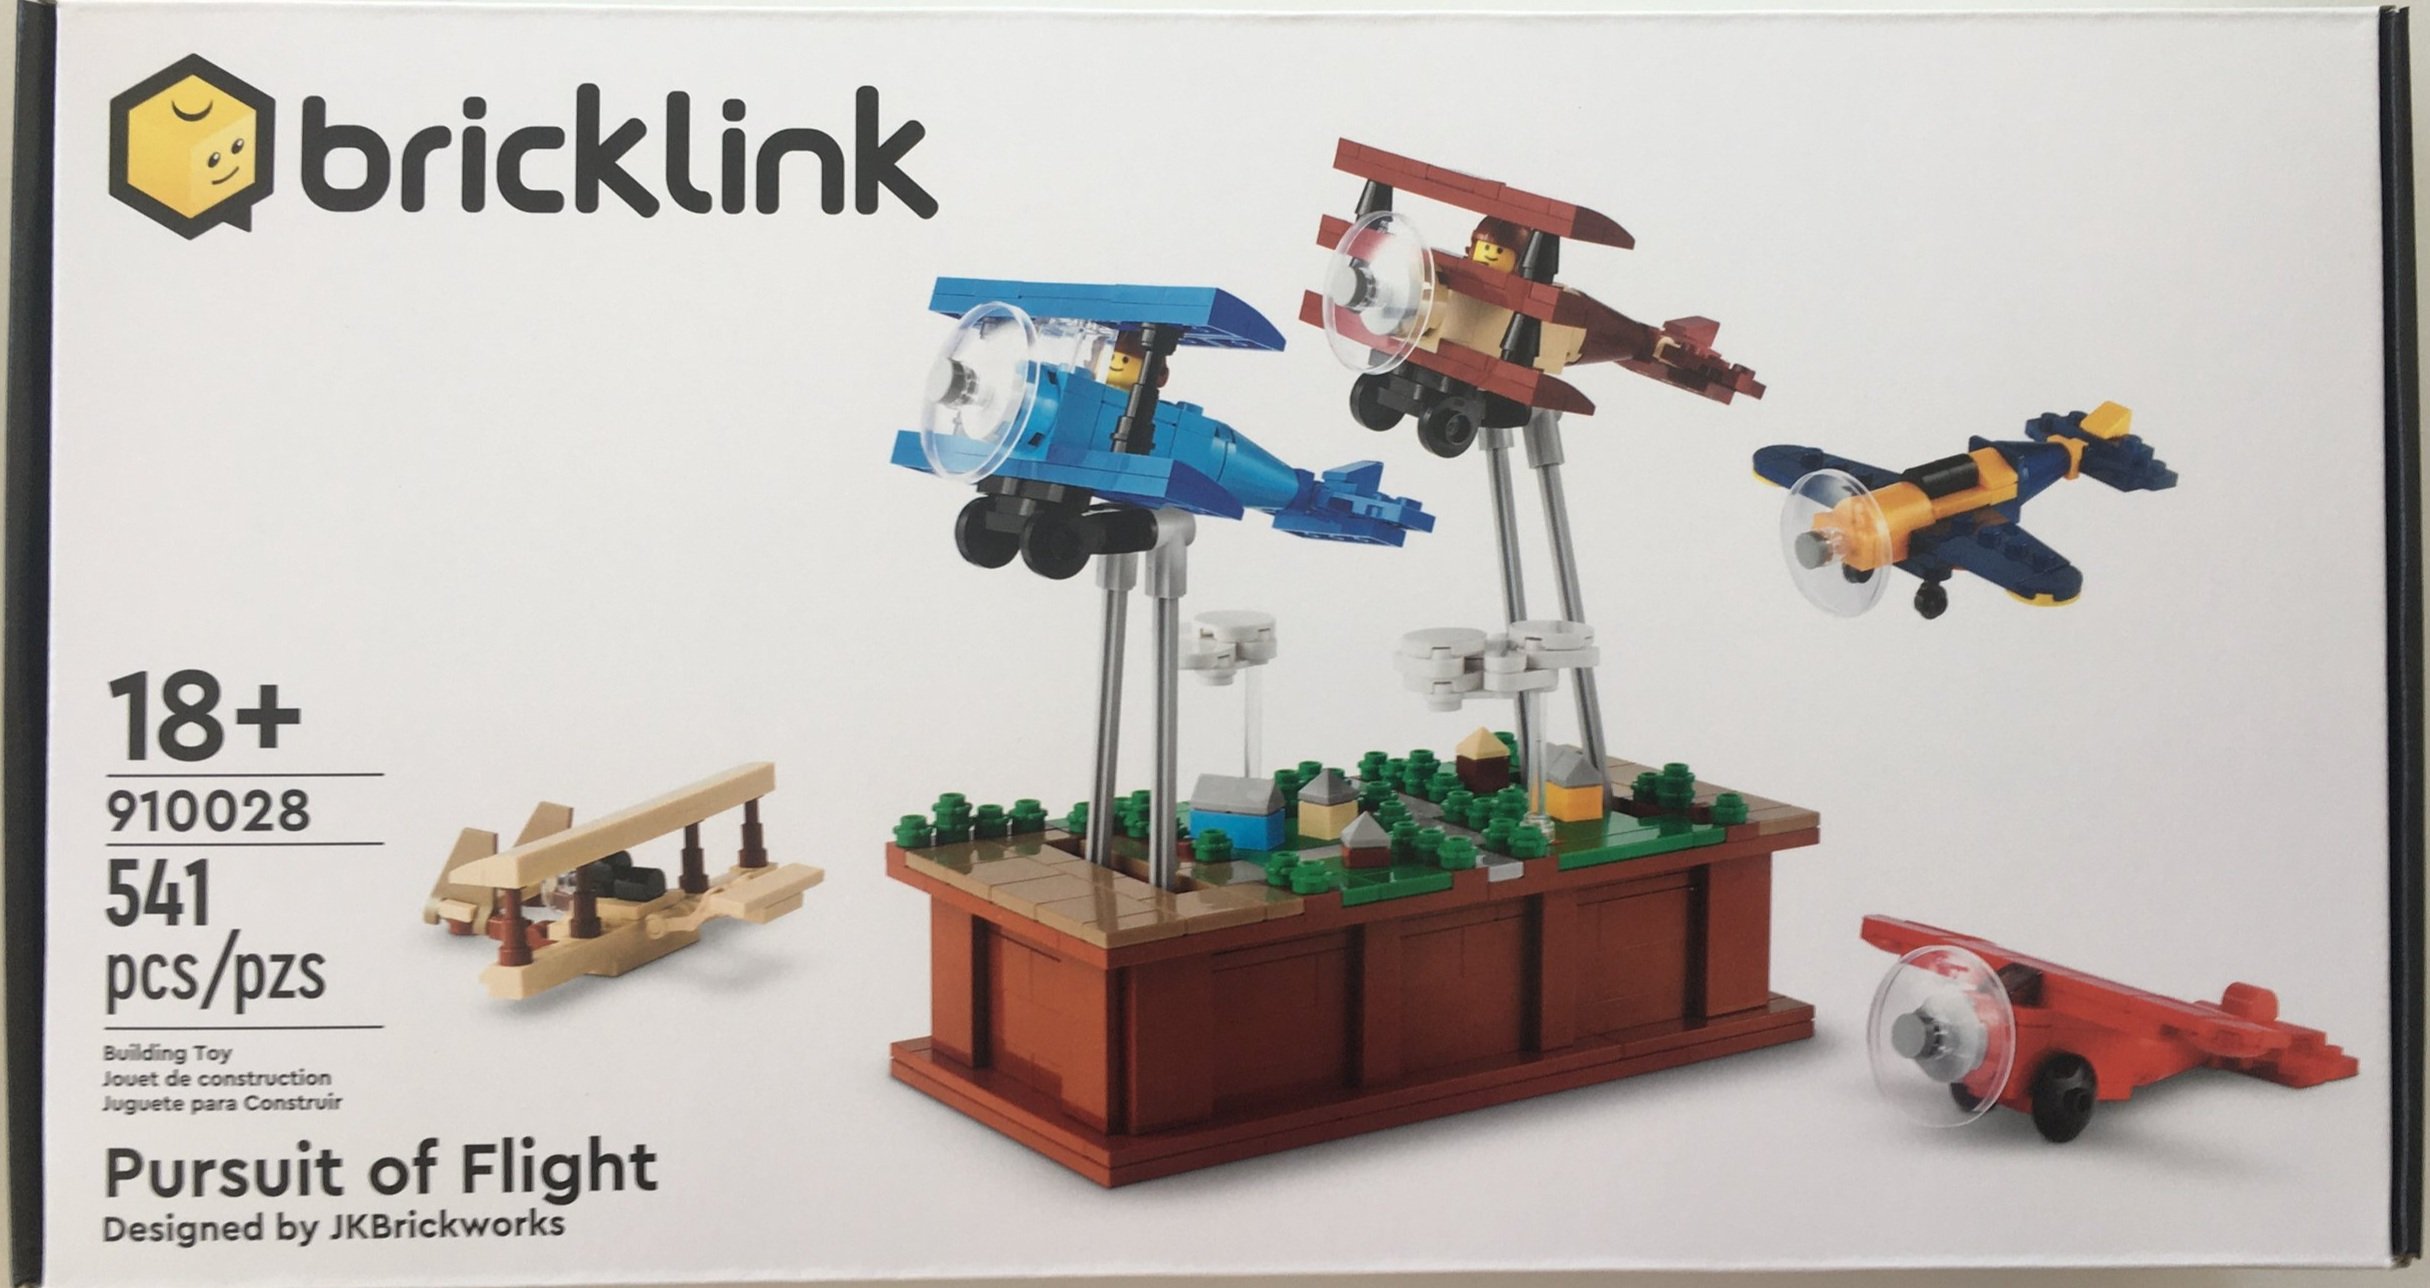
Round one of the Bricklink Designer program happened back in the summer of 2021. The sets that I ordered finally got delivered in March 2022. I believe Europe got their deliveries first and then North America. This set is #910028-1: Pursuit of Flight. It was designed by JK Brickworks which is made up of Jason Allemann and Kristal. The set contains 541 pieces and retailed for $54.99 in the US. This works out to $0.102 per piece. The program only allowed between 5,000 and 10,000 copies of the set to be produced so you’ll only find this one on BrickLink or other secondary sales locations. Another option is to piece out the set using the instructions available online and building it yourself. I’m not sure how much that would cost, but it could save you some if you have a lot of the parts on hand or if you substitute colors and pieces with parts in your inventory or that you can pick up used.

The box is white with BrickLink’s logo. The front and back both have the logo while the front only lists the standard LEGO lettering with set number, age range (18+), piece count, the warning not to swallow tiny pieces, and the set name with designer. The back just gives another picture of the set with a different view and different planes attached. You’ll note on the bottom of the picture I took of the back is the BrickLink seal. I guess they are concerned about people opening the set and then re-closing it and trying to sell it off as new. Not a problem with this sticker.

The side of the box as you lift open the cover says “Bricklink Designer Program” and “2021 Invitational.”

Here’s how the set was packed. Instead of instructions in the form of a booklet, you get a card. The card gives you the option to scan a QR code which lets you download an app to view 3D instructions. I used the app instructions. They weren’t too bad, but it took some getting used to after building with paper booklets for so many years. I liked the ability to pivot the model on the screen to see other sides. To improve it, I would add in the ability to tell colors apart better; Multiple shades of blue and brown/red in this set were a challenge to pick out. I’m glad the set wasn’t much larger. Also, I would add in the ability to line up Technic pins like in the paper instructions to verify that you have the right size.

The card provided a link to go and download a .pdf version of the instructions. I tried the link, but it didn’t work. However, if you go to Bricklink and the Designer Program page, you can go to the page for each individual model and download the instructions there. You can still use a screen, or you can print them (if you have a lot of ink and paper).

This set contains four parts bags numbered one through three with two bags labeled number three. Bag one contains a teal brick separator to add to your collection.

Bag one builds the main base with the majority of the Technic parts. The brick section is fairly simple to put together with mostly studs on top. The Technic build just required that you watch how pieces were lined up and how long the various axles were. Overall, not too bad though.

The second bag adds a top to the box section that you built with bag one. The top has a microscale village with some buildings, roads, and trees. Using clear antenna pieces and some white plates and tiles, you add in some clouds. The last section you add in is the last of the Technic pieces. The longer axles were slightly hard to install as the pieces they attach to weren’t set in place below or at least one isn’t. I had to fish for that one, get the axle installed, and then I could attach the second one. Not a huge deal, just something to pay attention to if you build this one.

The last part of the build is assembling the aircraft in bag three. This set comes with five different designs, but you could easily add your own as desired. For this one, you get a triplane, a biplane, two single wing aircraft (one with the wing below the fuselage and one with the wing above the fuselage), and then a small version of the Wright Flyer. The triplane and biplane both come with a minifigure head with a flight cap to have it look like there’s a pilot (although it’s too small of a plane to fit the rest of the minifigure). The other three do not have pilots. You can interchange them as desired to “fly” them on the set. While the original Wright Flyer didn’t do a whole lot of maneuvering, it’s a fun concept to add that aircraft in.

Overall, I like the set and think it’s something out of the ordinary that we haven’t seen before in the Ideas line or elsewhere. The price is a bit steep considering what you’re getting, but it is a “low production” run set so that’s what you get. I’m curious to know if anyone built this on their own with their own parts or parts sourced from Bricklink or elsewhere. I’m looking forward to more of the Bricklink Designer Program sets.

Happy building!

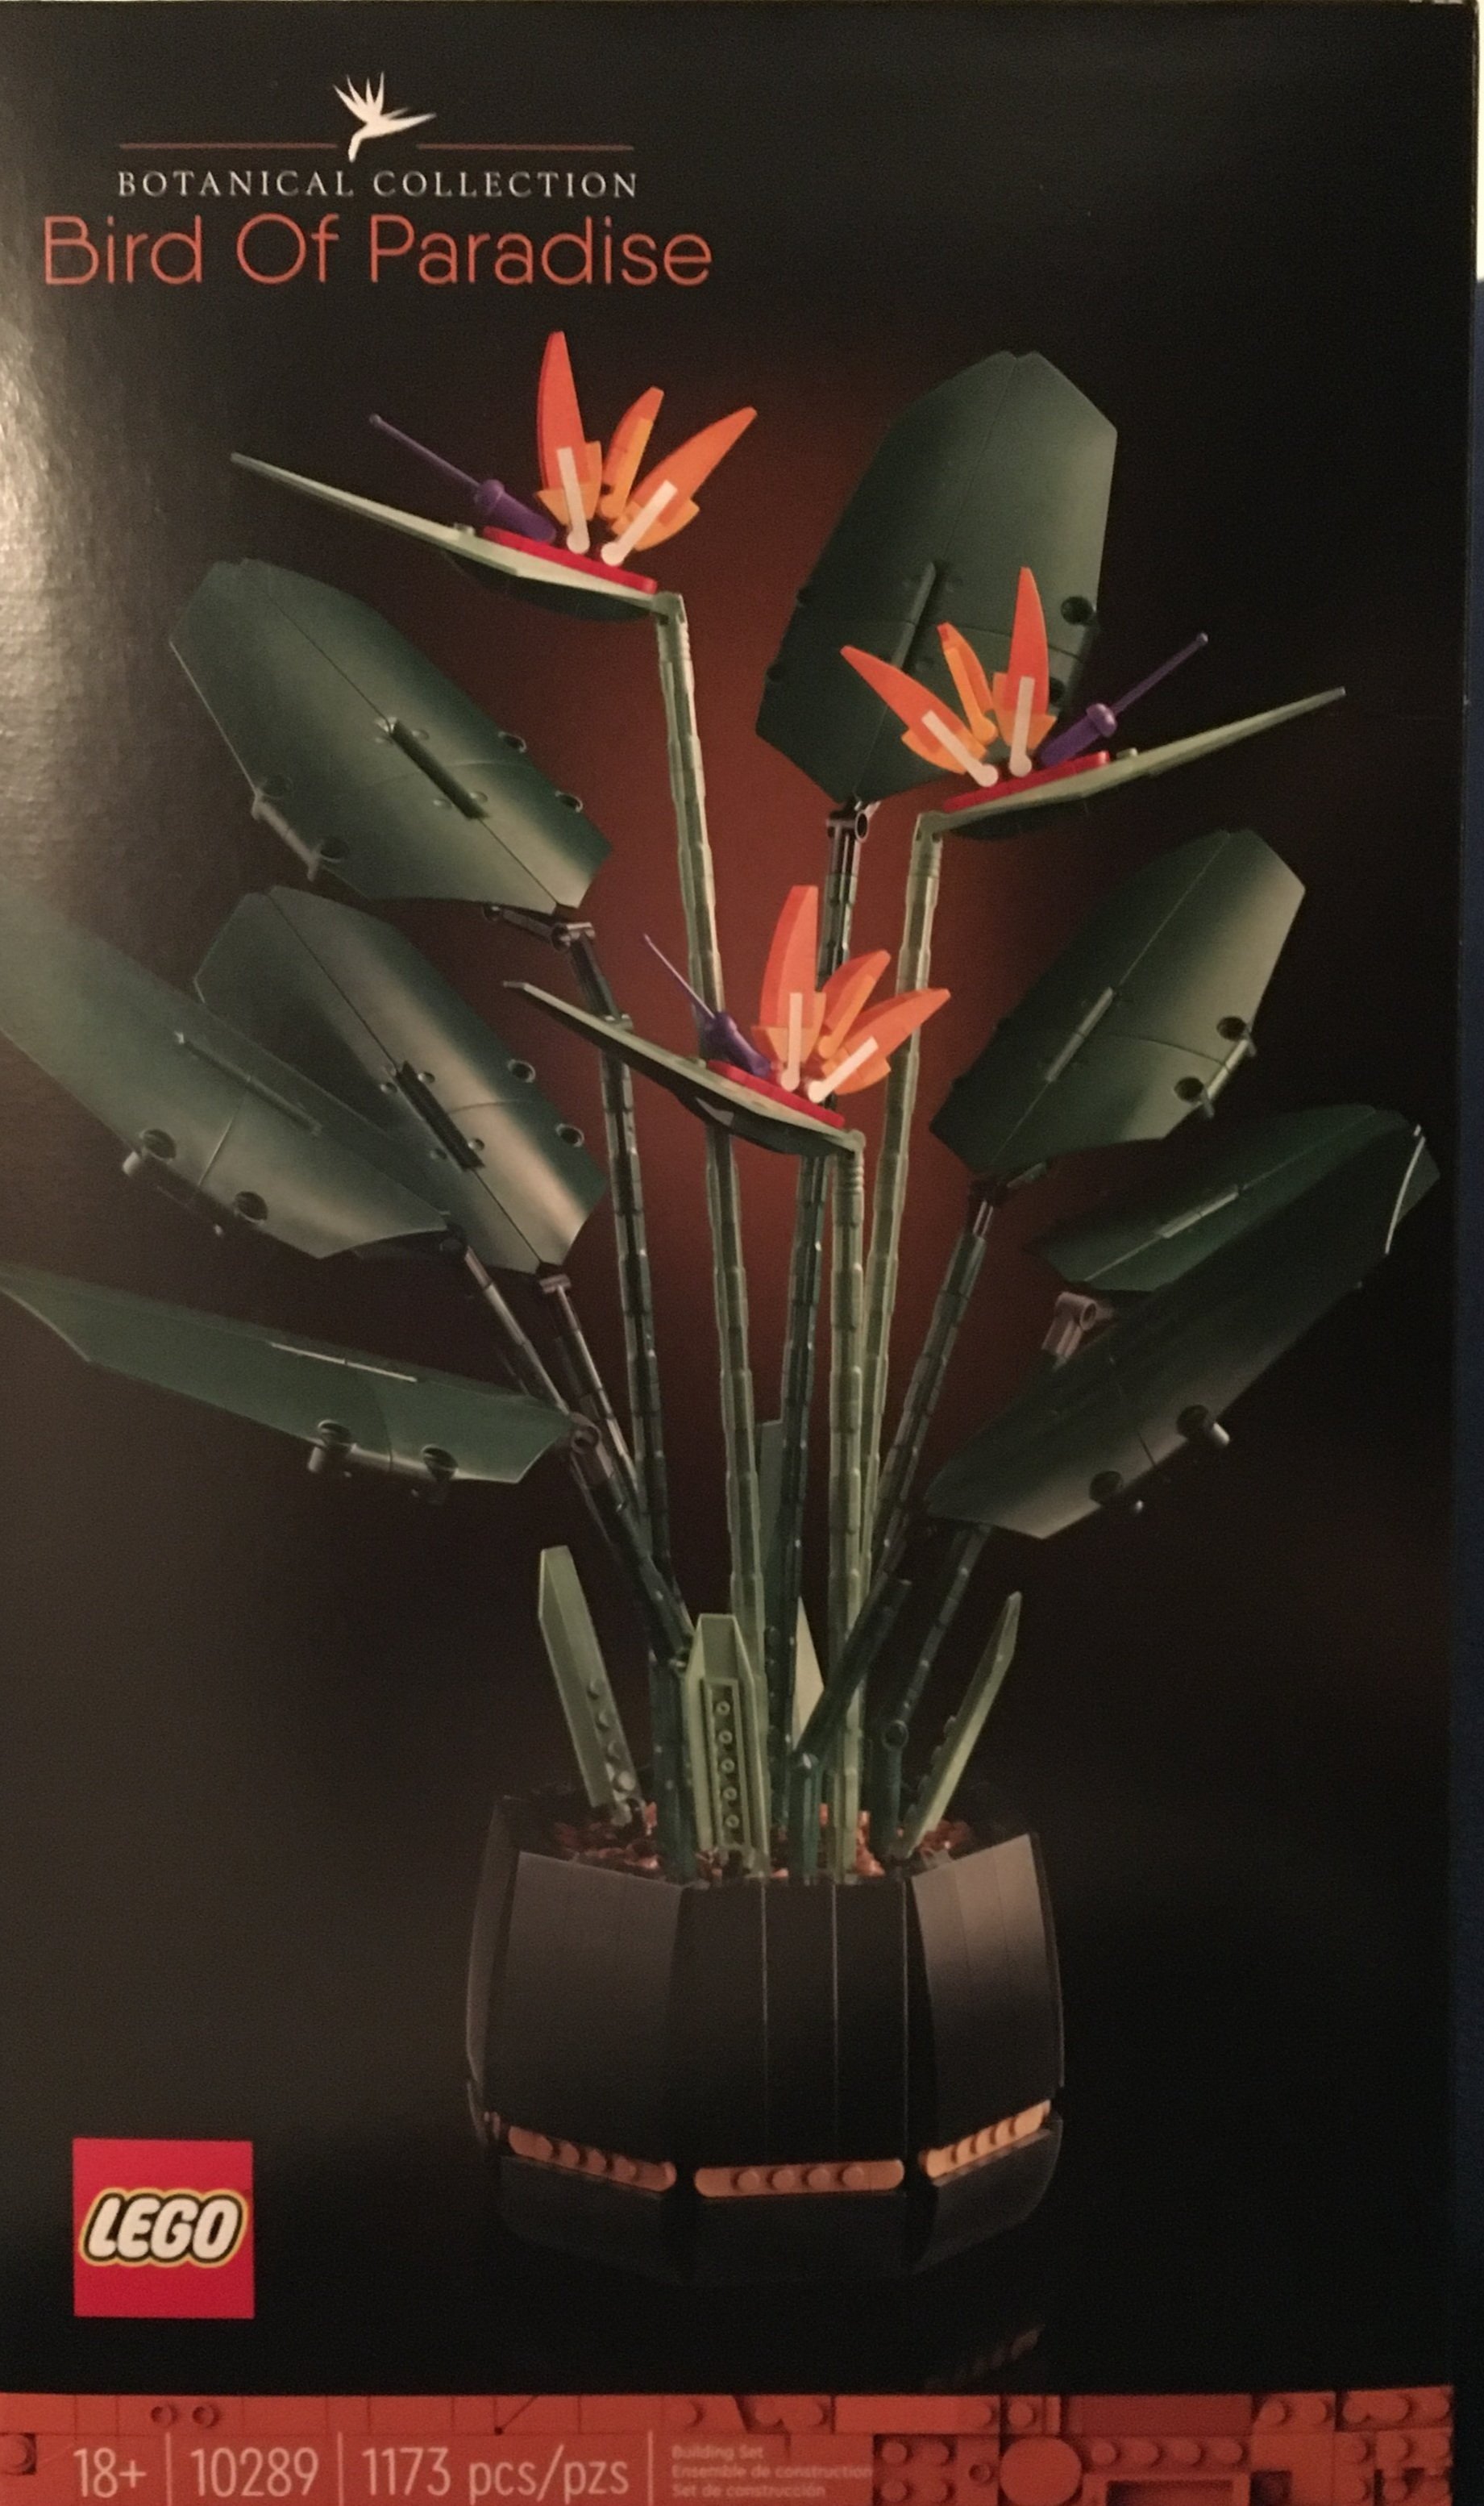
Set Review - #10289-1: Bird of Paradise - Botanical Collection - 18+

LEGO’s journey into plants started with #10280-1: Flower Bouquet. This set is another addition to the LEGO plant line. It’s #10289-1: Bird of Paradise. It was released in the US on 19 June 2021 and contains 1,173 pieces. It retails for $99.99 and works out to $0.085 per piece. LEGO had the set on sale for $69.99 around the Christmas 2021 time frame and I picked it up then. I thought $100 was a bit much for this set and I assume it was put on sale as it was not selling as good at the Flower Bouquet has sold.

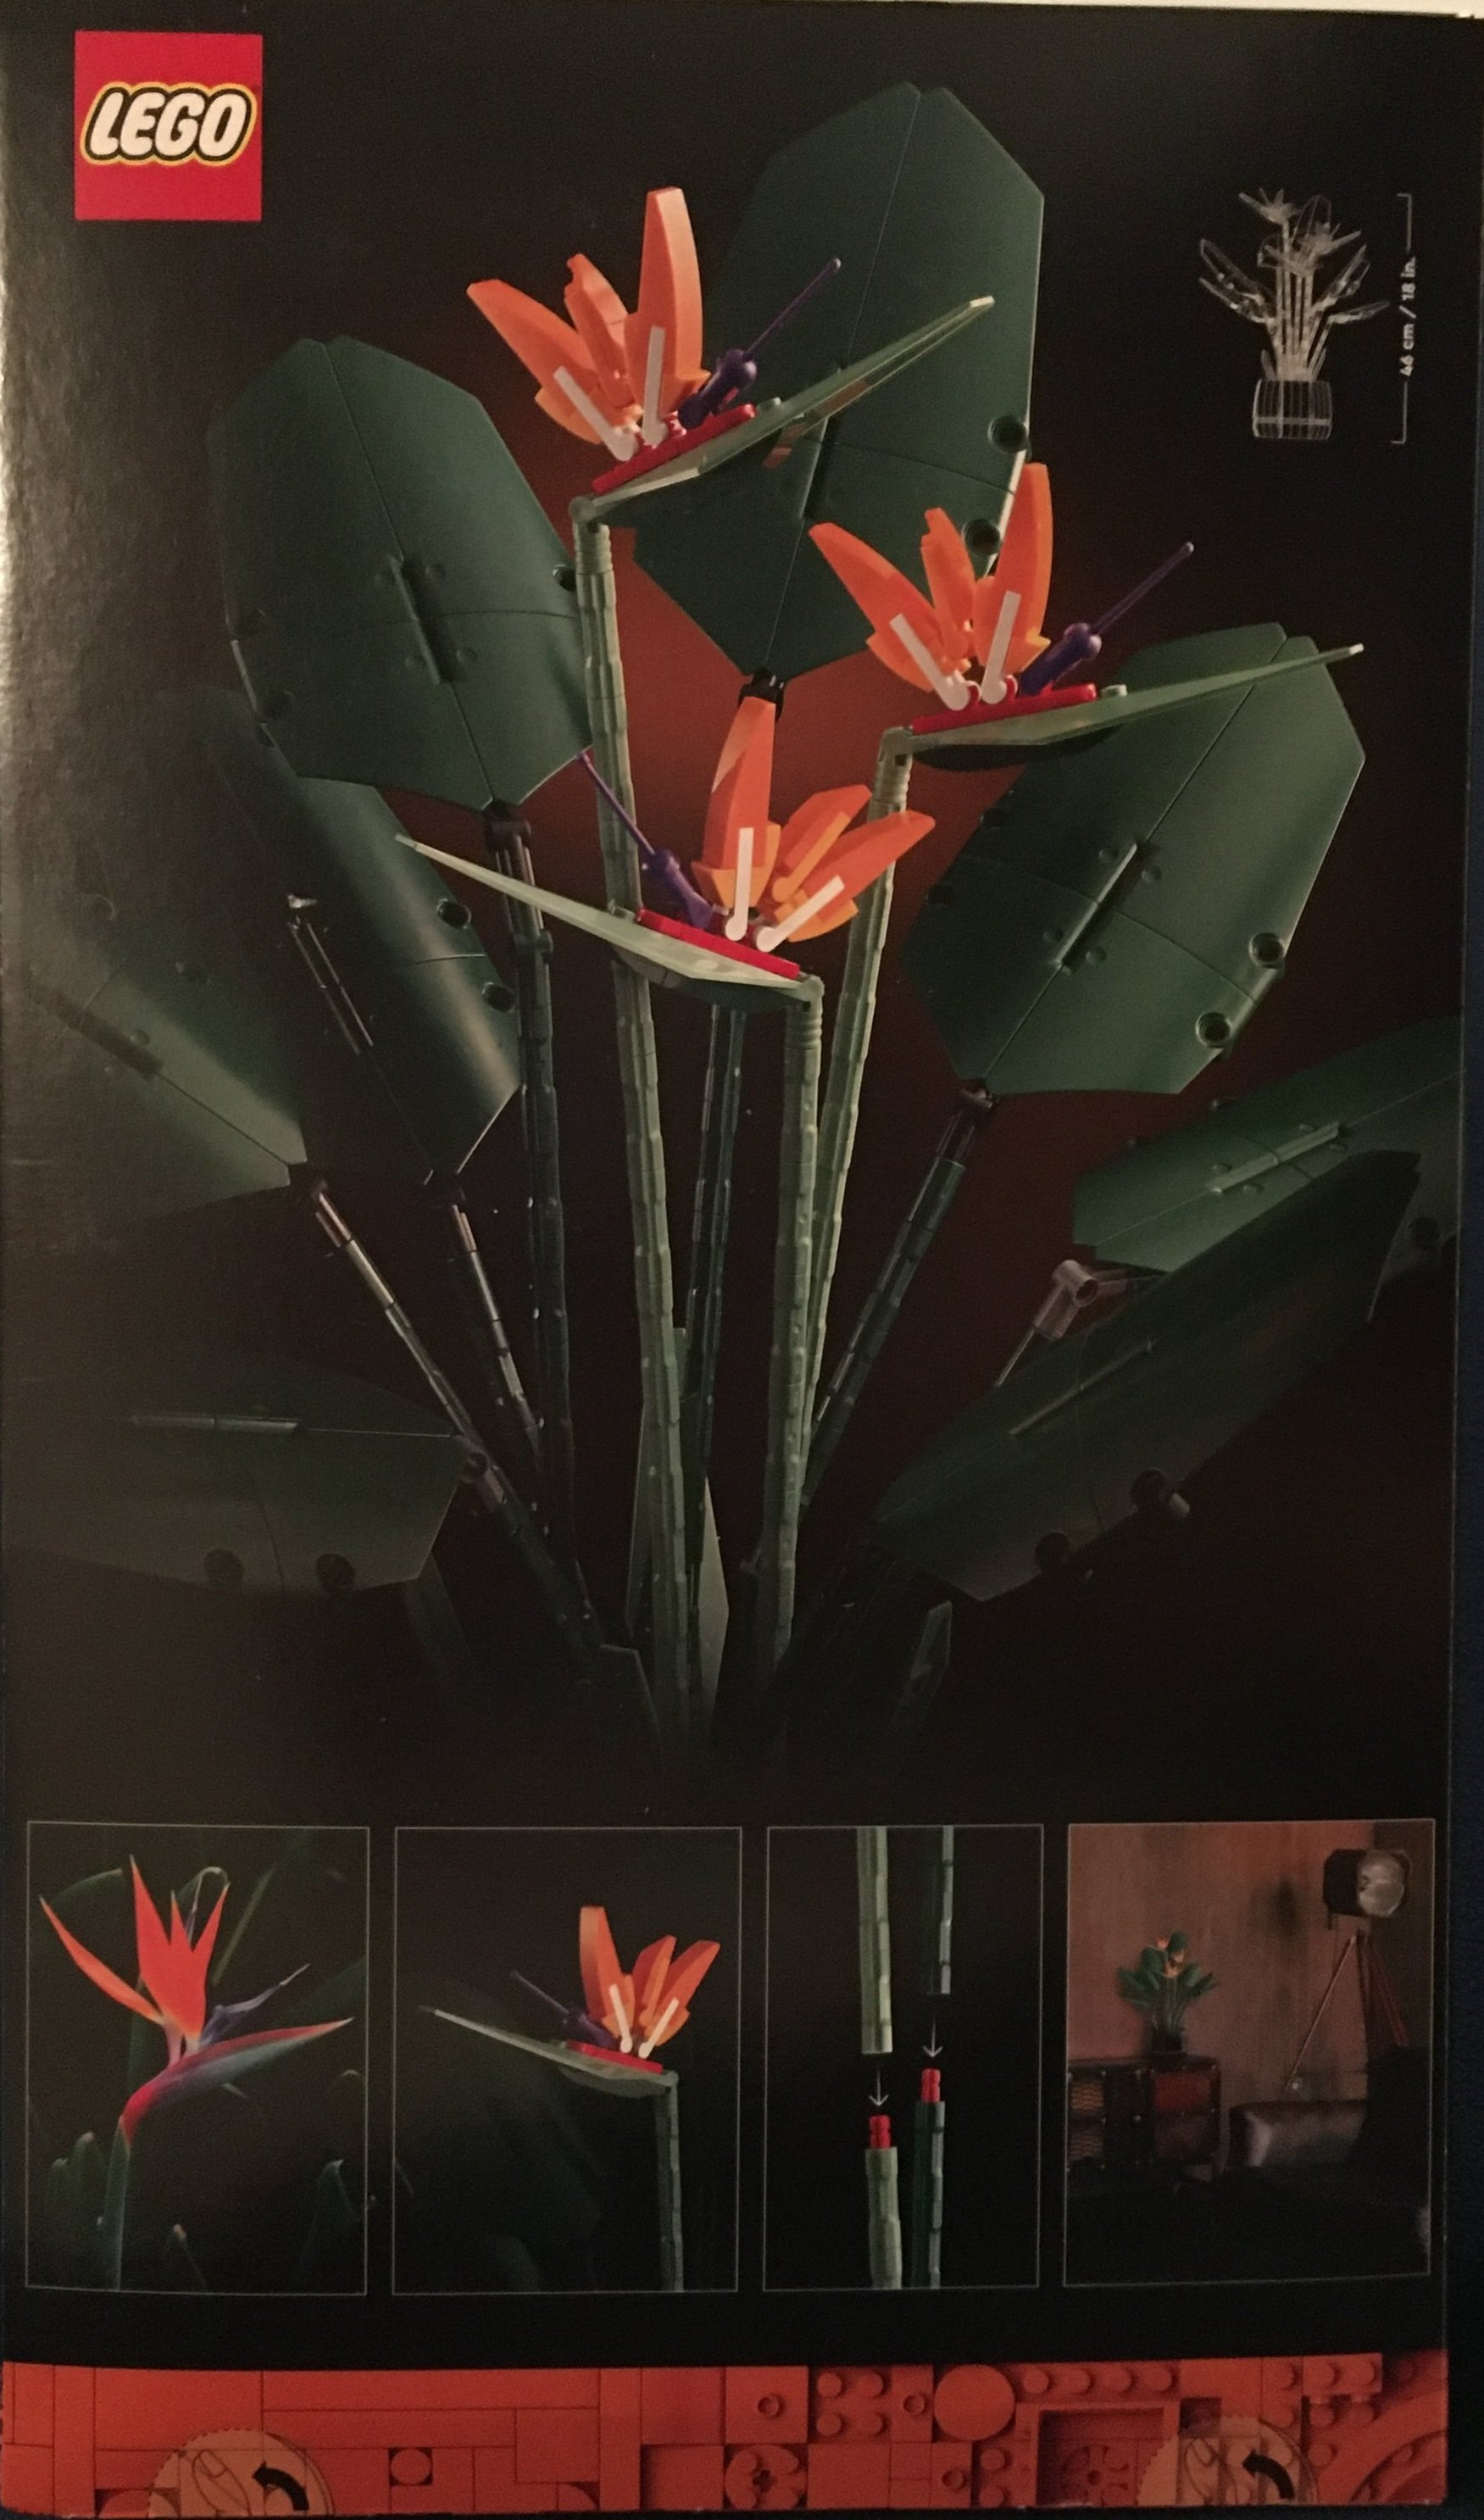
The box has a picture of the set assembled on the front and then another picture on the back. The back also shows some details, lists dimensions, and shows what the set looks like if you place it in a staged room in your photography area.

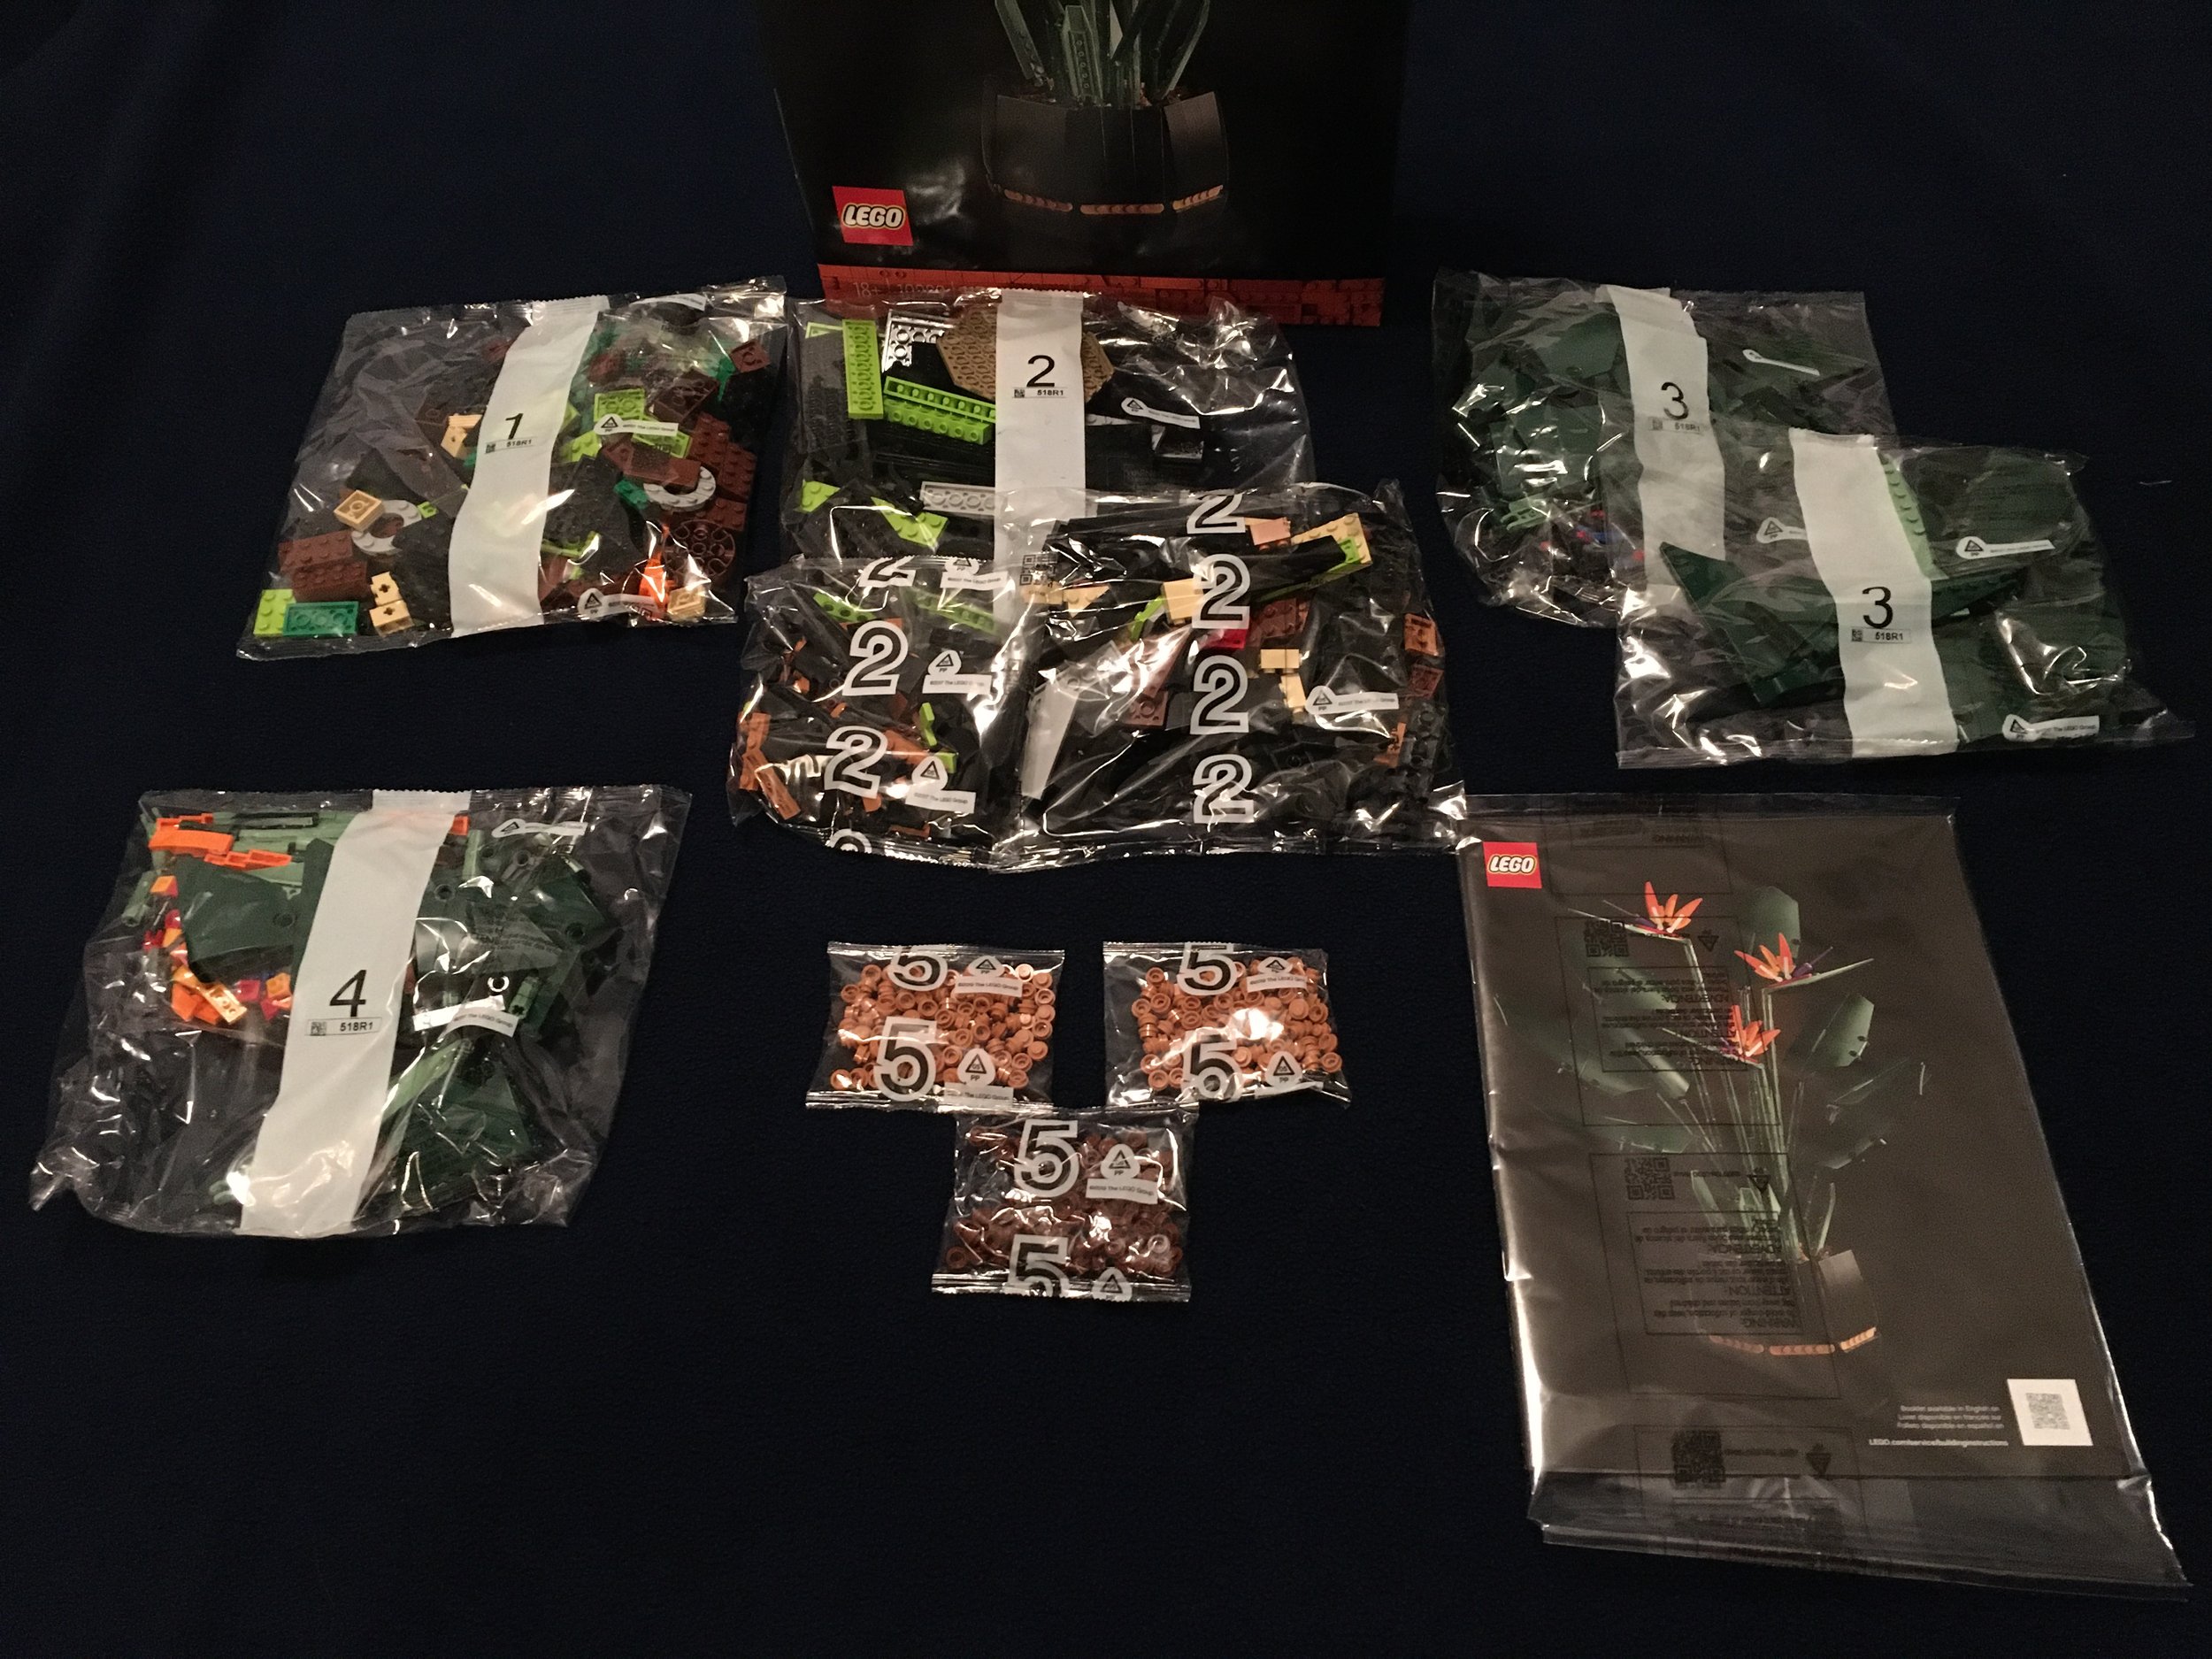
The set contains 10 parts bags numbered one through five. The instructions come wrapped for protection.

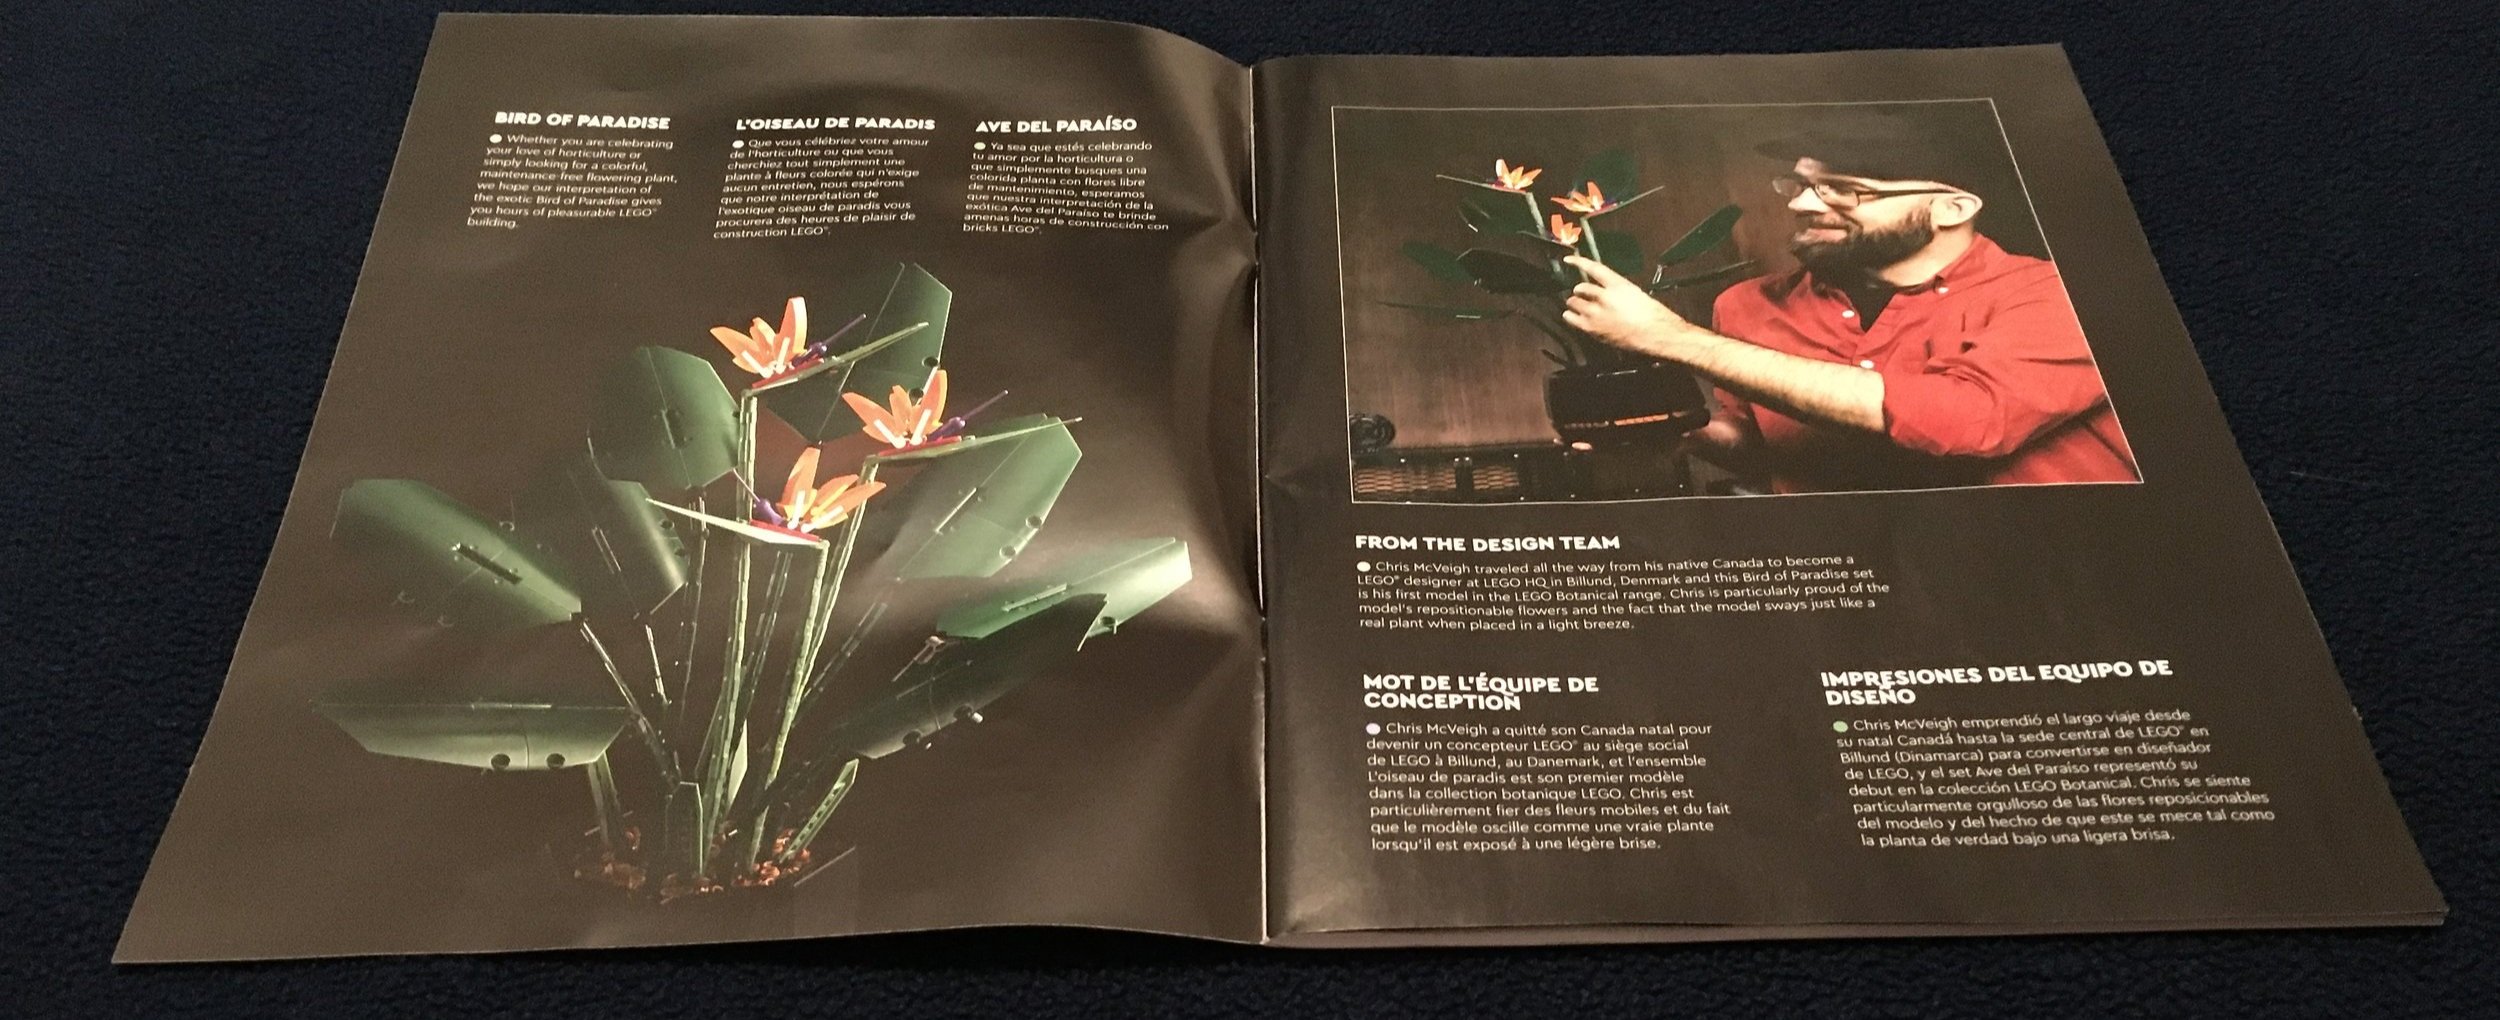
The instructions provide some details about the actual plant and include a picture of the set designer Chris McVeigh

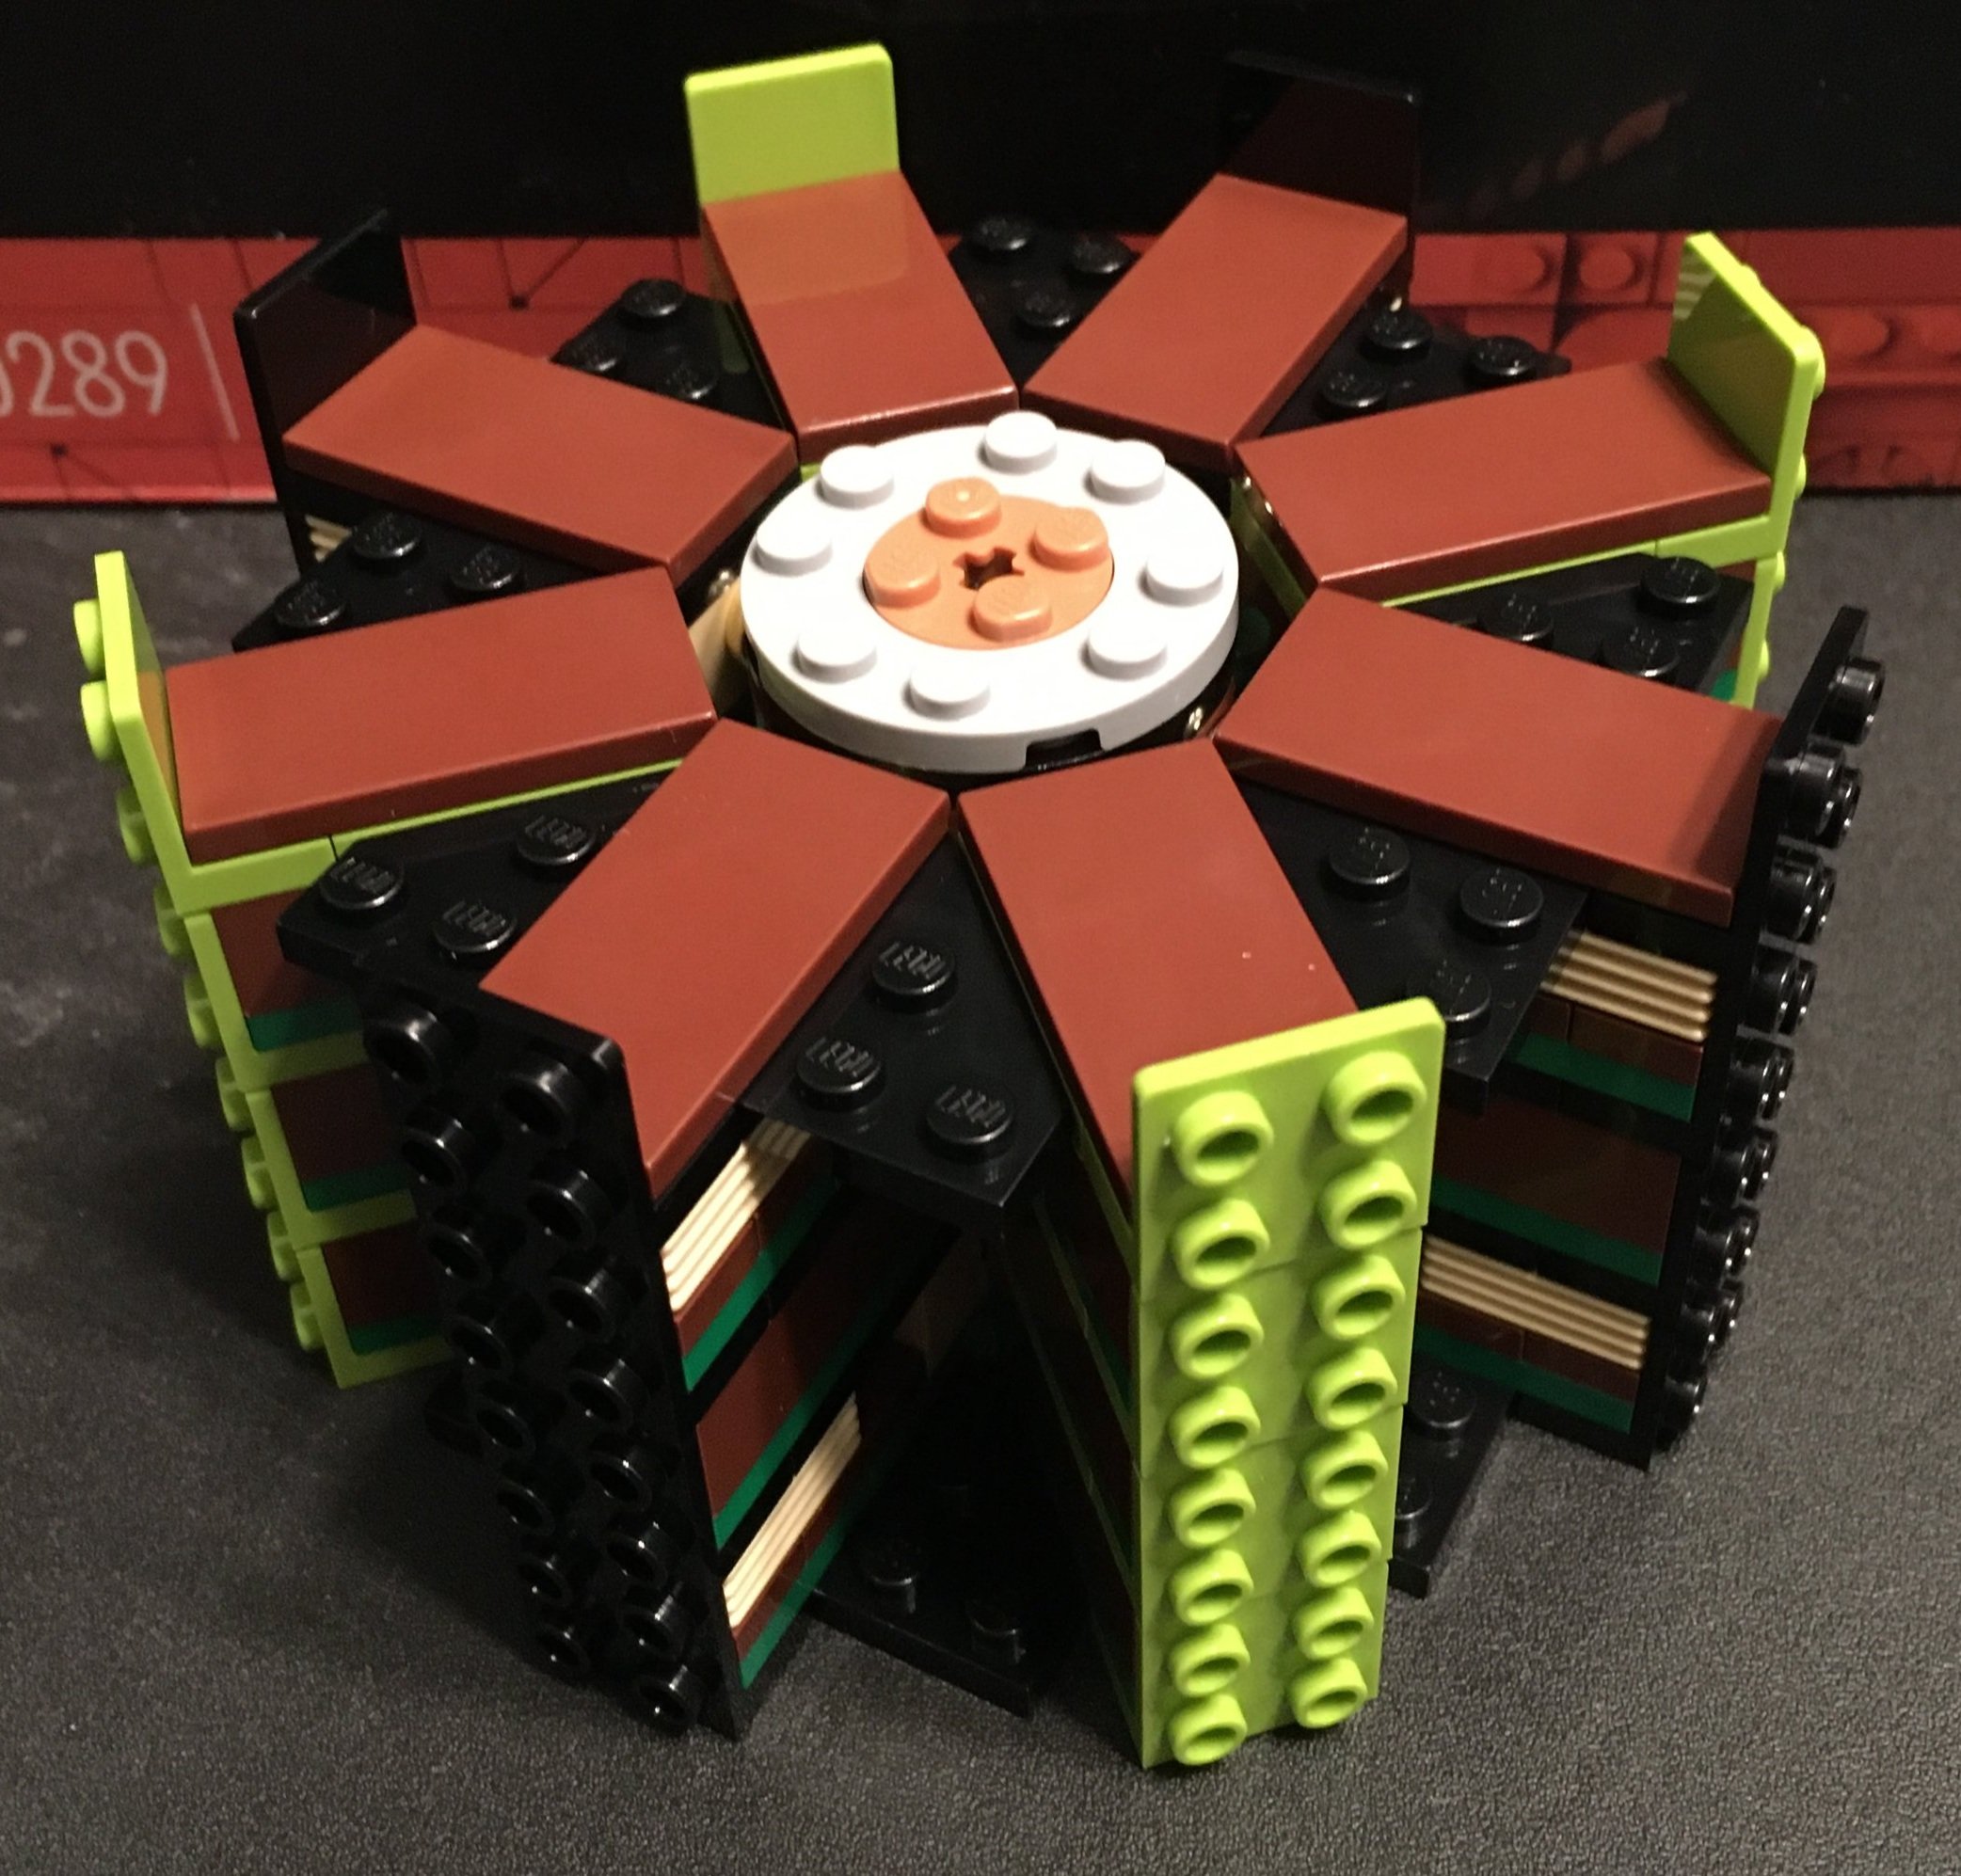
The first bag starts to build the pot for the plant. It’s always interesting to see how different designers come up with ways to create rounded builds using a system built on right angles. This one is unique from what I have seen in the past and it uses mostly common pieces. The only one odd is a 2x2 double plate with textured sides. I’m not sure why they used this piece versus two plates, but it’s cool that you get multiples of these pieces with this set.

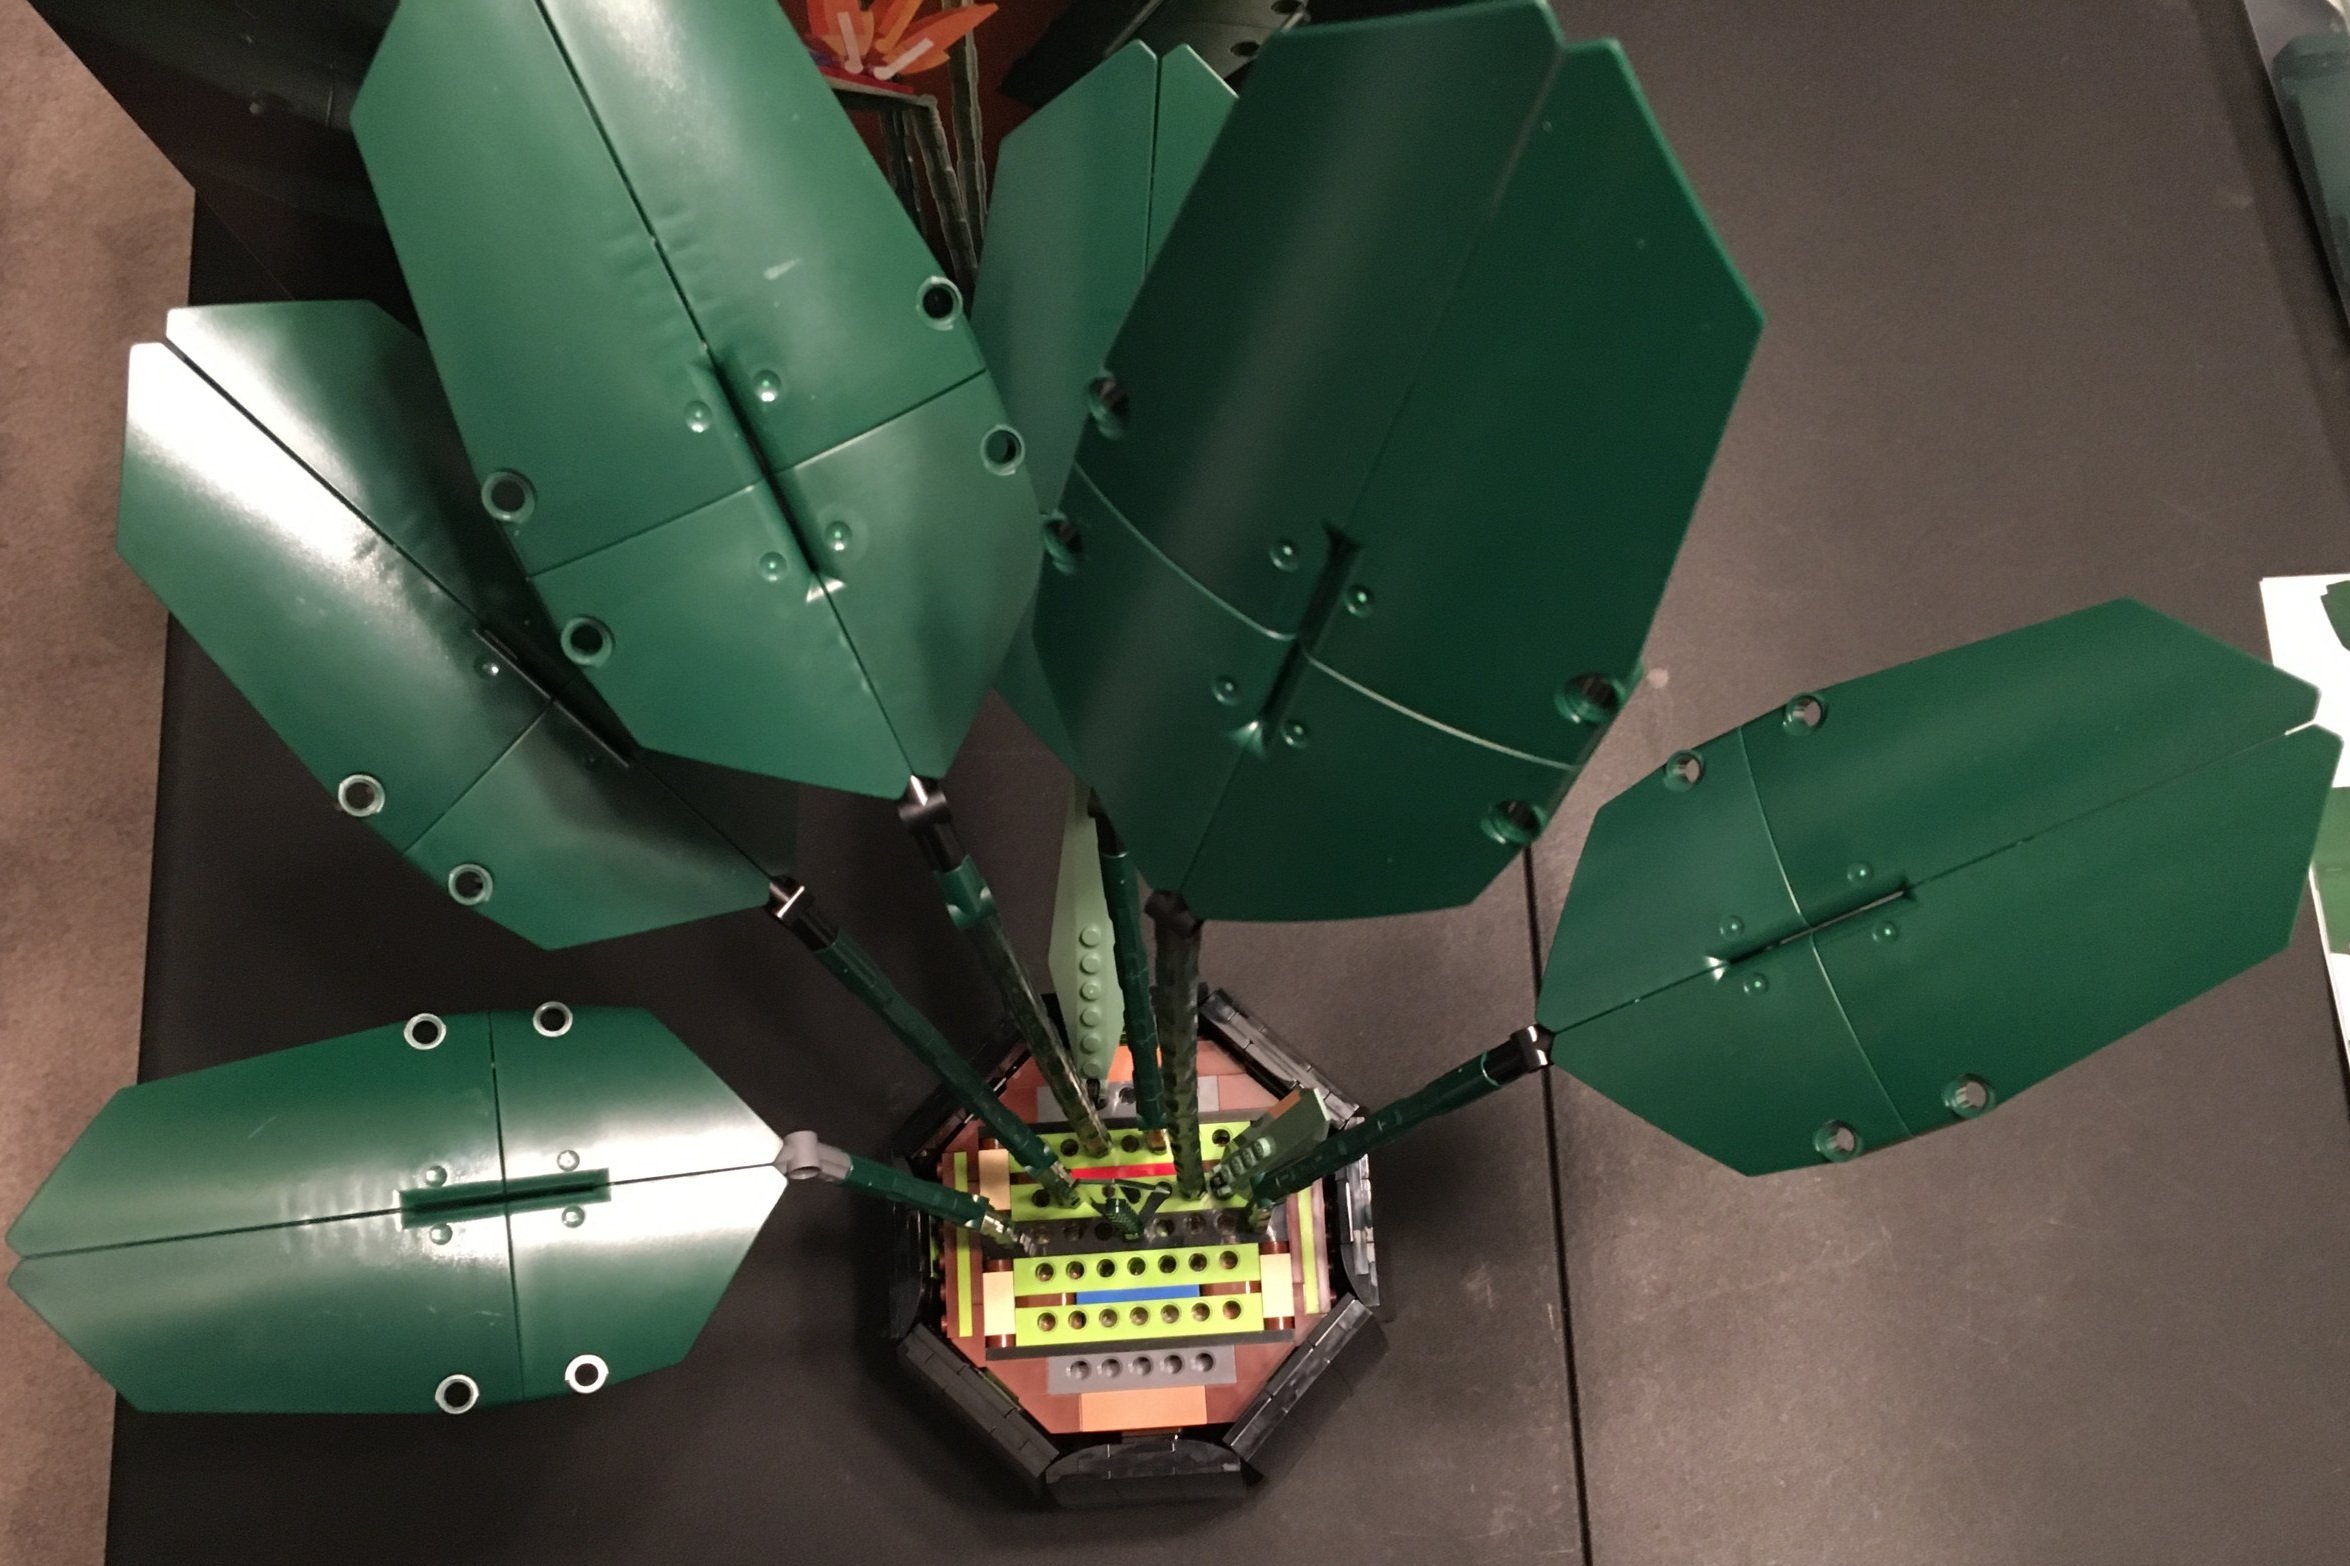
The second bag adds the outsides of the pot for the plant and then it adds a top section with Technic pieces. The outside pieces of the pot are all the same… well you build three one way and then three another way, but they are mostly the same. The Technic section comes into play when you attach the plant pieces next.

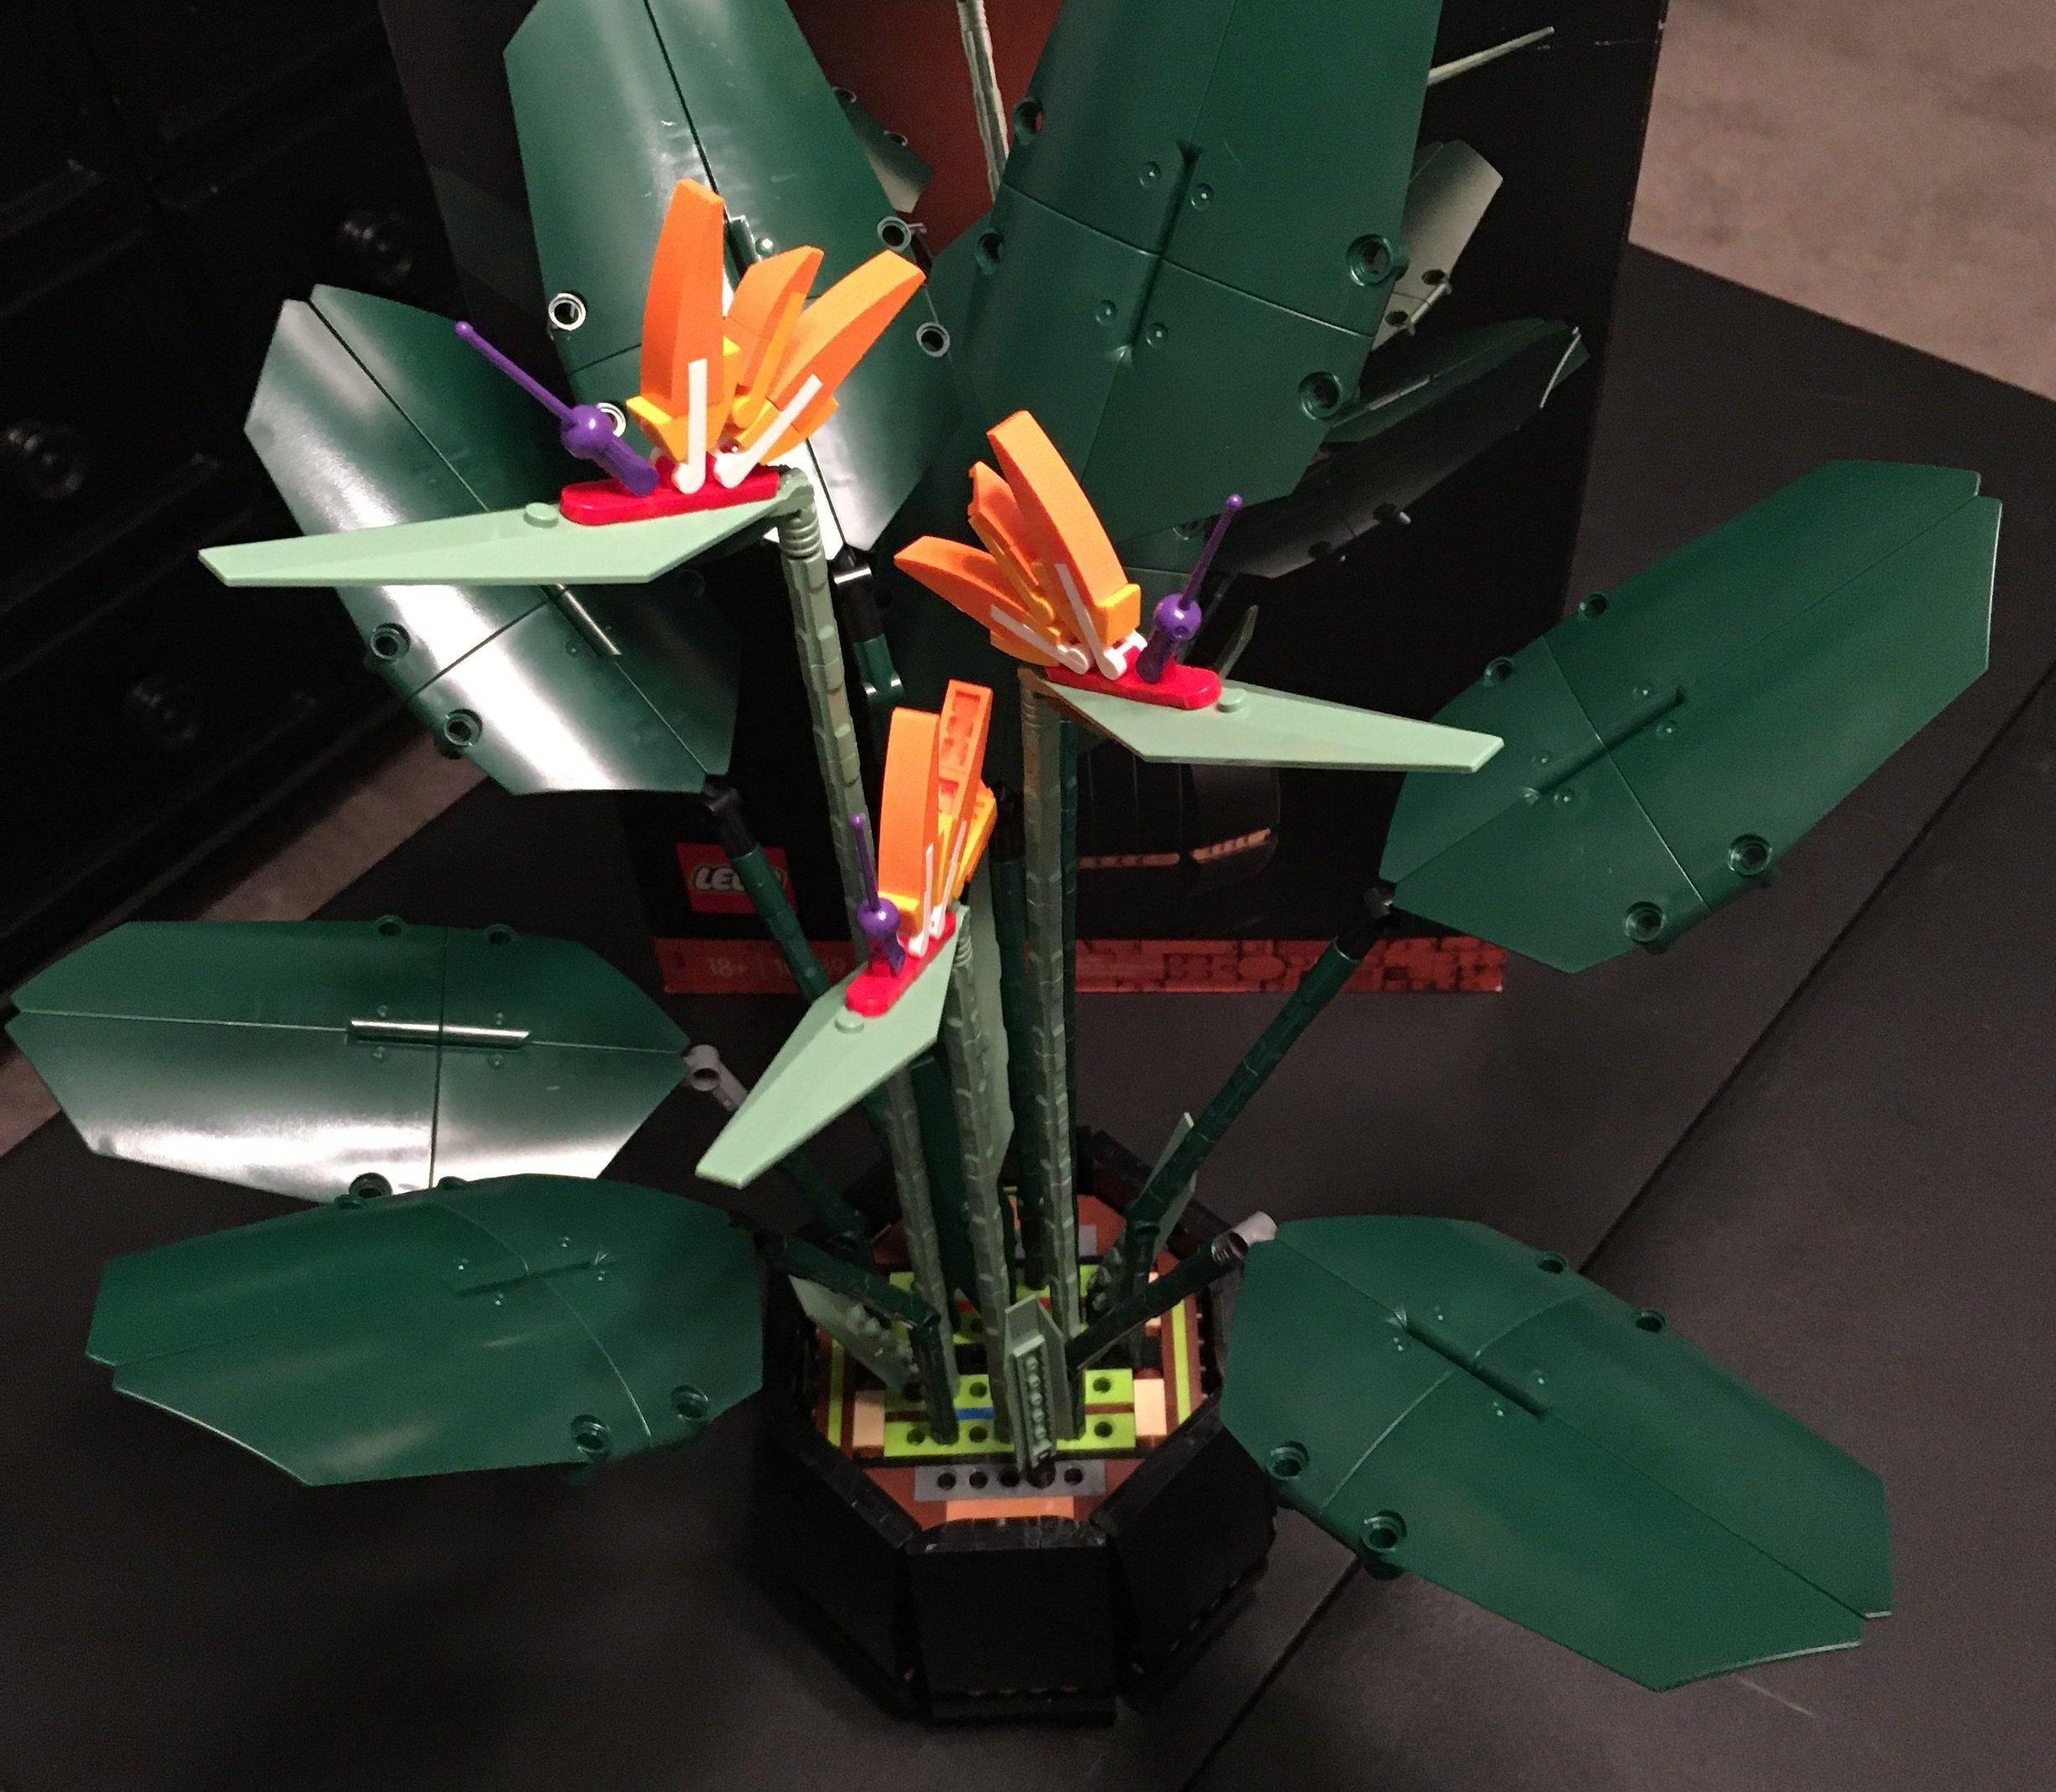
The third bag adds the larger leaves for the plant and some of the smaller leaves on the bottom. I followed the instructions for where each one goes, but you can place them where you want. You can also adjust the height of the leaves as well. Again, I just followed the instructions for the height of each leaf.

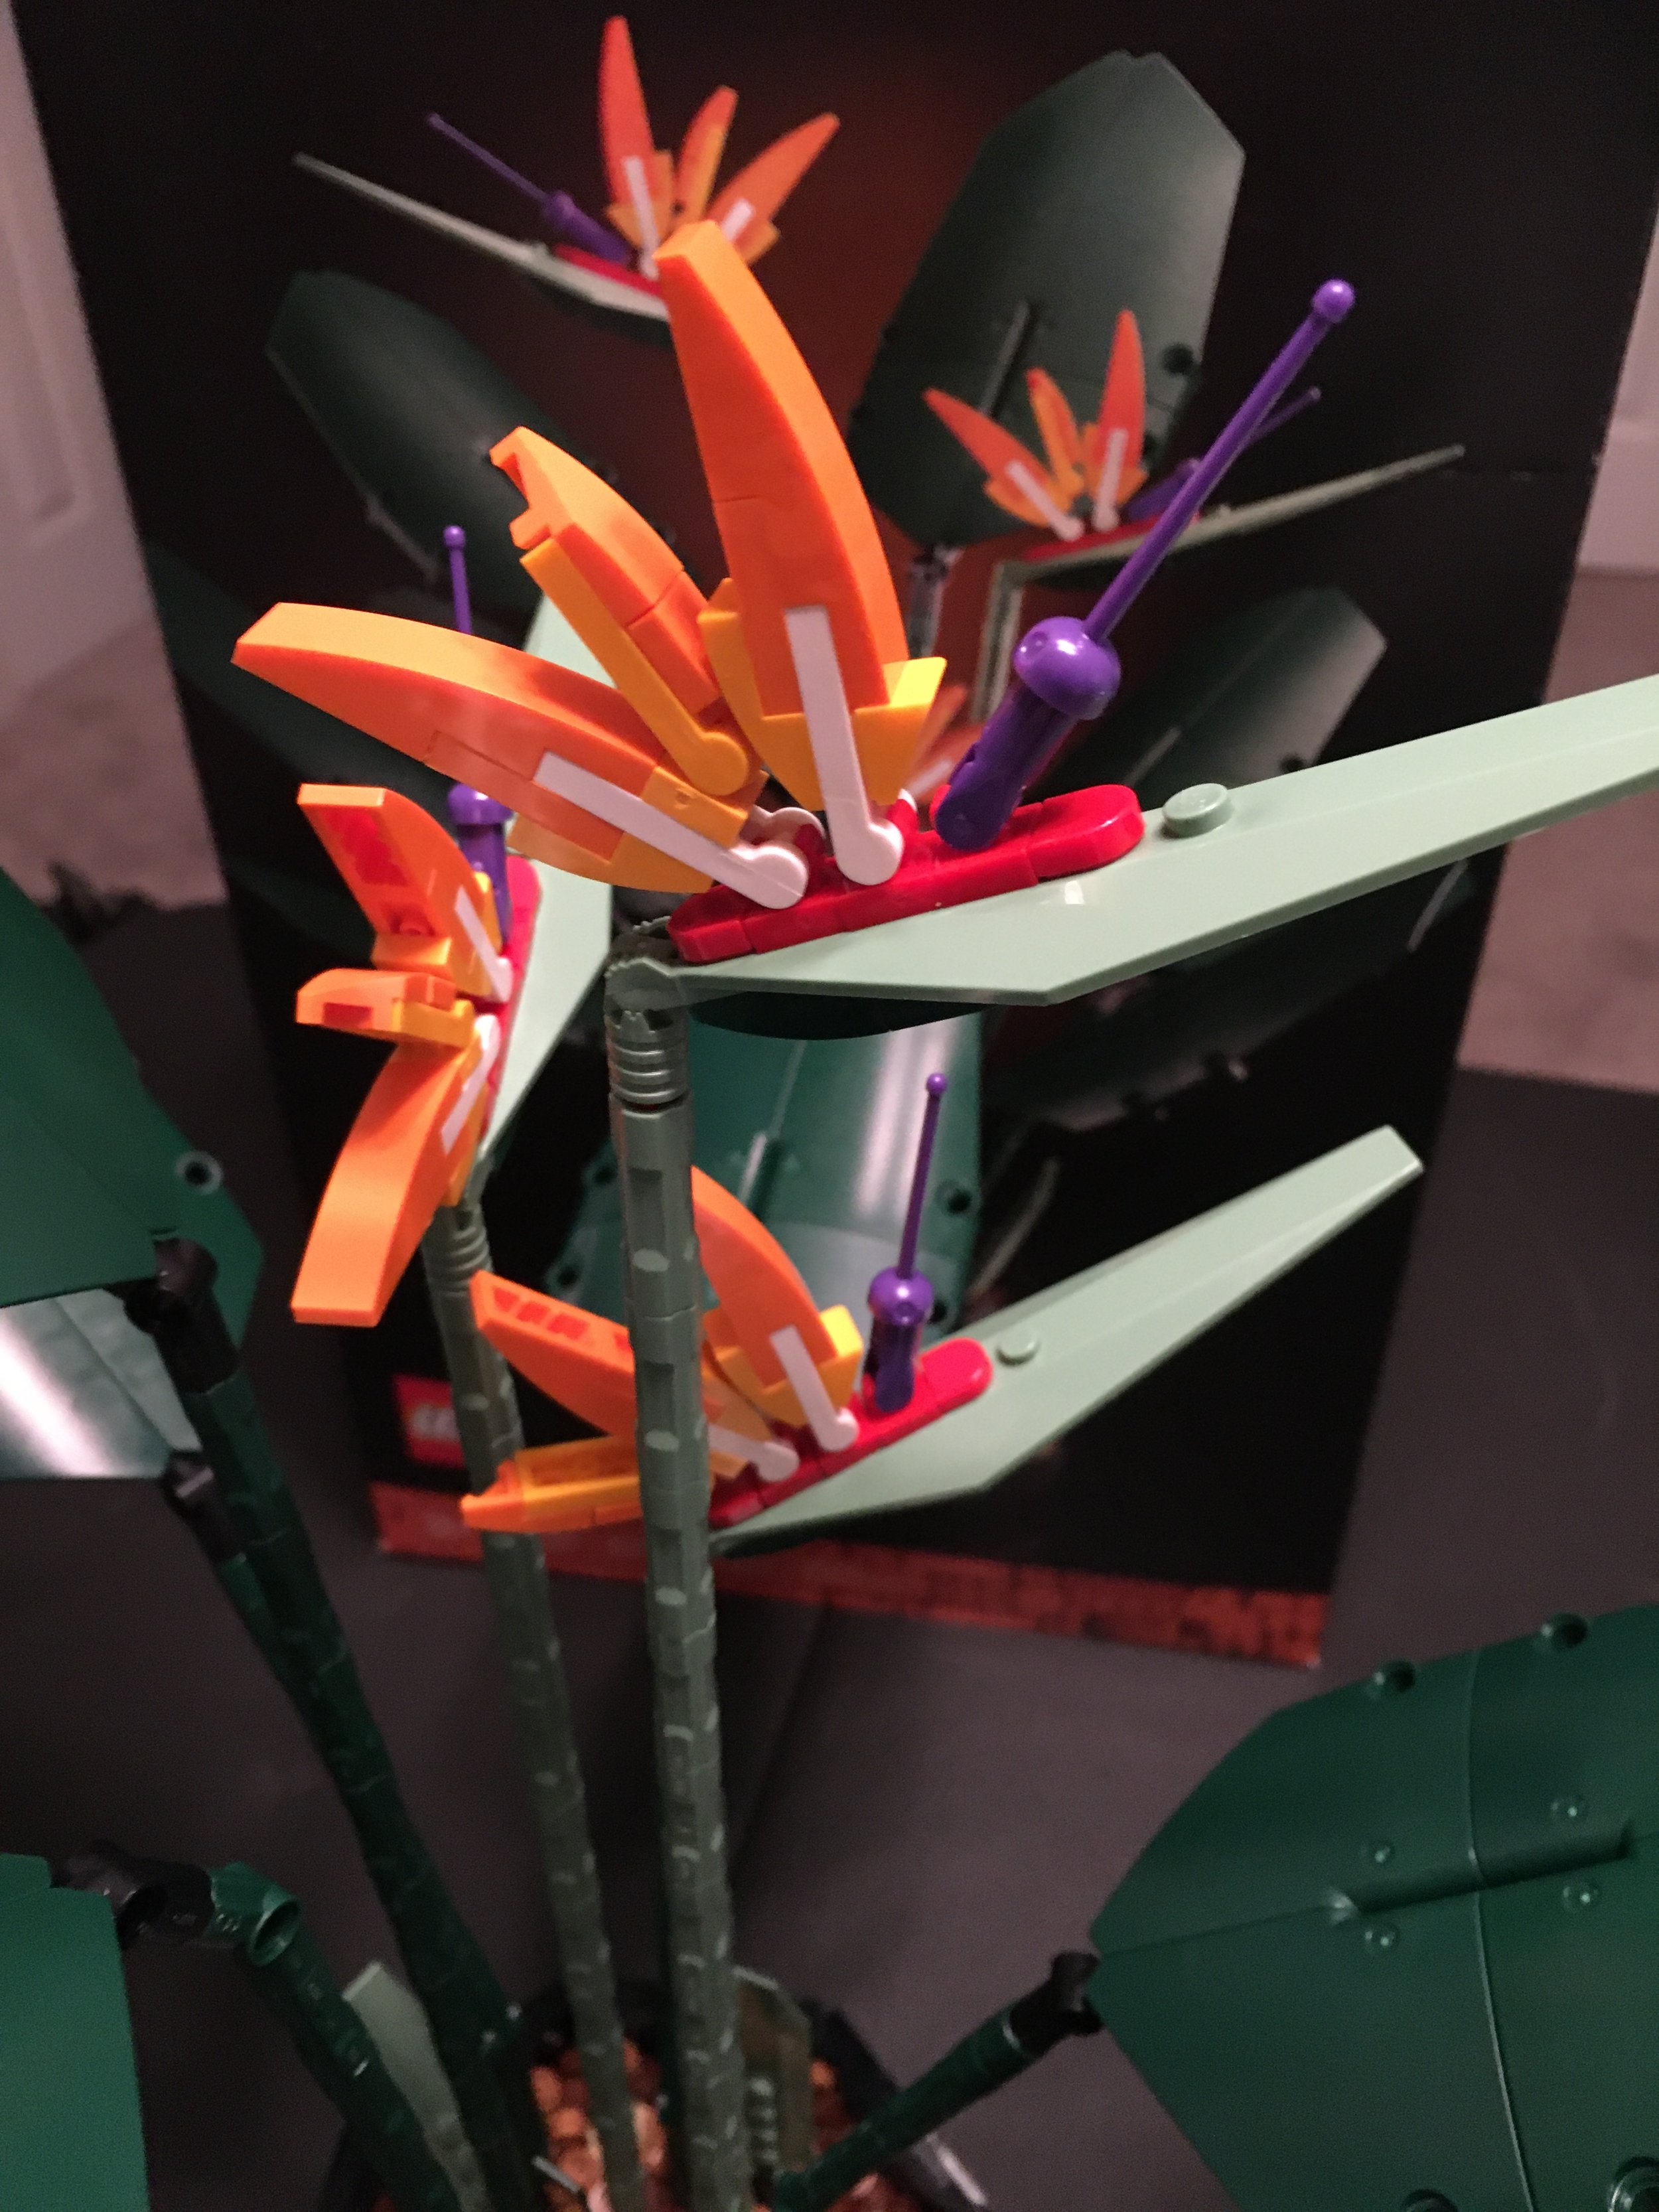
The fourth bag adds the flowers to the build. There are three, but you could probably make your own if you could come up with all the additional pieces. I’m not sure how common the purple sabre is in LEGO, but maybe you could some up with alternative pieces to use to make it.

The last set of bags, number five, adds a whole bunch of 1x1 brown plates. It’s actually two different colors of brown. You dump them in as the “dirt” and then the build is done.

Overall, the build is pretty quick and not too exciting. As mentioned, there are a few newer pieces, but the set is mostly a build to display piece. My NLS liked it and found a place where she wanted a real plant, but there wasn’t enough light to actually grow one. I guess I’m not the primary audience for this type of set.

I think the set is priced a bit high. This is especially considering many of the parts are the 1x1 plates that you add in as dirt. I’m glad I caught it on sale. If you’re looking to pick this one up, definitely wait for a sale to pop up. Maybe it’ll happen again for Christmas time 2022.

Happy building!

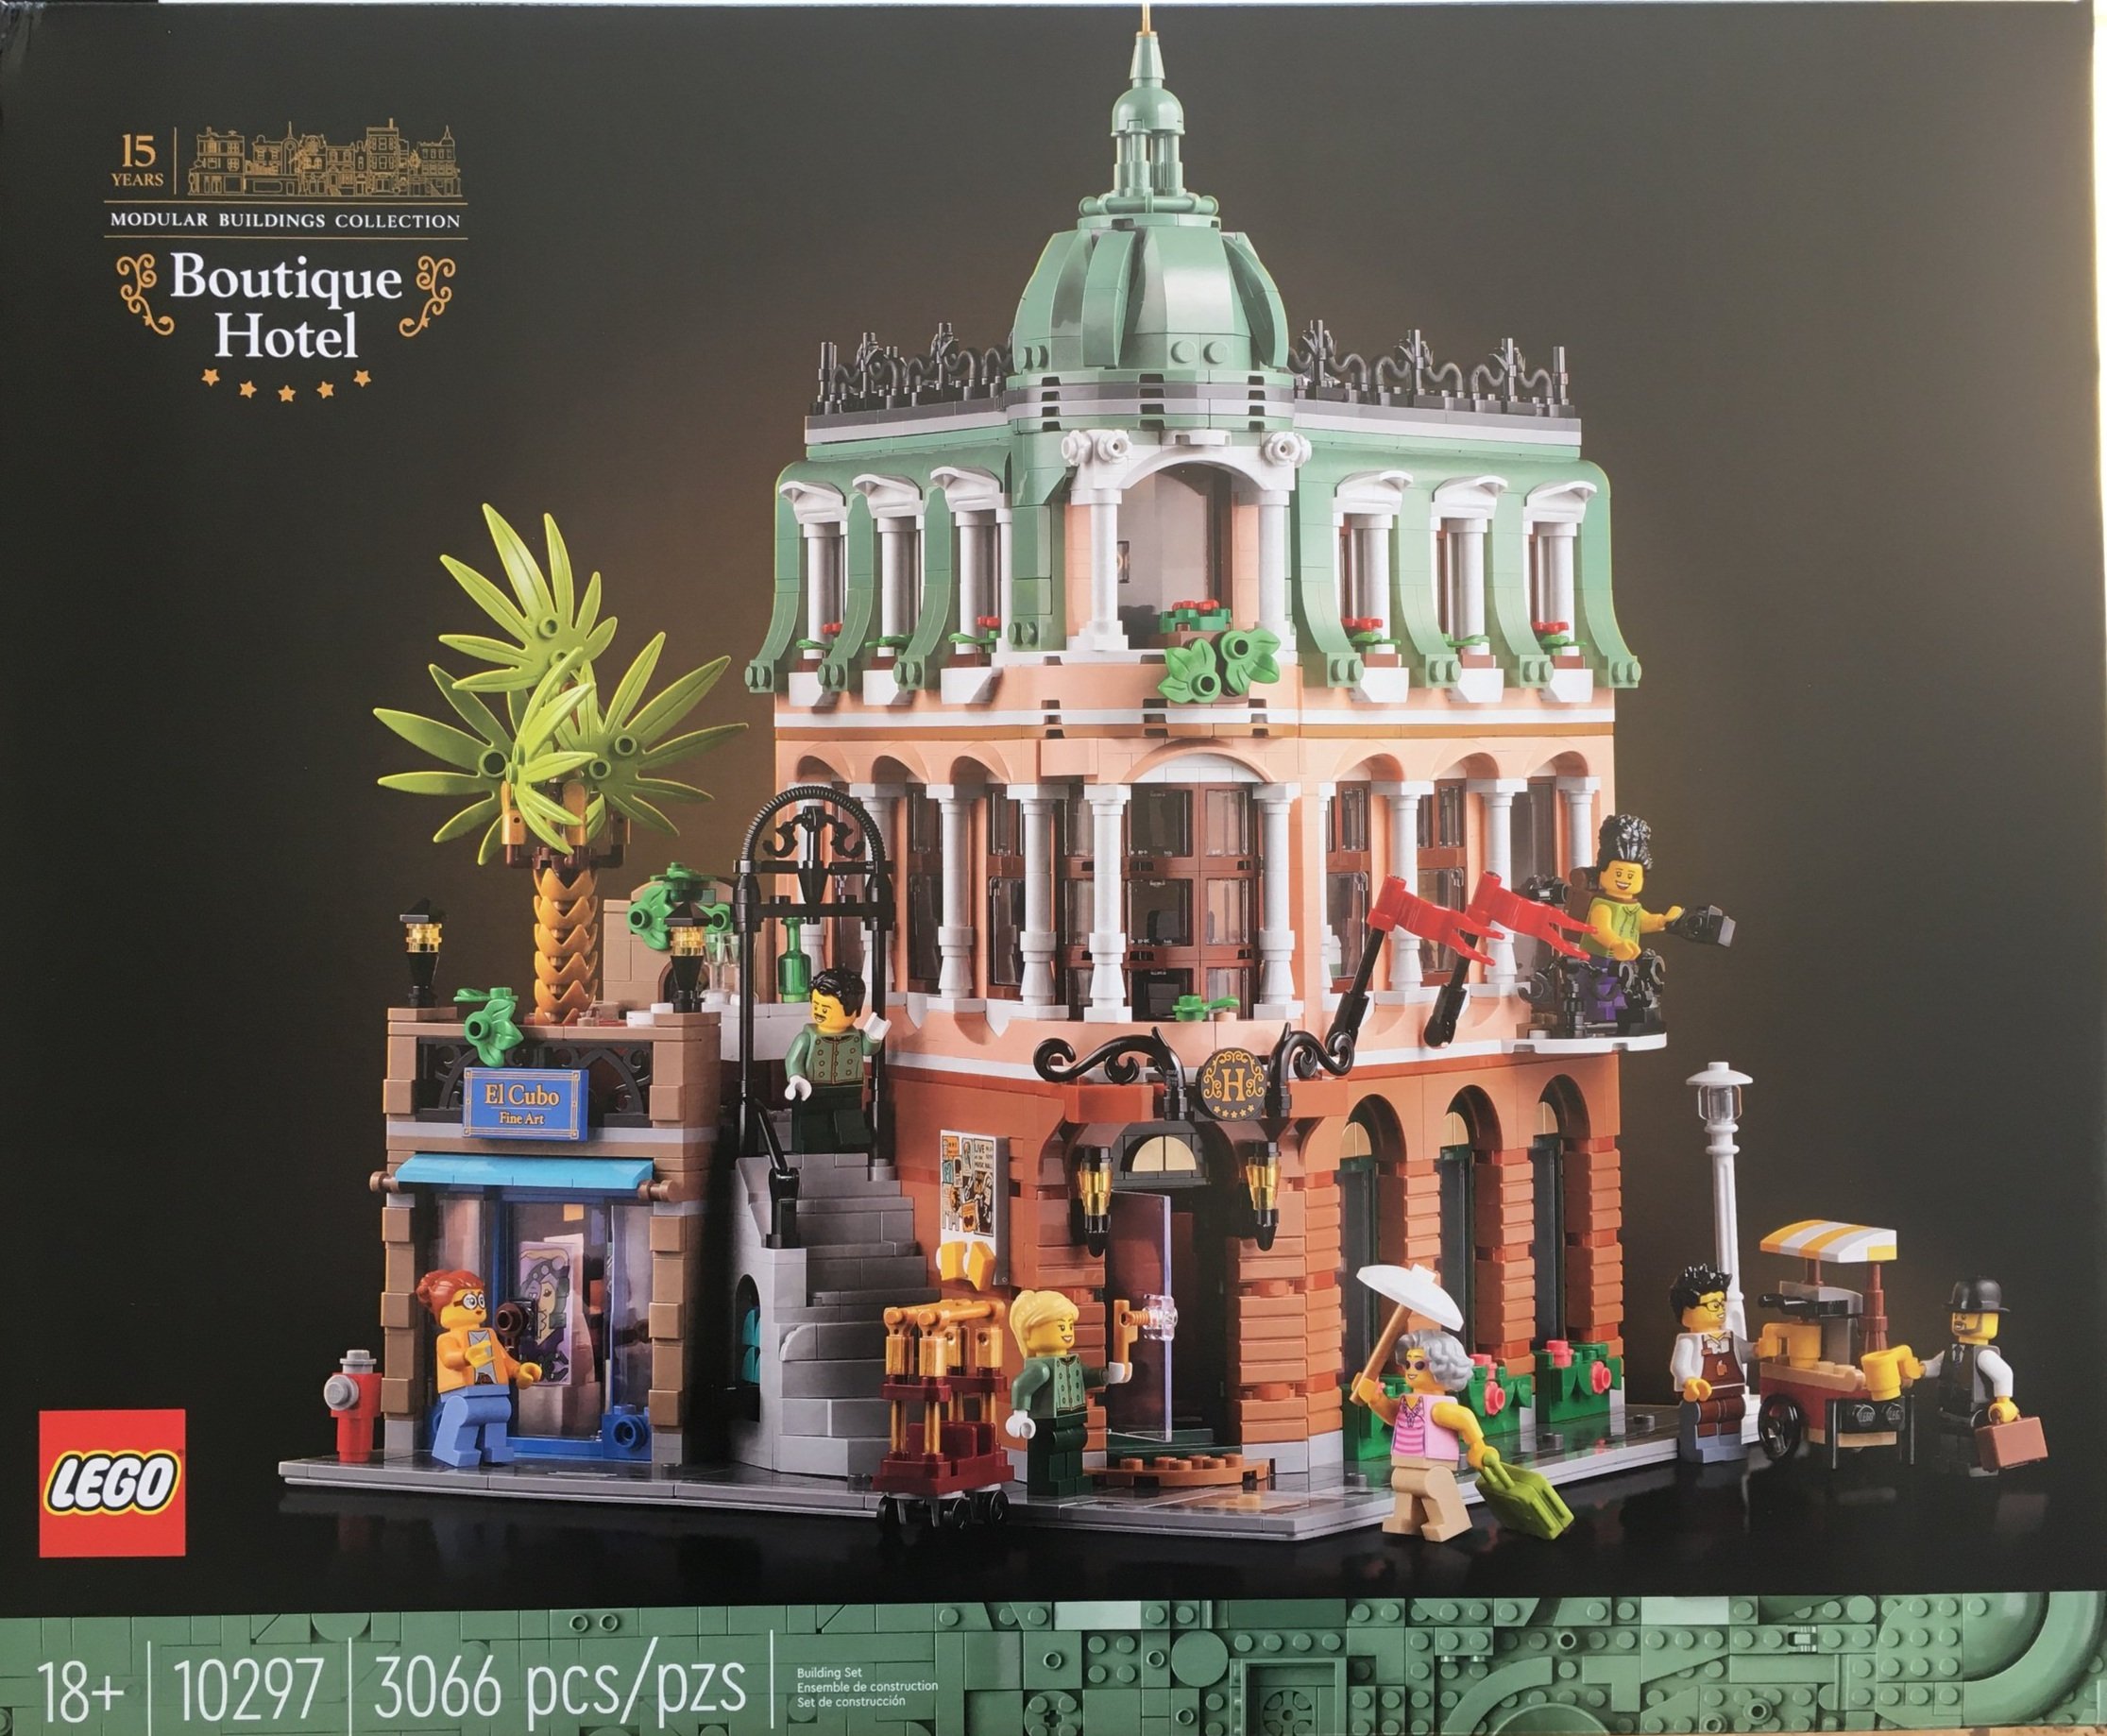
Set Review - #10297-1: Boutique Hotel - Creator Expert/18+ - Modular Building

The LEGO Group successfully sucked me into the modular building fandom a long time ago and I’m always in line to get the latest version every year. This one is the 15th anniversary of modular buildings called #10297-1: Boutique Hotel. It was released in the US on 2 January 2022. It retails for $199.99 and contains 3,066 pieces. This works out to $0.065 per piece which isn’t too bad. To be fair, a lot of the pieces are smaller so maybe it’s not a huge win, but I can’t complain.

The box has the 18+ branding on the front and is black. The full set is shown with all of the minifigures. There’s a logo for the Boutique Hotel and then the mention of the 15th anniversary. The back shows a few details, the dimensions of the set, and how the set assembles together. It also shows it next to #10278-1: Police Station and #10270-1: Book Shop.

The set contains 20 parts bags… or at least that’s what I can count in the picture I took. They are all numbered. It also contains a 32x32 baseplate colored gray. The instruction book is wrapped.

The instructions have a few pages on the design and the designer as well as a picture of the designers who have contributed to the theme over the years. Also throughout the book are little tidbits about various pieces used, references to other modular buildings, and other fun facts.

The first bag starts with adding the basic layout to the base plate. This is usually lots of tiles and there are no exceptions here. The first bag comes with a female hotel worker.

The second bag builds up the first floor with tiling on the inside in a fun pattern. It also starts the stairs and then adds a dumpster outside with a white croissant in reference to #10243-1: Parisian Cafe. This bag contains a male minifigure who works at the hotel and you build a small luggage cart.

Bag three builds up more of the first floor with steps in the hotel and the check-in desk. The check-in desk has a fun telephone, some flowers, and then actual keys for the rooms. The back of the wall for the check in desk has some art work for the art gallery behind the hotel.

Bag four adds a couch in the lobby of the hotel and then builds up the art gallery. You put in a desk and then a few pieces of art to include a brick version of the Creator Expert logo. You also construct the stairs to the cafe above the art gallery. Bag 4 comes with a female minifigure who works at the art gallery.

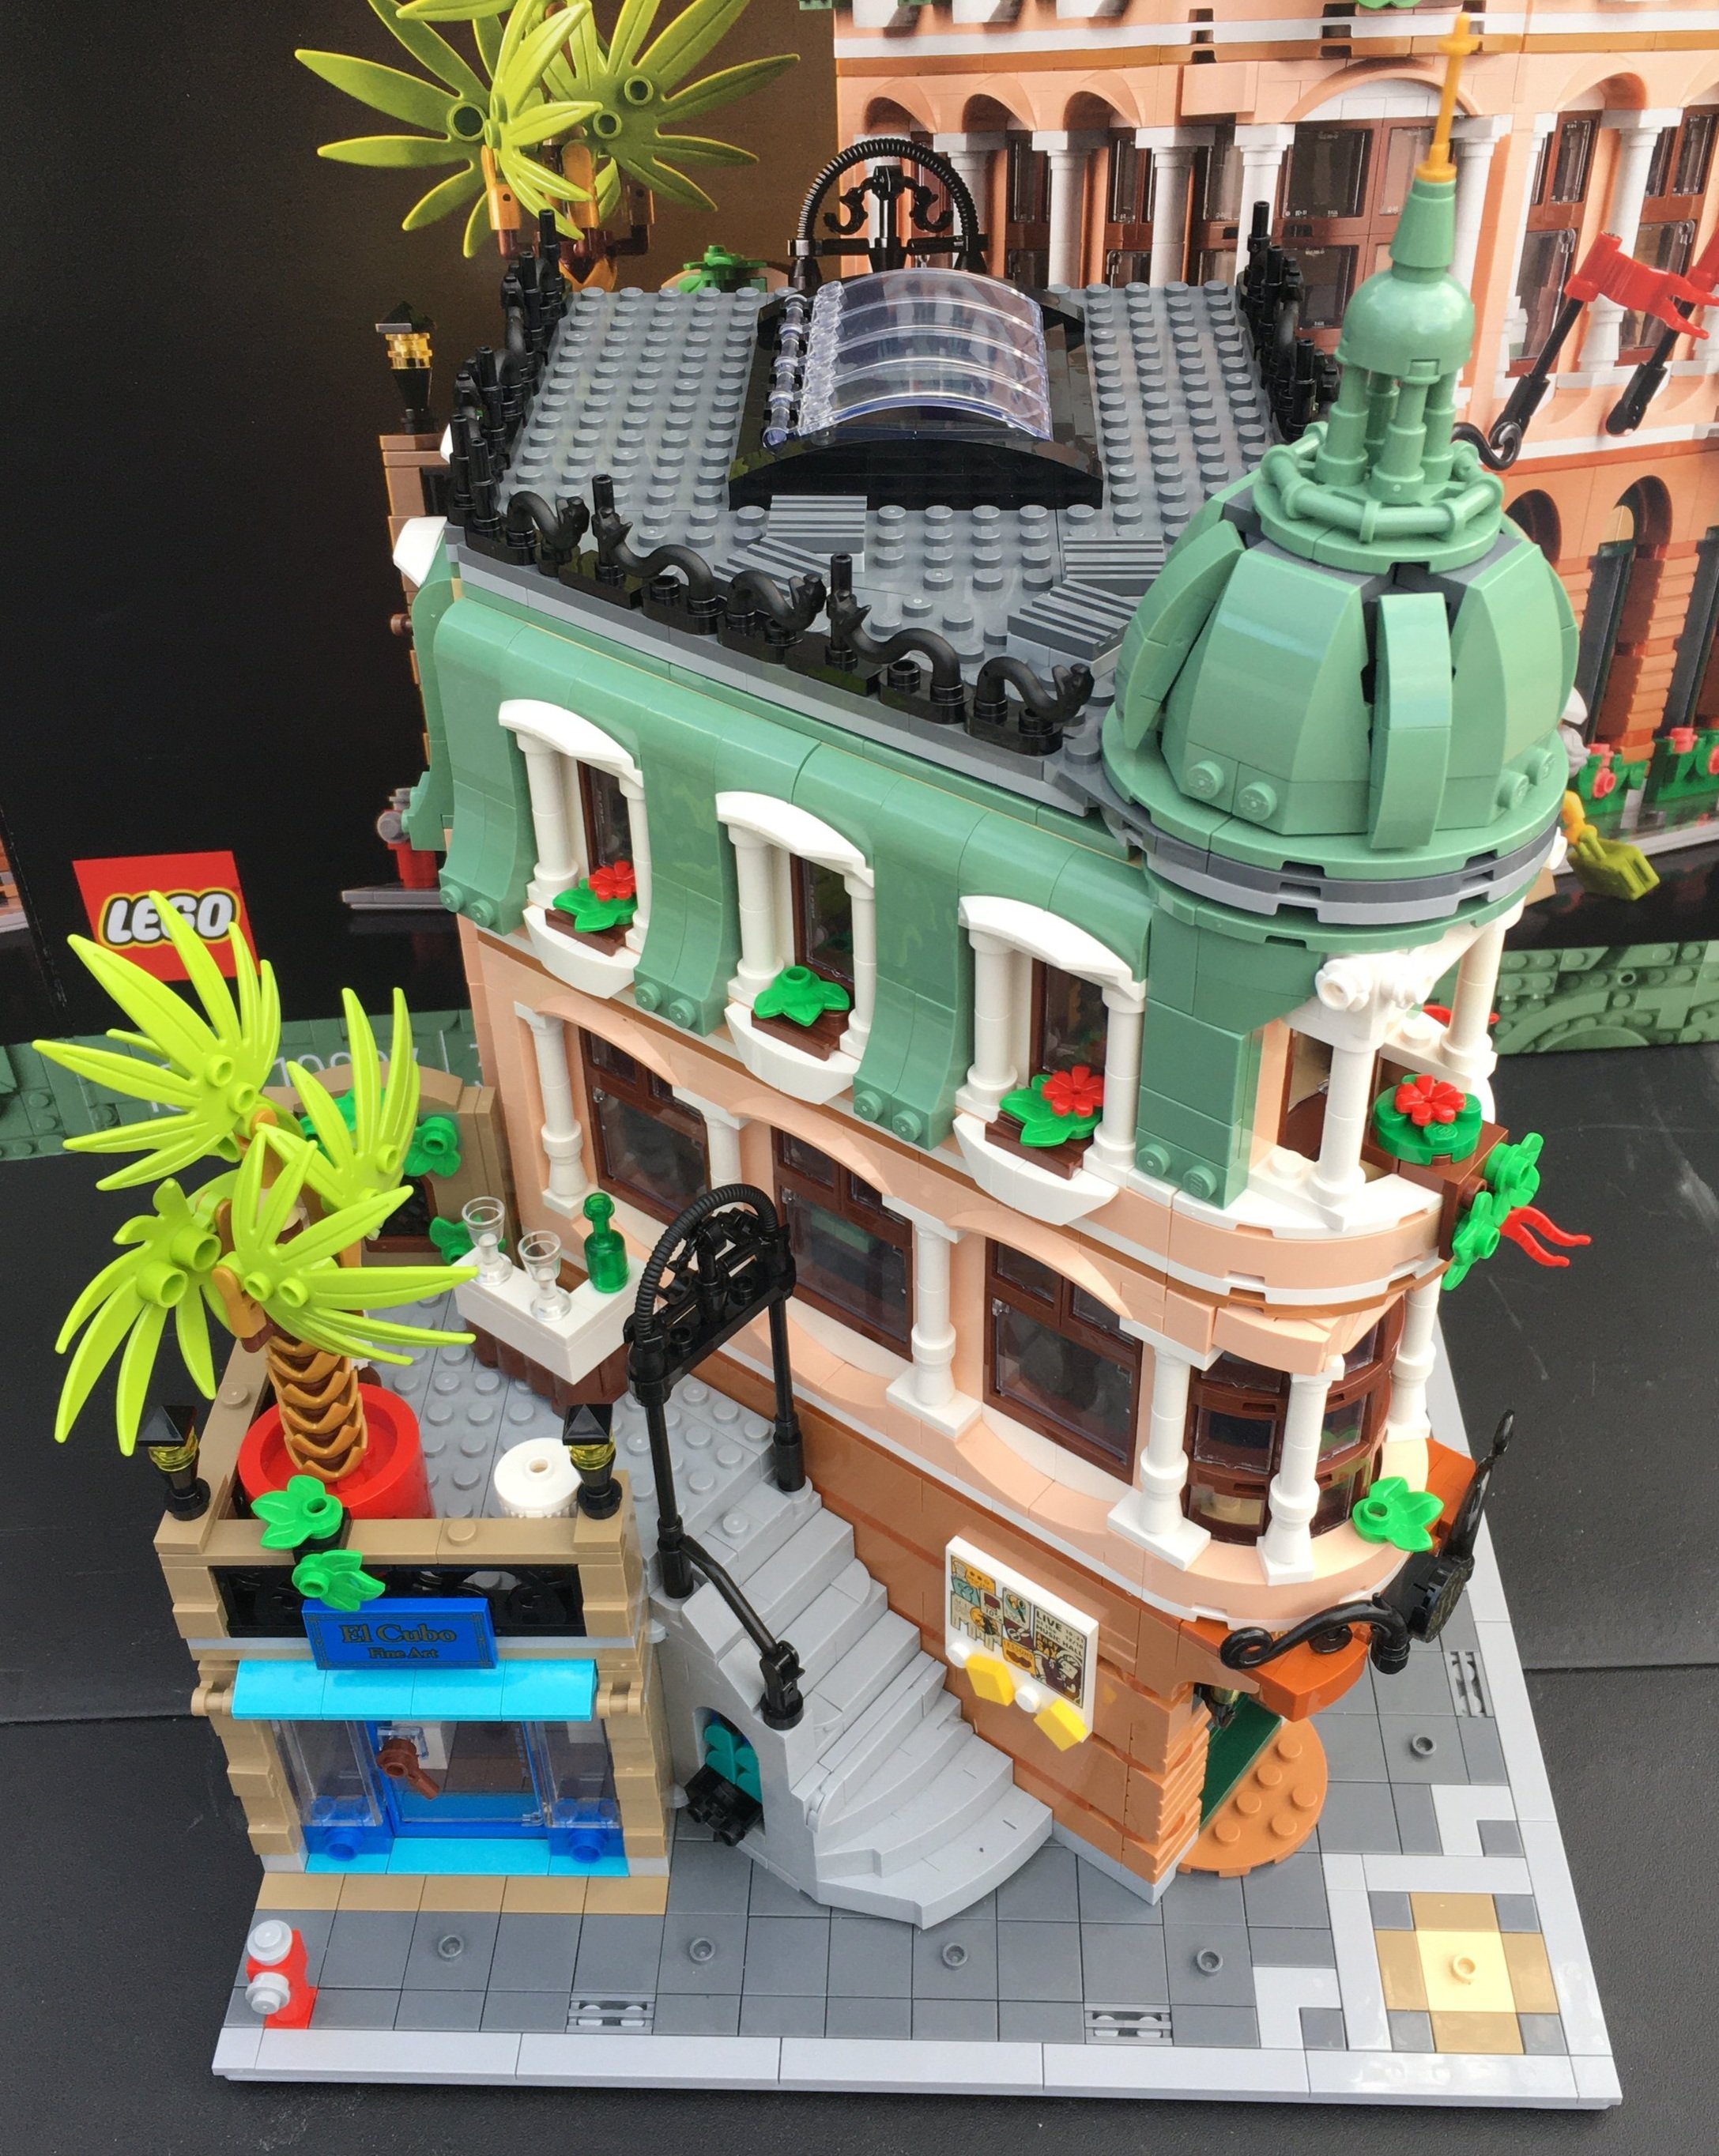
I really appreciate the use of angles and how this set isn’t just the standard building with 90 degree angles.

Bags five and six wrap up the first floor. The biggest section of the build is the front façade of the hotel with doors, windows, some texture to the outside, some plants, and the curved arches. Inside, you finish up the stairwell to include a handrail. On the outside, you add a lamp post.

Bags seven and eight start on the second floor which is all hotel rooms. Bag seven builds the base with plates and then starts on walls. I like the peach color which you don’t see too often. Bag eight adds in windows, furniture, and stairs to the next floor. One of the rooms comes with a typewriter which is very similar to #21327-1: Typewriter.

The ninth bag wraps up the second floor. It also comes with a male minifigure with a suit case. The arches over the windows look good along with some of the columns. The one room has a balcony with some decorative fencing made of brick handcuffs.

Bag ten adds a small cafe above the art gallery called “El Cubo.” It has a few tables and then a bar with some glasses and bottles. This section also has a larger palm tree made up of some fun pieces and then an entrance similar to the Market Street modular building.

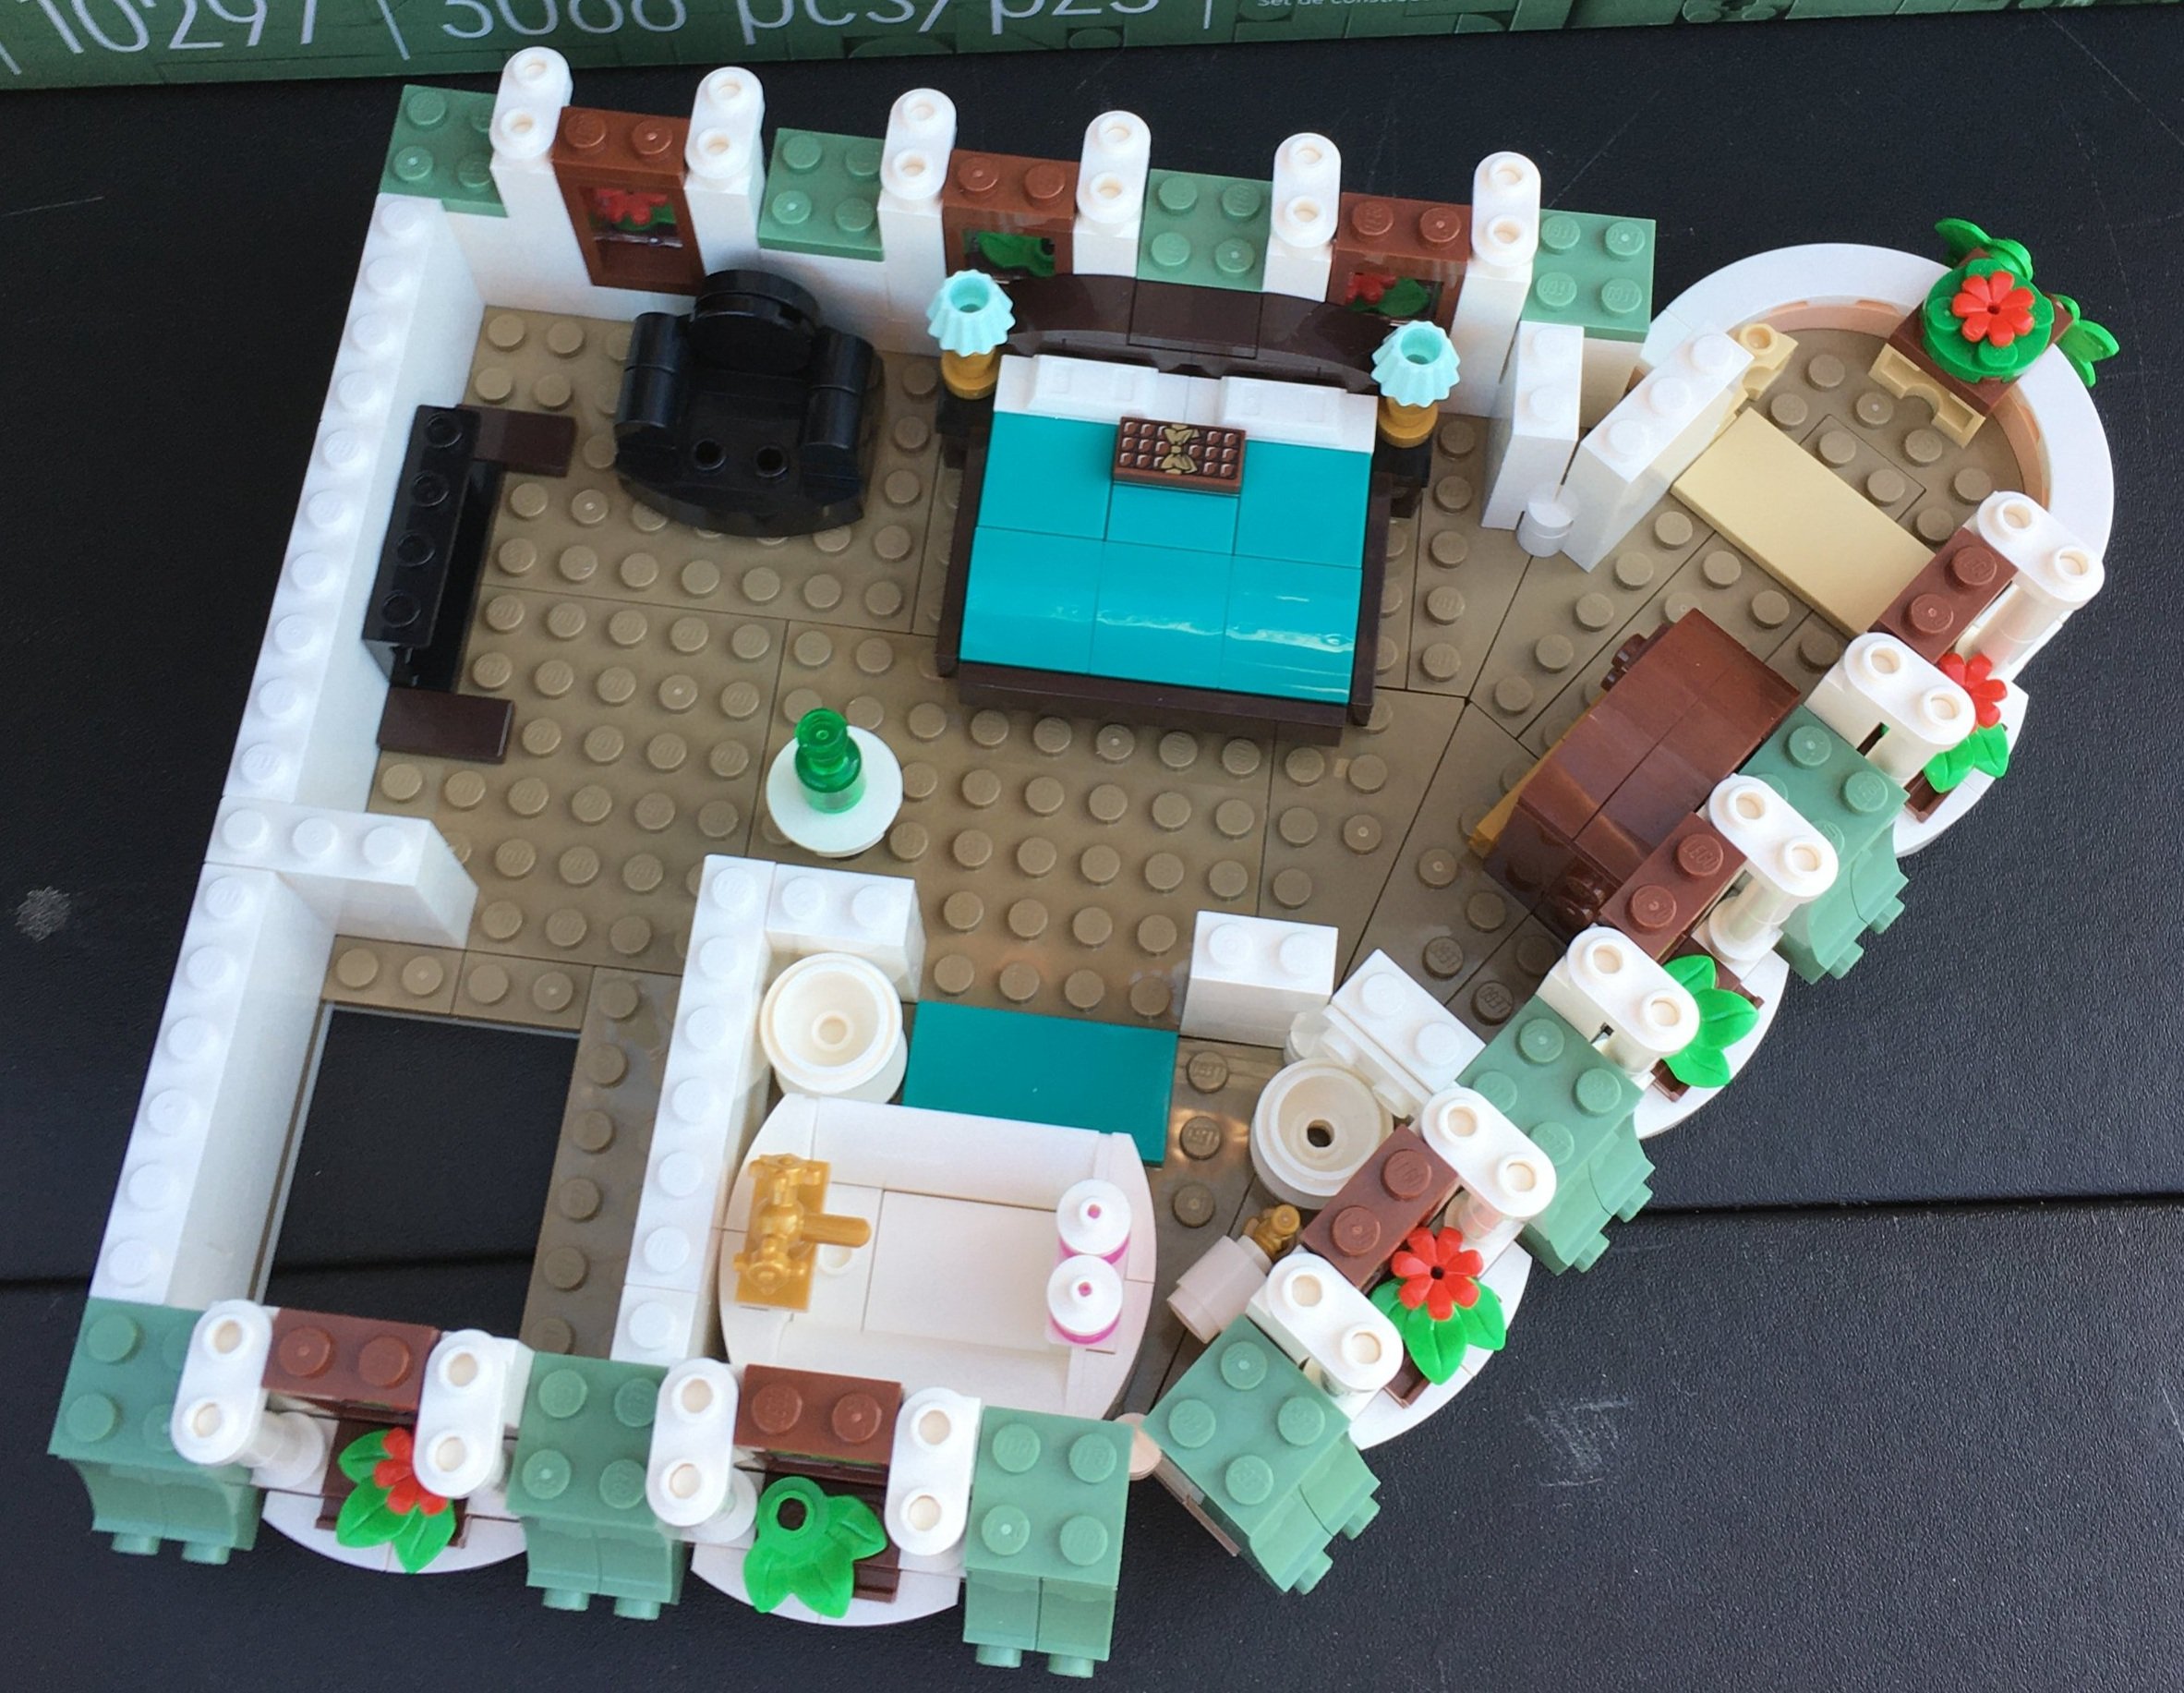
Bag eleven starts the third floor with the floor plates, some wall sections, and the start of a bathroom.

Bags 12 and 13 finish up the third floor. There’s a large bed, a chair, an old fashioned TV, and a wardrobe in the main bedroom. The bathroom has a sink, toilet, and tub. The windows all have some greenery and a few have flowers.

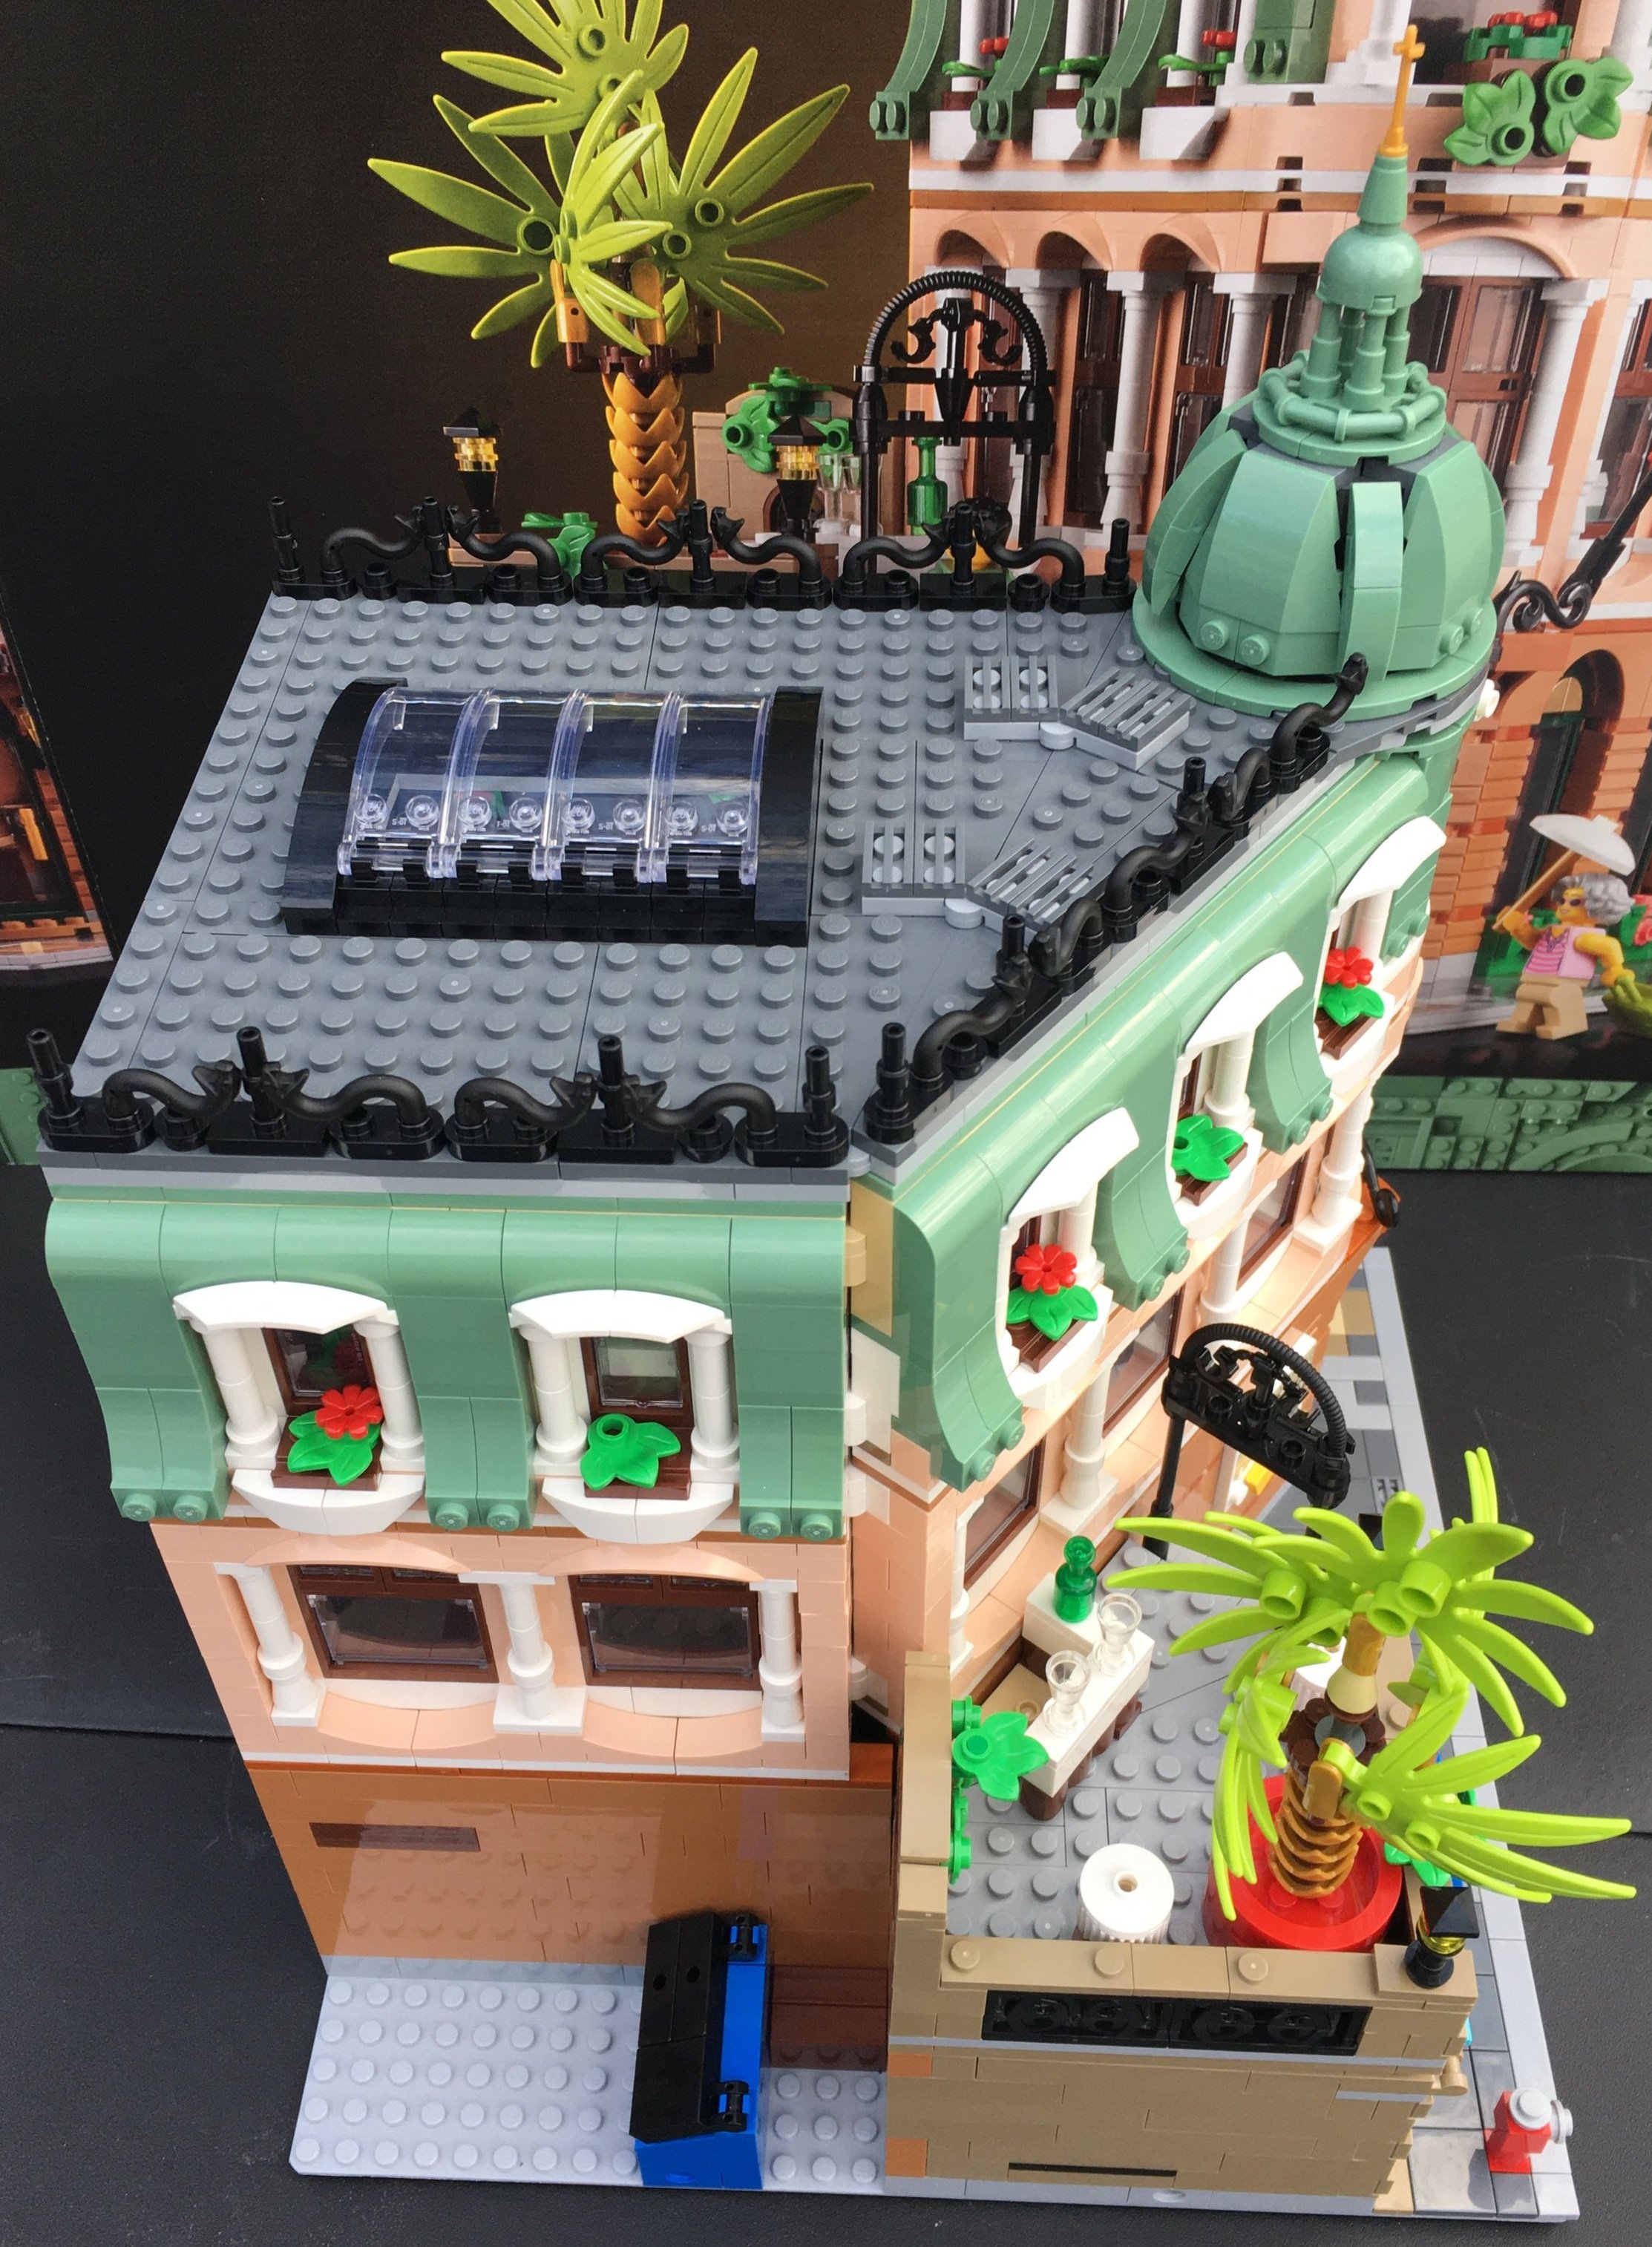
Bag 14 is the final bag and builds the roof along with the rounded point at the top. The large skylight is done with simple wind screens, but it looks good.

It also includes a small coffee cart and a coffee seller minifigure.

There was an error in my set with this bag. For the roof, I was supposed to get a light gray 1x2x2 plate corner. Instead, I was given a 1x2 light gray plate with slide. I replaced the part with a part from my collection, but it has been a while since I’ve seen an error in a set. Has anyone else had this issue?

Here are the minifigures. I’m glad that LEGO decided to get away from the traditional two dots and a smile to the faces with expressions. I think it’s a good mix here. A few have dual expressions.

Here is the final set from all the sides. I’m a big fan of this one. I like the building at different angles instead of the 90 degree angles. The colors are fun as well and there are a lot of great pieces. Well done design team!

The price continues to creep up on these sets with them being $200 now, but thankfully, the part count goes up. A lot of the parts are smaller though. I recommend waiting for opportunities to get double VIP points or a fun gift with purchase before diving in. You should be able to get this one for a few more years (hopefully) so there shouldn’t be a rush to get this one.

Happy building!

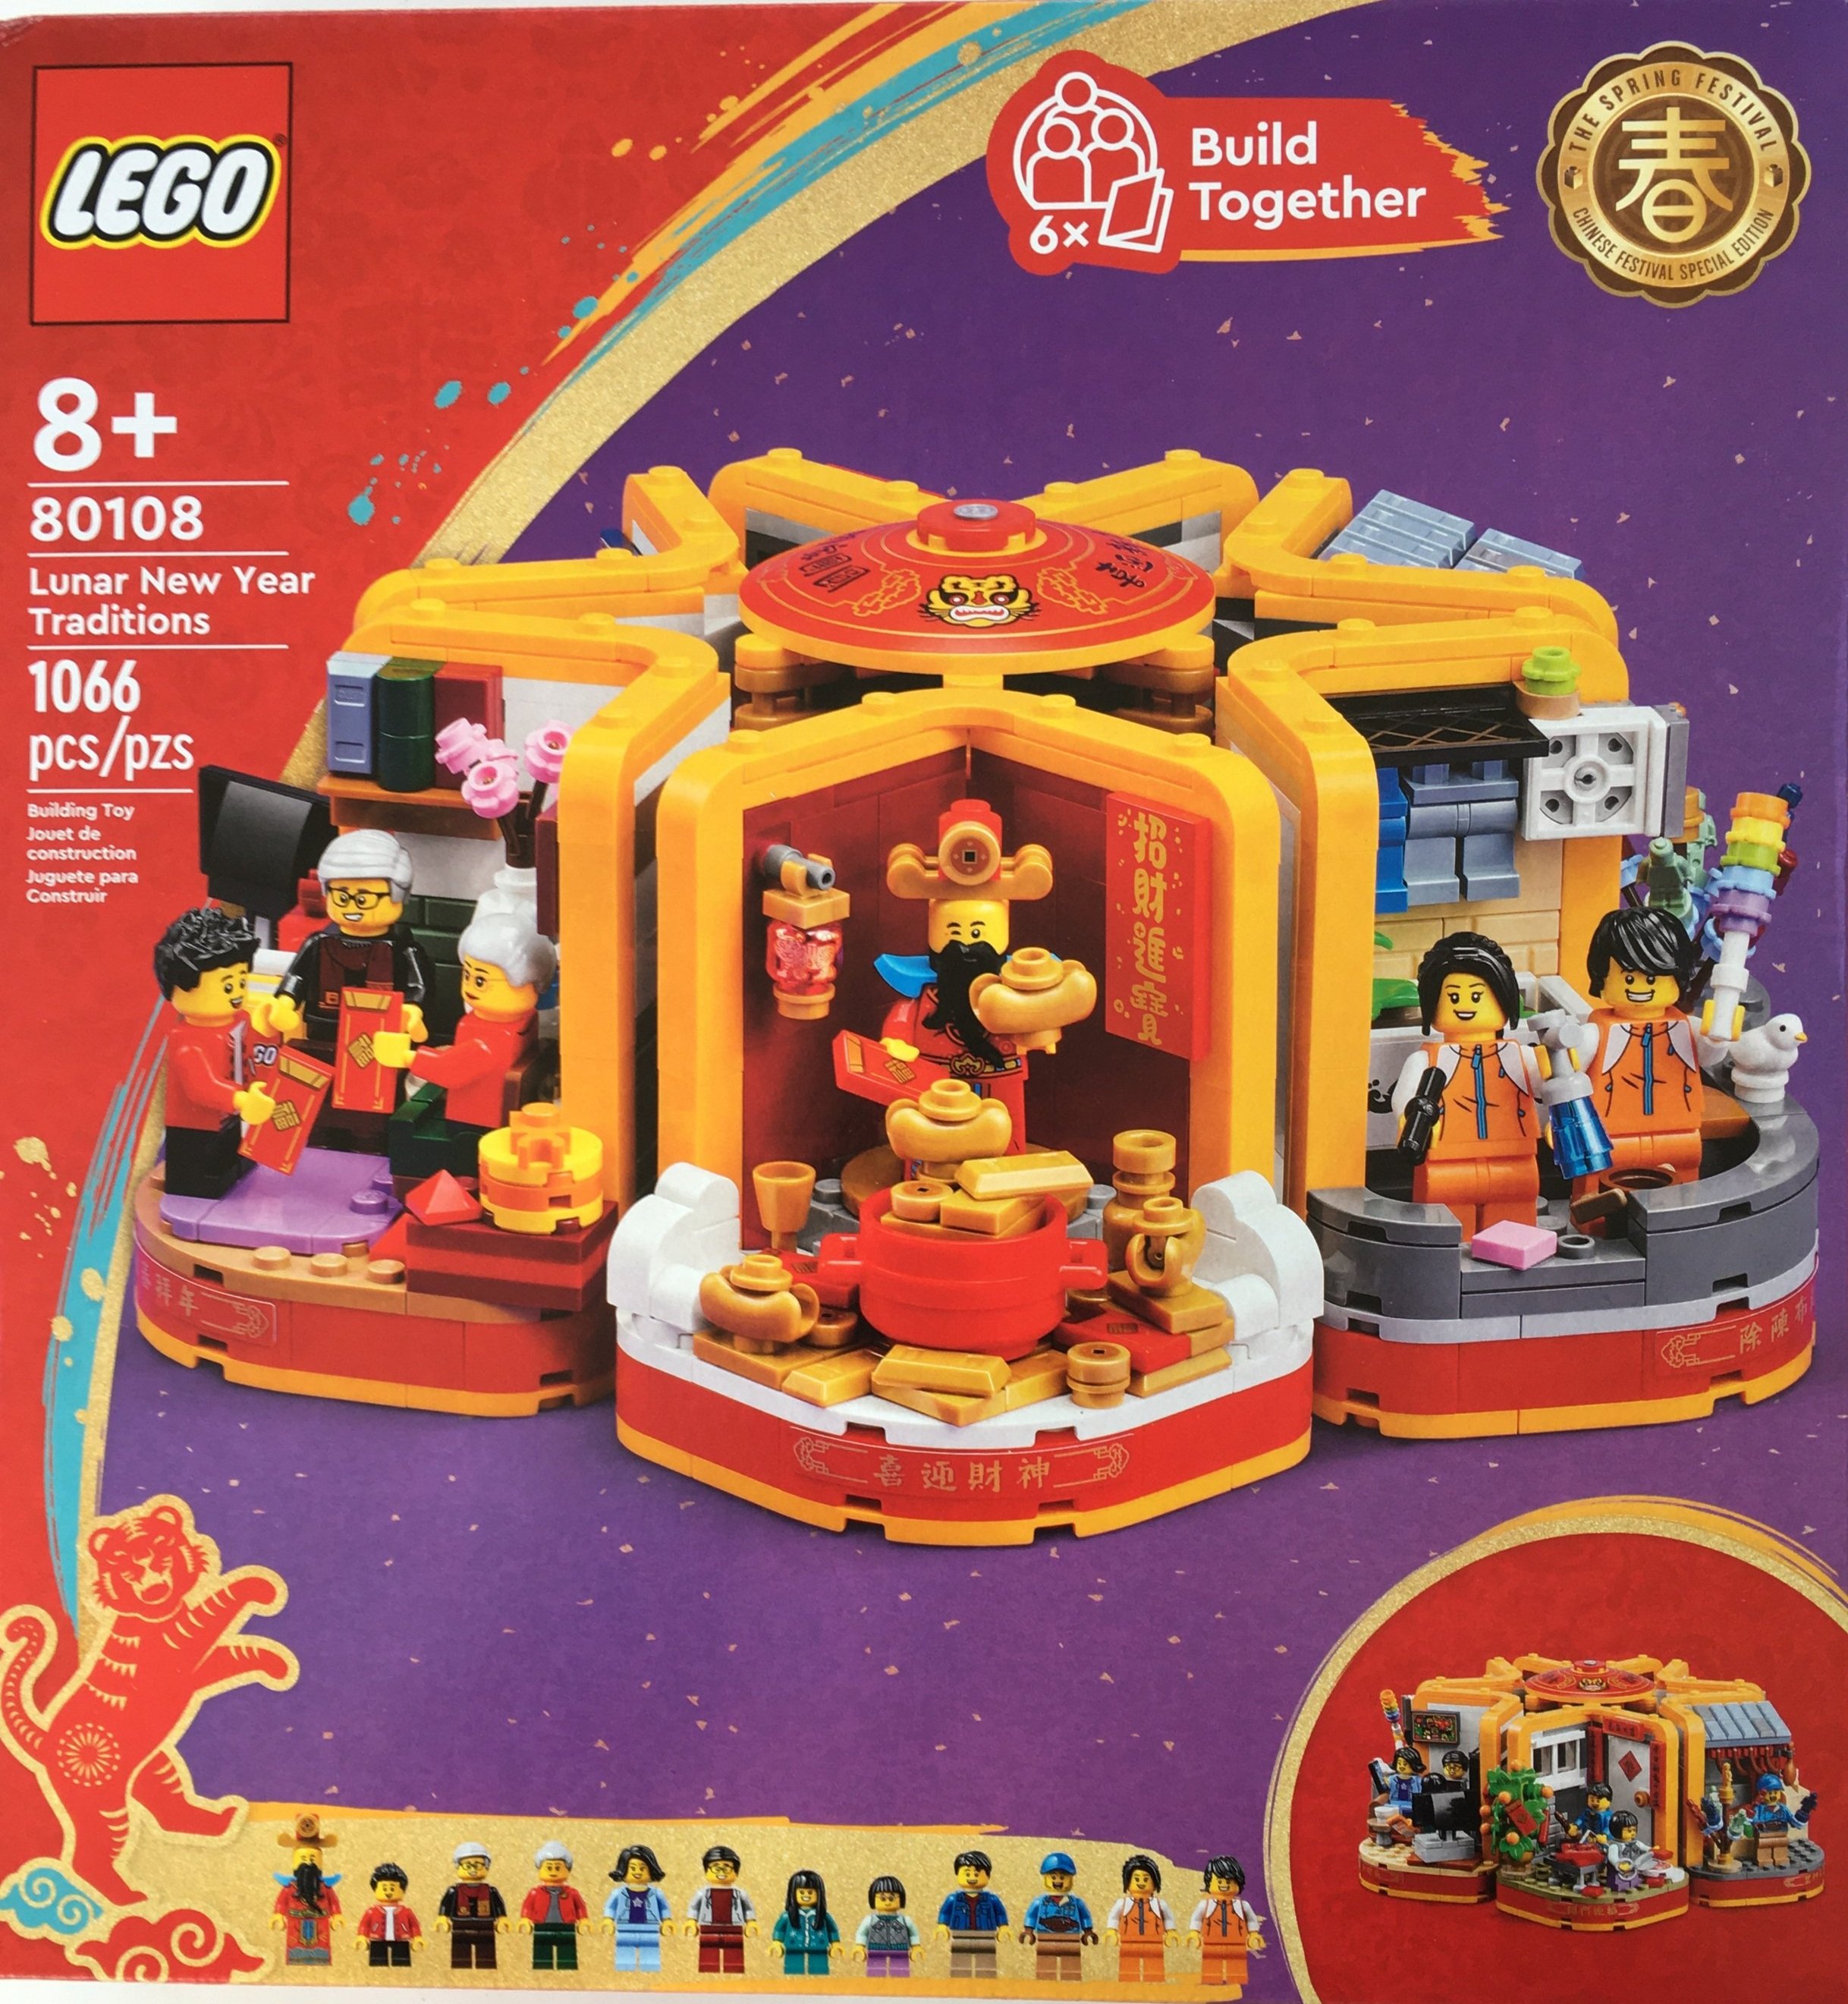
Set Review - #80108-1: Lunar New Year Traditions - Chinese Festival Special Edition

Here is the second of two Chinese Festival Special Edition sets for 2022. This one is the lower priced set with it retailing for $79.99 in the US. It was released at the same time as #80109-1: Lunar New Year Ice Festival which was 10 January 2022. This set contains 1,066 pieces so the price per piece is $0.075 per piece.

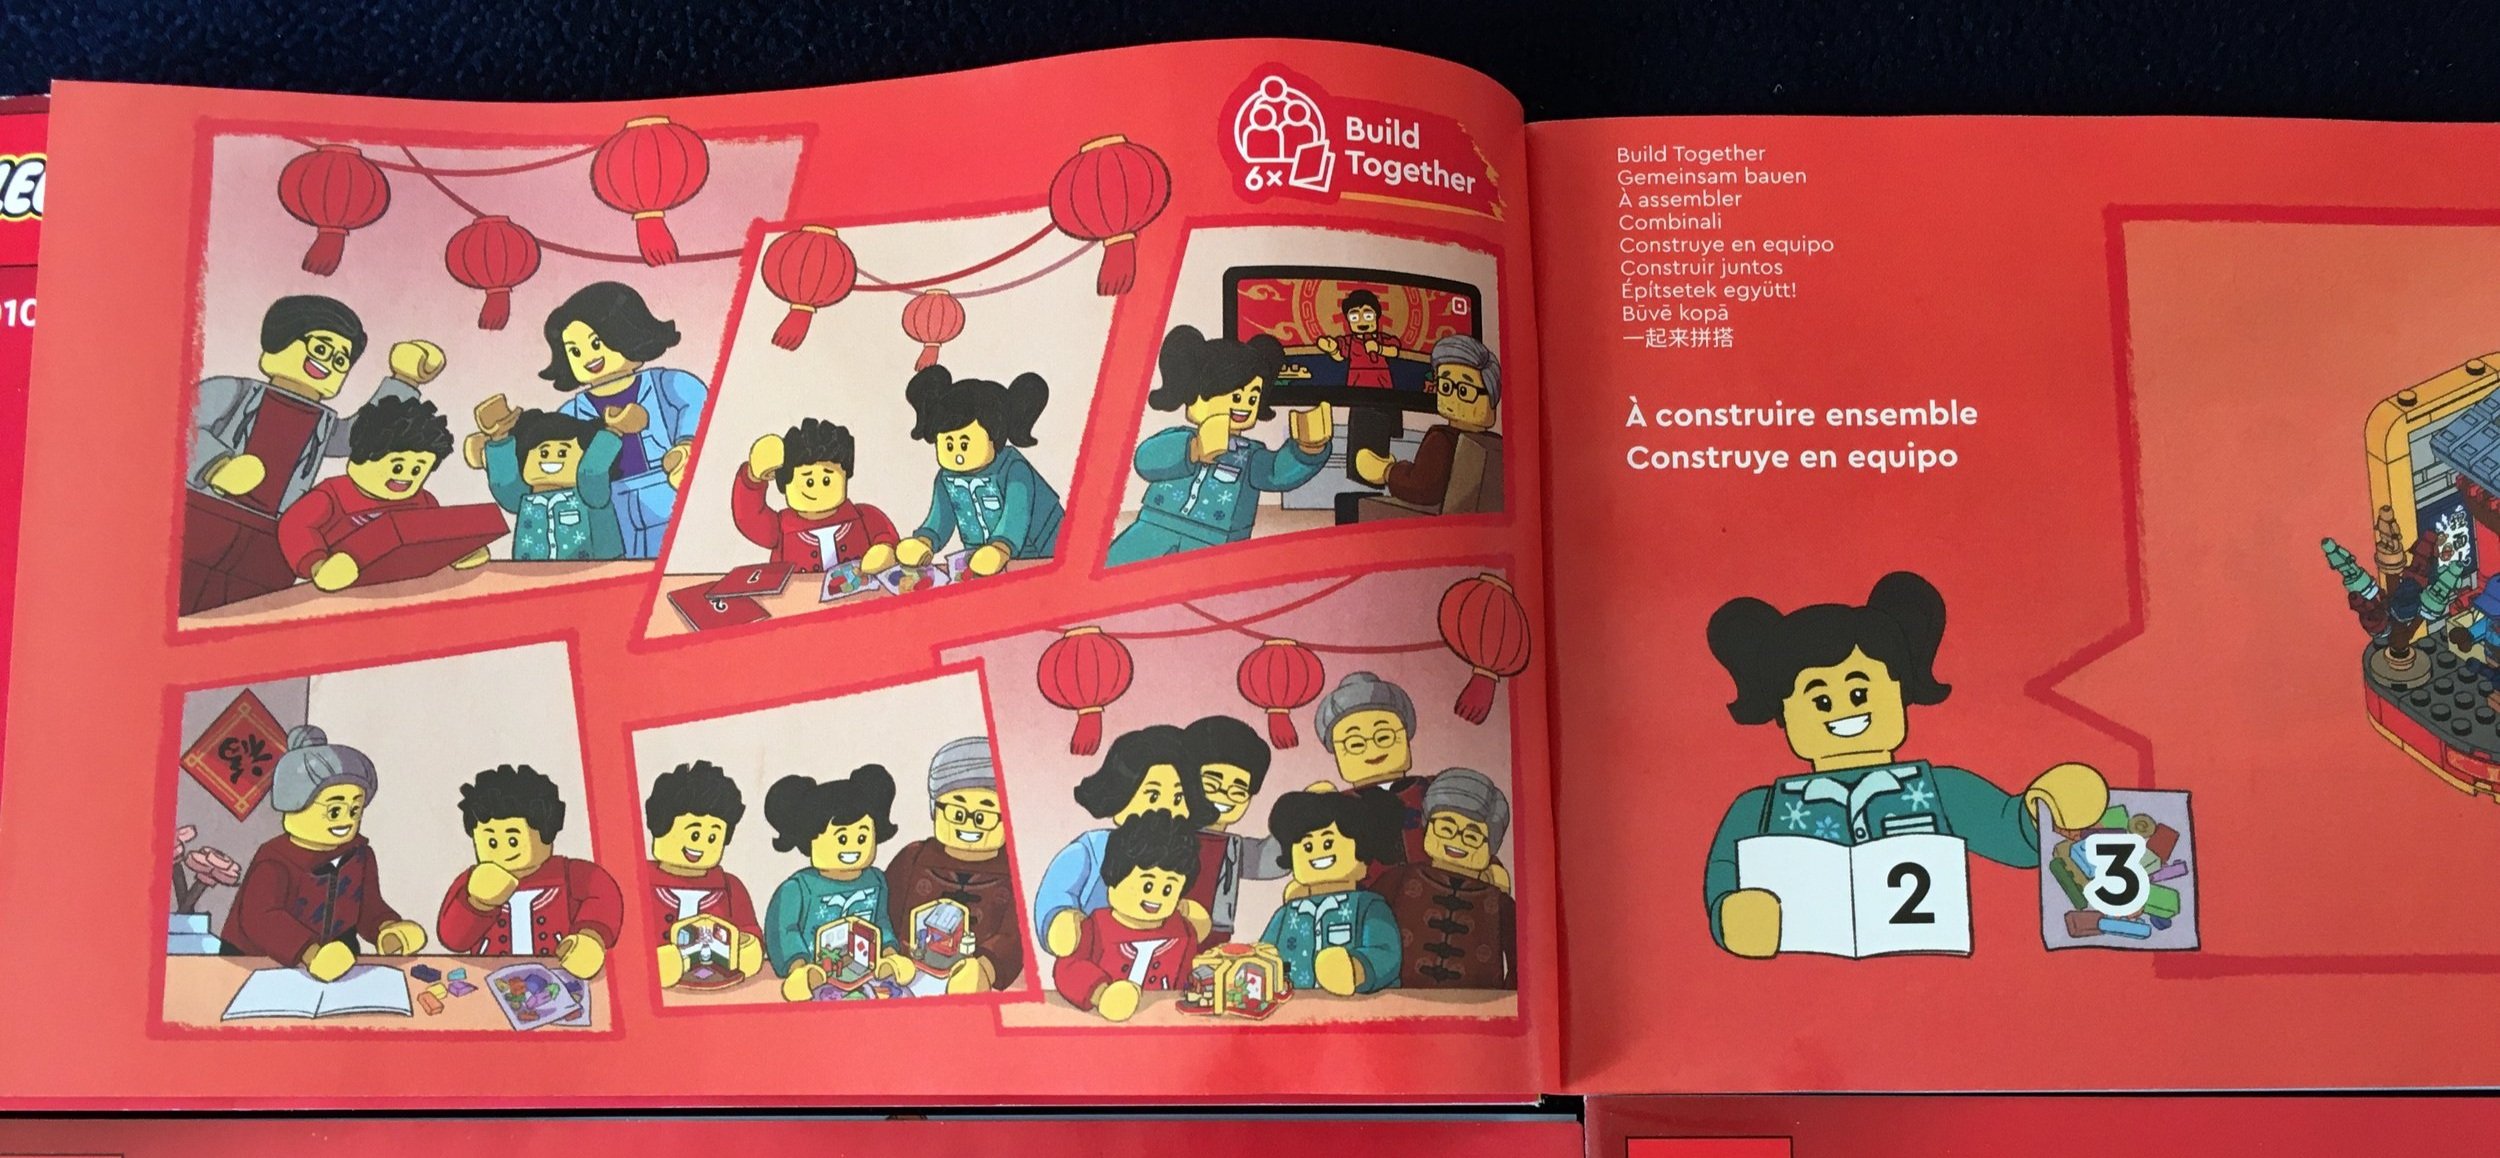
This set has branding for “Build Together” and it says 6X on the front of the box. The set is designed so that you can build it with others. There are multiple instruction booklets which apply specific numbered bags. I tested it out and did this build with my kids. My 4 year old and I as a team and then my 8 year old going solo. My NLS originally was supposed to join us, but found excuses not to.

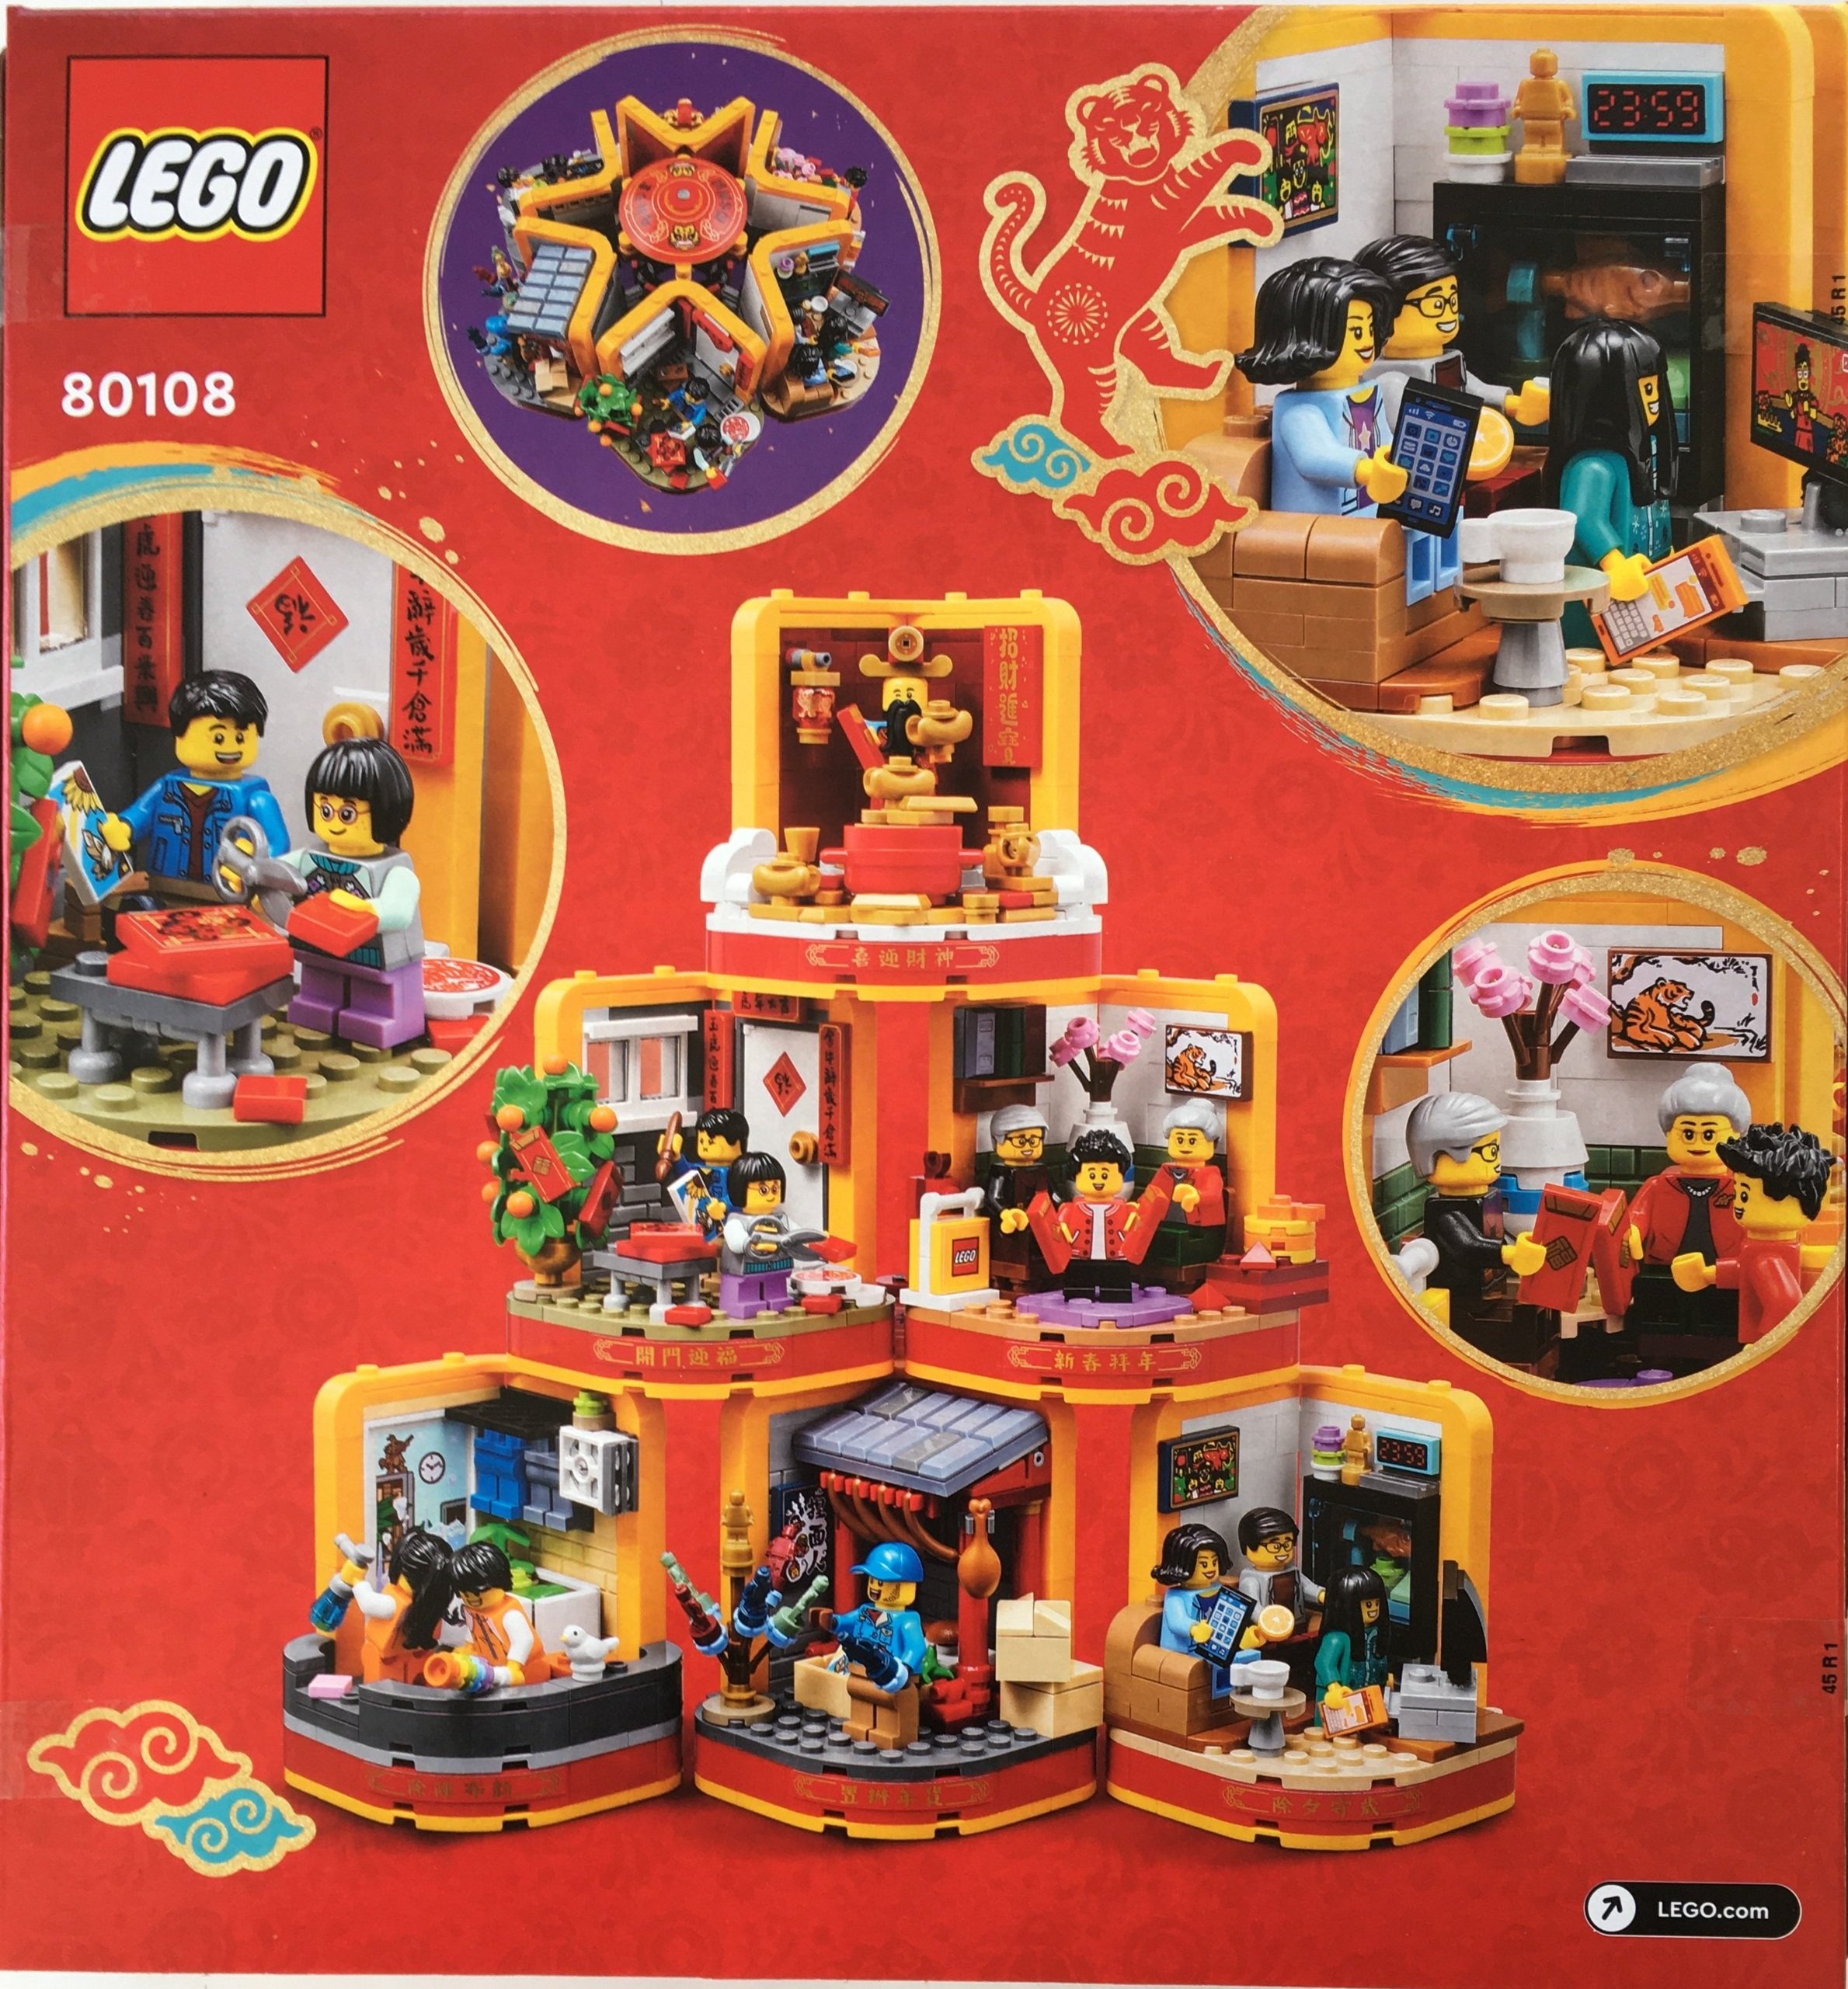
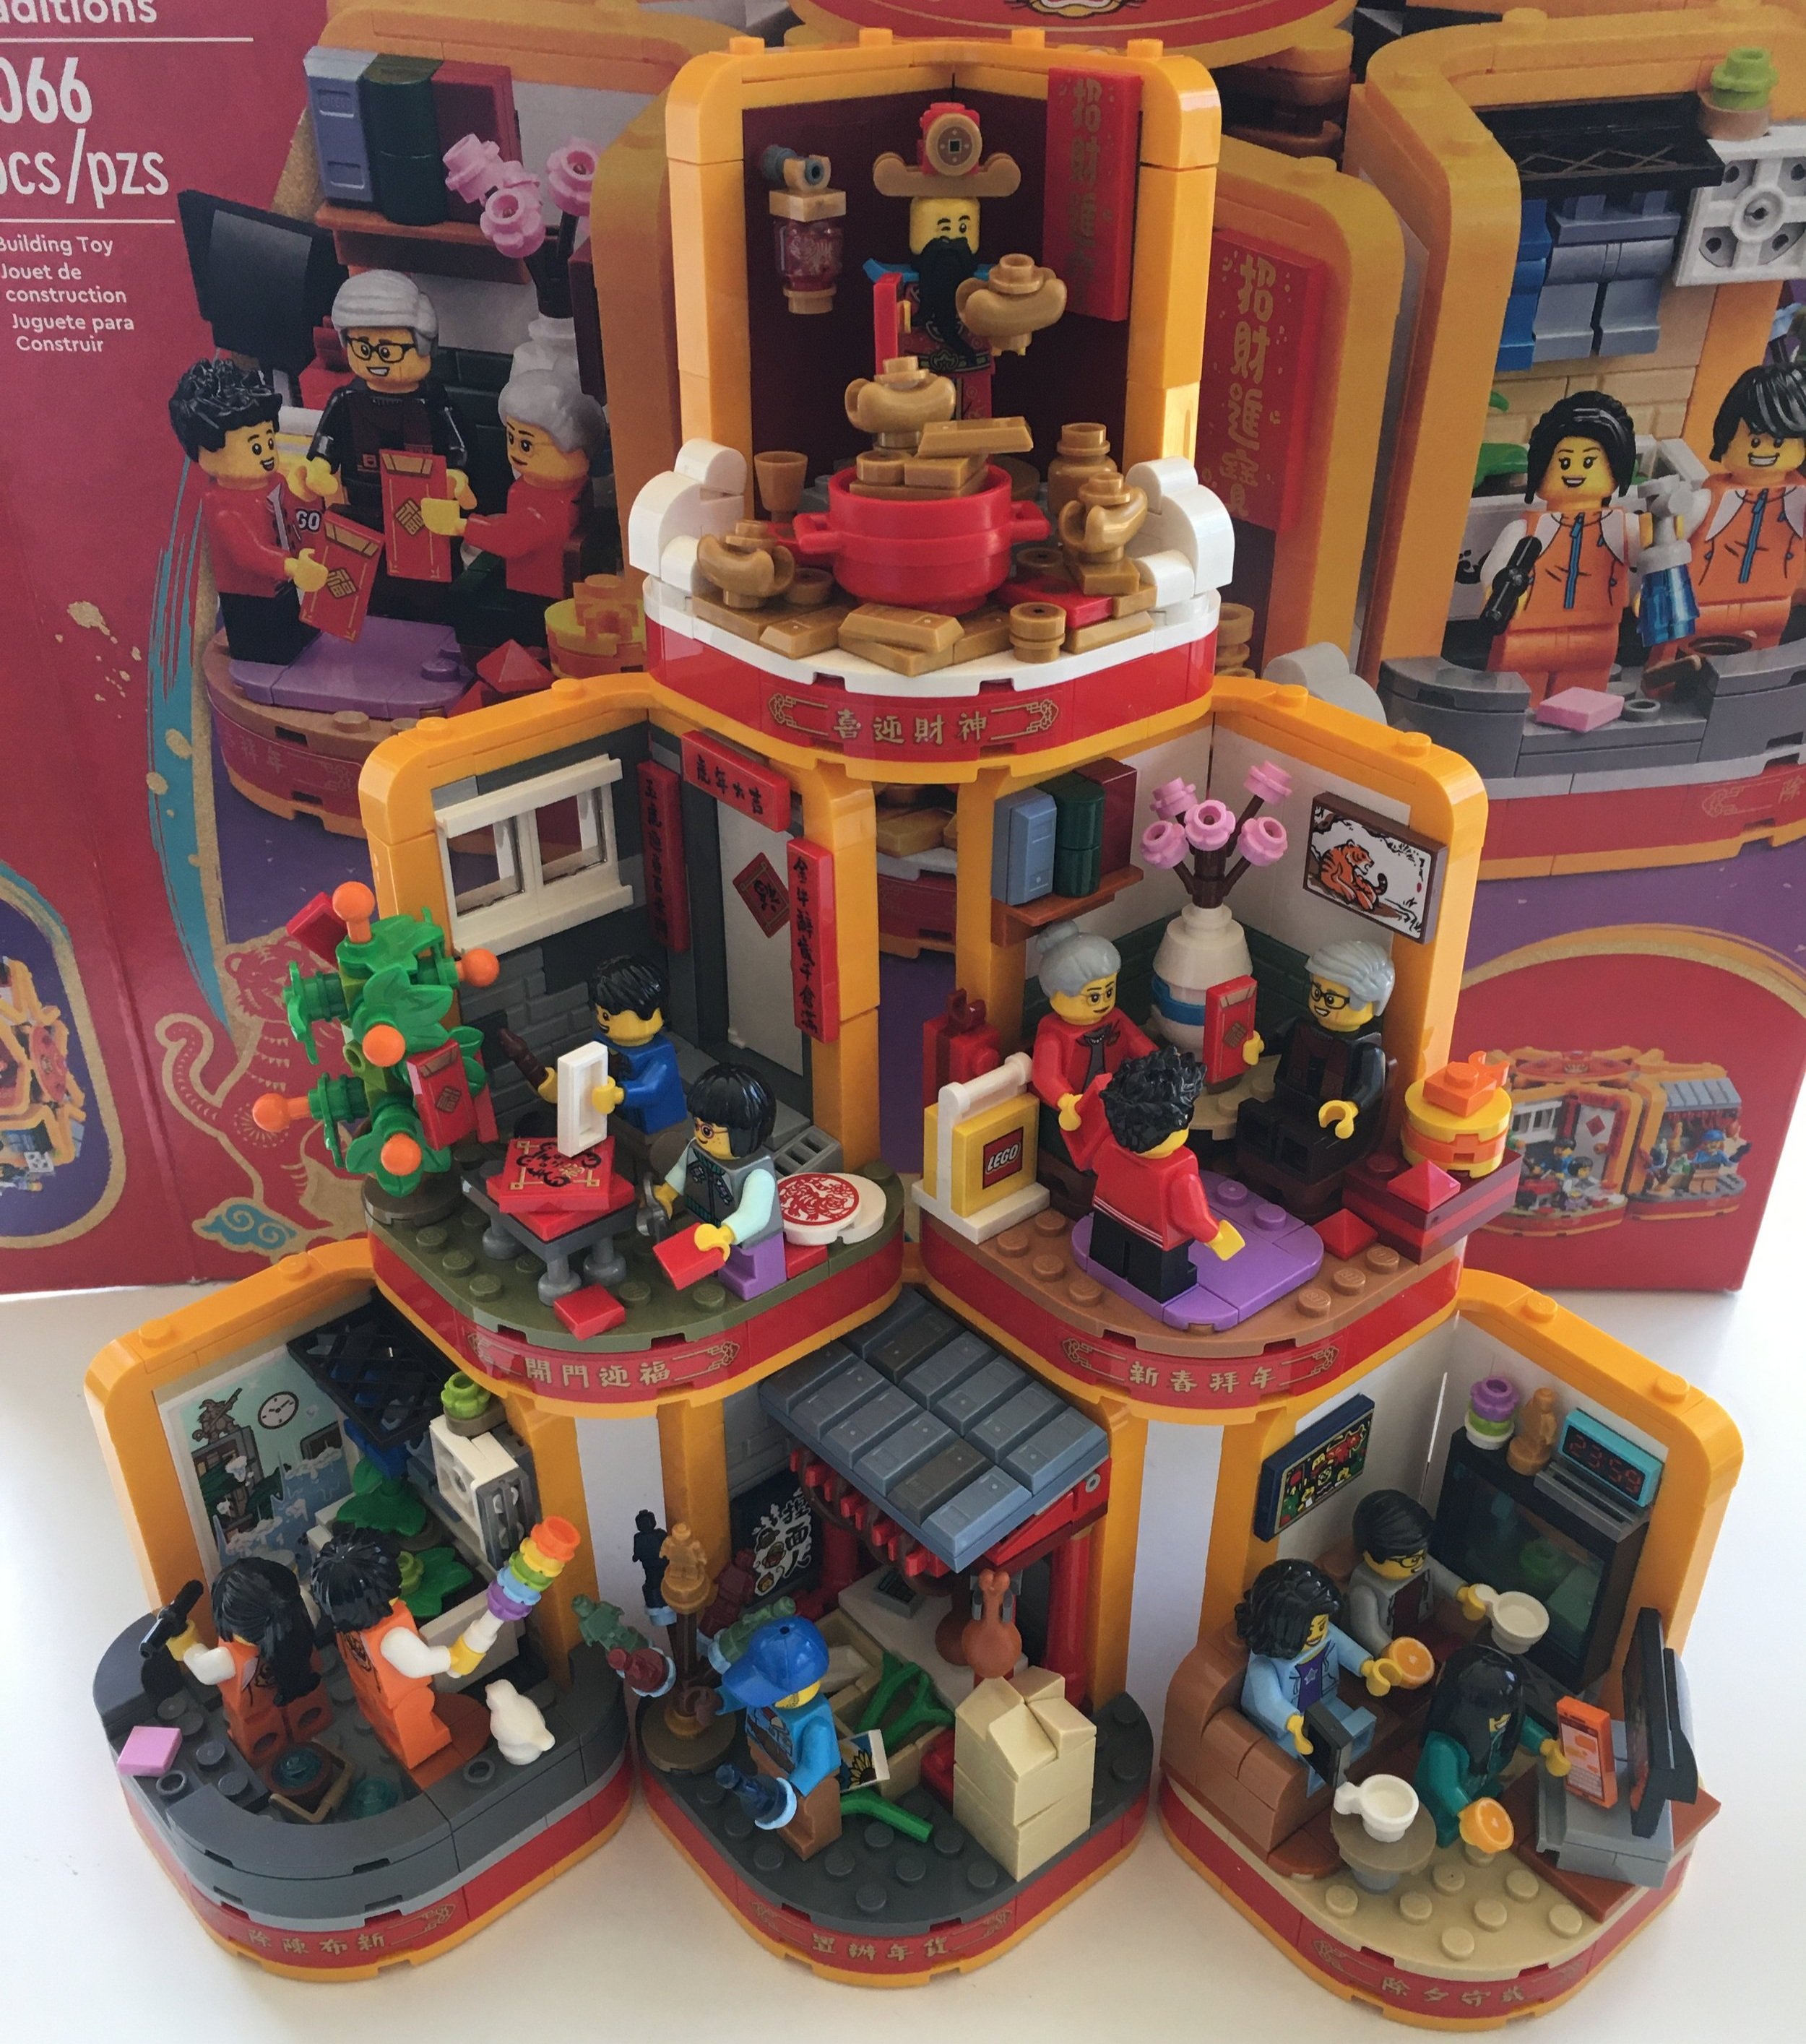
The front of the box also has the Chinese Festival Special Edition logo, a picture of the set and then all of the 12 minifigures included in the set. The back of the box shows that you can display the set rounded or stacked on top of each other. It also gives a few details of some of the individual builds.

This set includes seven numbered parts bags. The instructions are wrapped in a bag with the stickers.

There are six instruction booklets so you can split up the build as desired. One slight challenge is that the instruction booklets don’t match up with the bag numbers. So instruction booklet one uses bags one and two. Then after that instruction booklet two uses bag three. The bags and booklets continue the disconnect throughout. Not a big deal, but make sure you pay attention to it when building.

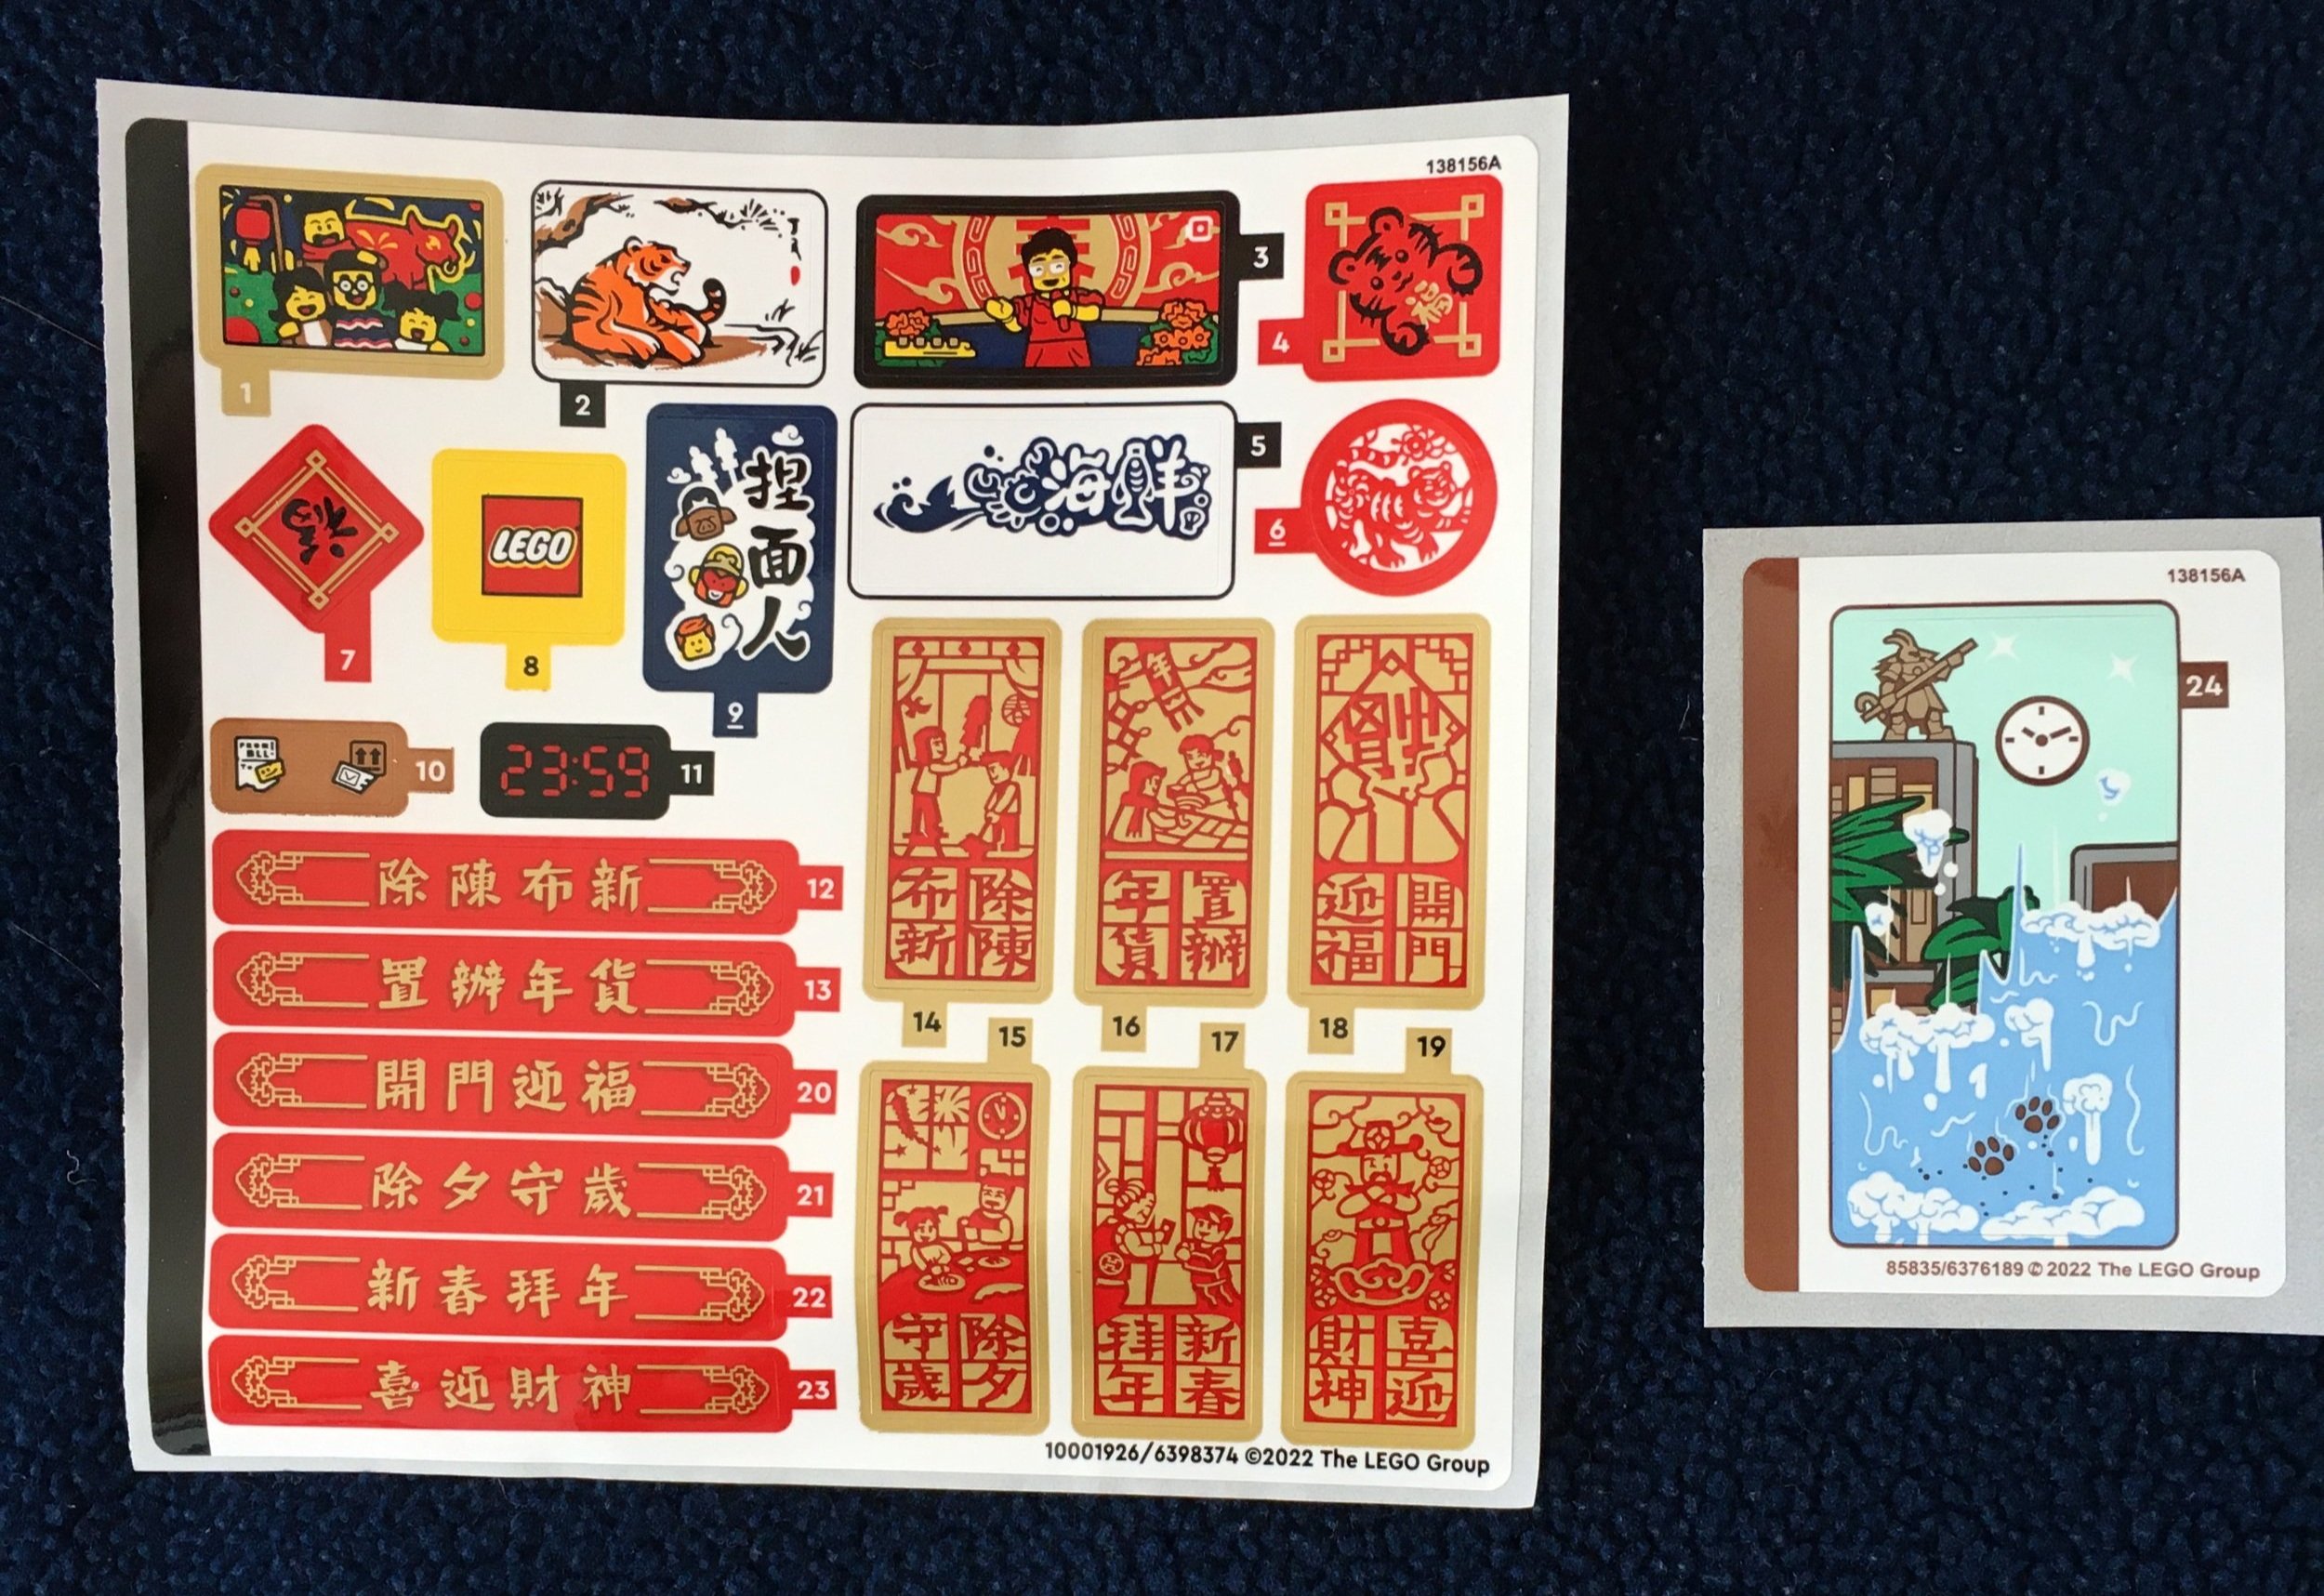
Here are the stickers. There are a bunch. I learned that my 7 year old is really good at putting stickers on LEGO sets. I might have to keep that in mind for future builds.

Bag one builds the first vignette. It has two minifigures cleaning a store that sells pants. There are some fun details in this one to include a small bird, the sticker shows where the window is still being cleaned, and the minifigure pants hanging on the wall.

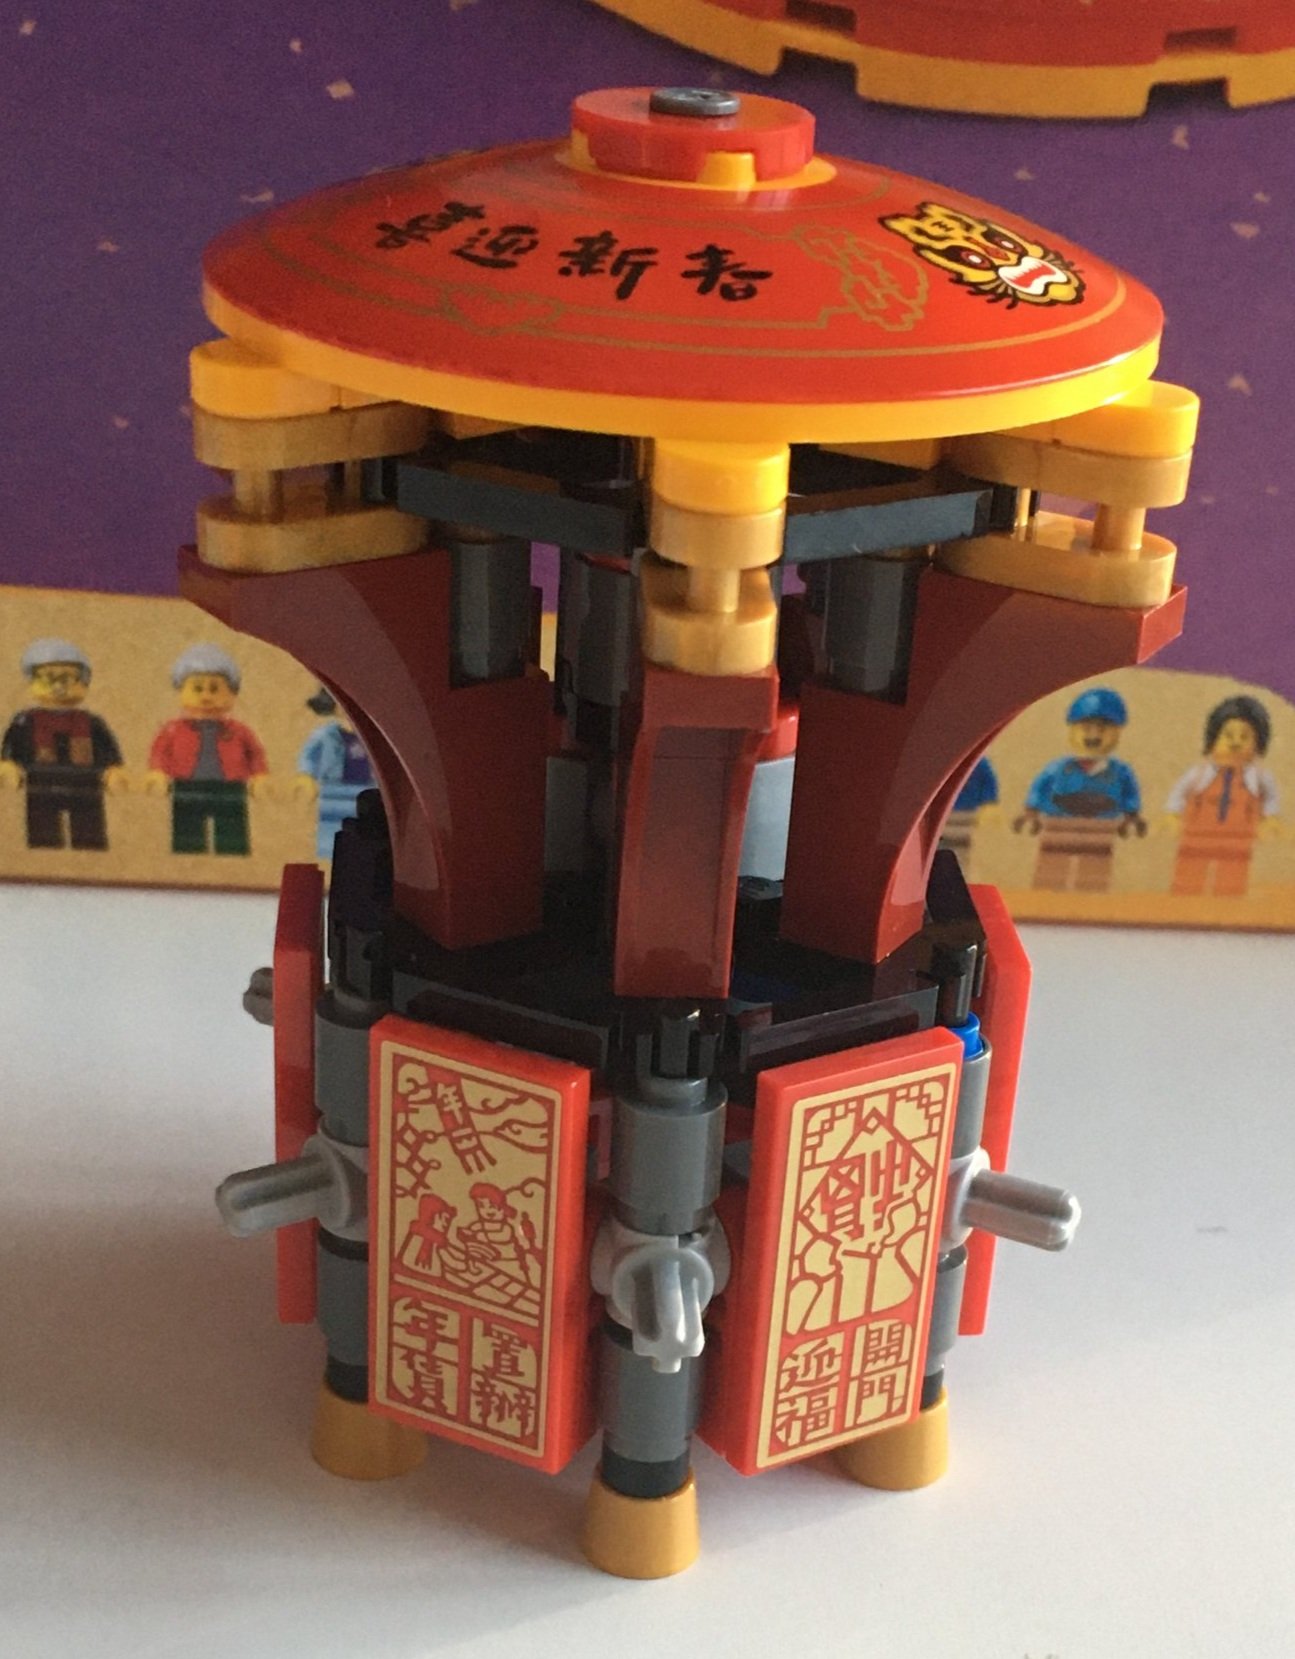
The second bag builds the piece that holds each of the vignettes together if you want to put them in a circle. Each side has a 2x4 tile with a picture depicting the scene. The top round dish piece is all printed and looks pretty good.

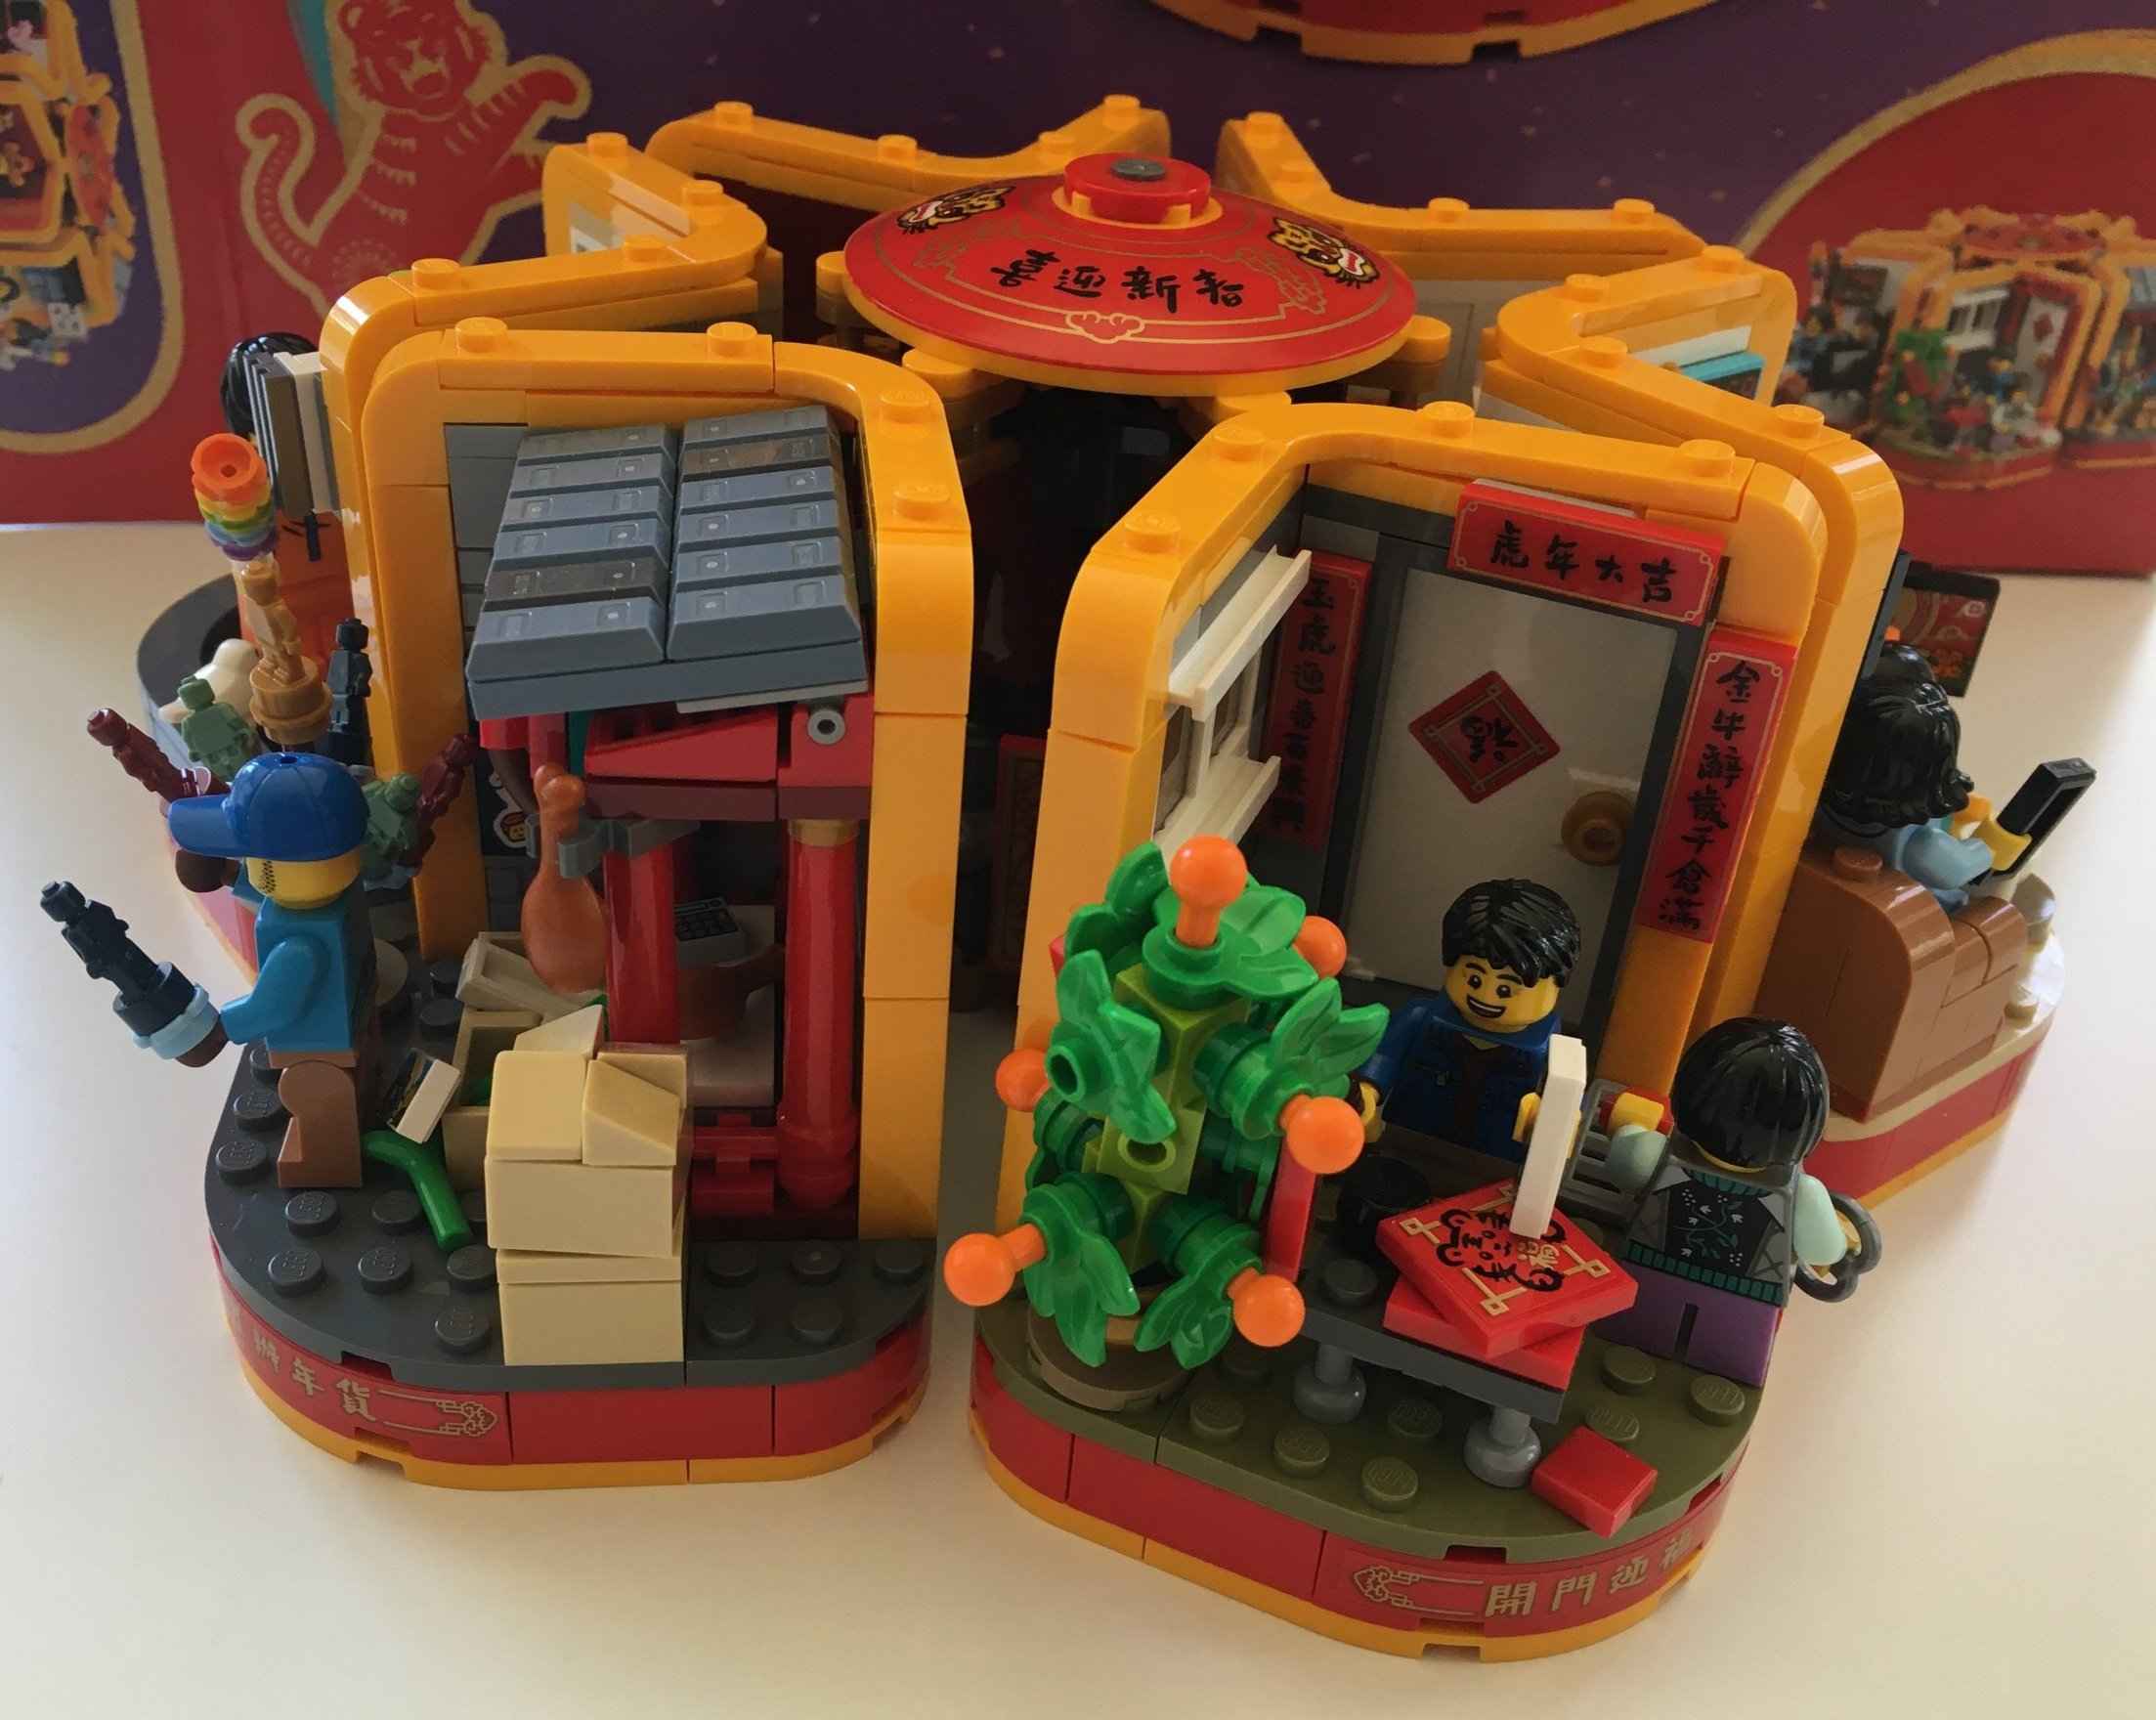
The third bag has a vendor selling various items. There are some chicken drum sticks, some sausages, some green… um… not sure what they are, and then the little minifigures. There are a few boxes on the side with some extra inventory. The use of the textured tiles for the roof area is a nice touch here. I also like the different colored tiny minifigures.

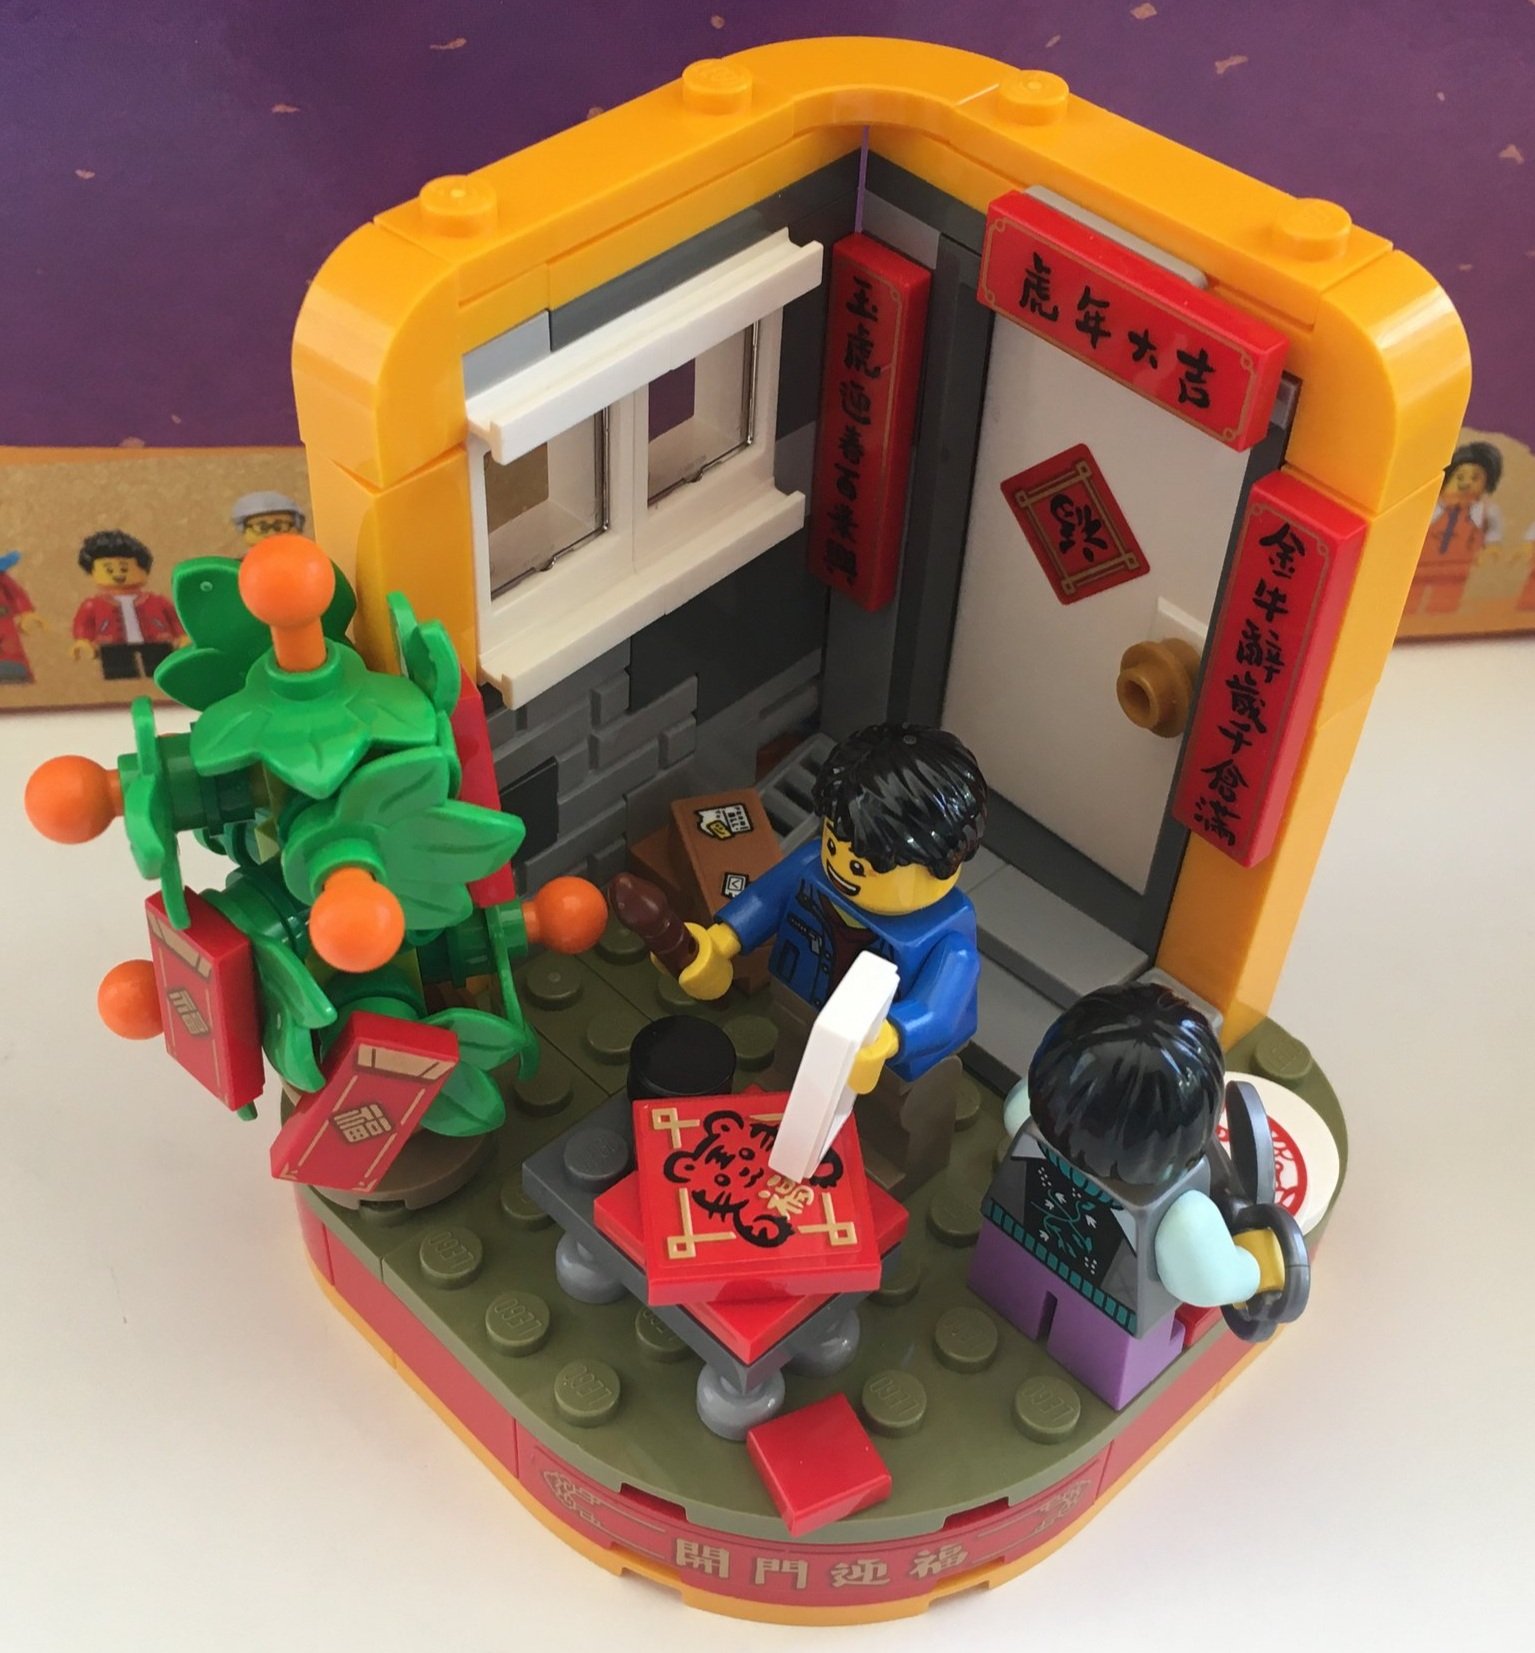
Next up are two minifigures putting up decorations and an orange/tangerine tree. While I think it’s a fun scene, I think LEGO is missing an opportunity to educate the world. What do the various signs say? What are the different traditions? The instructions could have a short little statement on each scene and translations of the various signs and stickers. At least that’s my opinion.

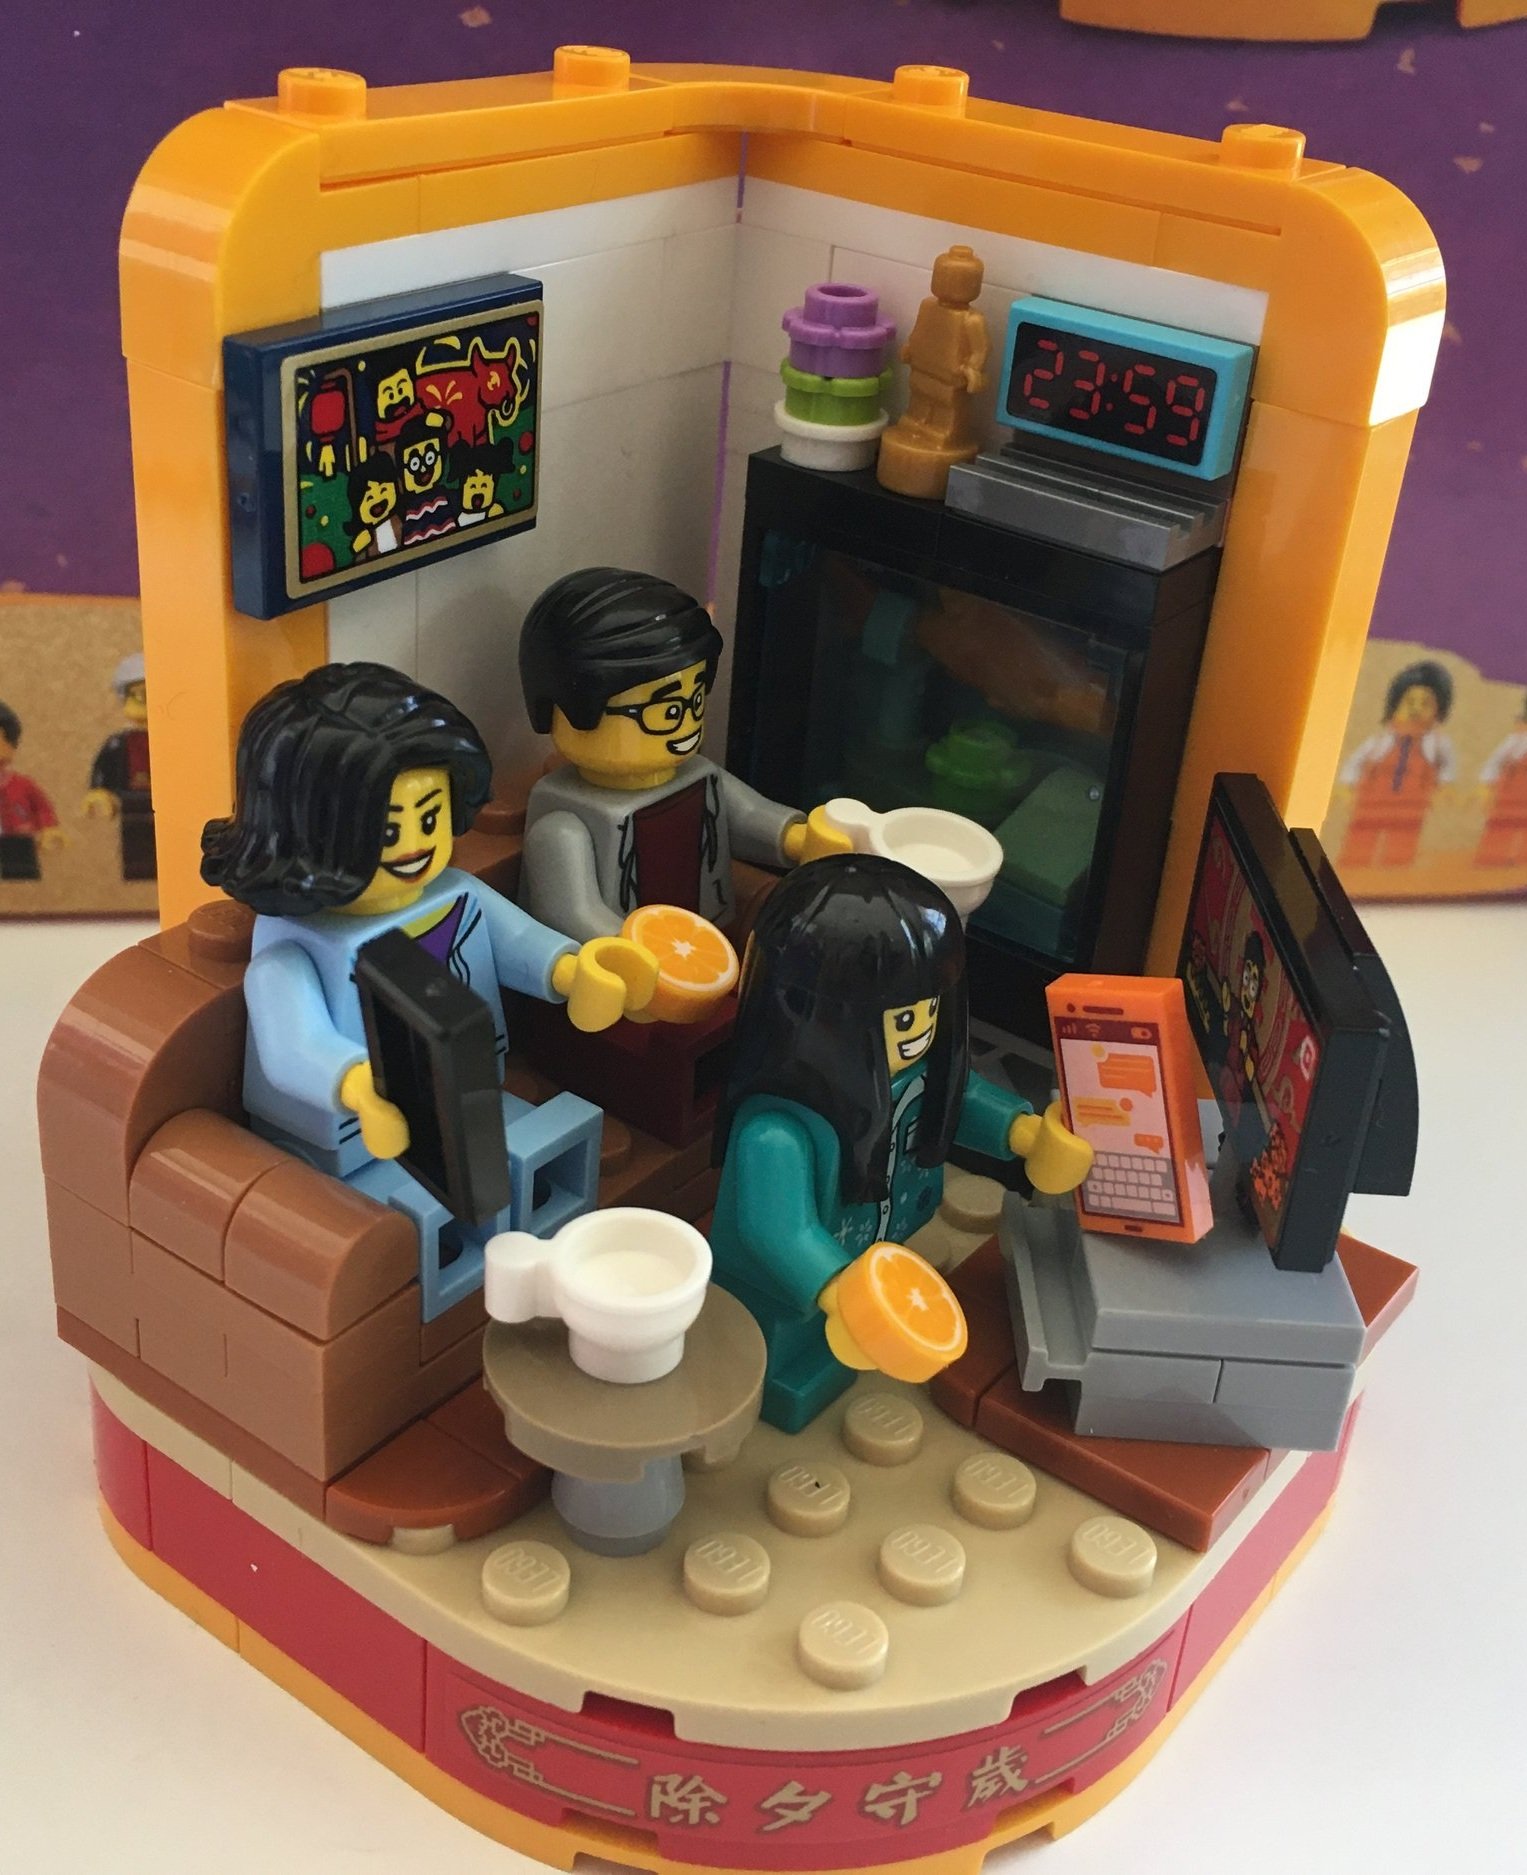
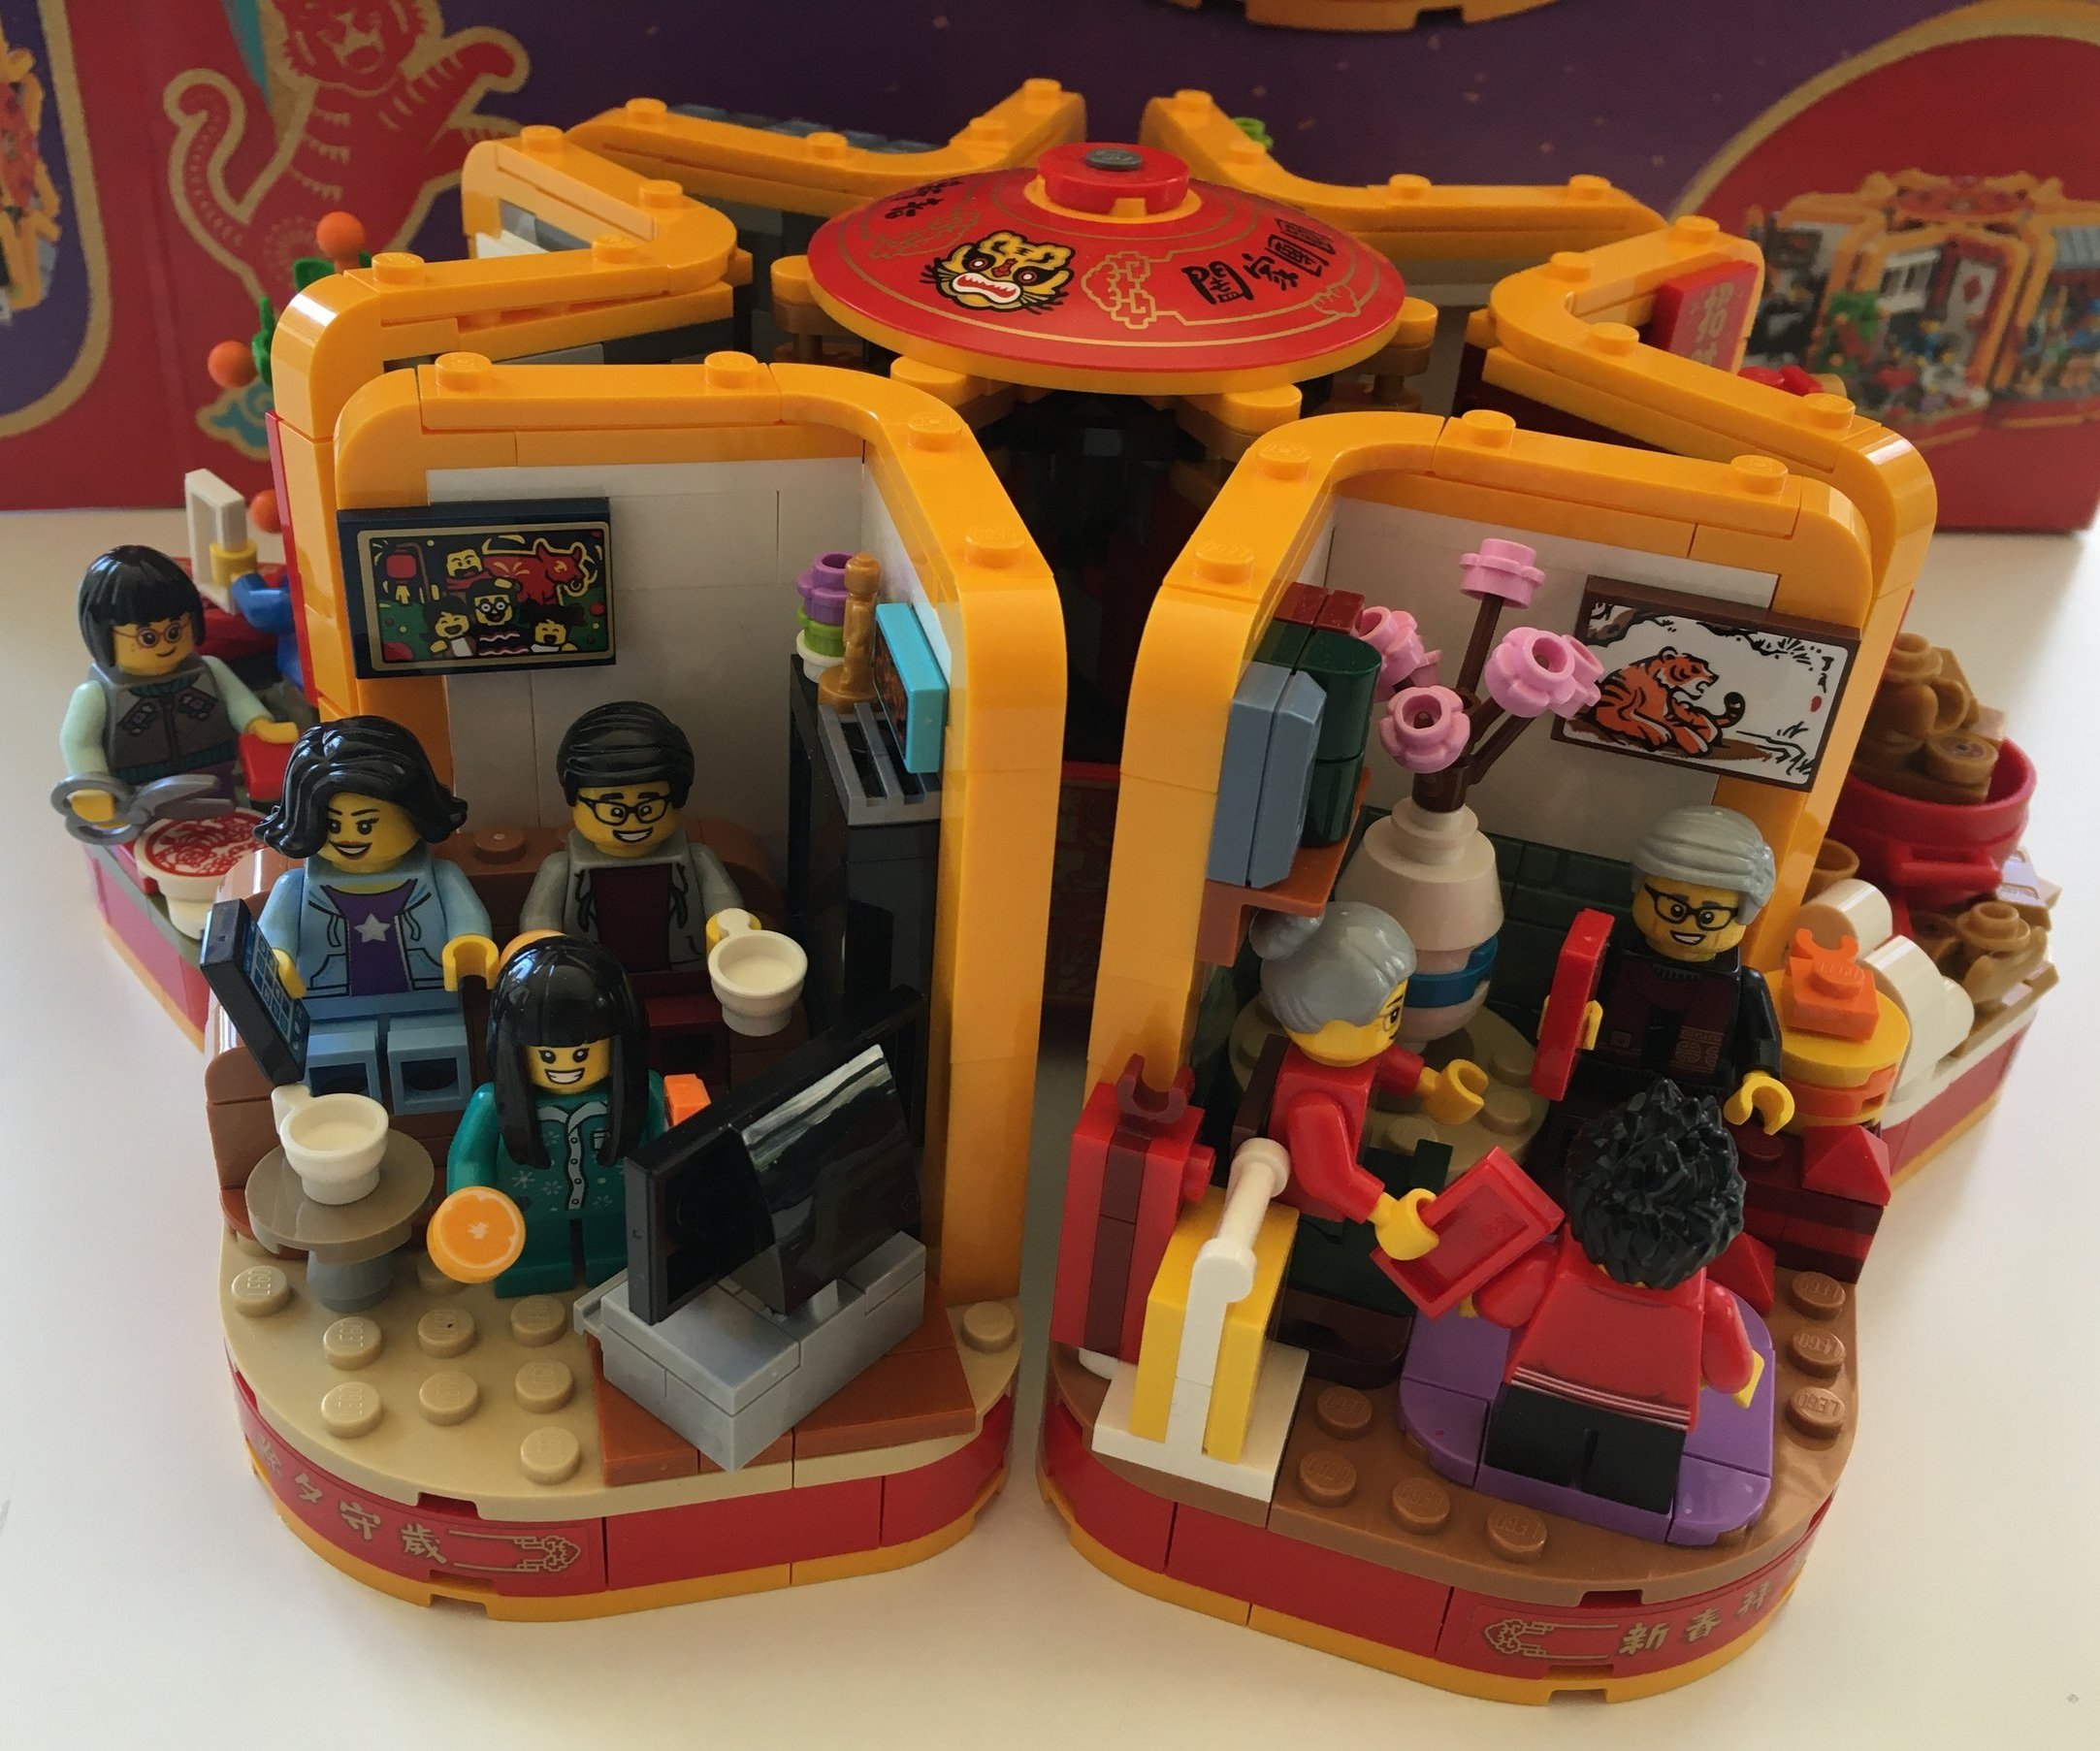
The fifth build has two adult minifigures and a girl watching television right before midnight. The scene is pretty fun with a clock on the wall telling the time and the scene on the TV screen. This bag comes with two smartphone tiles because we are incapable of watching TV without being on our phones at the same time. Also, there are some cups for tea perhaps and some cookies or orange slices. Not sure which they are.

One wall has a fish tank with a brick fish inside. The other wall has a sticker photo taken at 2021’s #80107-1: Spring Lantern Festival. This is a fun reference to a previous set.

The sixth build is of two grandparents giving their grandchild some gifts. From my knowledge, the red 1x2 tile is supposed to be an envelope with money in it. The scene has some fun decorations to include a picture of a tiger on the wall, a flower in a vase, a bookshelf on the wall, and then all the gifts. The best gift is obviously the LEGO bag on the floor. Or maybe it’s not a gift and the grandparents bought it for themselves.

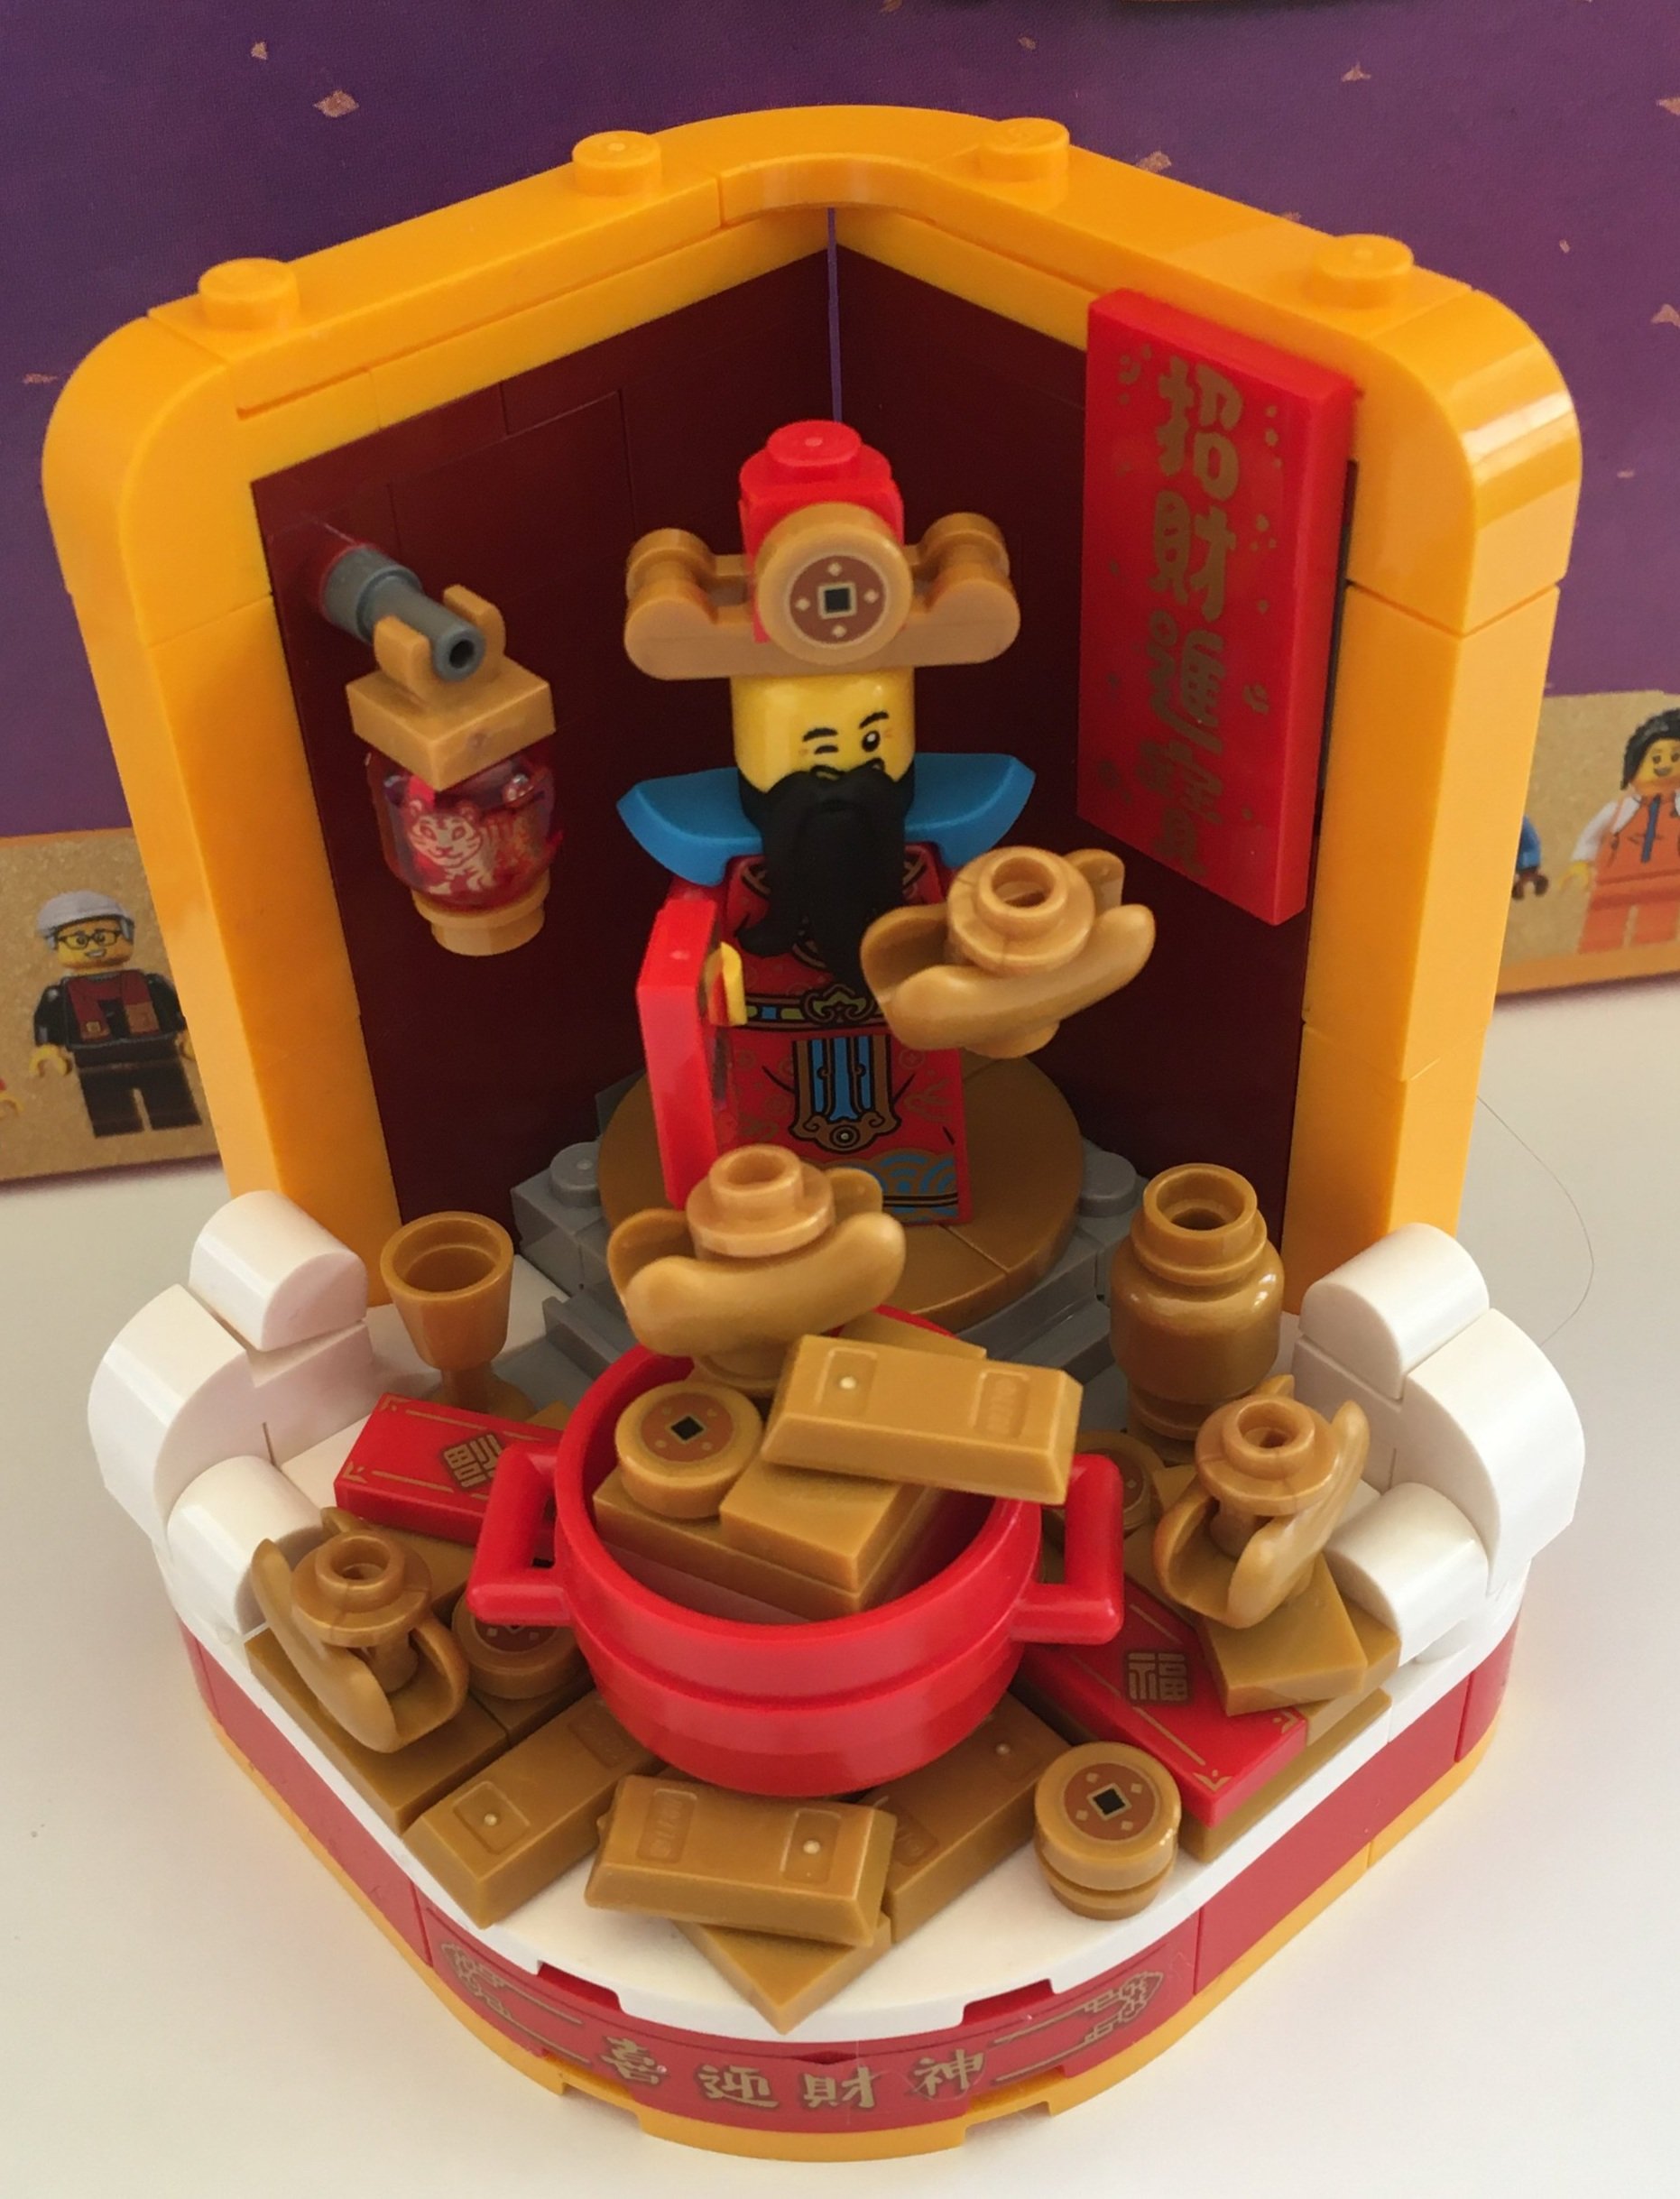
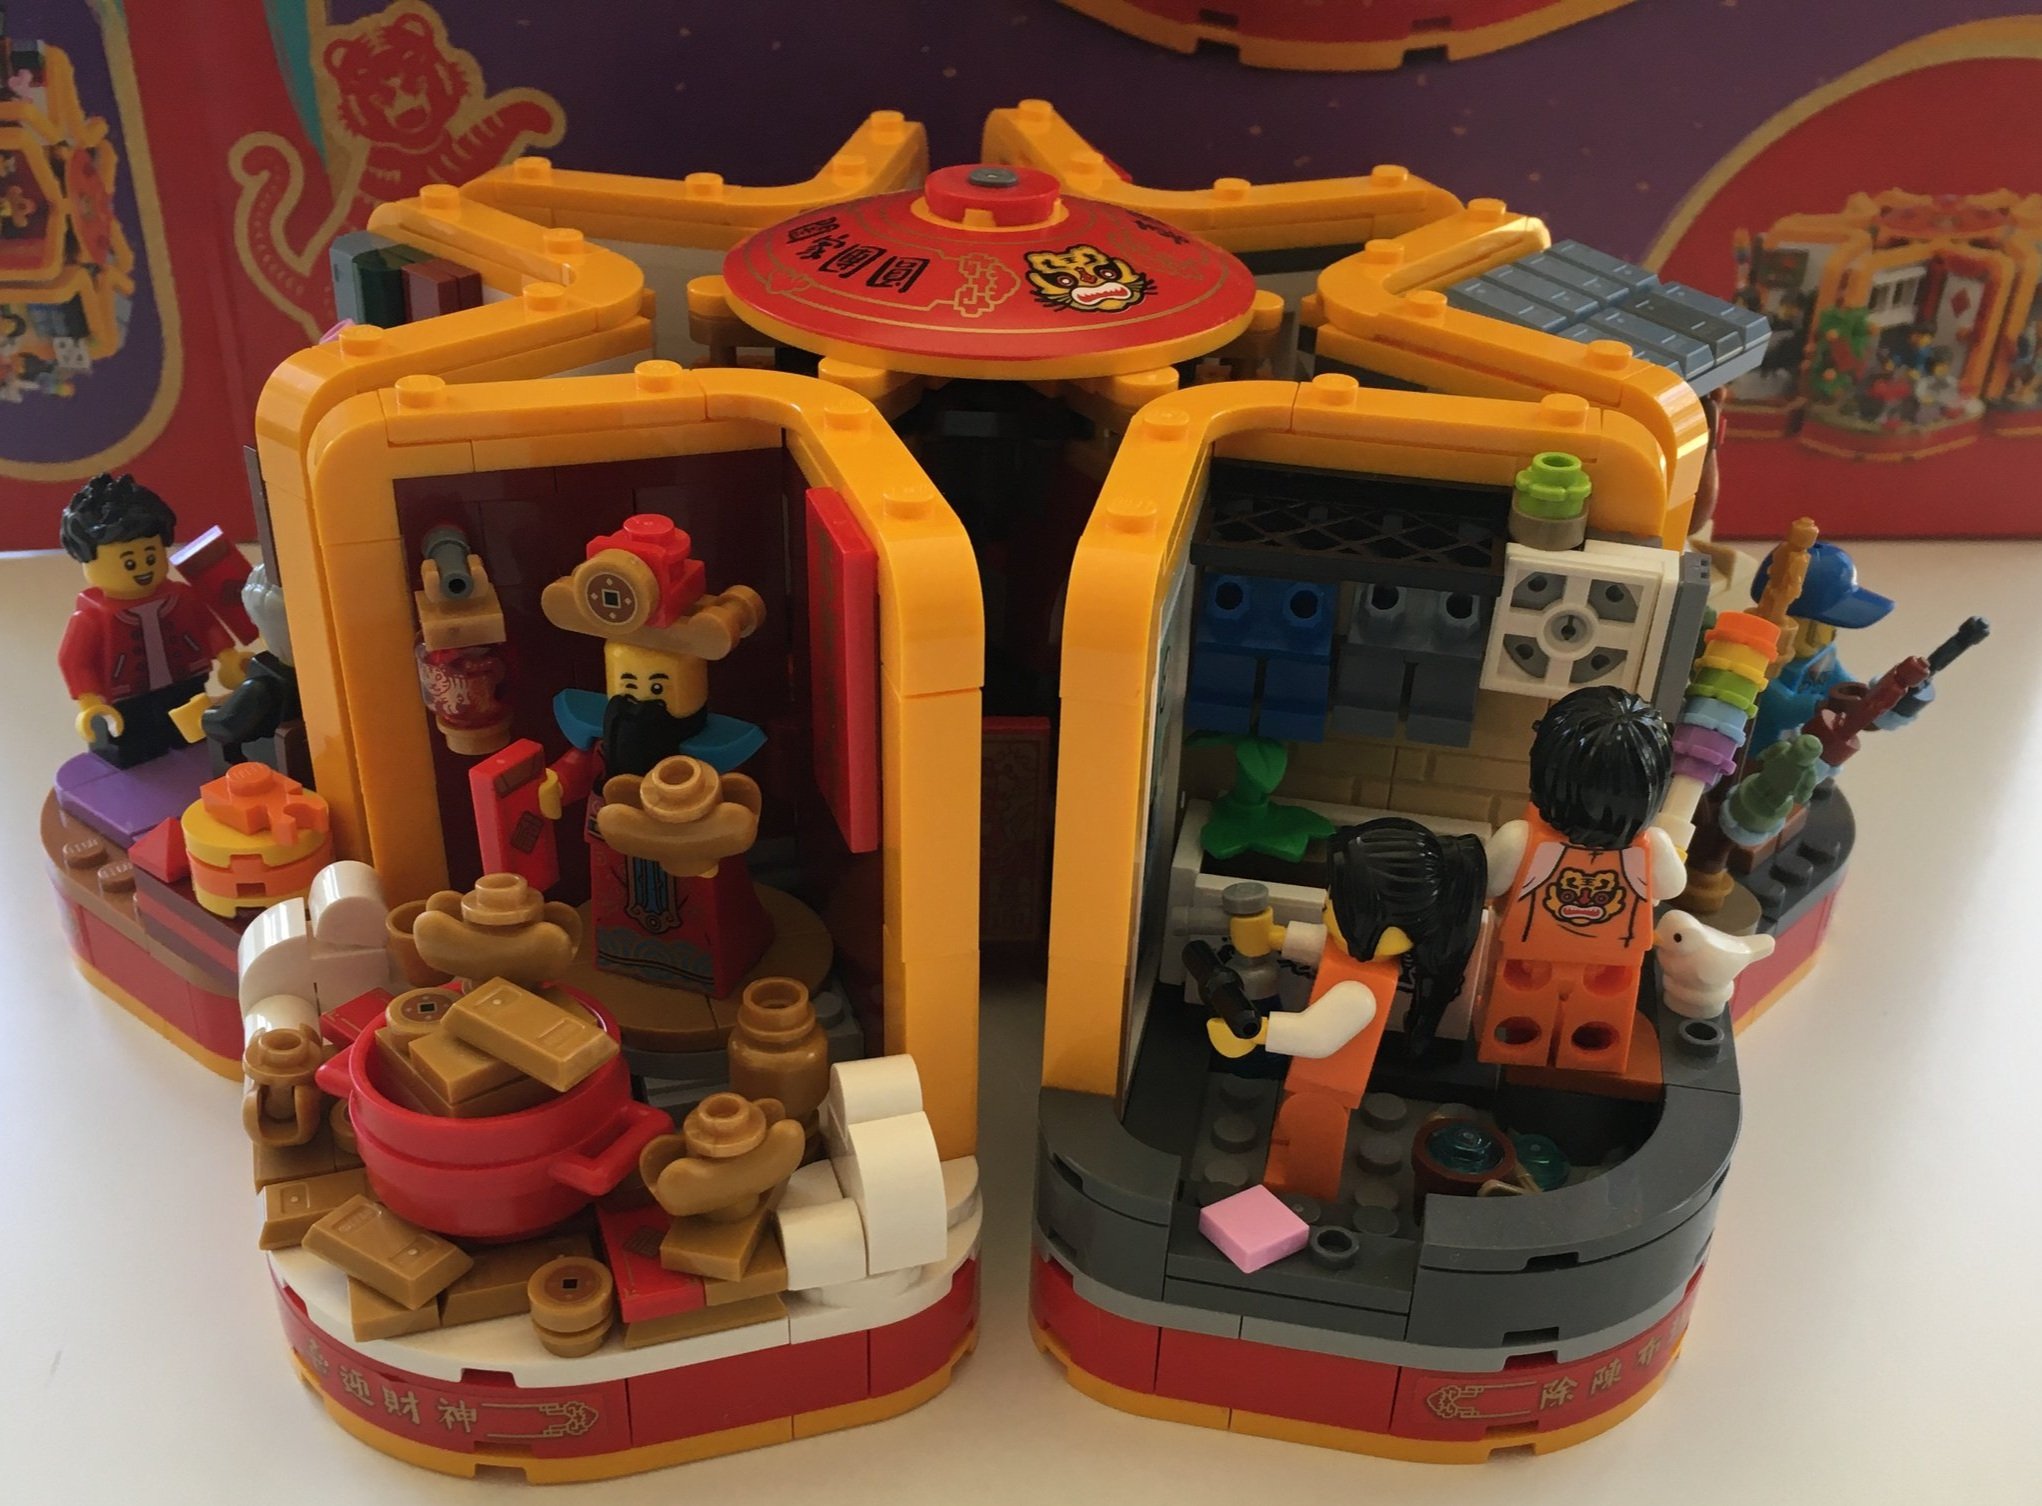
The last build is of a minifigure surrounded by a pot of gold. I’m sure there is some symbolism and once again it would have been great if LEGO shared some of the story in the instructions. The little gold hot dog bun type pieces are fun. You also get a bunch of gold bars and coins which could be useful for MOC builders.

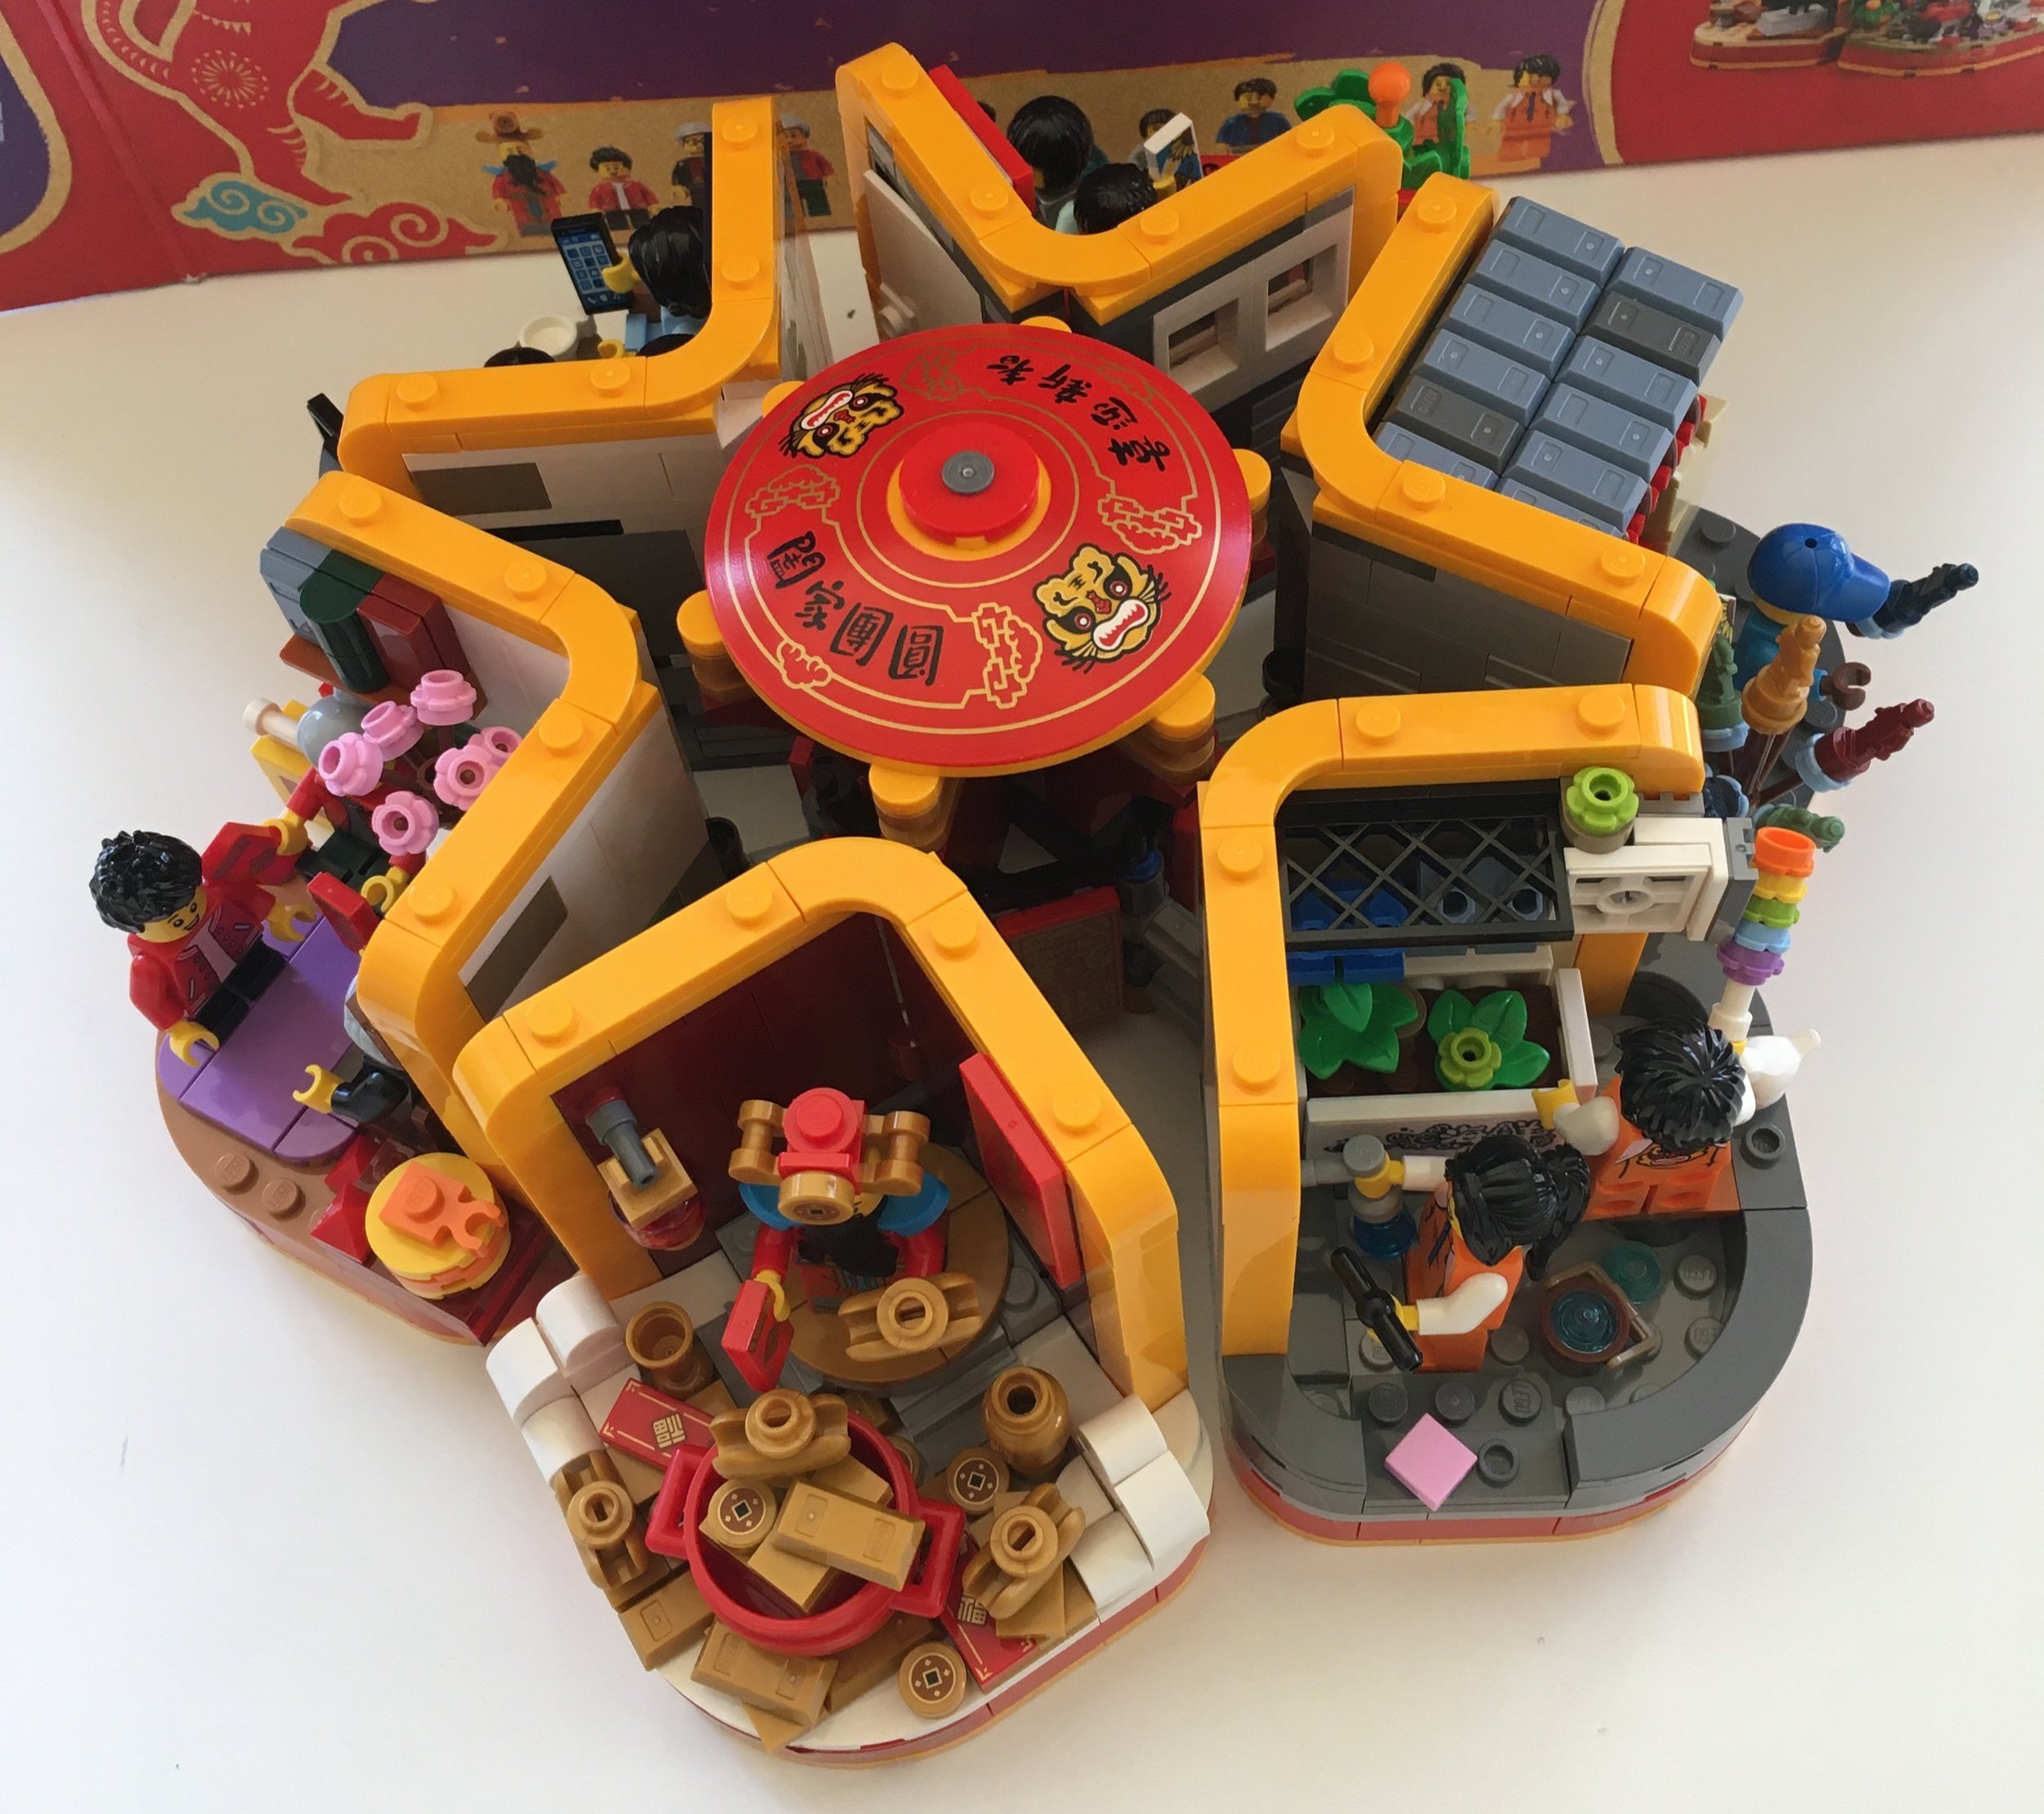
Here is what the set looks like all connected together using the assembly built with bag two. You can spin it around to see each side as desired. The pieces connect pretty easily and can be removed easily, but they don’t just fall out when you try to move the set.

Here are pictures of the set with different views. I tried to line them up with the pictures on the 2x4 tiles so hopefully I came close.

Here’s what it looks like when stacked. There are no instructions to guide you and I didn’t line them up correctly the first few tries so don’t feel bad if it doesn’t look pretty like the example on the set box right away. I prefer this version better as you can see all the vignettes at once.

As mentioned, I built this set with my kids. It actually worked out pretty good to do it this way and we had fun assembling it together and seeing how the different vignettes connect together. My 8 year old did great on her own and my 4 year old did fine working with me so I can endorse the “build together” strategy.

Overall, it’s a fun set with some cool vignettes that I have no idea what they mean. The build can get slightly repetitive with some minor differences between each vignette, but it wasn’t overly boring. This also opens up a chance for you to create your own vignettes using this design or to add your own. For the price it wasn’t too bad, but it does feel rather small for $80. You do get a lot of minifigures though so no complaints there.

What are your thoughts on this one? Has LEGO exhausted the Chinese Festival sets? Should the line continue?

Happy building!