Set Review - #21047-1 - Las Vegas - Architecture Skylines

LEGO released the Las Vegas Skyline as part of its Architecture series back on 2 September 2018. While I’m not a collector of every Architecture set, this one hit home with me because I lived in Las Vegas for 4 years. It retails in the US for $39.99 and with 501 pieces, that makes it $0.08 per piece. I picked it up at Amazon.com for 20% off or $31.99 so no complaints from me on price. I just had to wait for the set to be discounted.

Most of the sets in the Architecture Skyline series like #21039-1 Shanghai feature famous landmarks in the city, monuments, tall skyscrapers, or other key buildings. Las Vegas is the only one that features only resort casinos. I’m not sure what else they would put… the Hoover Dam? Or… that’s really it. So they selected a few of the casinos and given that there are so many in Vegas, they had to choose. They picked mainly from the Strip (except for one) and originally they were in order of appearance as your drive through the Strip or along I-15 that runs parallel to it. Unfortunately for LEGO, one of the casinos they choose was the Mandalay Bay Resort where in October 2017 a really awful thing happened there and a lot of innocent people lost their lives. When LEGO announced the set, there were a lot of comments about it being inappropriate to highlight this Resort after what had happened less than a year ago at the time. So they smartly delayed the set to redesign. Now the skyline is not in order, but it works.

Onto the review…

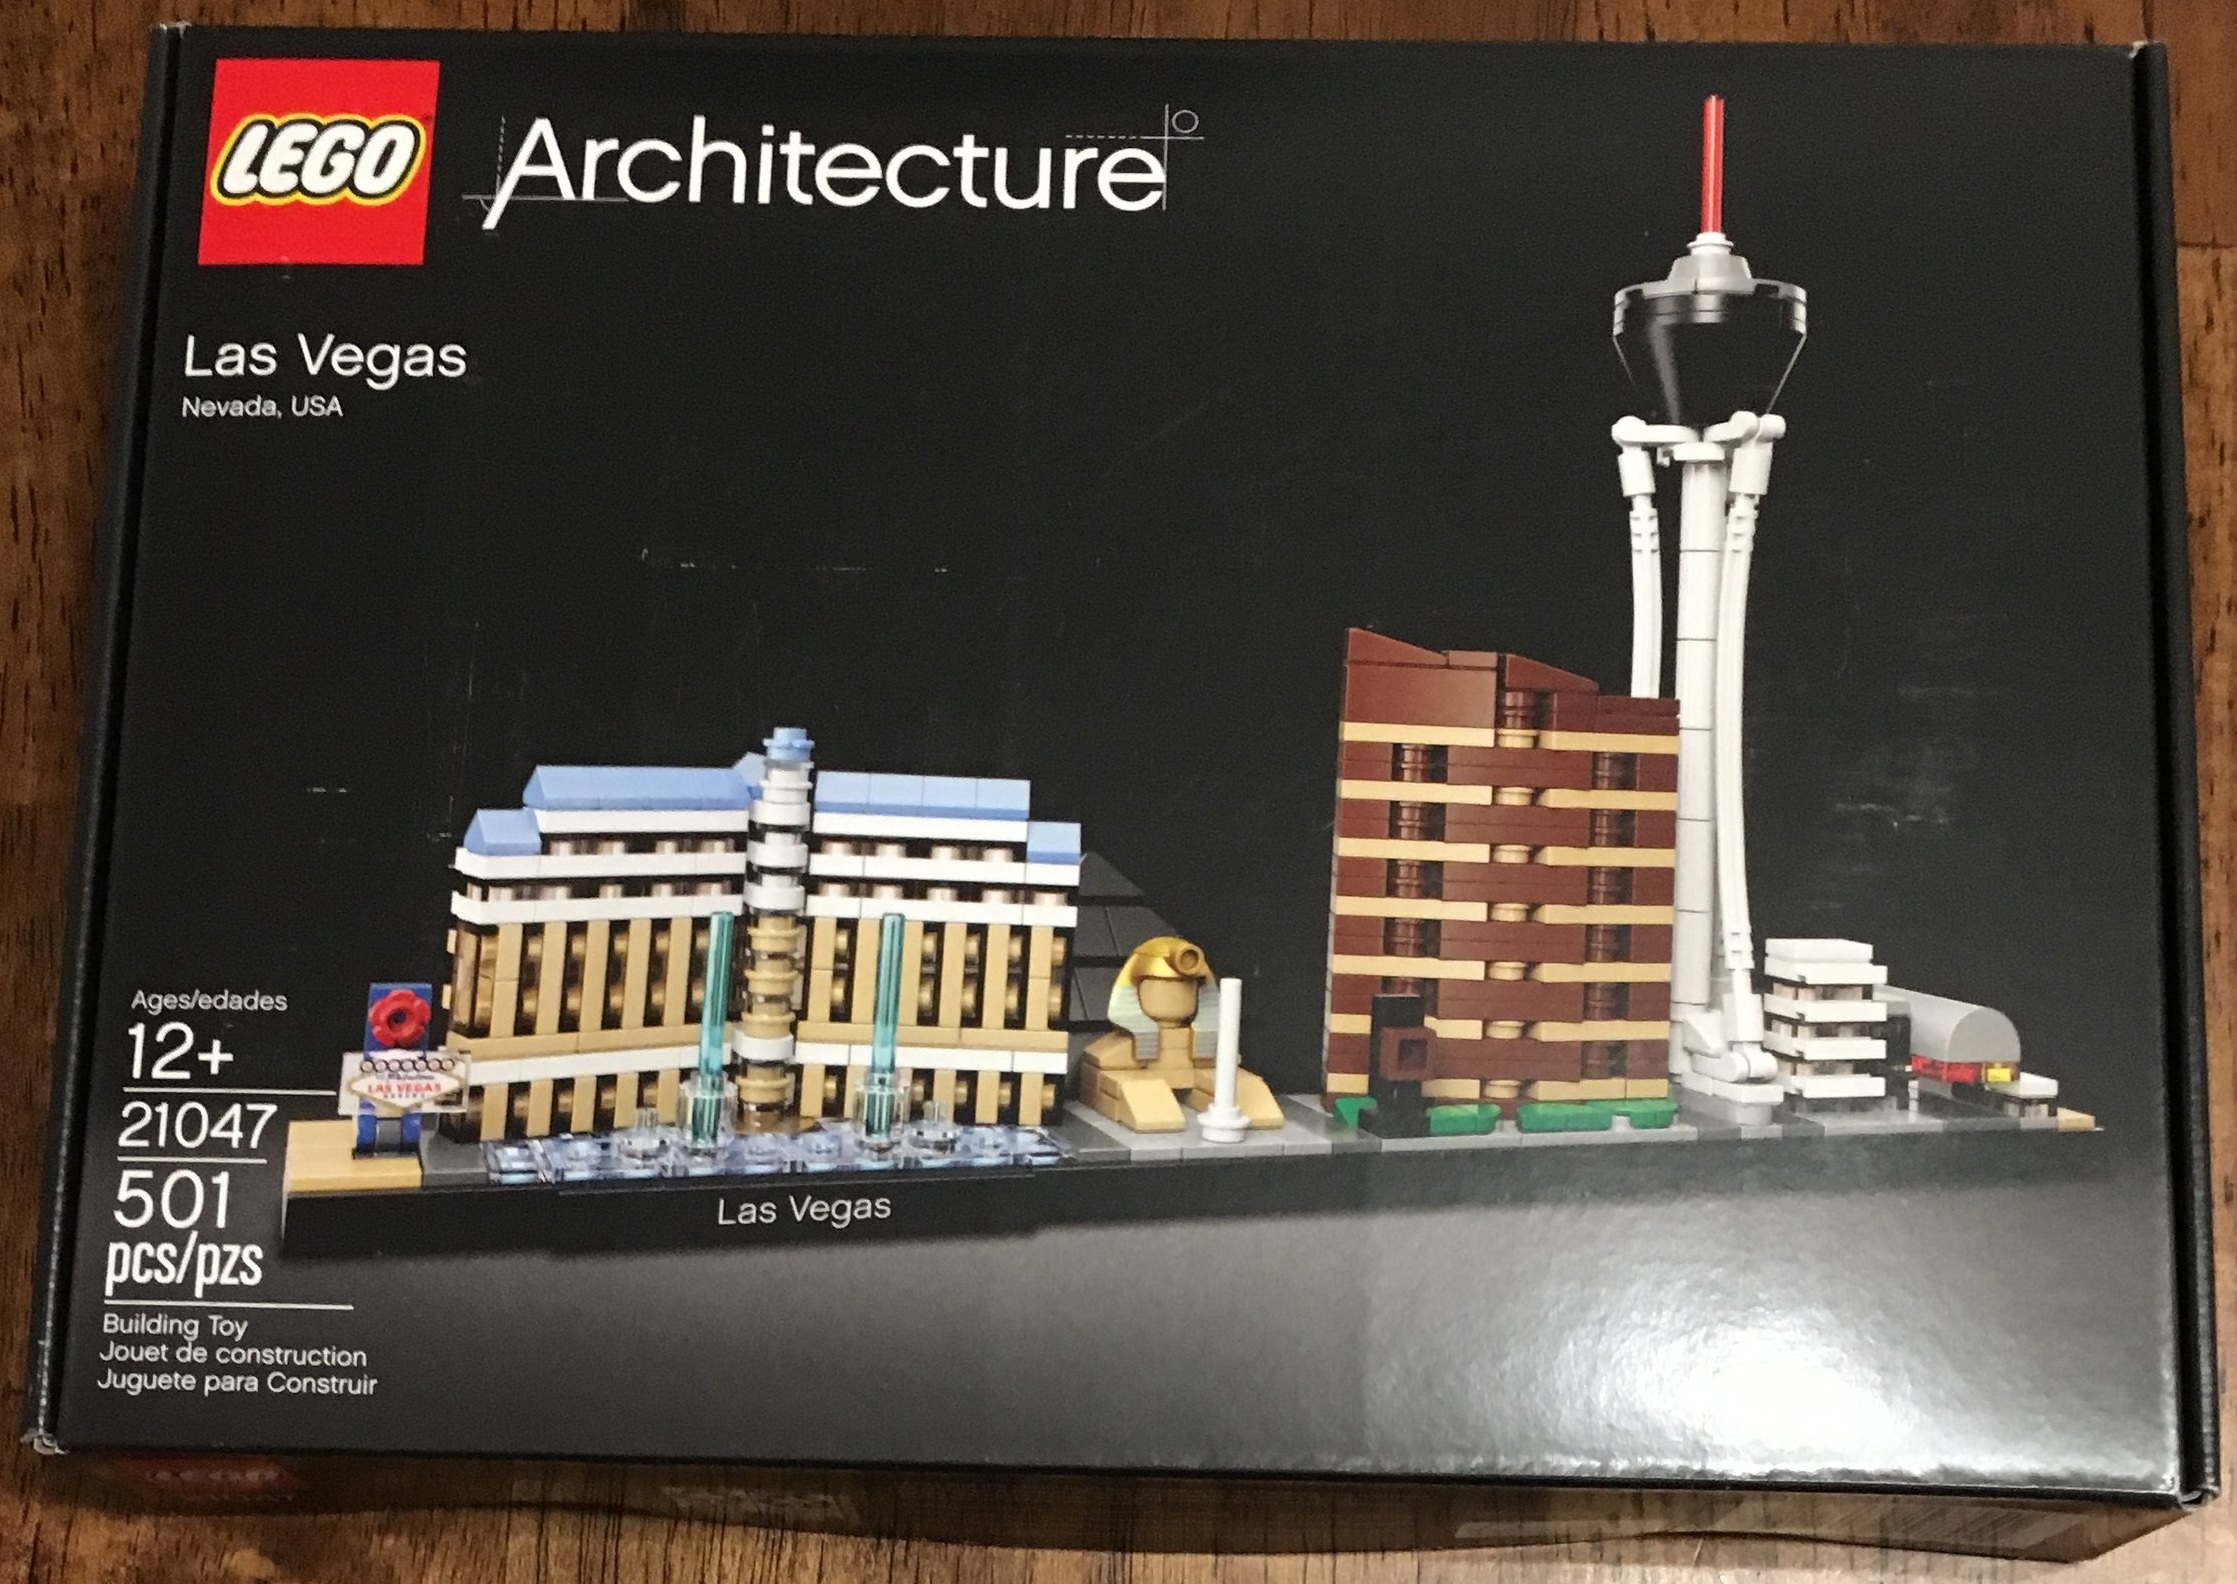
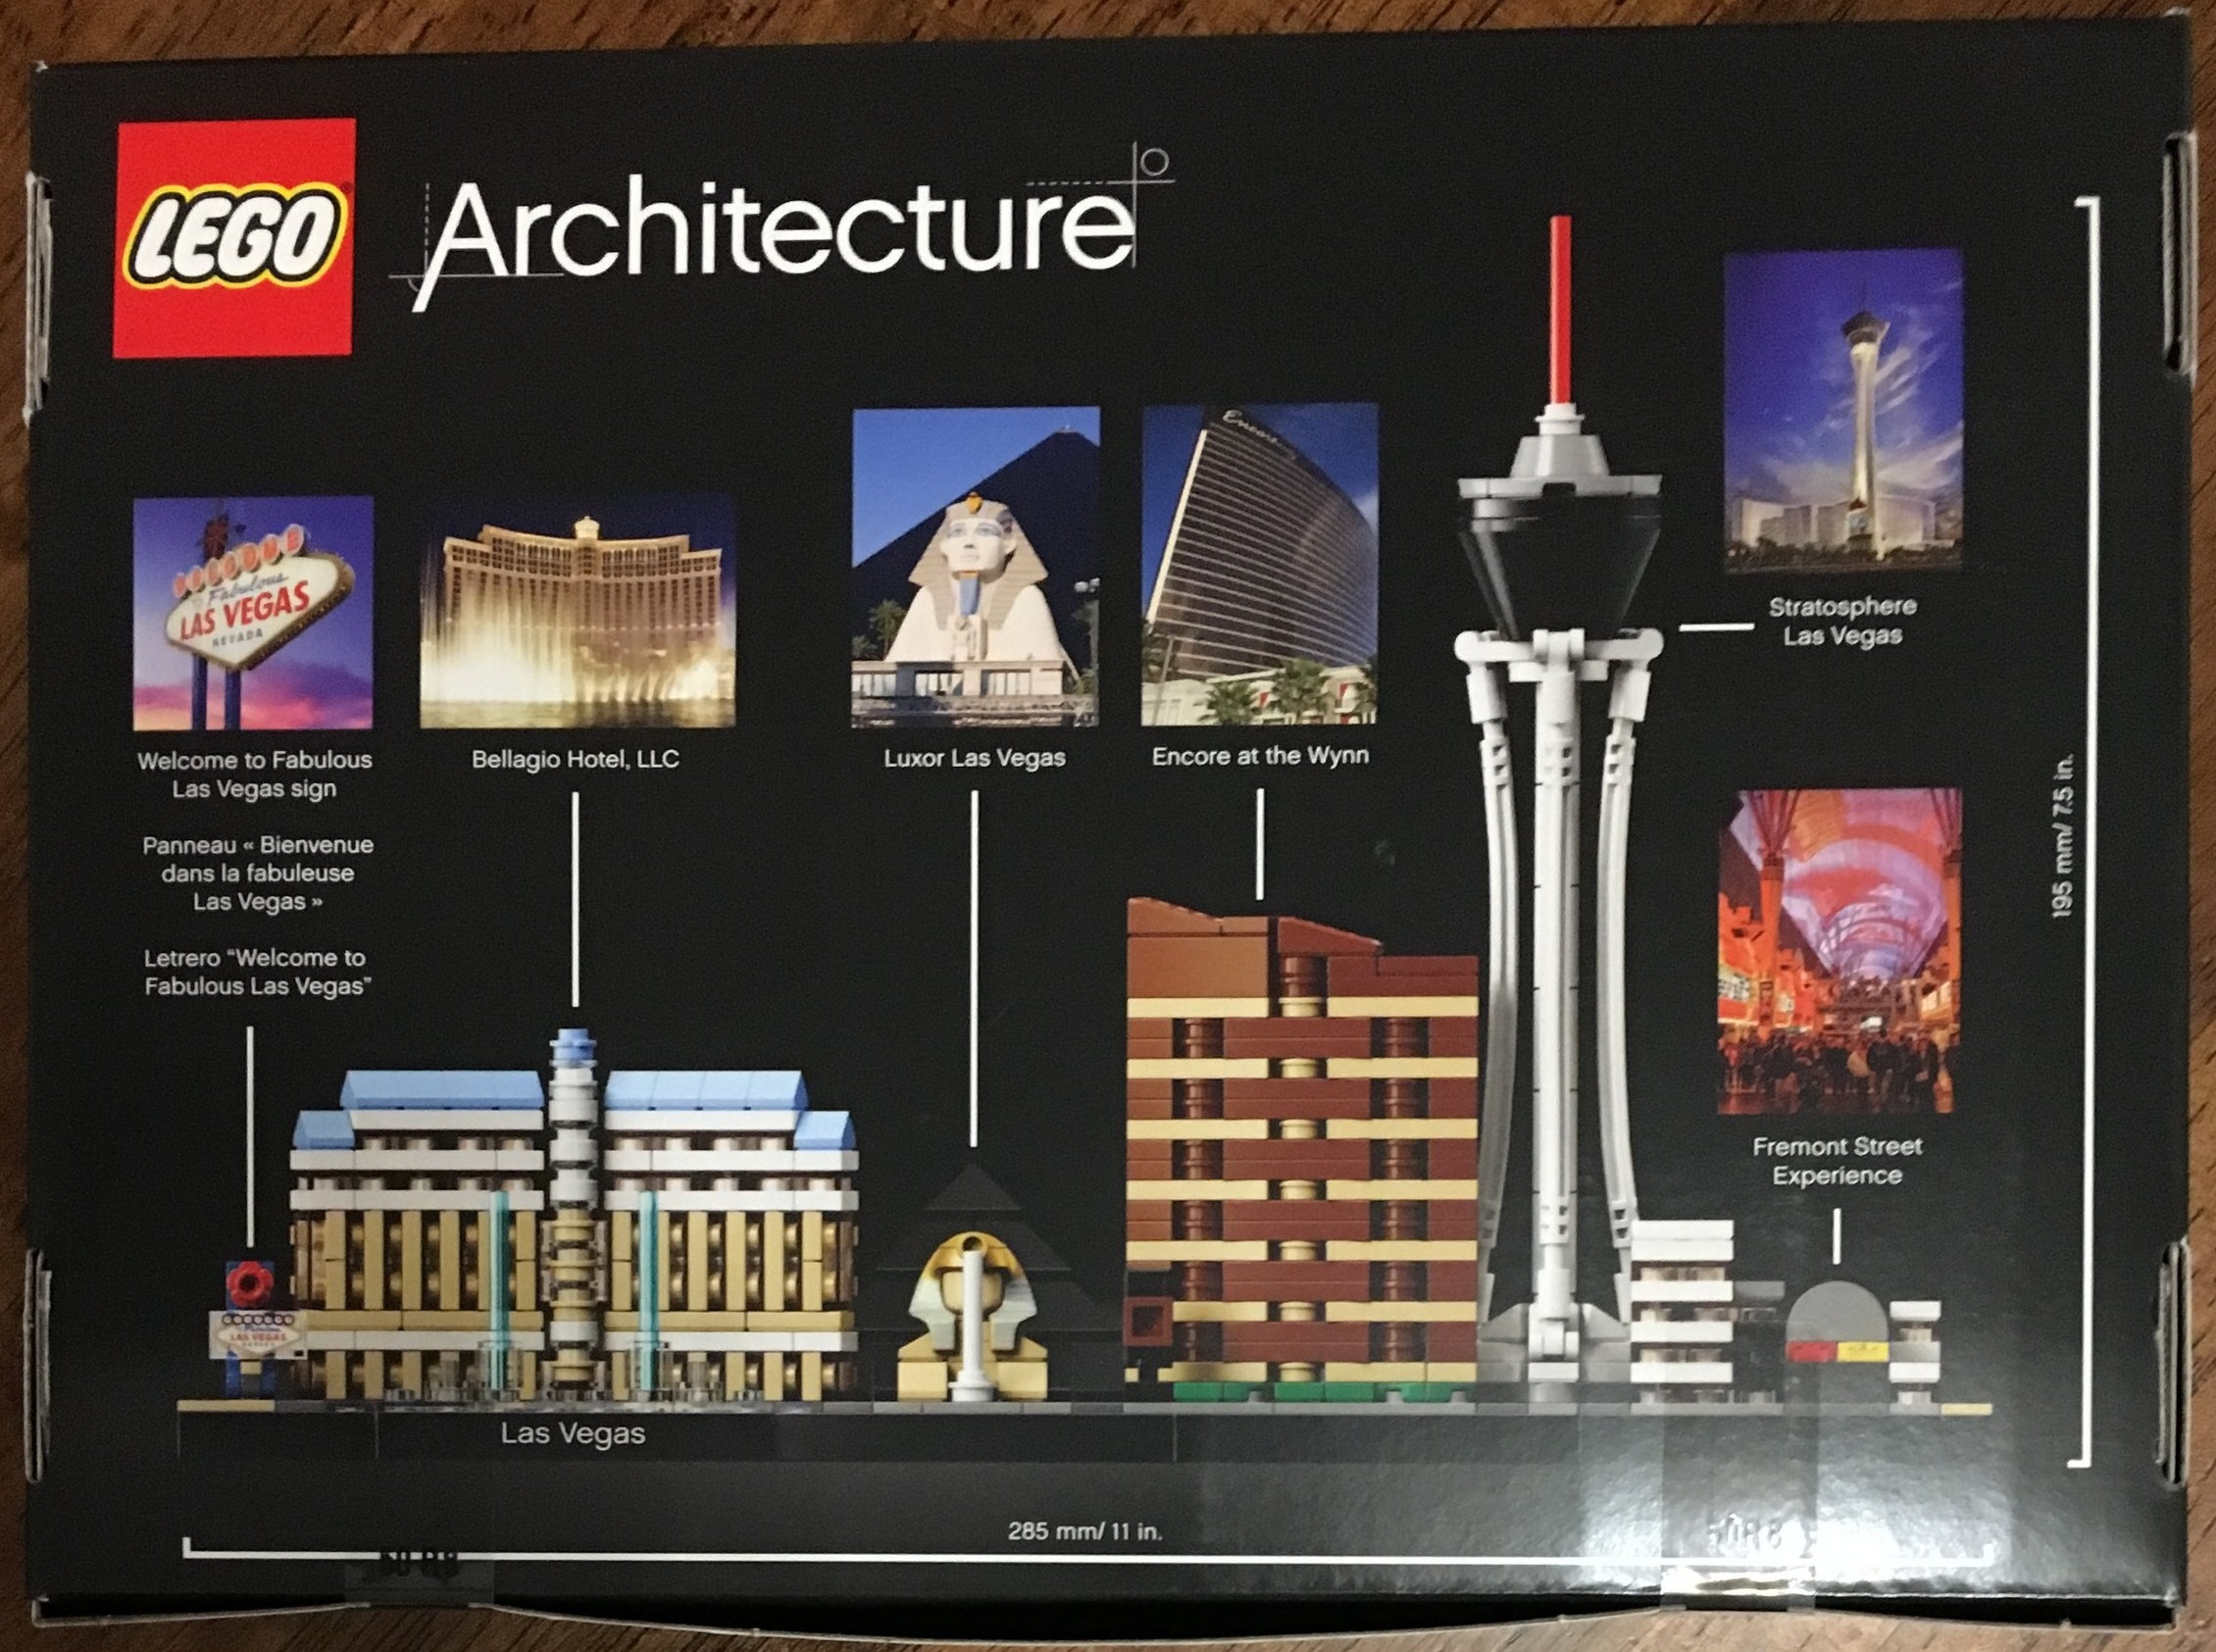
Here is the box. The front shows the completed set, the back shows the completed set with pictures of the actual buildings nearby.

21047_boxfront.jpg
21047_boxback.jpg

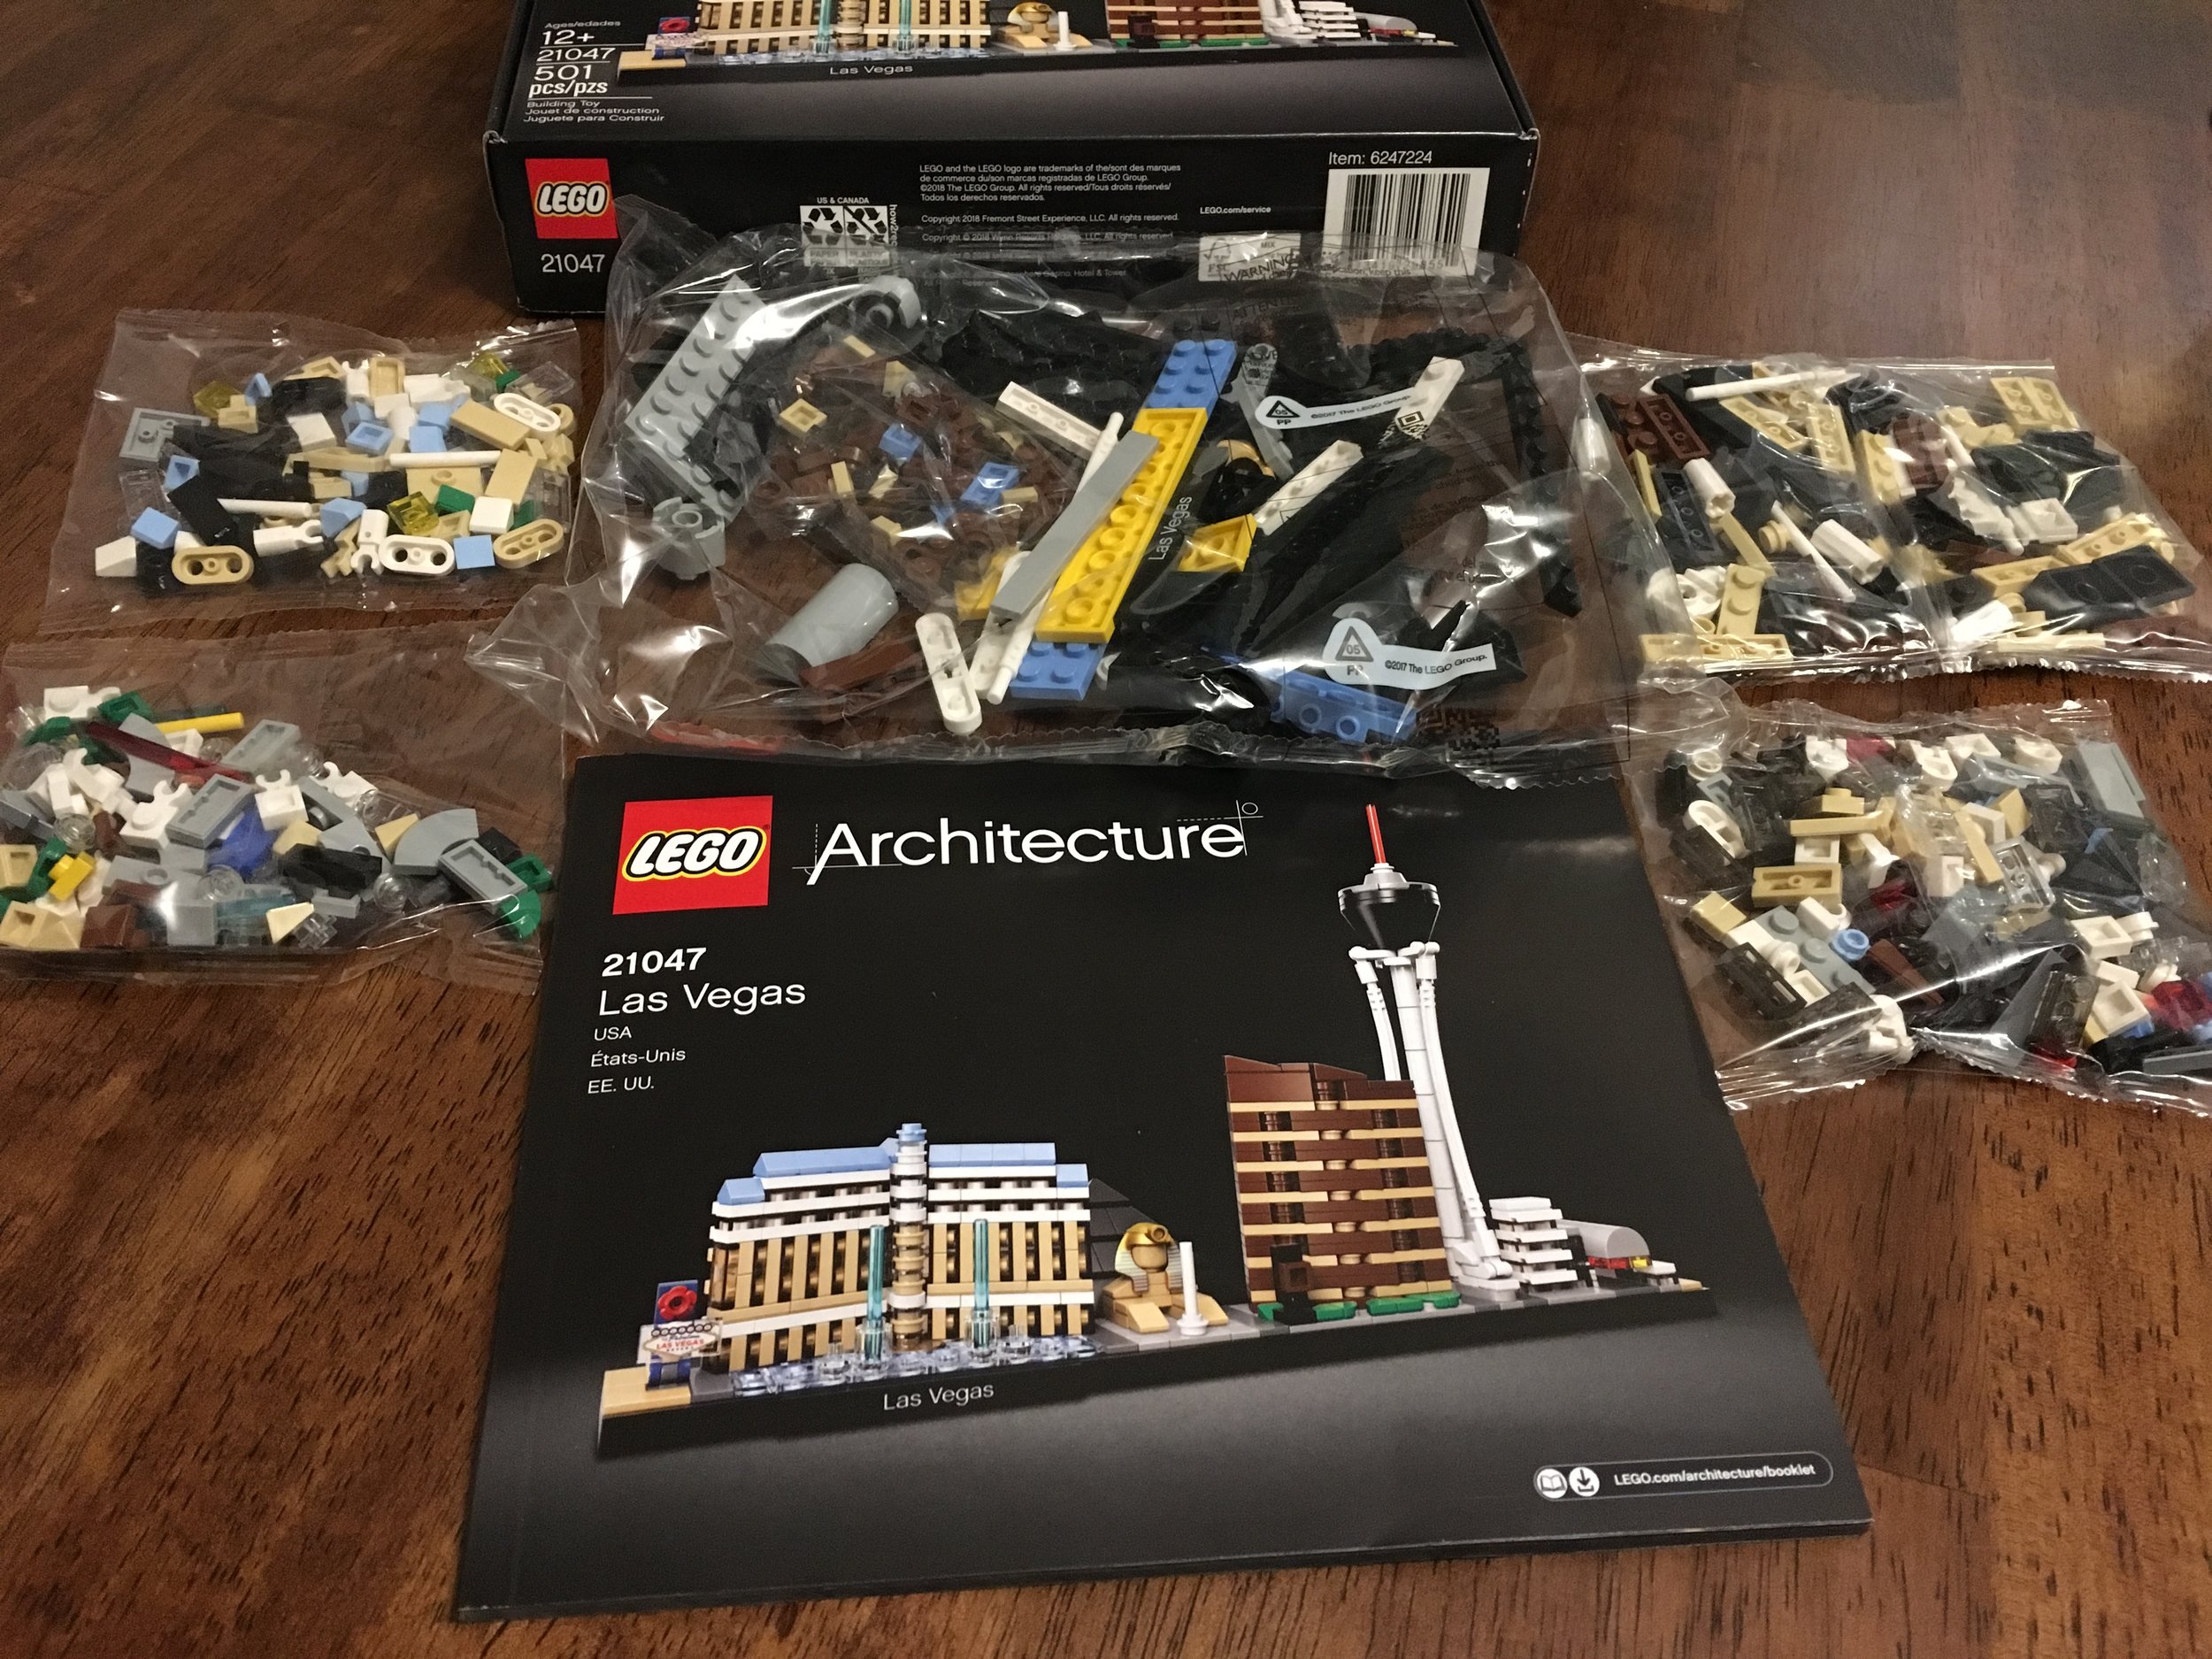
The box has 5 unmarked bags and an instruction booklet. The instruction booklet has some facts about the city and the buildings in the beginning and then throughout the build. It also has a number of quotes to include the one I posted from the box.

If you’re bored, Google “Cinnamon Stomberger.” It’s not who you think it is…

21047_contents.jpg
21047_quote.jpg

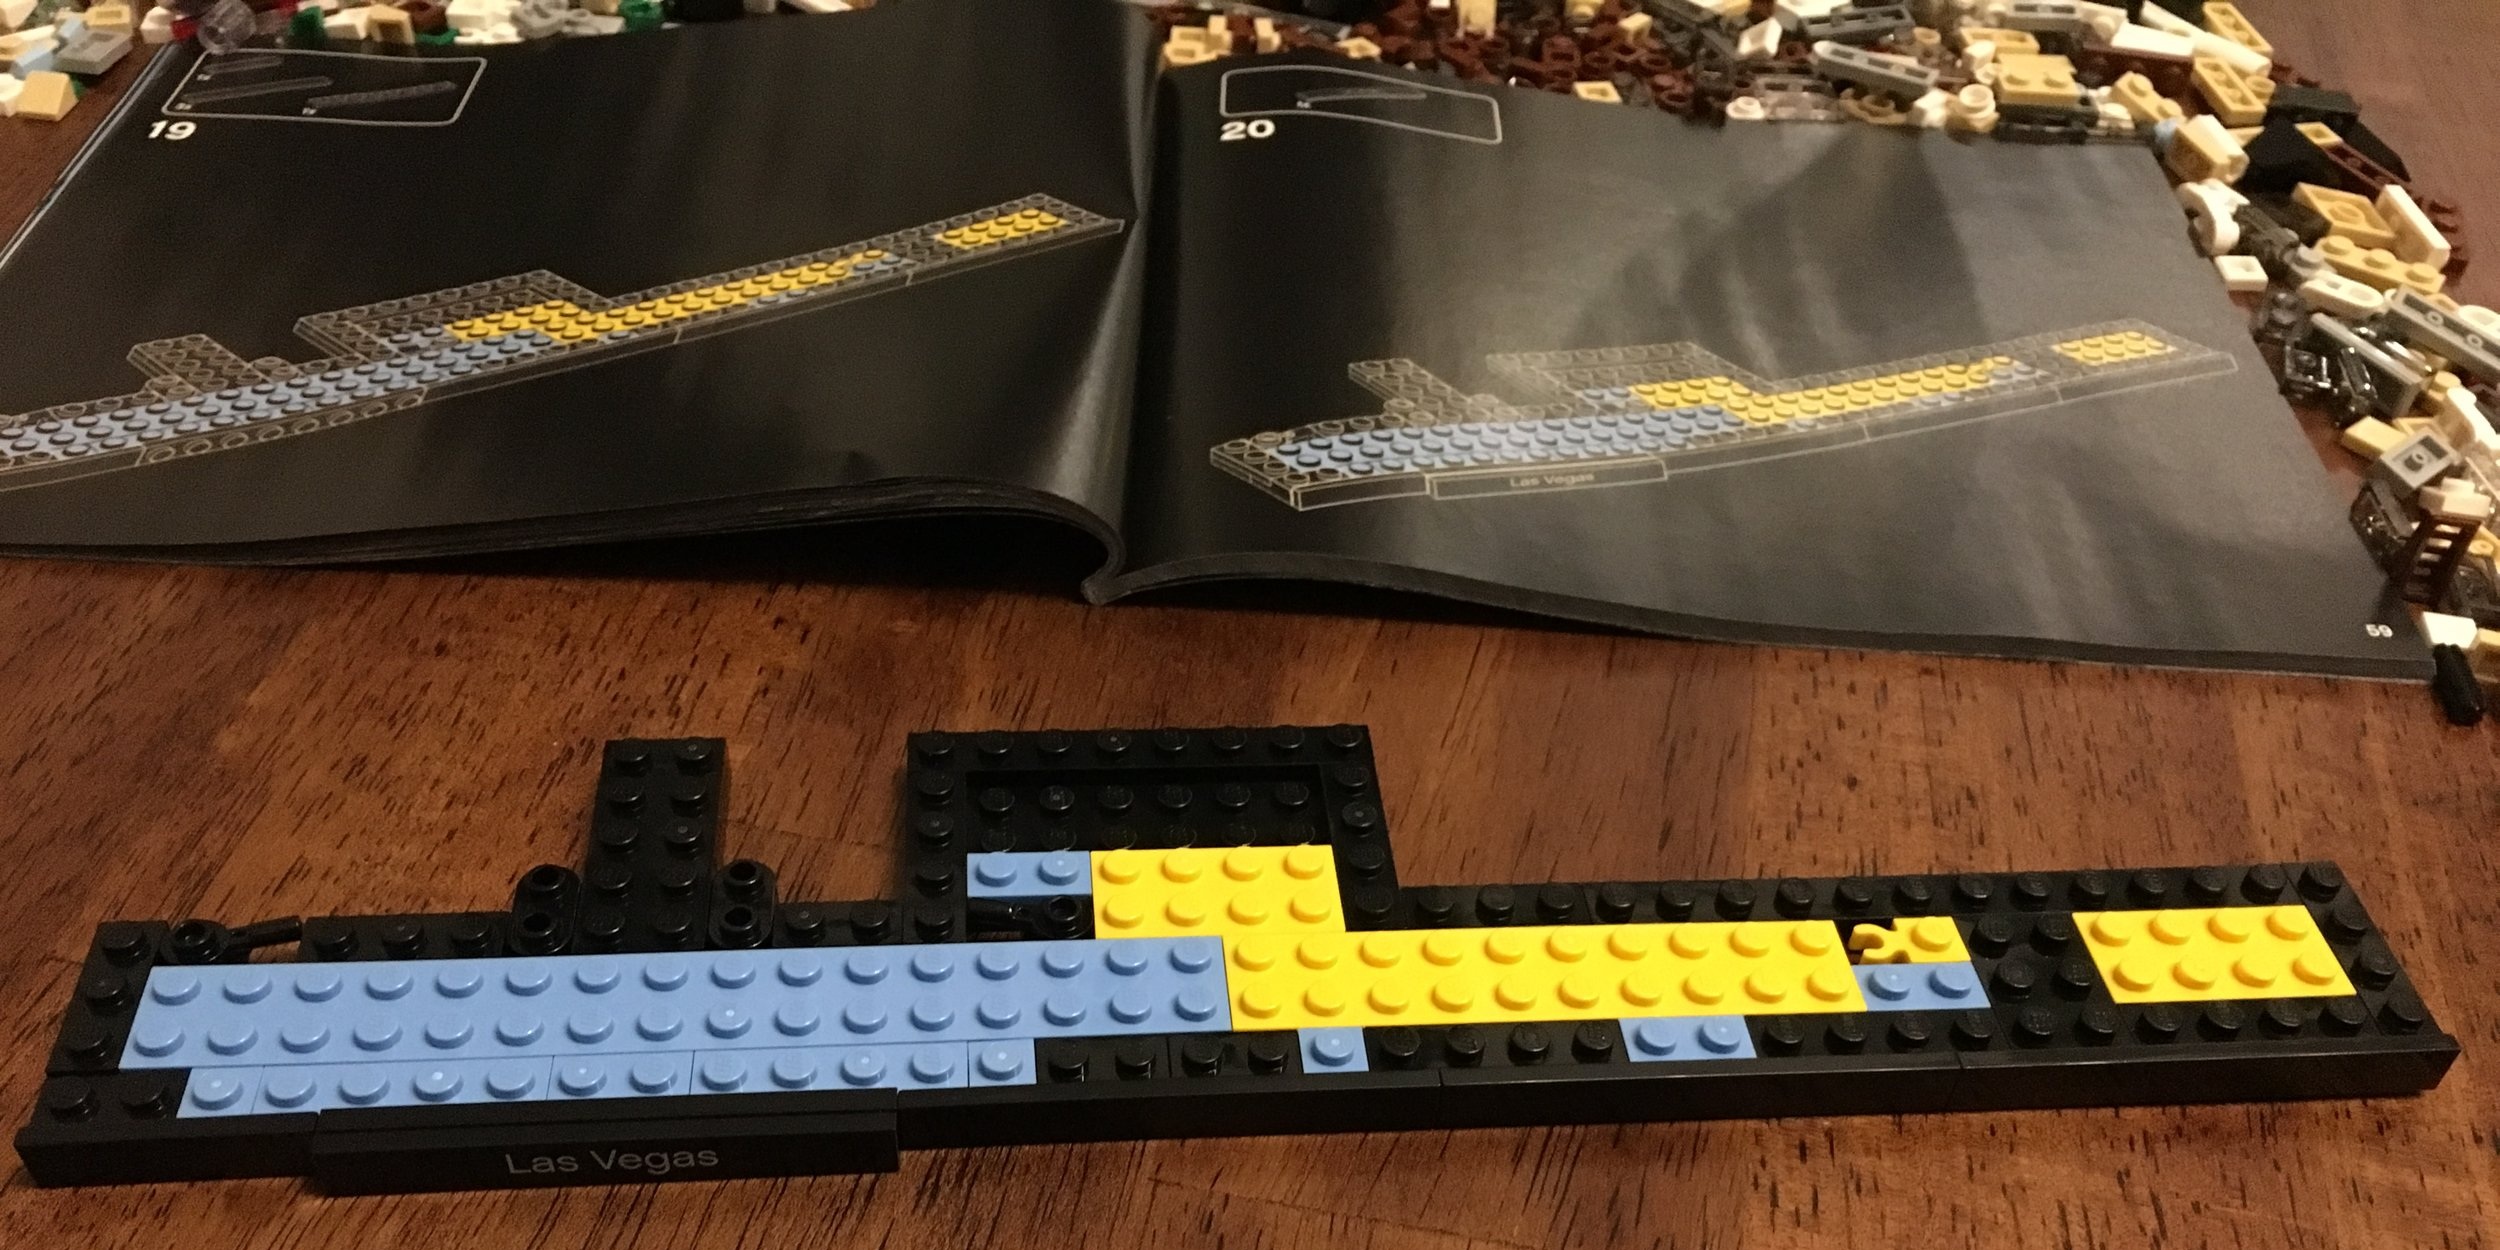
Onto the build… The base is built first. It’s nothing out of the ordinary. Space for the buildings with a printed tile on the front.

21047_base.jpg

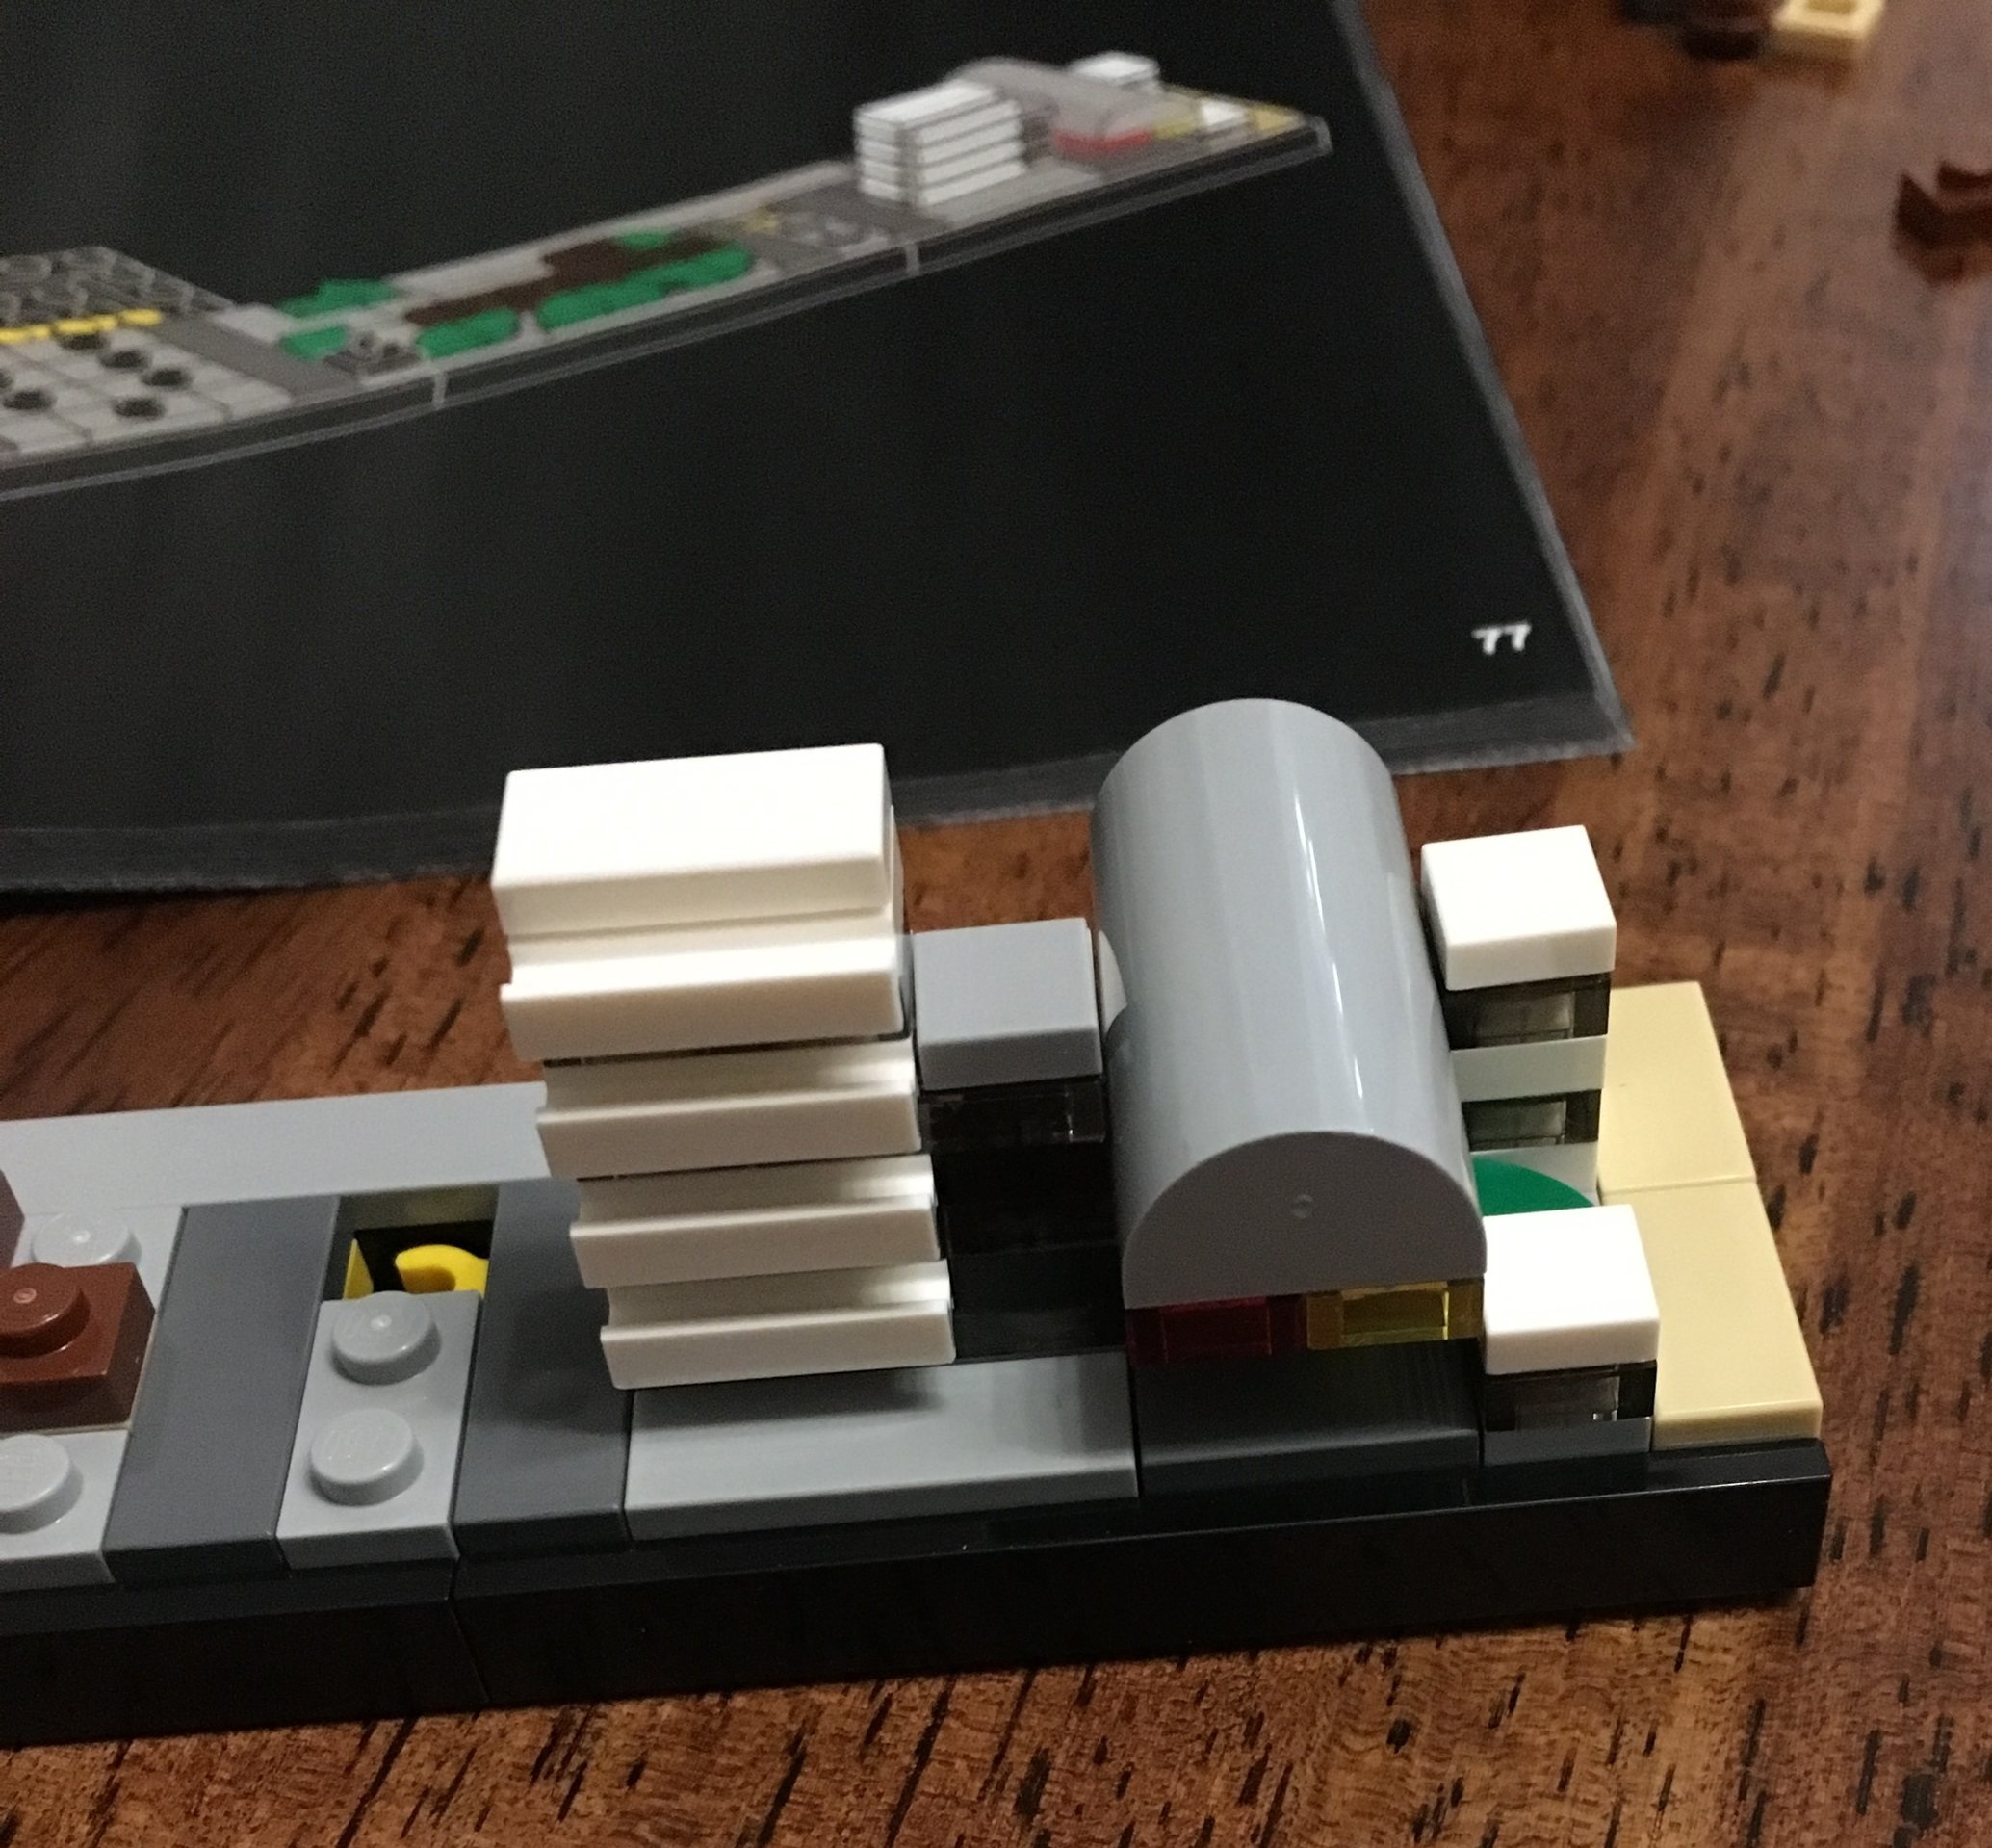
To start the build, you make the Fremont Street Experience and the Stratosphere hotel. Fremont Street is in Downtown Las Vegas and not a part of the Strip. For those of you not familiar, the Strip is actually part of Unincorporated Clark County. So the city of Las Vegas gets mad that it doesn’t receive tax revenue from the Strip. When I was there they were promoting Downtown Las Vegas quite a bit because they got revenues there. At the time, downtown was pretty sketchy, but I hear it has improved. The Fremont Street Experience is much larger than what is in the set so it was scaled down substantially. I get what they tried to do, but it doesn’t to much for me. They should have added another of the better known casinos instead of an inadequate Fremont Street Experience model.

21047_fremont.jpg
21047_stratosphere.jpg

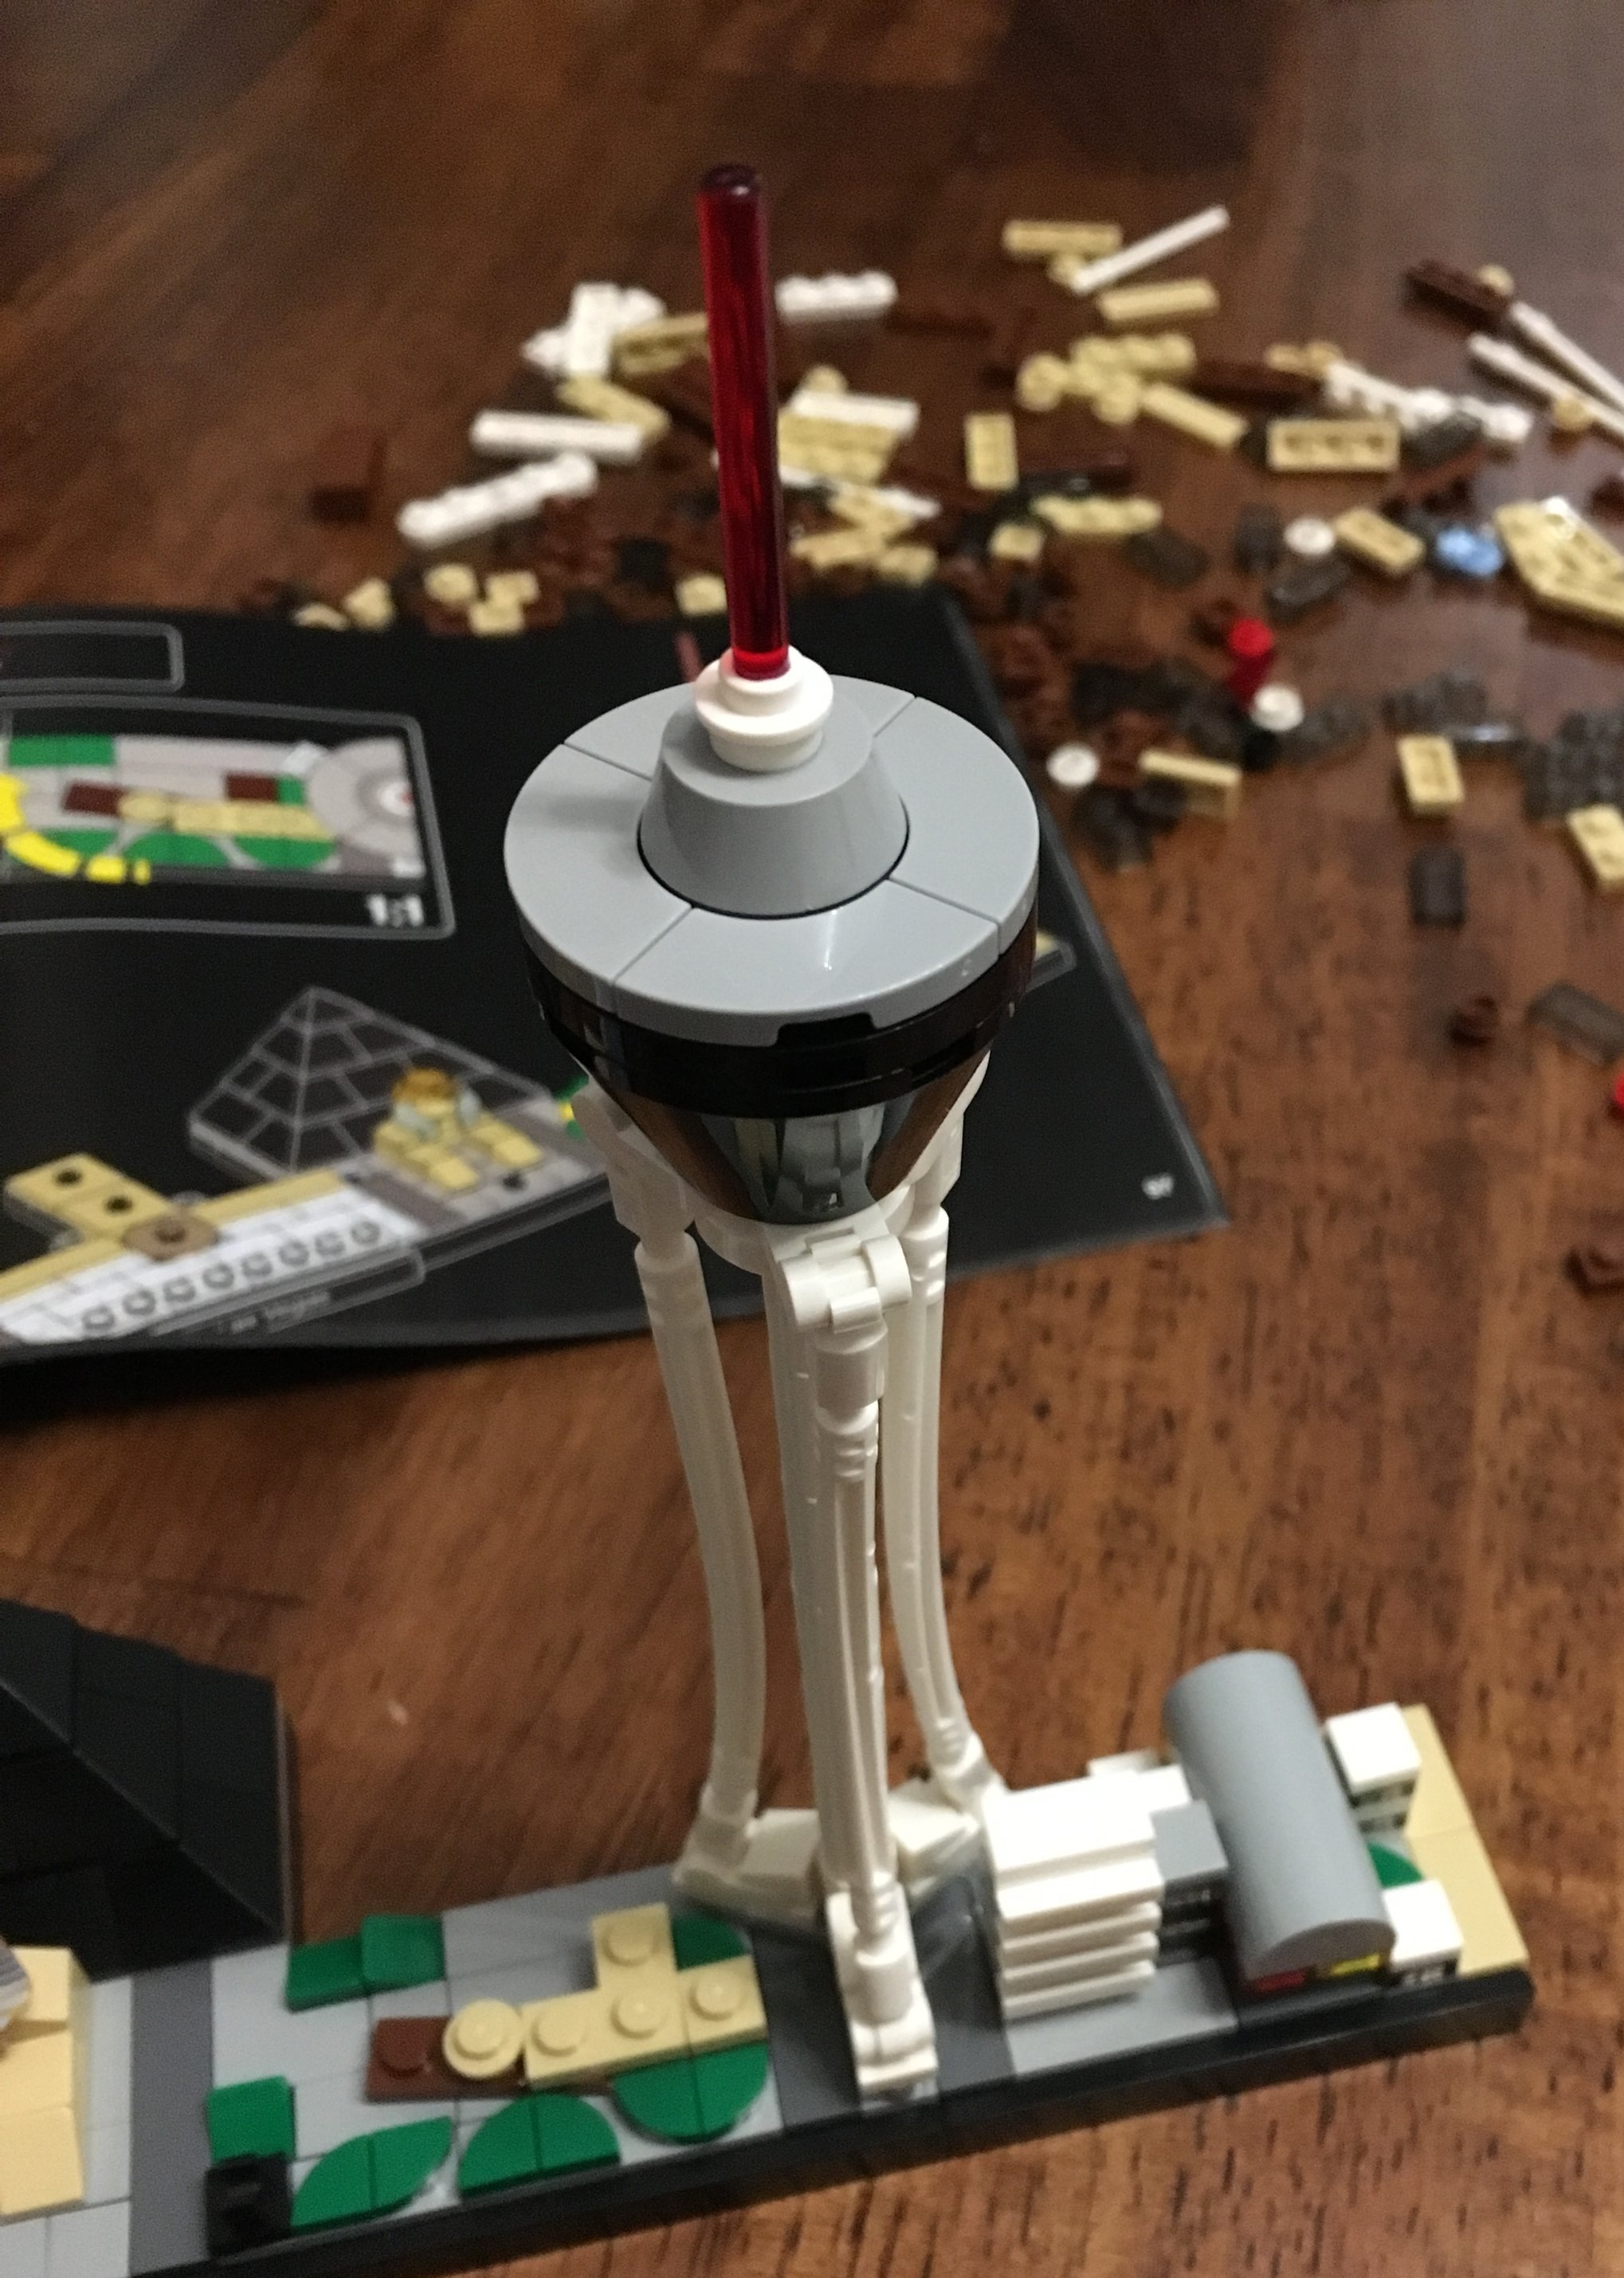
Next up is the Stratosphere which is on the northern end of the Strip. I lived in Vegas before smart phones were big so instead of GPS, we navigated around the city based on where the mountains were and the Stratosphere. I think they did a good job capturing it in a miniaturized LEGO form.

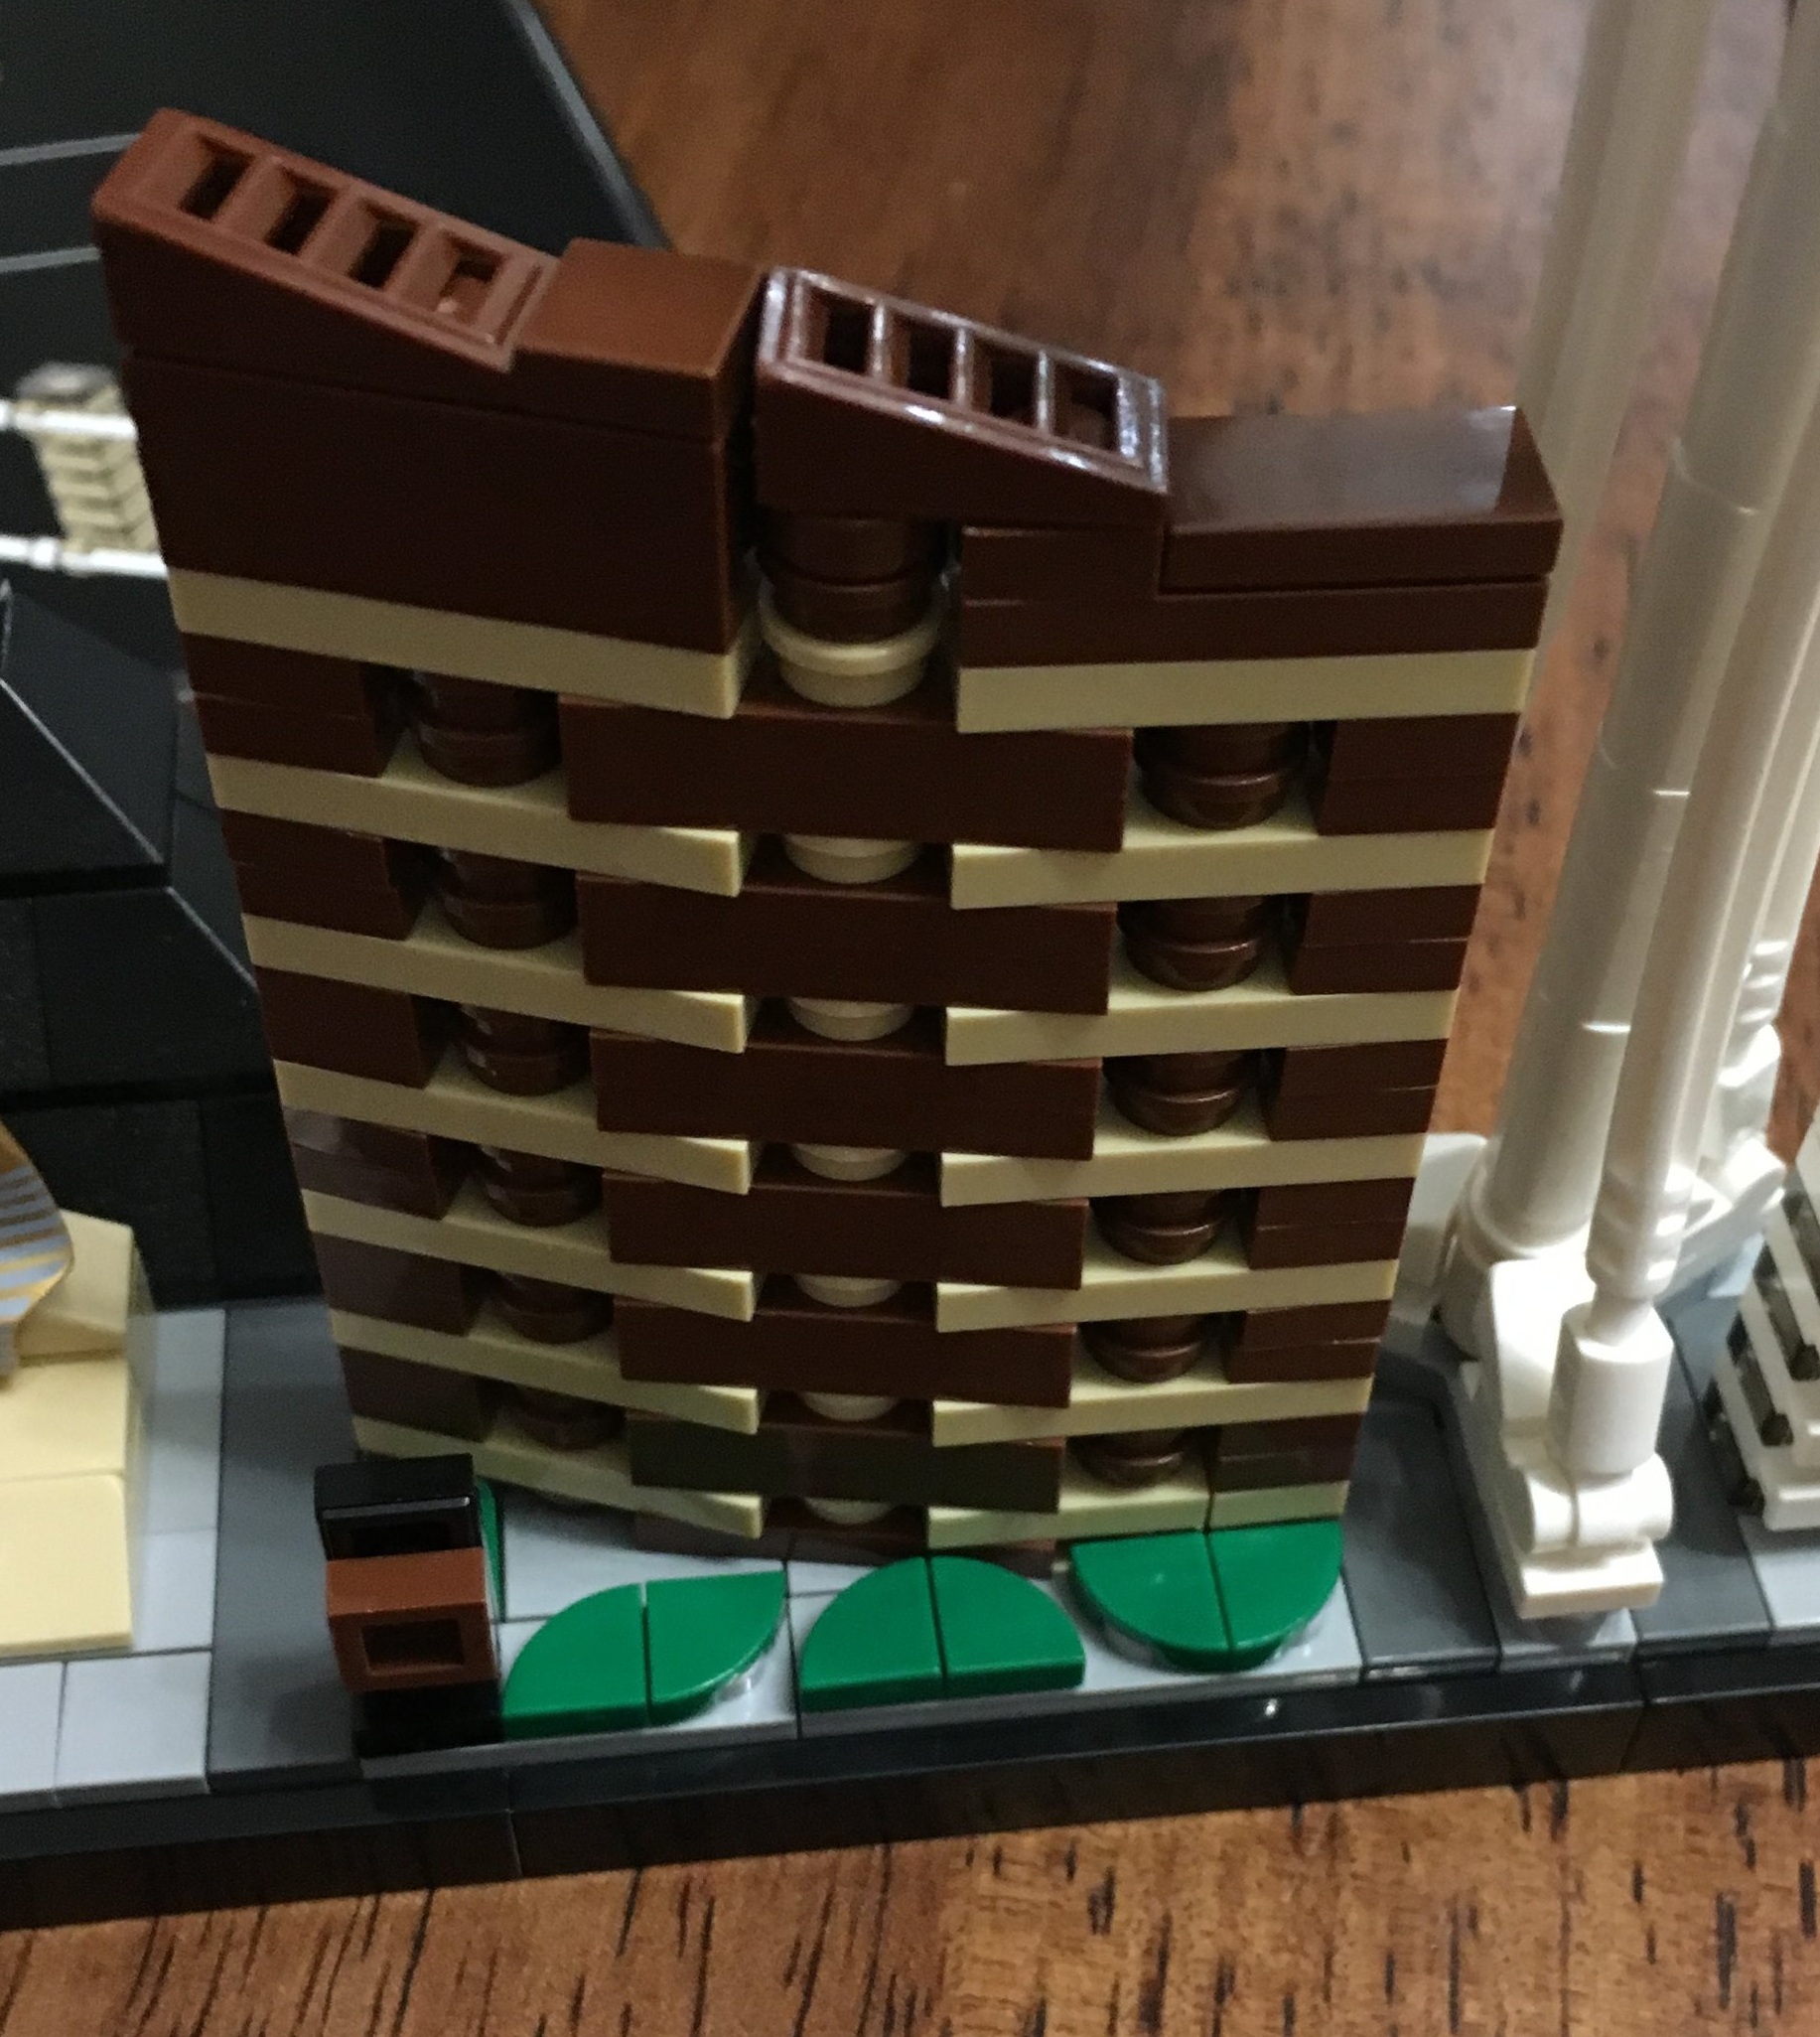
Next up on the east side of the Strip and still on the northern end is Encore which is part of Wynn Resorts. Encore is the second hotel which was built after the Wynn and it looks very similar. My guess is they choose Encore over Wynn to get the Wynn name out of the set given recent misconduct reporting on the company’s namesake CEO. Encore is a curved hotel which makes it a challenge to build at such a small scale. I think LEGO captured the color scheme good, but at such a small scale, adding in the curve makes the building look a lot less sleek than it actually is in real life.

21047_encore.jpg
21047_luxor.jpg

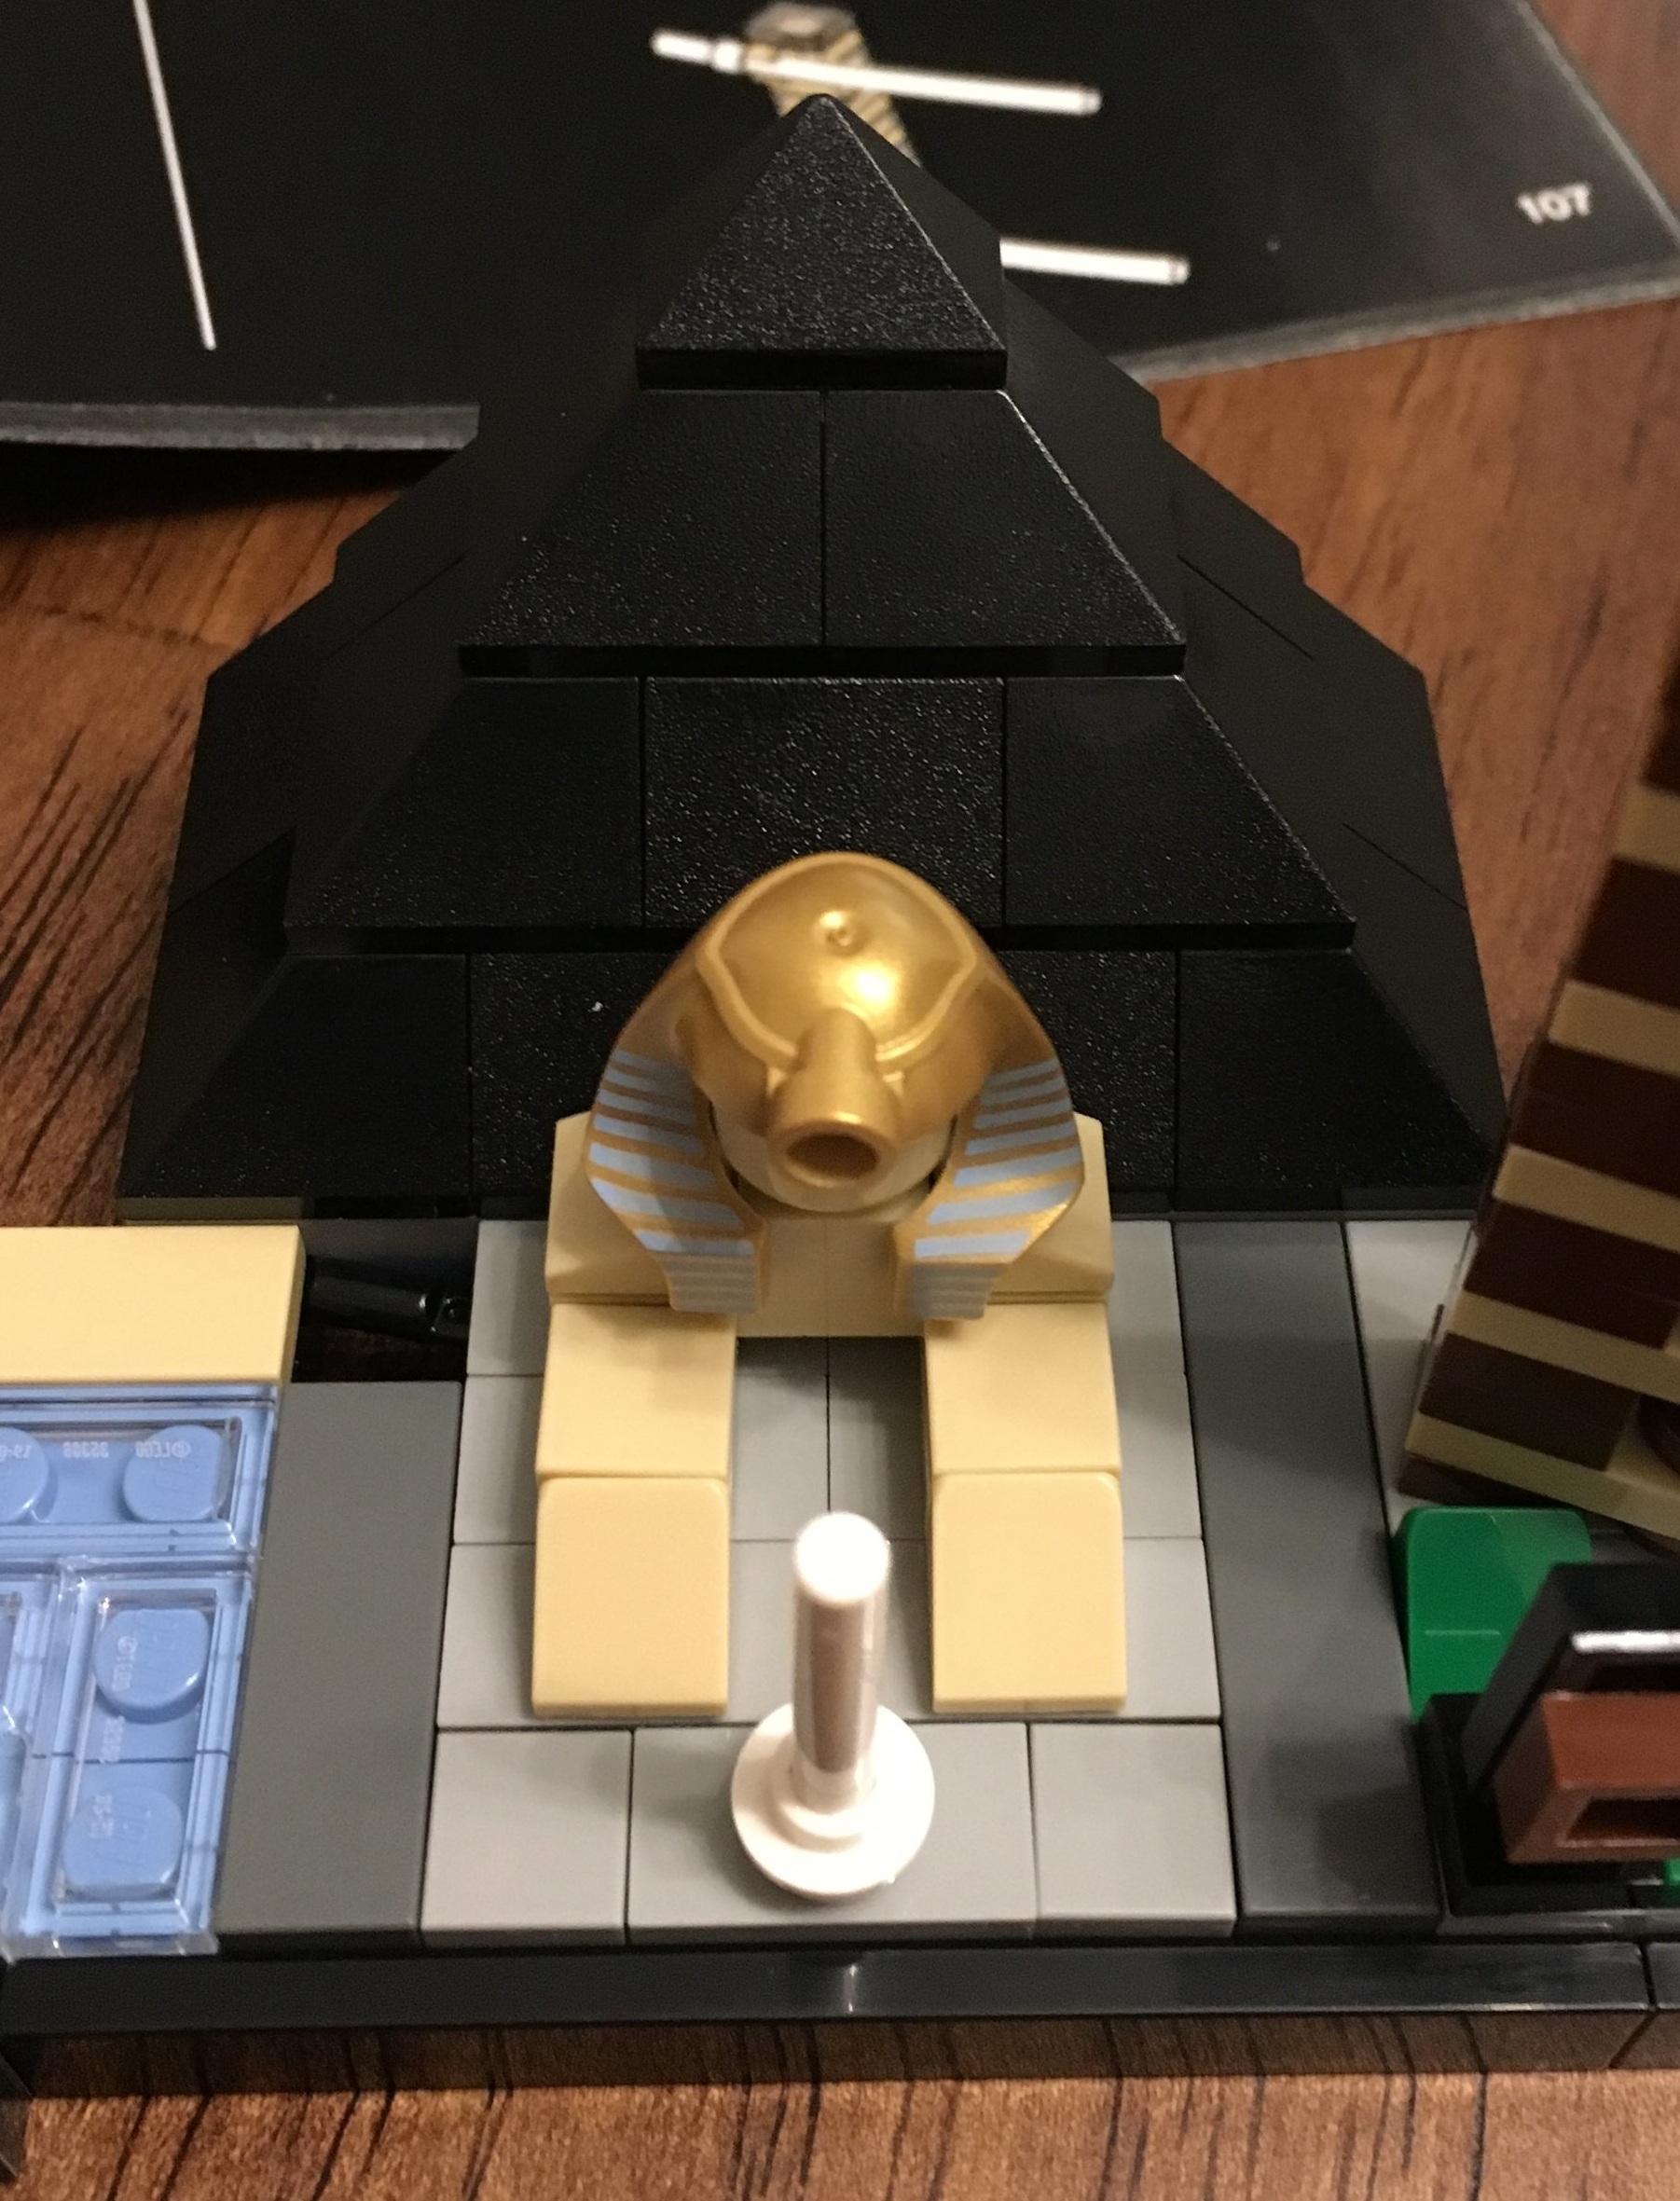
The Luxor is on the southern end and west side of the Strip. The LEGO build has half of the hotel casino and then the sphinx out front. The head piece is pretty cool and they captured the obelisk out front too. The only thing I would have improved on would be the famous Luxor light on the top. They added in the red light on top of the Stratosphere and I think it would have been cool to show the Luxor light too.

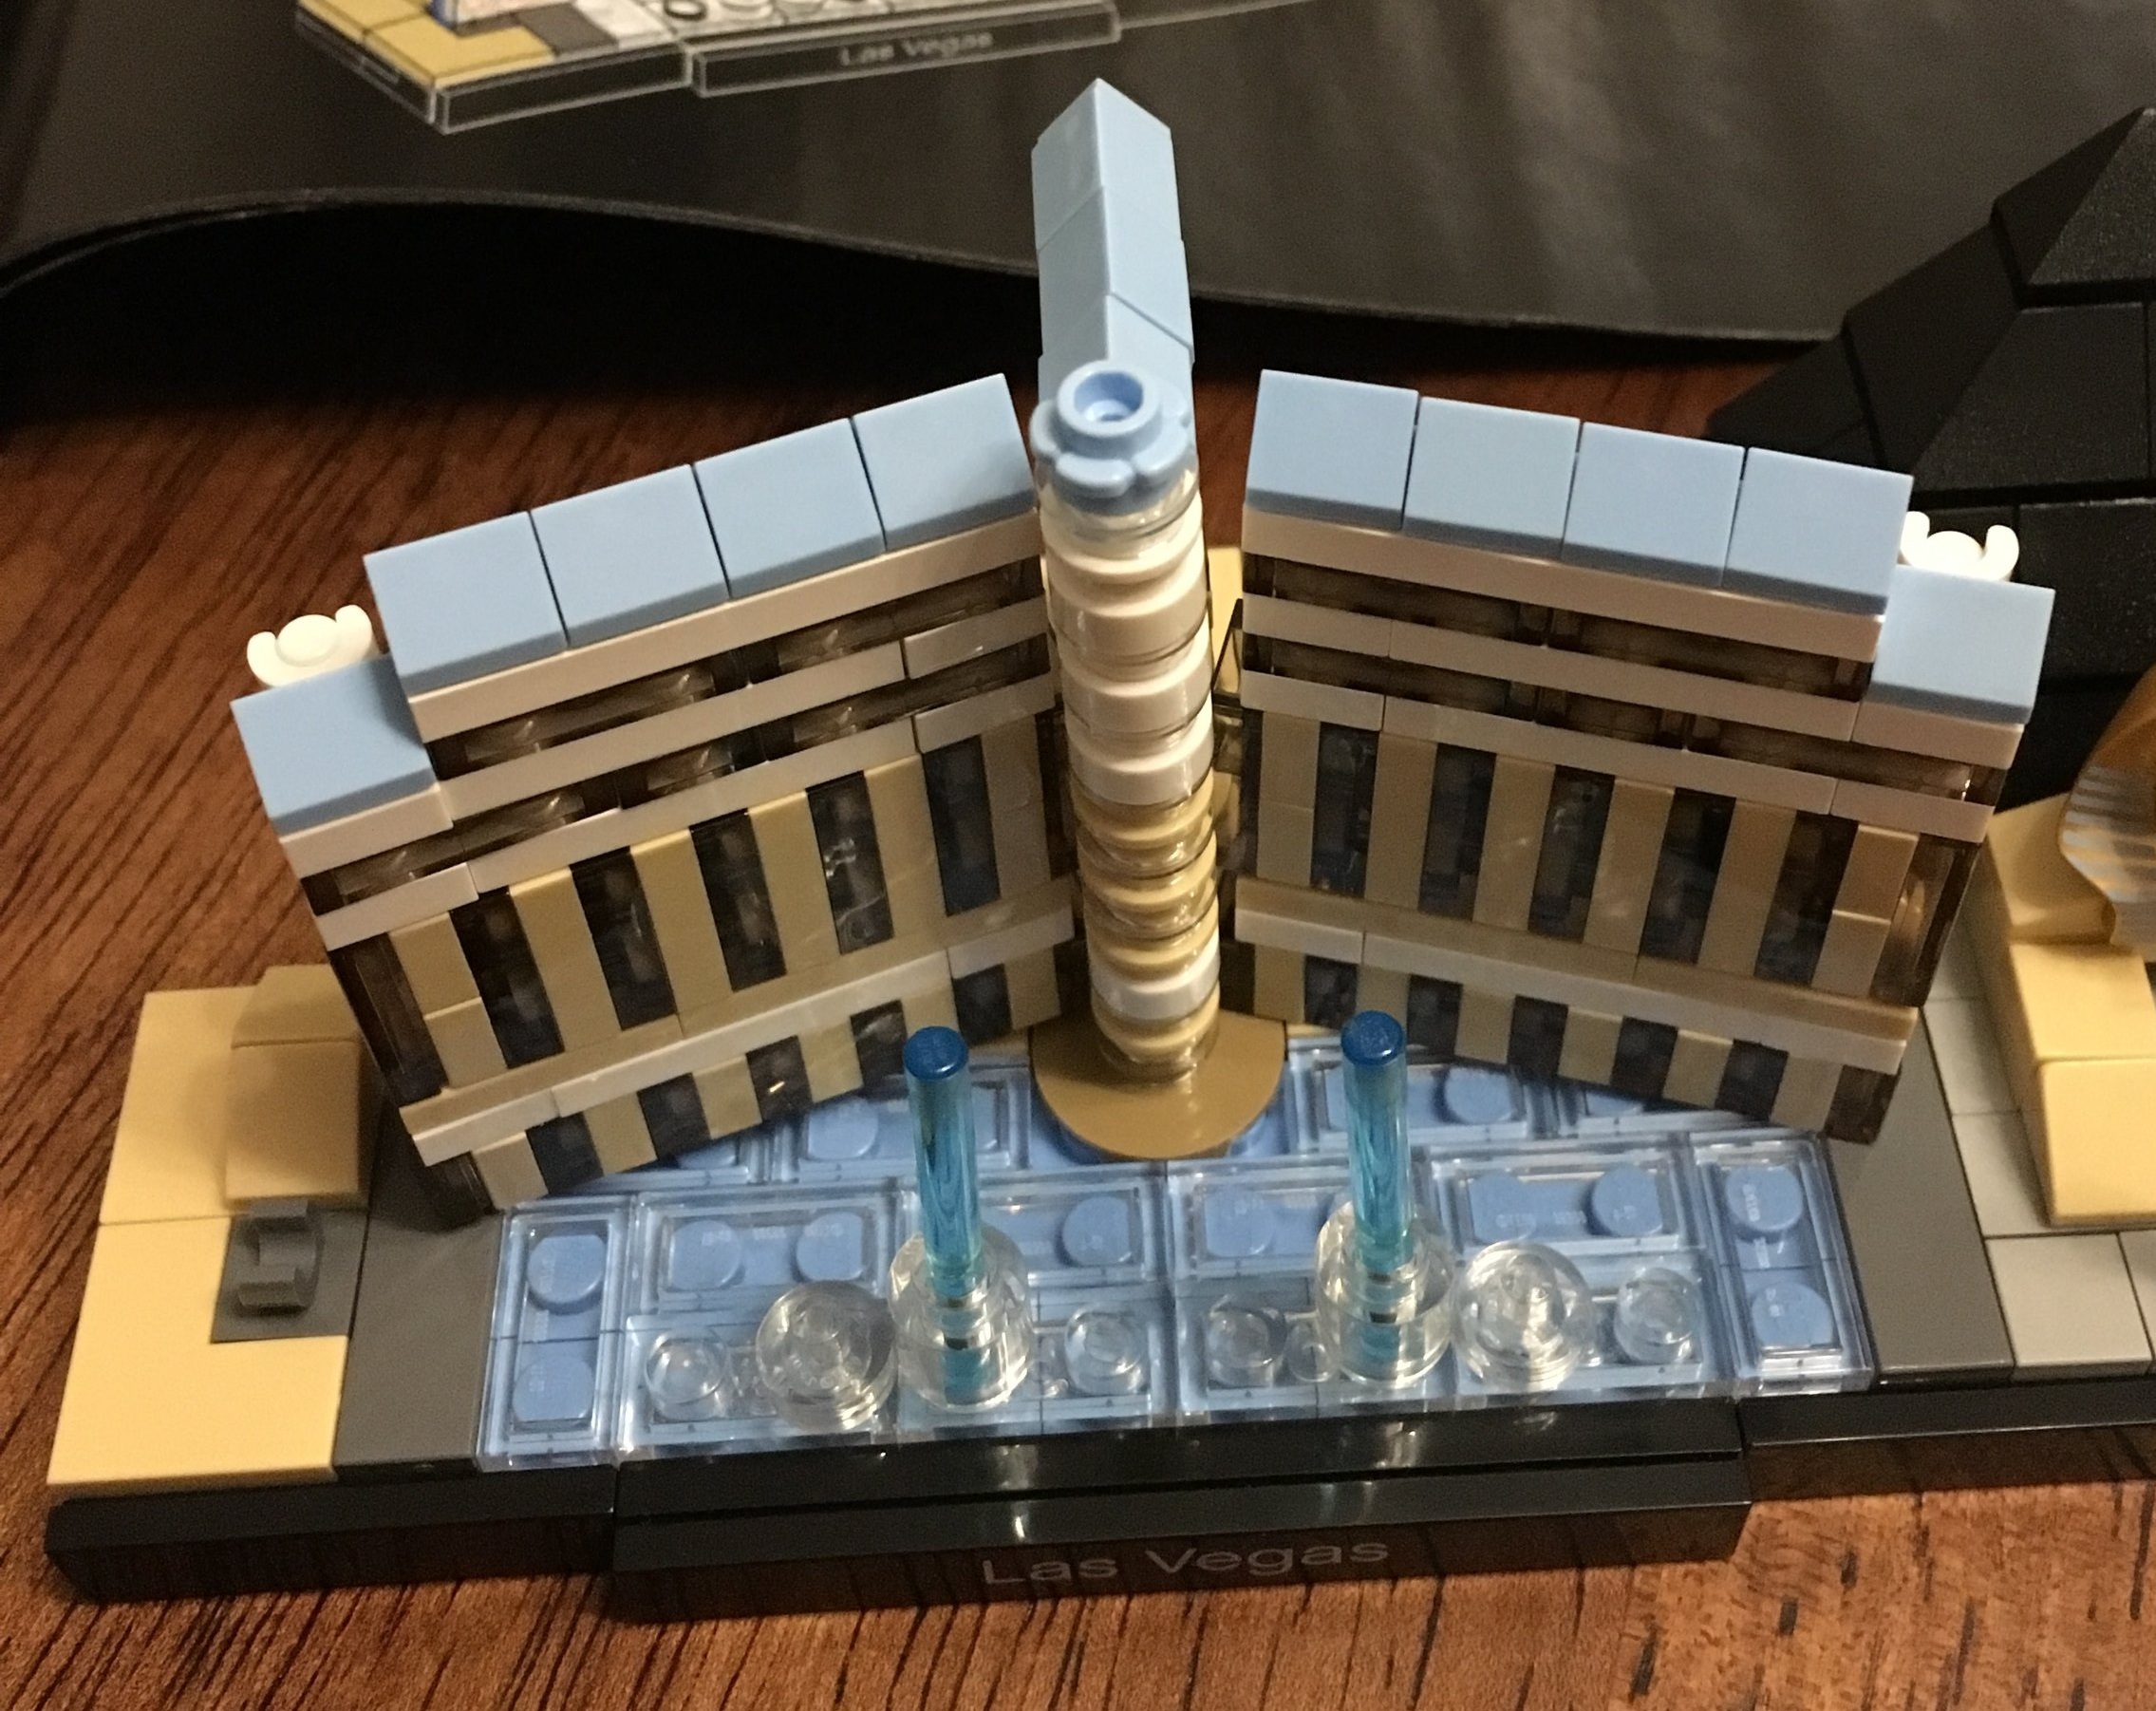
The final building is the Bellagio. The Bellagio replaced Mandalay Bay in the set. Mandalay Bay is next to and further south of the Luxor on the south end of the Strip. The Bellagio is actually further north on the west side of Las Vegas Blvd. No big deal…. I think they did a good job capturing this casino and its famous fountains out front. If you have never been to Vegas, definitely YouTube the fountain show. It’s cool to see and even better in person. There is another tower to the left that they didn’t include called the Spa tower. I've spent the night there and got to watch the fountains from above. Pretty cool! The wings of the hotel are held up by some clips so the back of the hotel is ugly looking in this design, but as long as you stick to the front, you’re fine.

21047_Bellagio.jpg
21047_sign.jpg

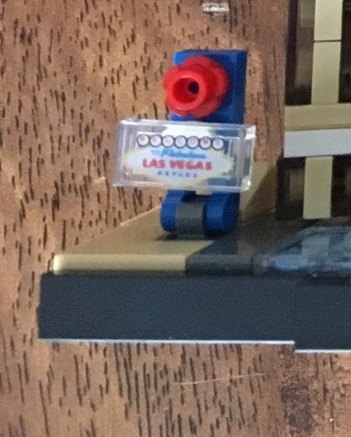
Last up is the famous “Welcome to Las Vegas: sign. I think this is the only time I’ve seen a Skyline set have a printed tile versus a build. I get why they did it, but I think it looks tacky. It also doesn’t look quite to scale given the pieces behind it.

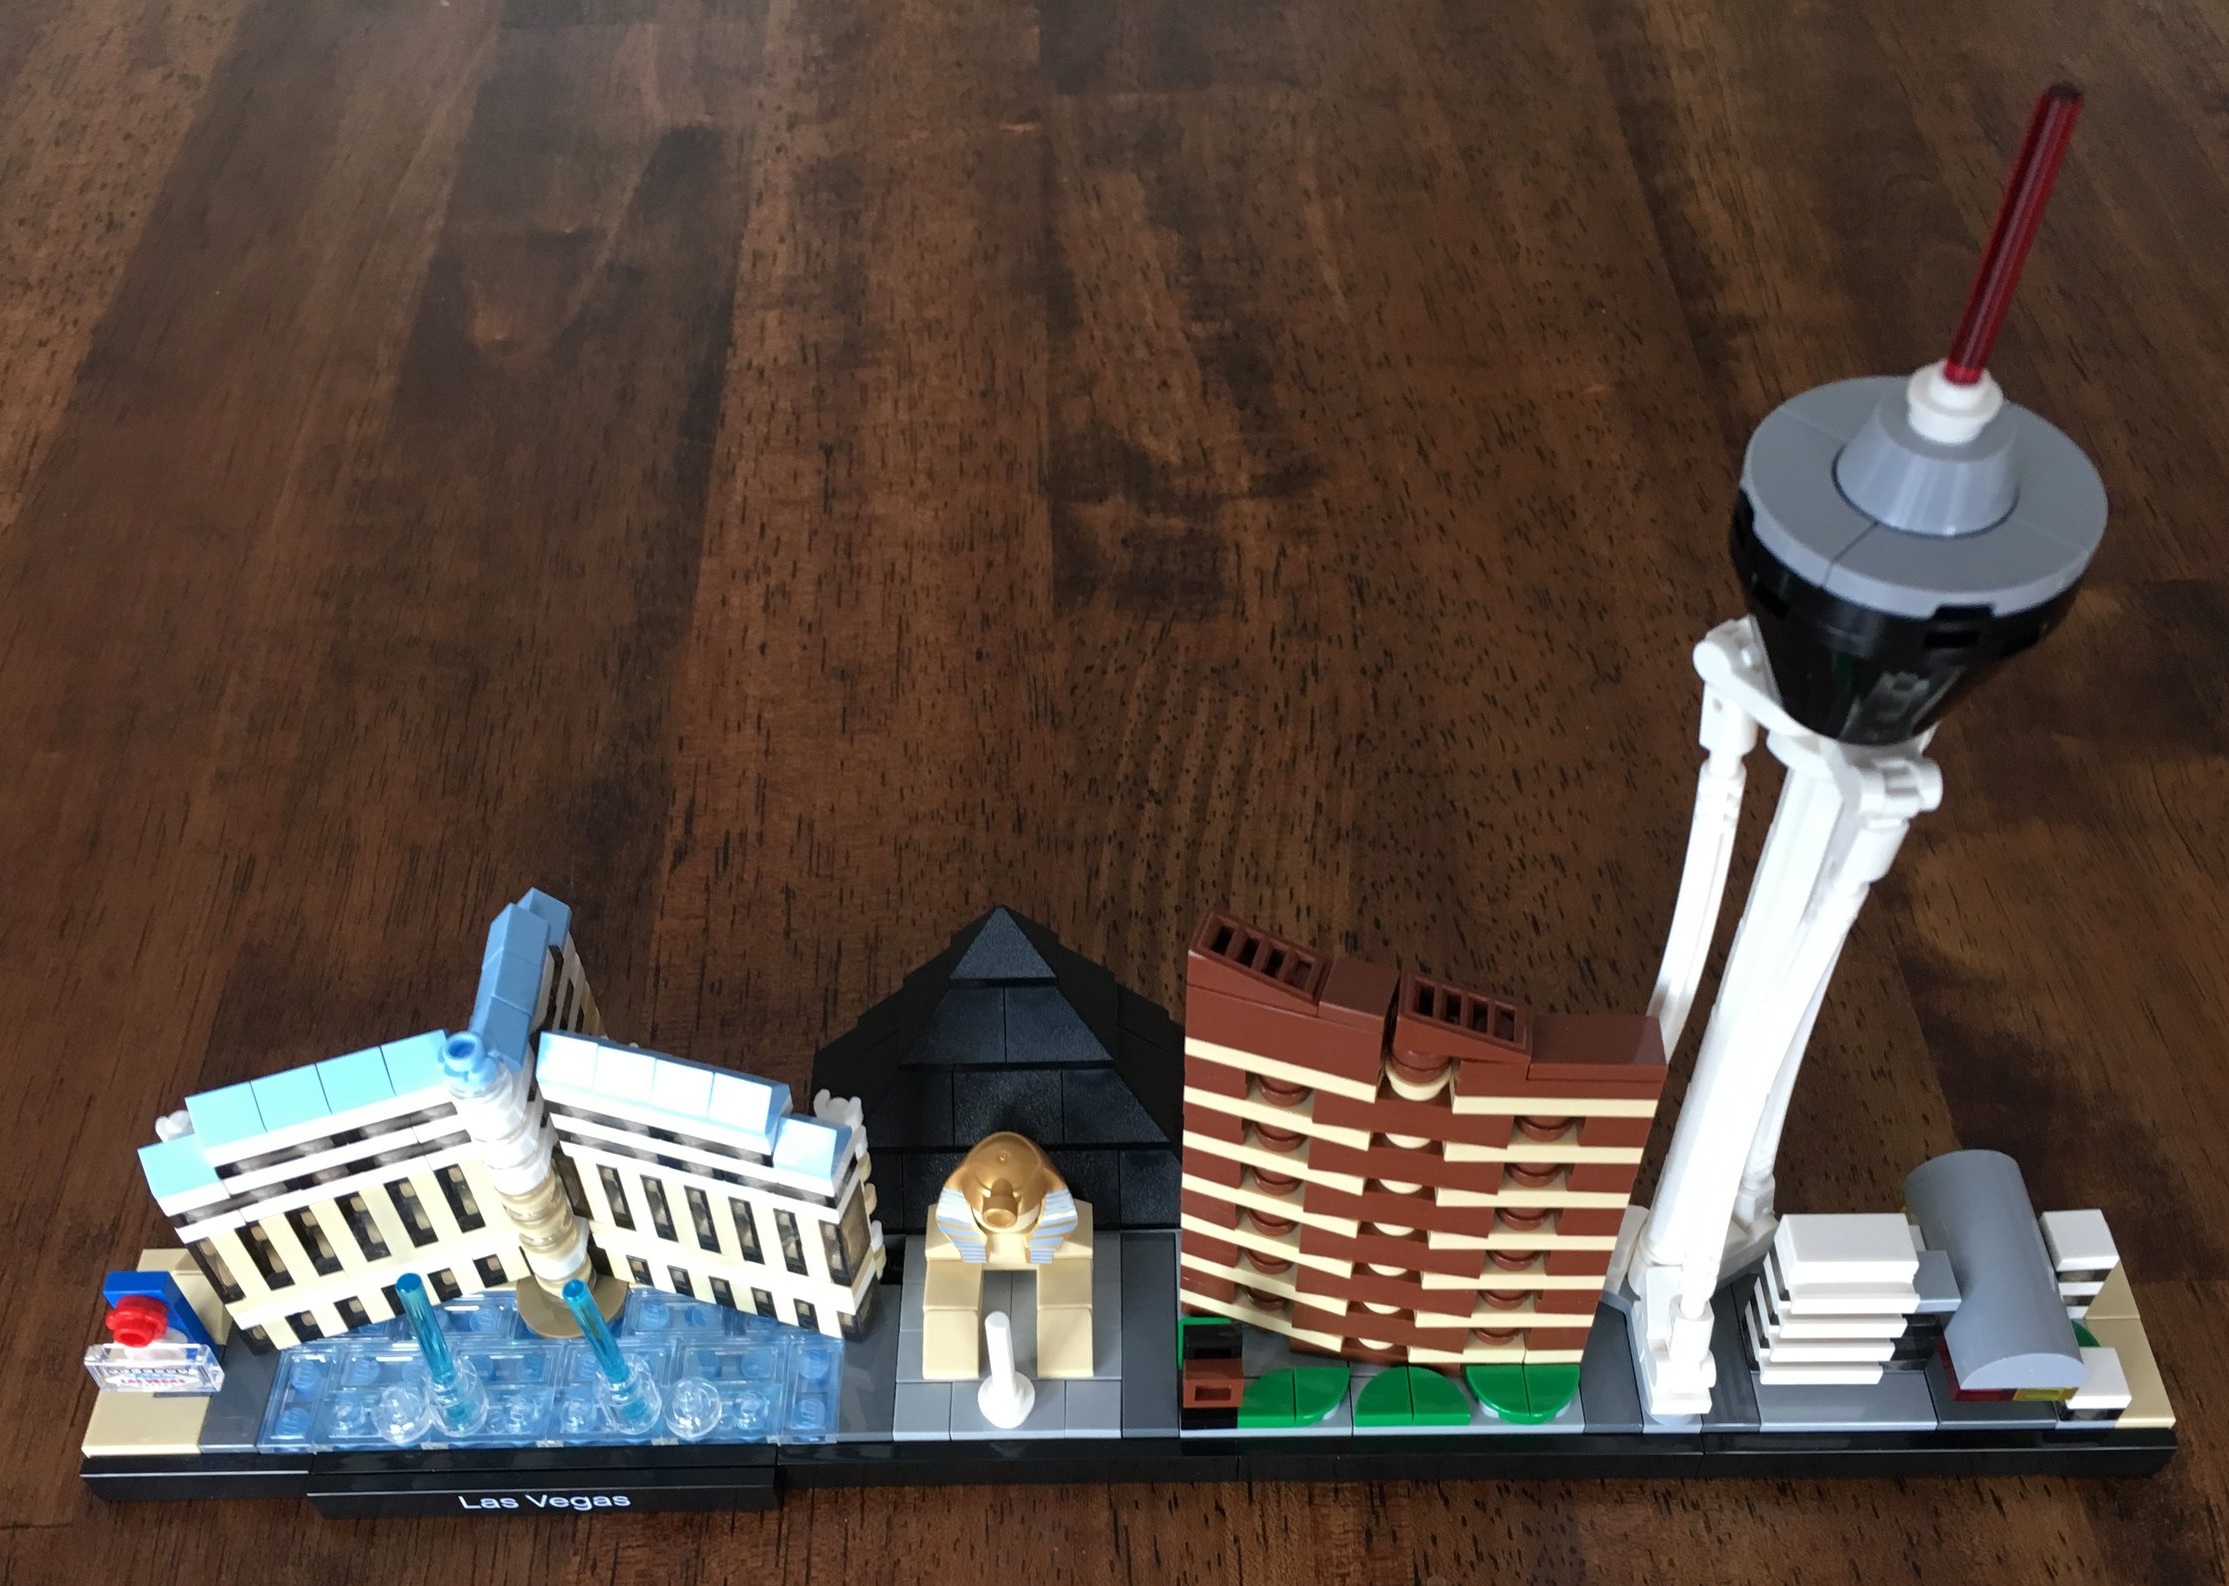
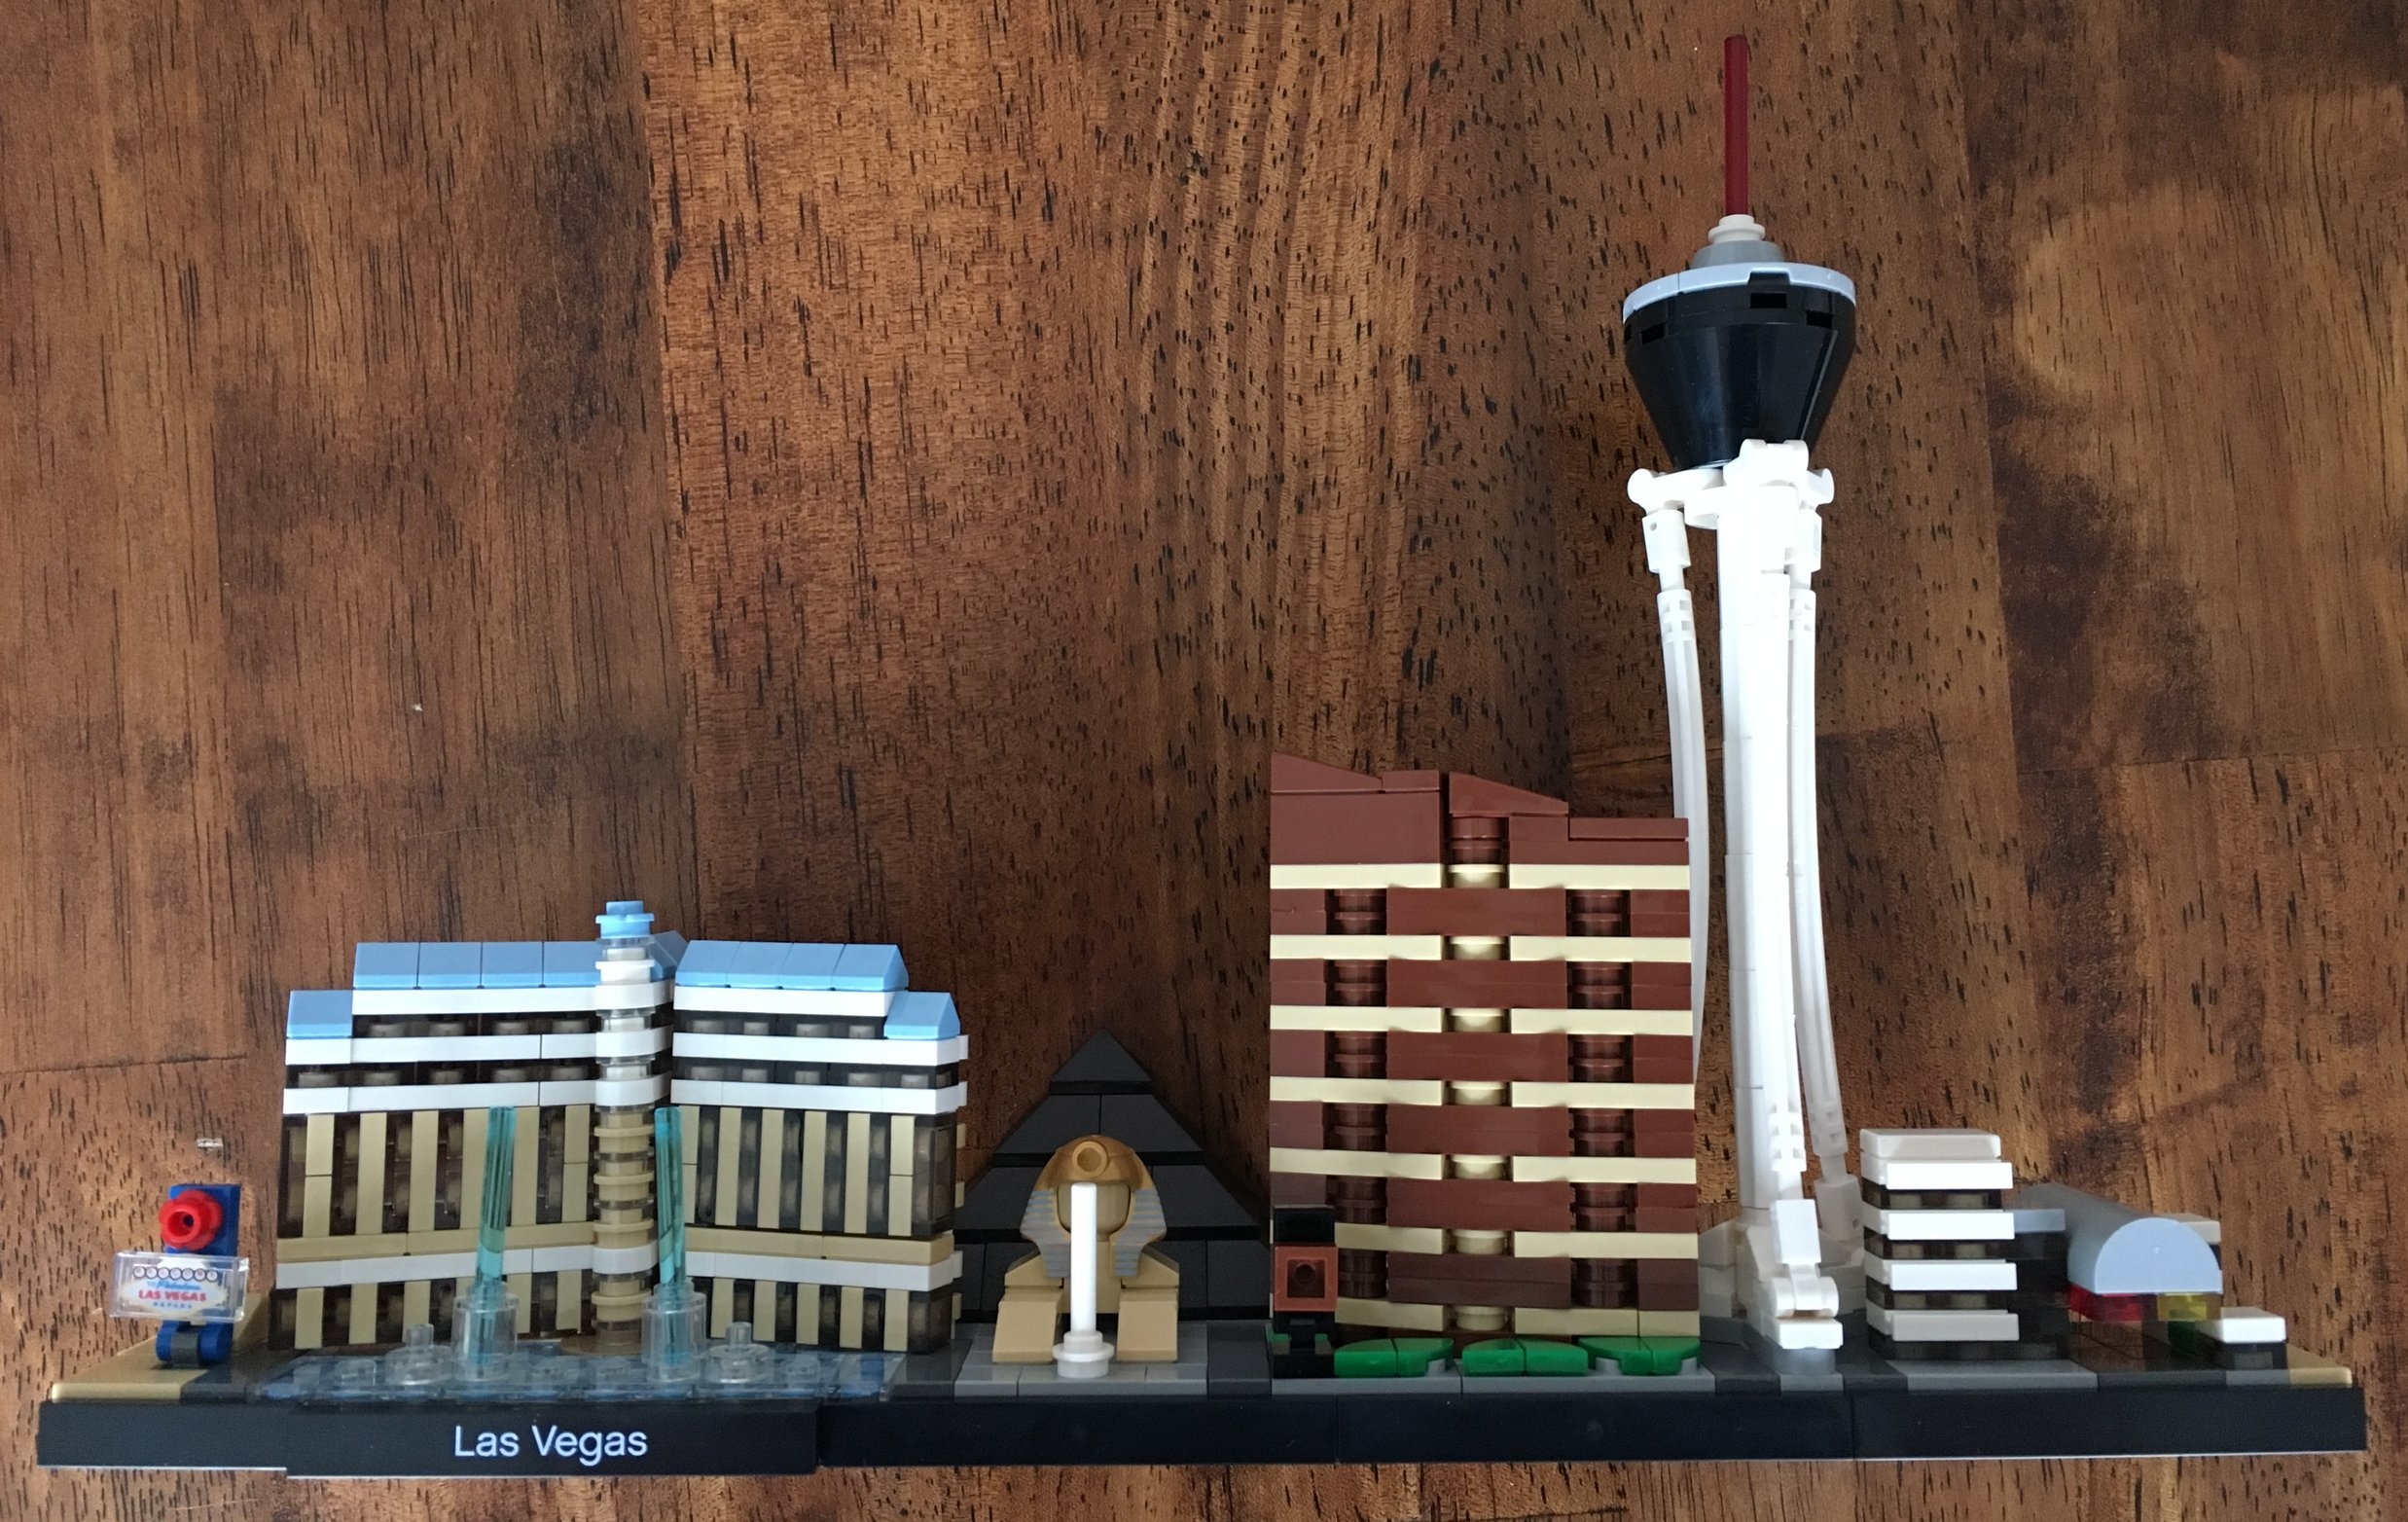
Here’s the final set… I think the designers did a decent job capturing the city given the constraints, but I don’t agree with all of their choices. Fremont Street looks dull and the Encore loses out of its sleekness. Could they have added in Caesar’s Palace and its statues? Paris Las Vegas and the Eiffel Tower? Treasure Island and the pirate ship? The Mirage and the Volcano? MGM Grand and it’s awesome bright green color? NY NY? I realize you are limited to space so maybe the goal was to pick buildings where you didn’t have to put a lot of outside detail into the model to get across the resort you’re building.

My overall take is that I don’t think I would have picked this one up if it wasn’t on sale. Also, having lived there, I have a connection to the place too. As a touristy place, I’m sure selling a brick built version of the Strip goes over well to include at the LEGO Store that wasn’t there when I lived there. The build was alright and there are some decent pieces, but overall this one didn’t excite me.

What are your thoughts?

21047_final1.jpg
21047_final2.jpg

Turning Your LEGO® Bricks Hobby into a Business

If you’re a nerdy AFOL like me, you probably think it would be great to get paid to build with LEGO bricks all day. Maybe you’re a great builder and could go work in Billund designing sets or at one of the theme parks. Or maybe you’re like me and your building skills are just average. As far as I know, the LEGO Group isn’t looking for mediocre to average builders. Maybe I could be a janitor at the LEGO House?

Besides working for the LEGO® Group, a number of fans have turned what they do as a fan into a full time business that pays their bills. I’ll bring up a few of them here and if you know of more, please let me know in the comments or email me at store@bricksforbricks.com.

Beyond the Brick: I posted about this YouTube channel here. My post has a link to an interview of them where they spend some time talking about how they turned traveling around the world to visit LEGO conventions, theme parks, and other events into a full time business that pays the bills. Pretty awesome if you ask me.

Brickset: If you haven’t been to brickset.com and you’re an AFOL, where have you been? Huw Millington decided in the late 1990s that there needed to be a database of all of the LEGO sets out there to include special edition sets and those sold in limited markets. It has since expanded to minifigures and individual pieces as well. Along the way he found that he could add advertising to his site and he used affiliate marketing (you buy LEGO from amazon.com and he gets a cut of the sale if you link through his site) as well. Once it started paying the mortgage, he quit his job and ran the site full time. There are a number of interviews with Huw online. I watched one from Beyond the Brick here. This one is a few years old and there are some newer ones so check around.

Brick 101: Another YouTube channel… this one is run by fan Dave Pickett. To be honest, I hadn’t heard of this channel until I stumbled upon a video he posted. Dave gave a talk at Bricks by the Bay 2018 about how he turned his love of LEGO and animation into a full time gig. You can watch the video here. He has videos where he explains how to build various creations, he reviews sets, and he does some animation work. He also does some work for non-LEGO toy companies… GASP!!!! (from the purists out there) The video is about 45 minutes long, but it’s interesting to see how he made it work.

The big recurring theme I saw from all 3 of these businesses I mentioned is that their success did not happen over night. It took all of them a few years to turn their hobby into a business. I’m not saying that there aren’t overnight successes out there, but something to keep in mind if you plan to be a full time brick fan starting tomorrow.

I only selected 3 to talk about here and I realize I’m missing a lot of people. I know there are folks that run BrickLink, EBay, BrickOwl, and other stores full time selling sets, pieces, minifigures, and other LEGO related items. I’m sure there are others out there too that Brick full time and don’t run stores. I will look to do an update to this post in the future with some others I find out there who went from hobby to business. In the meantime, happy building!

Amazing Fan Creations of Hogwarts Castle

Normally, I’d have a set review to post, but I’m in the middle of a large build so I guess you could say I’m killing time until I can finish and write a proper post. Most of my “LEGO fun time” has been consumed by building set number 71043-1, Hogwarts Castle. At 6,020 pieces, it’s the second largest set out there by piece count. I’ve been trying to enjoy the build instead of rushing through it so it’s taking a bit longer than usual.

Unlike some of the LEGO themed blogs out there, I don’t run this full time so my goal right now has been to post something new once a week. So while you’re waiting to hear what I think about the latest Hogwarts Castle set (spoiler alert, so far, it’s awesome!), I figured I’d talk about some of the ones out there that fans have created.

I realize I’m going to report on some old news here, but back in 2013, a LEGO builder named Alice Finch built a 400,000 piece Hogwarts Castle to display at a Comic Con. If you haven’t seen it yet, it is phenomenal! Definitely check out her Flickr page, a YouTube video of her set up, or if you can find it, watch the Lego Brickumentary from 2015 as she is spotlighted there too. Beyond the Brick (you can check out my post about them here) has done 3 videos out her. They are:
-A tour of her building area in her home (I’m jealous)
-A microscale version of her larger Hogwarts Castle
-An hour plus long interview with Alice about the 400,000 piece version she built

Onto the smaller scale… on the LEGO Ideas page is a submission titled “Hogwarts Castle Miniature Model.” It was submitted by user “LegoDog0126” and as of 15 January 2019, there are 12 days left with 8,435 votes total. Go to the LEGO Ideas site and do a search for it. It doesn’t say the piece count (that I could find), but you can download instructions and a fan even went out and built it (pics are on the Ideas site as well).

hogwarts miniature model.jpg

And one more…

I wasn’t able to find more on this one, but there was a BrisBricks LEGO®  Fan event (Australia) back in September 2018 and a builder there displayed a giant Hogwarts castle connected by rail to Kings Cross Station. Here is the link to the article advertising the event and here is the picture. You can go to the BrisBricks site photo book here and see more pictures of the build as well as all of the other awesome MOCs. Definitely check it out… it’s pretty cool with the whole castle and the train leading to it.

Enough stalling… back to building so I can get a set review out!

LEGO® Appearance - CBS Sunday Morning

Normally all of the major fan sites are great at posting LEGO related items that appear in the media. If you’re a regular reader of The Brothers Brick site, you’ll note that on Mondays they do a role up for the week to include LEGO items that appeared on various blogs, websites, and news media outlets.

Well I found one video that I haven’t seen anyone post yet. CBS Sunday Morning pushed a roughly 5 minute long clip about LEGO on 16 December 2018 that you can see here:

The video’s main focus is on the quest to find alternative, sustainable materials to make bricks out of. There are some clips of testing materials and some interviews with the company personnel involved in finding new materials. There is also a short discussion on the material used to make some of the plant parts. Definitely check it out.

Happy building!

Another Way to Stay Engaged with Bricks - "Beyond the Brick"

Back in September 2018, I wrote about my favorite Brick podcast called “The Bricks King Podcast.” You can read my post about it here. I found the podcast to be a great way to keep up with my LEGO addiction while doing other things like driving or chores around the house. In my search to find even more, I looked for video options. And let me say, thank goodness for the invention of on demand content. YAY! Sites like YouTube are full of folks who post videos about their LEGO addictions, review sets, and provide information about the hobby. My favorite Brick inspired channel on YouTube thus far has been Beyond the Brick. Apparently many others are fans too as they have many hundreds of thousands of subscribers.

“Beyond the Brick” was started as an audio only podcast by LEGO fan Joshua Hanlon in November 2011 as his “About” page states. He has long since moved to YouTube and now runs this channel as a full time job. If you go to his videos page, you’ll see that he is releasing new content just about every day. Having watched some of Josh’s earlier videos you can see that he’s come a long way since his early days. His interviewing skills have gotten better and he’s done a better job editing videos as well (in my opinion). You can tell that he is getting good at interviewing LEGO fans who can often be introverts who don’t like to talk to audiences on camera.

“Beyond the Brick” is different from many brick content type channels on YouTube or other platforms as Josh travels. He videos at LEGO conventions sometimes giving multi-hour long tours of a convention in case you couldn’t make it (like Brick Fair 2018 in VA) or sometimes spending a few minutes at a notable build this this recent video of a huge recreation of a bell tower in Florence, Italy. He’s been to BrickLink HQ to get an inside look at how the operation is run and has a full tour of the LEGO House in Denmark on his channel as well. He’s interviewed countless LEGO fans, LEGO company designers, LEGO Ideas designers, and many others. He’s shown us through LEGO theme parks around the world to include Japan and Denmark. Do I need to continue? If you’re a fan of the LEGO brick and you can’t find content that “Beyond the Brick” has released that you like, then you need to question whether you are actually a fan of LEGO or not.

I’m not endorsed by anyone or getting paid to say nice things so don’t worry about me leading you astray. “Beyond the Brick” has done a great job and I hope they continue to put out stellar content for many years to come. Thanks “Beyond the Brick” and keep up the great work!

Update - 15 Jan 2019

Beyond the Brick posted an interview of its founders Joshua and John Hanlon. It was done at the Skærbæk Fan Weekend 2018 in Denmark. You can see the view on YouTube here. They talk about how they got started, how they make money, and where they plan to go in the future. It’s a great interview if you’re interested in the inner workings of their YouTube channel.

Set Review - #10268-1 - Vestas Wind Turbine - Creator Expert

In 2008, LEGO worked with Vestas to build a wind turbine set to be released to employees of Vestas. Of course that created an opportunity and the set is now currently going for almost $400 on the secondary market sites. If you were like me and you weren’t able to get #4999-1, you’re in luck as the re-release of the Vestas Wind Turbine (#10268-1) happened on 24 November 2018. Or as the LEGO Designer video says, there is now a “Vestas for the rest of us.”

The 826 piece set retails for $199.99 in the US which works out to $0.242 per piece. Yikes! It’s high, but it also includes a 32x32 stud baseplate and Power Functions gear. So is it really not that bad? Maybe. Let’s take a look at the set.

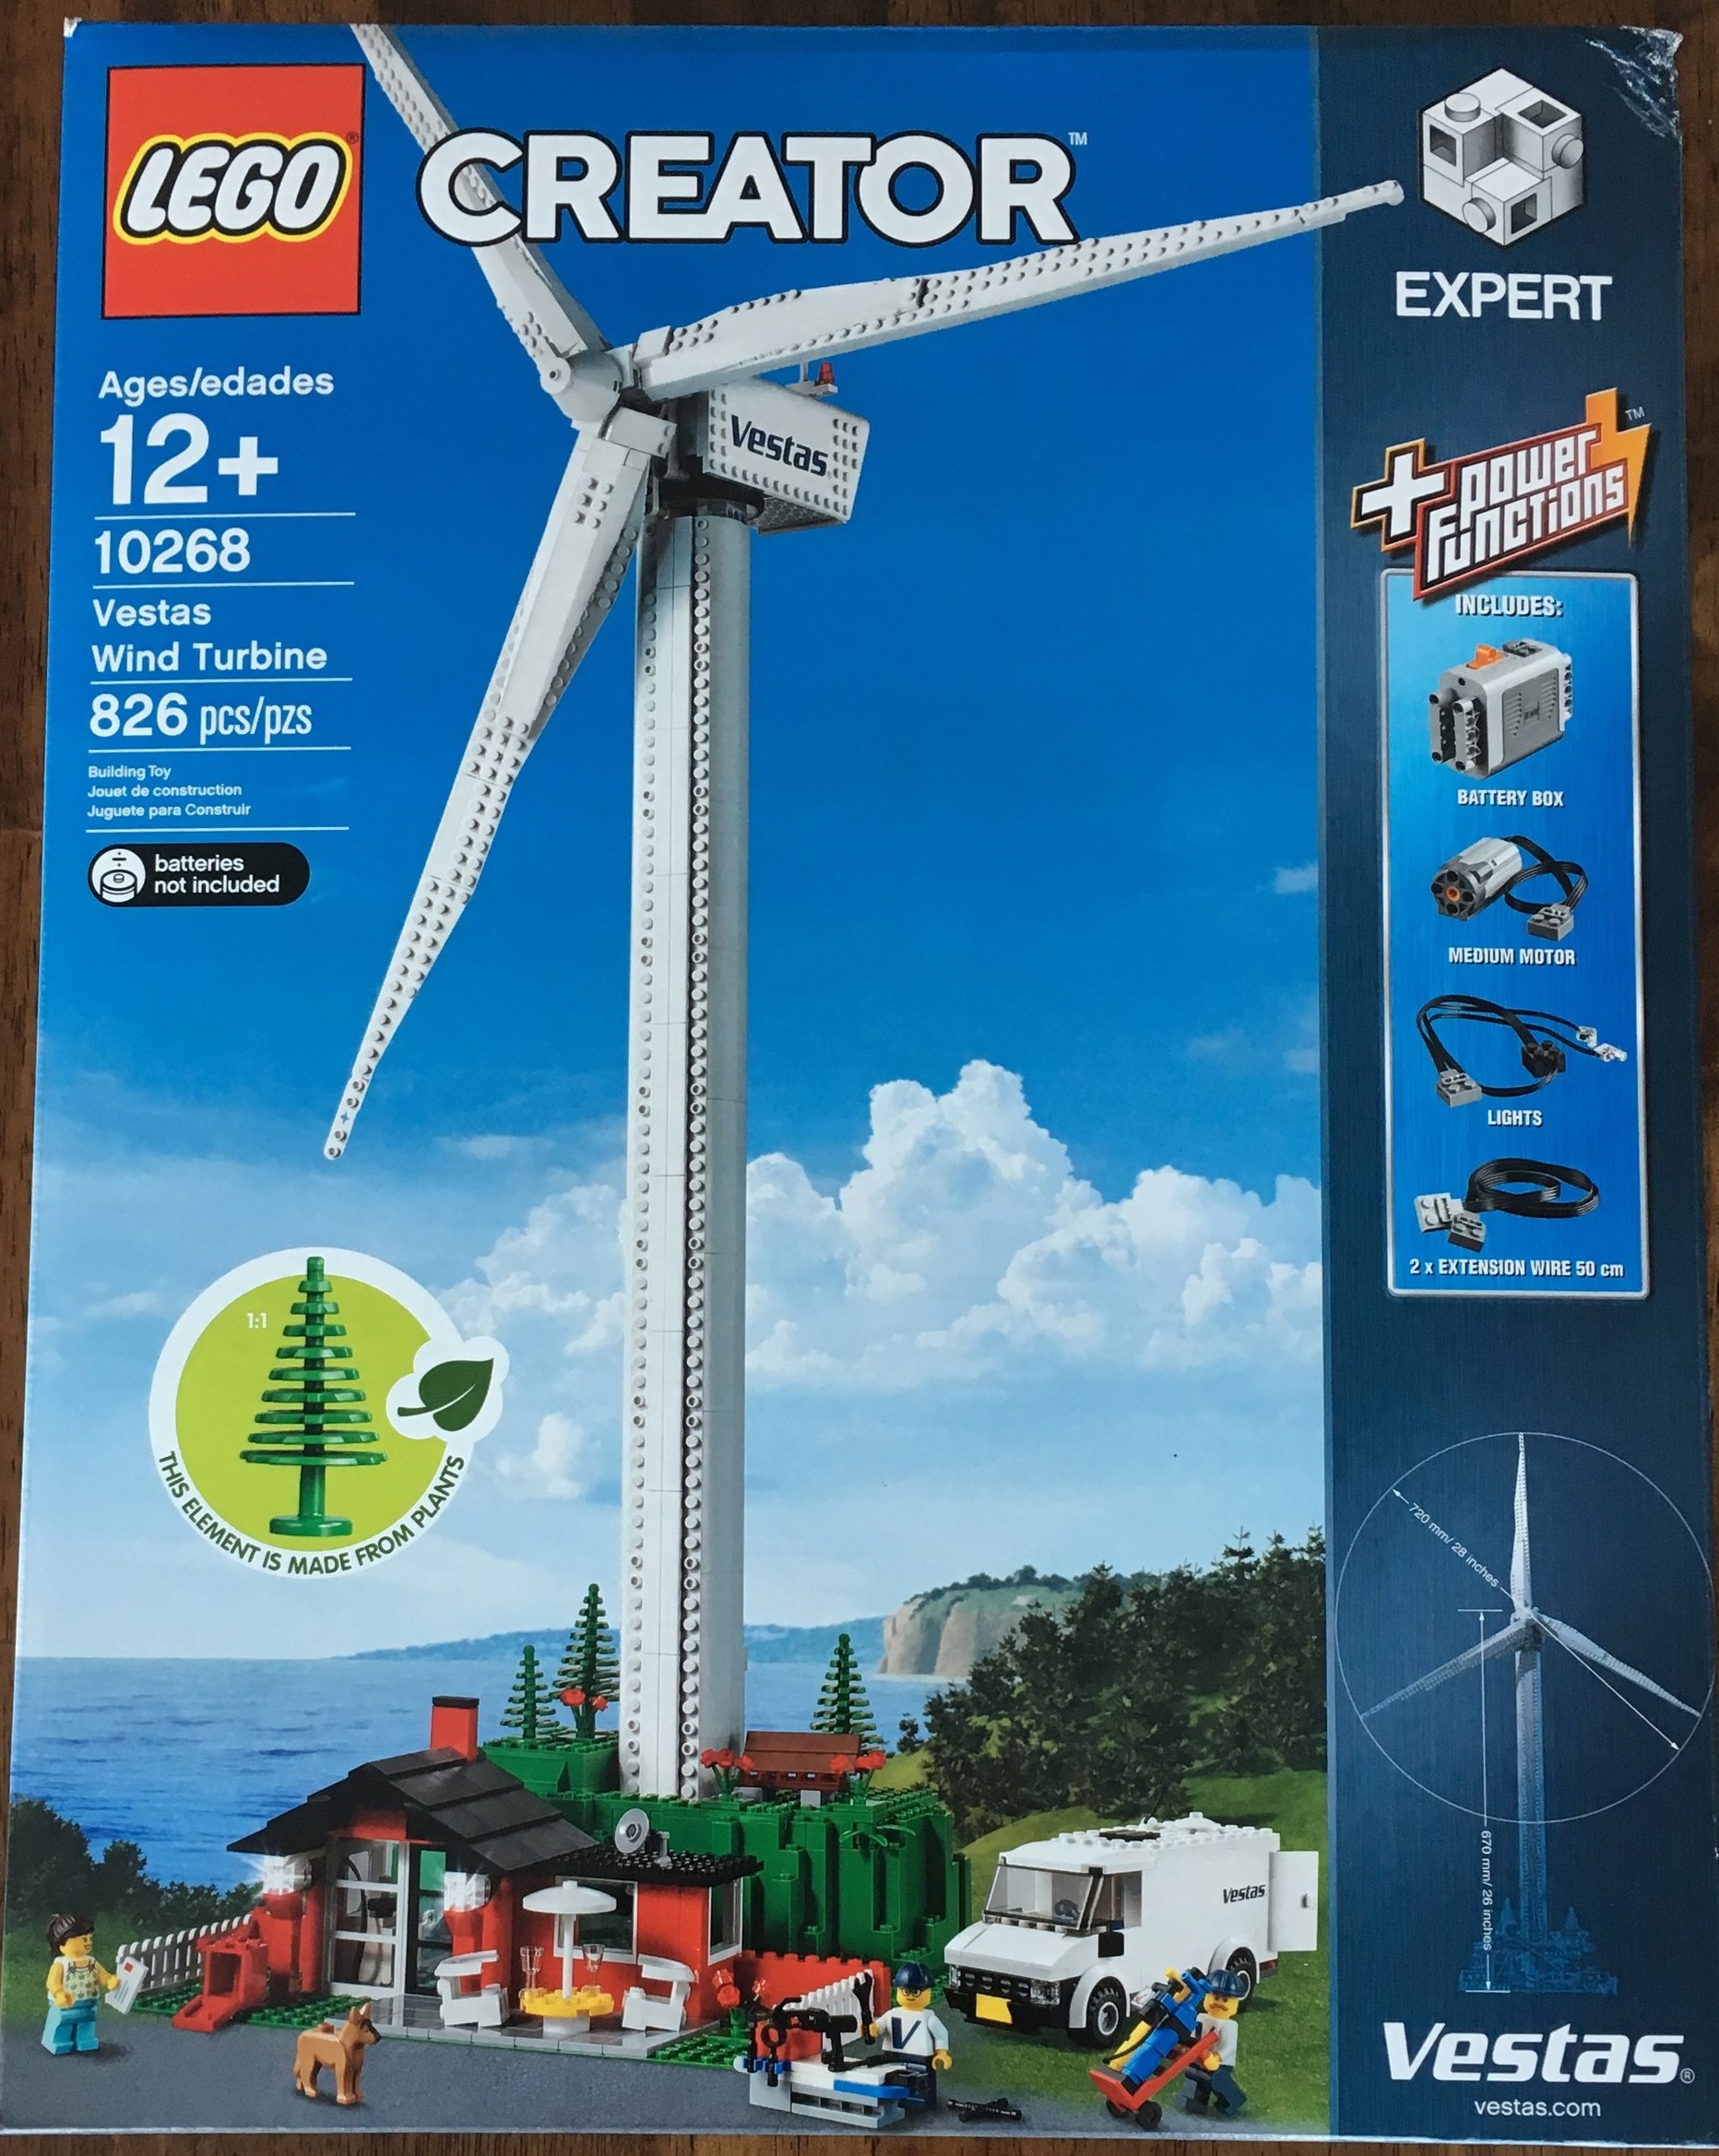
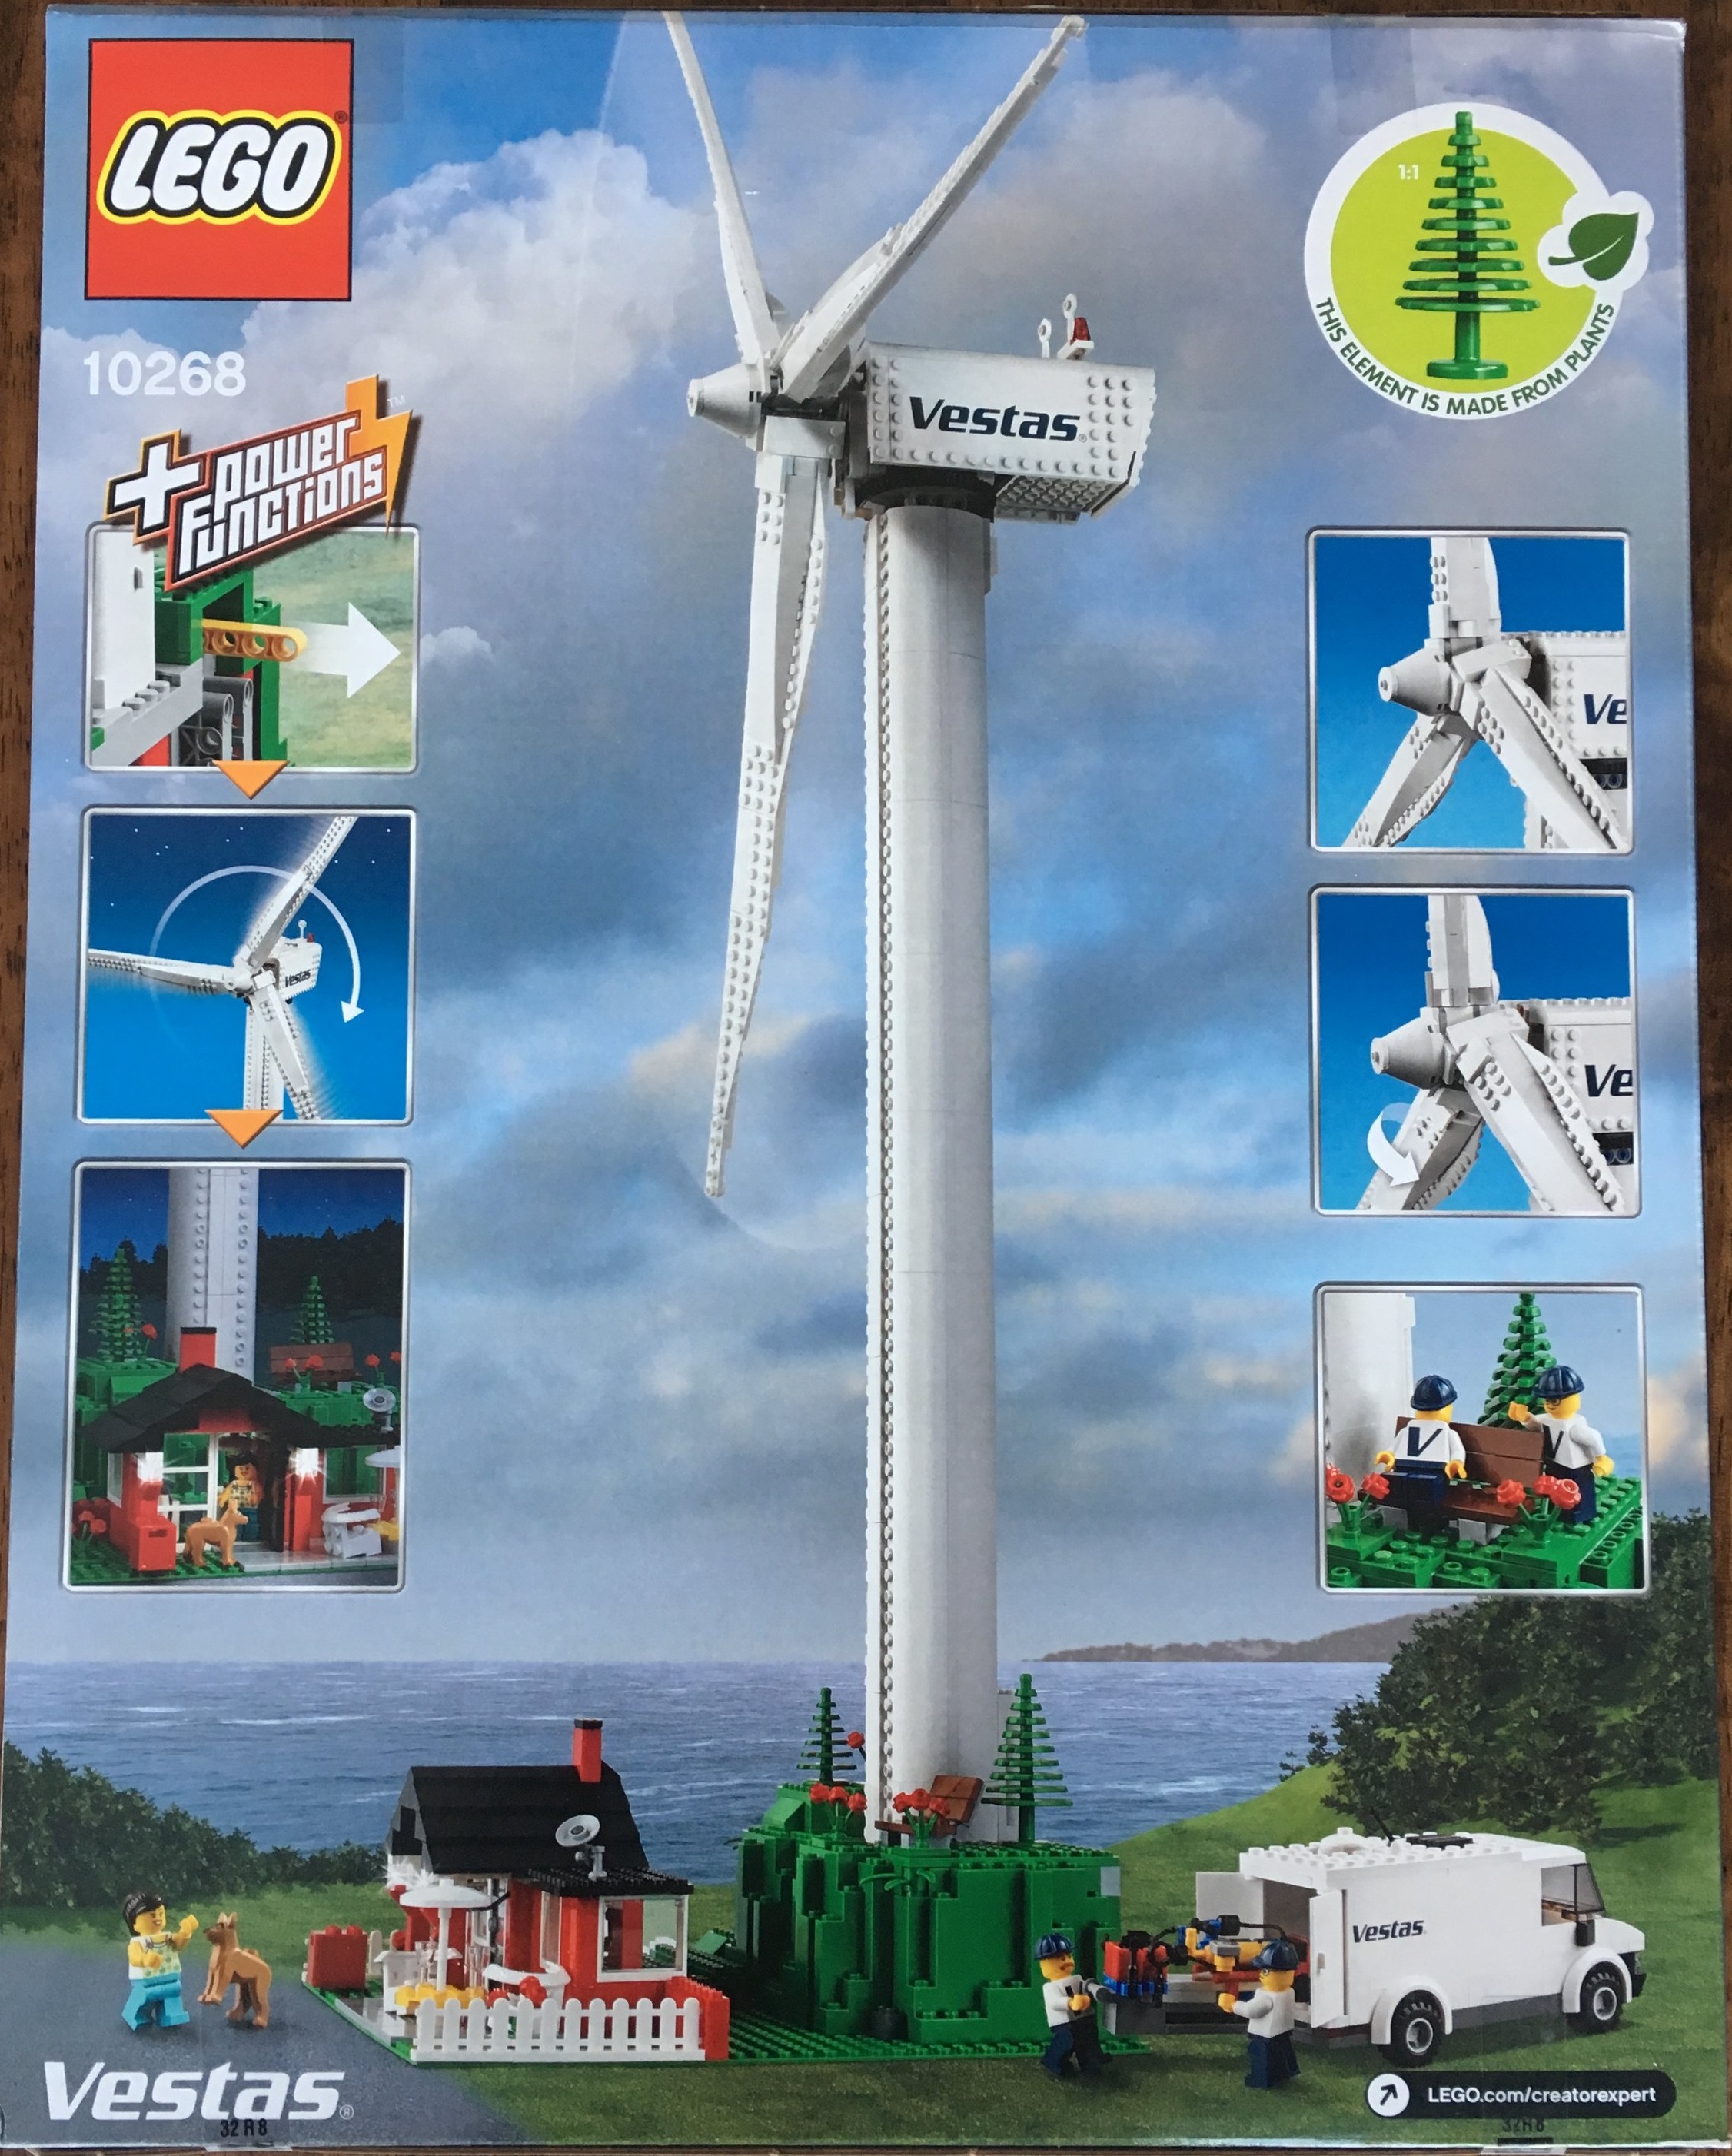
Here’s what the box looks like. The front shows the set, the back shows the functionality. It also highlights the fact that the tree pieces are made from the sustainable plastic similar to #40320-1.

10268_boxfront.jpg
10268_boxback.jpg

The contents are 12 parts bags, a wrapped instruction booklet and a 32x32 stud base plate. The parts bags are not numbered so you just open them all and start building versus opening bag one to build a specific part. With 826 pieces this method was manageable. I knew that some of the bigger pieces weren’t needed right away so I didn’t have to open them all at once.

The instruction booklet is part instruction booklet and part propaganda campaign. LEGO gets a chance to boast about their program to go green and to talk about how great wind turbines are for the world. Not only does the front of the booklet contain a few pages of details, but throughout the build there are little tidbits here and there that talk about wind turbines.

I think what the LEGO Group is doing is great in terms of becoming more sustainable, but I didn’t need all of the information in the instruction booklet to tell me that. I’ve read articles on it and have seen news videos about the program. I don’t want to have to spend money on a set and pay for instruction booklet pages for something that I could just click a link to online.

10268_contents.jpg

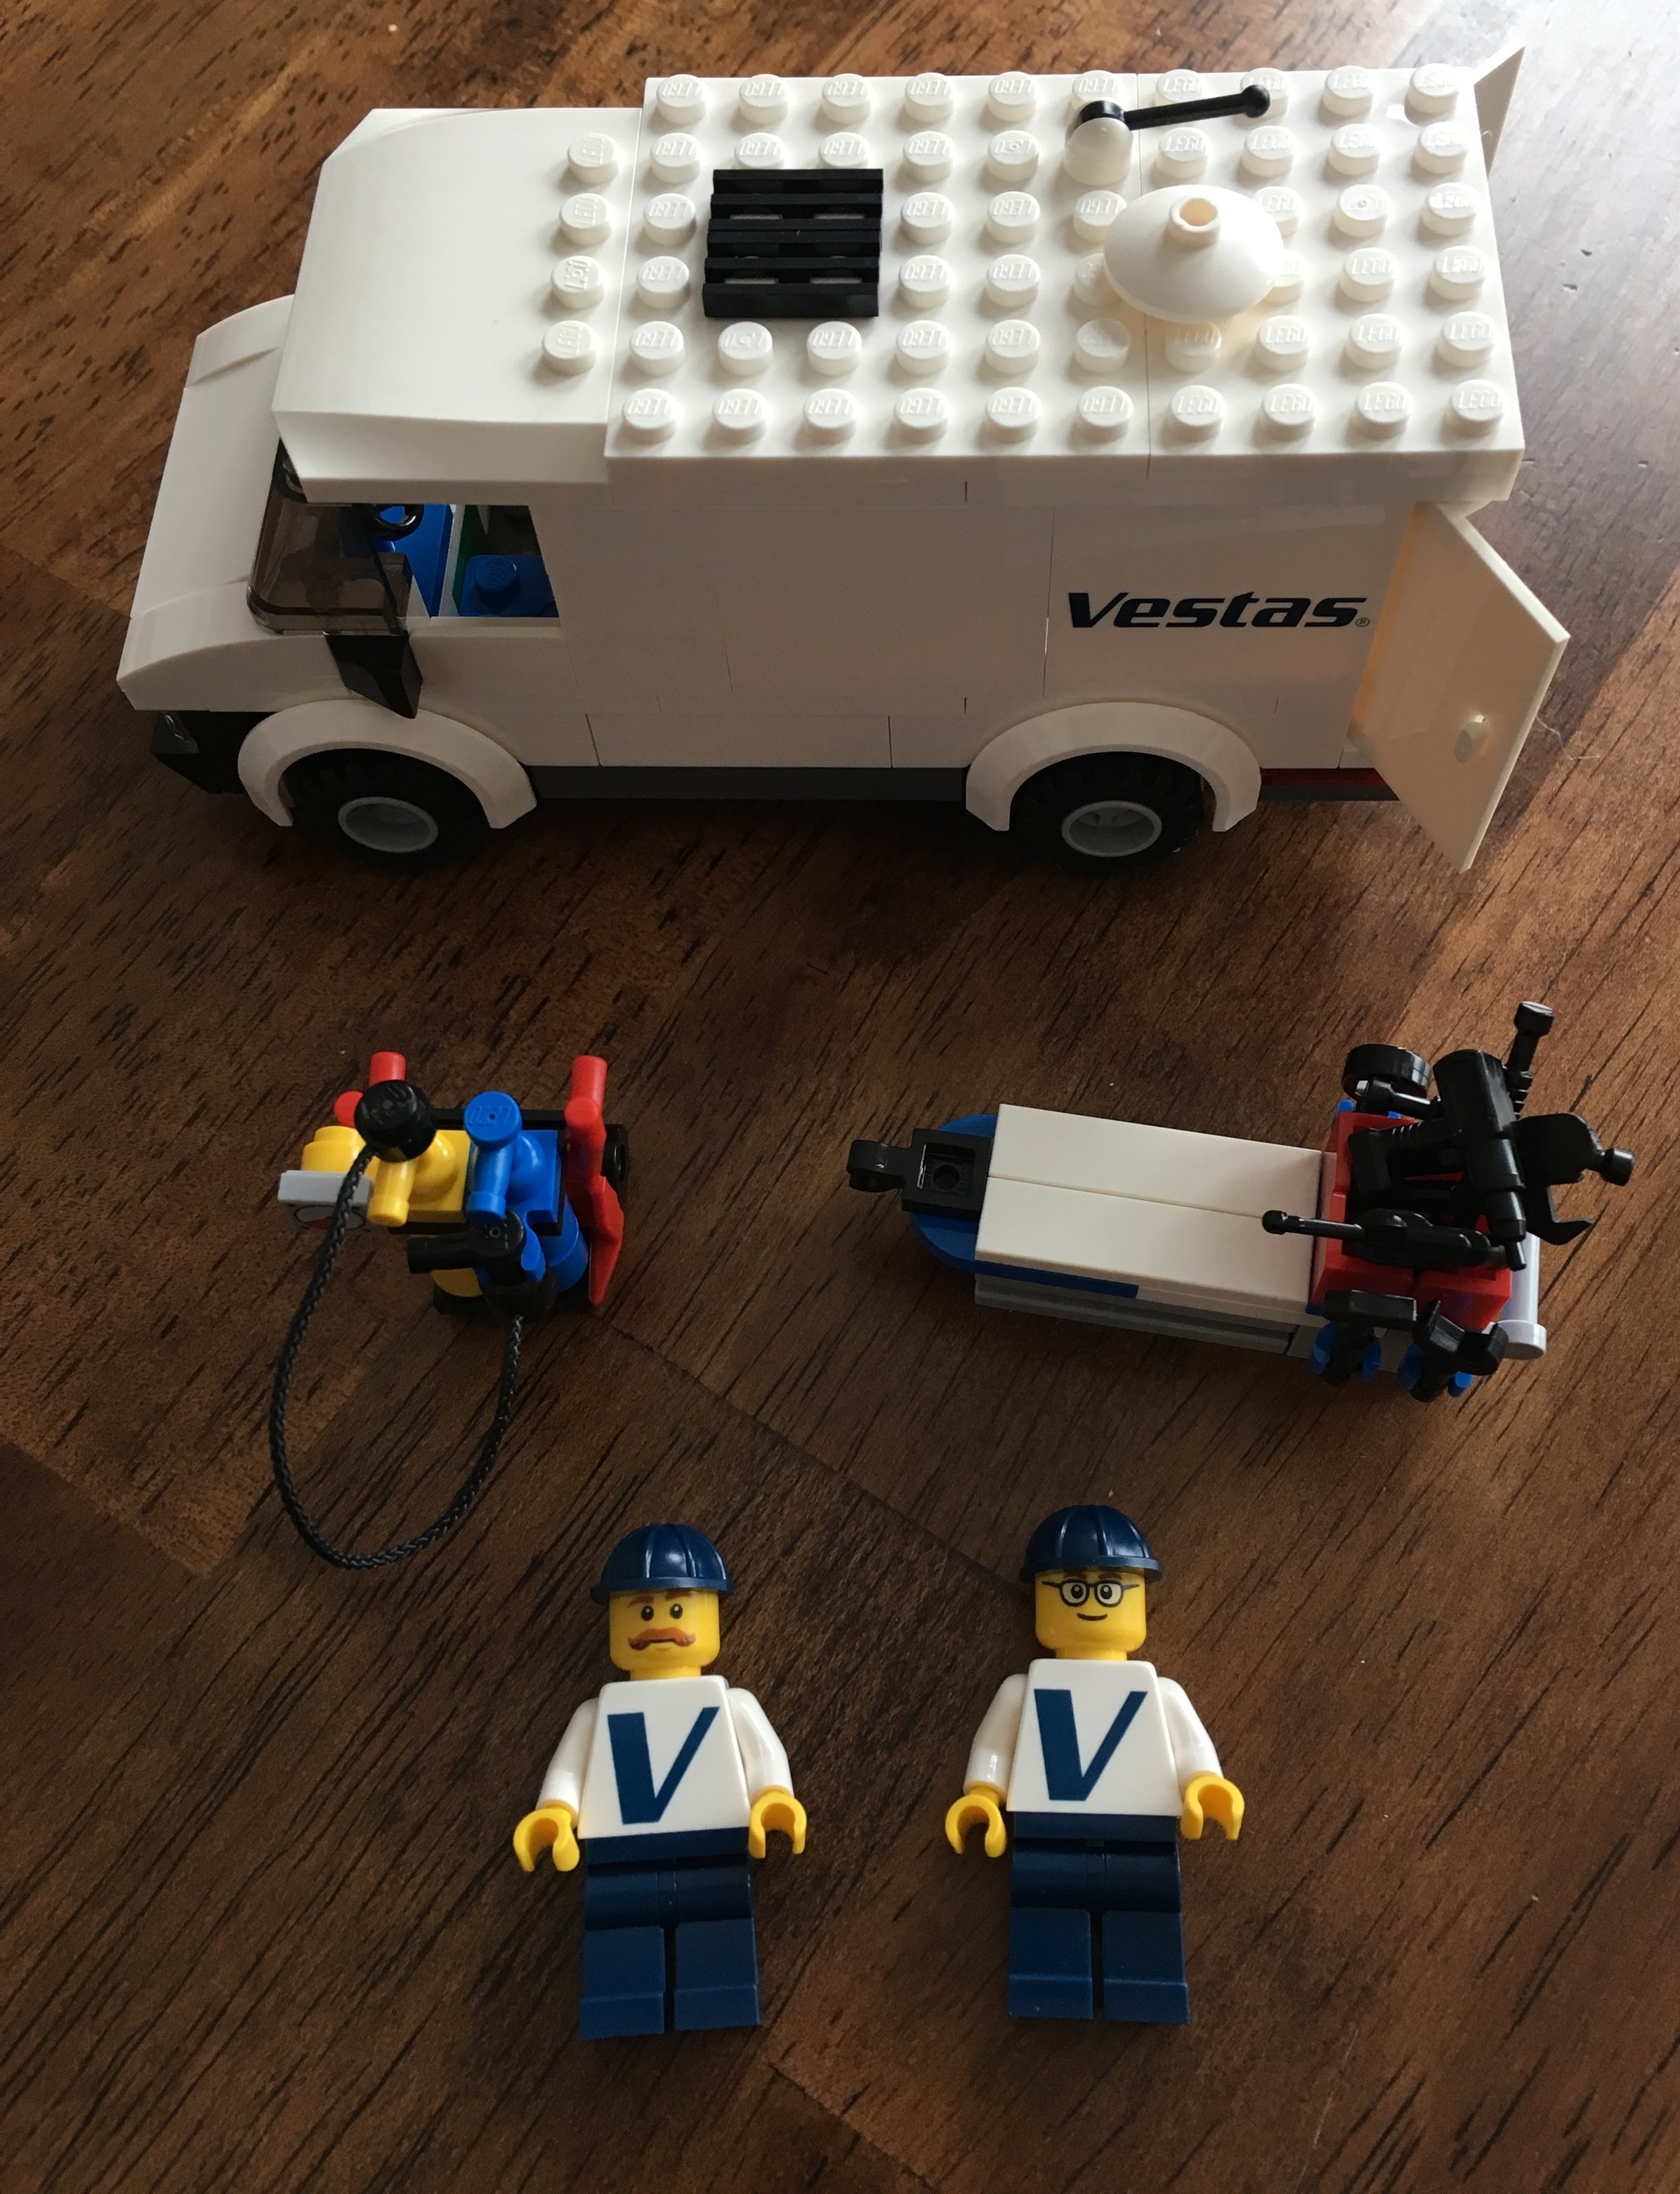
The build starts with the Vestas maintenance vehicle, the 2 workers, and their equipment. The truck looks more like an ambulance than a maintenance vehicle. The back even has a place to stick their equipment which could also be used for a stretcher. Page 8 of the instructions shows a pick up truck and a small SUV next to a wind turbine tower. I would have preferred a pickup versus the bulky ambulance.

10268_vehicle.jpg

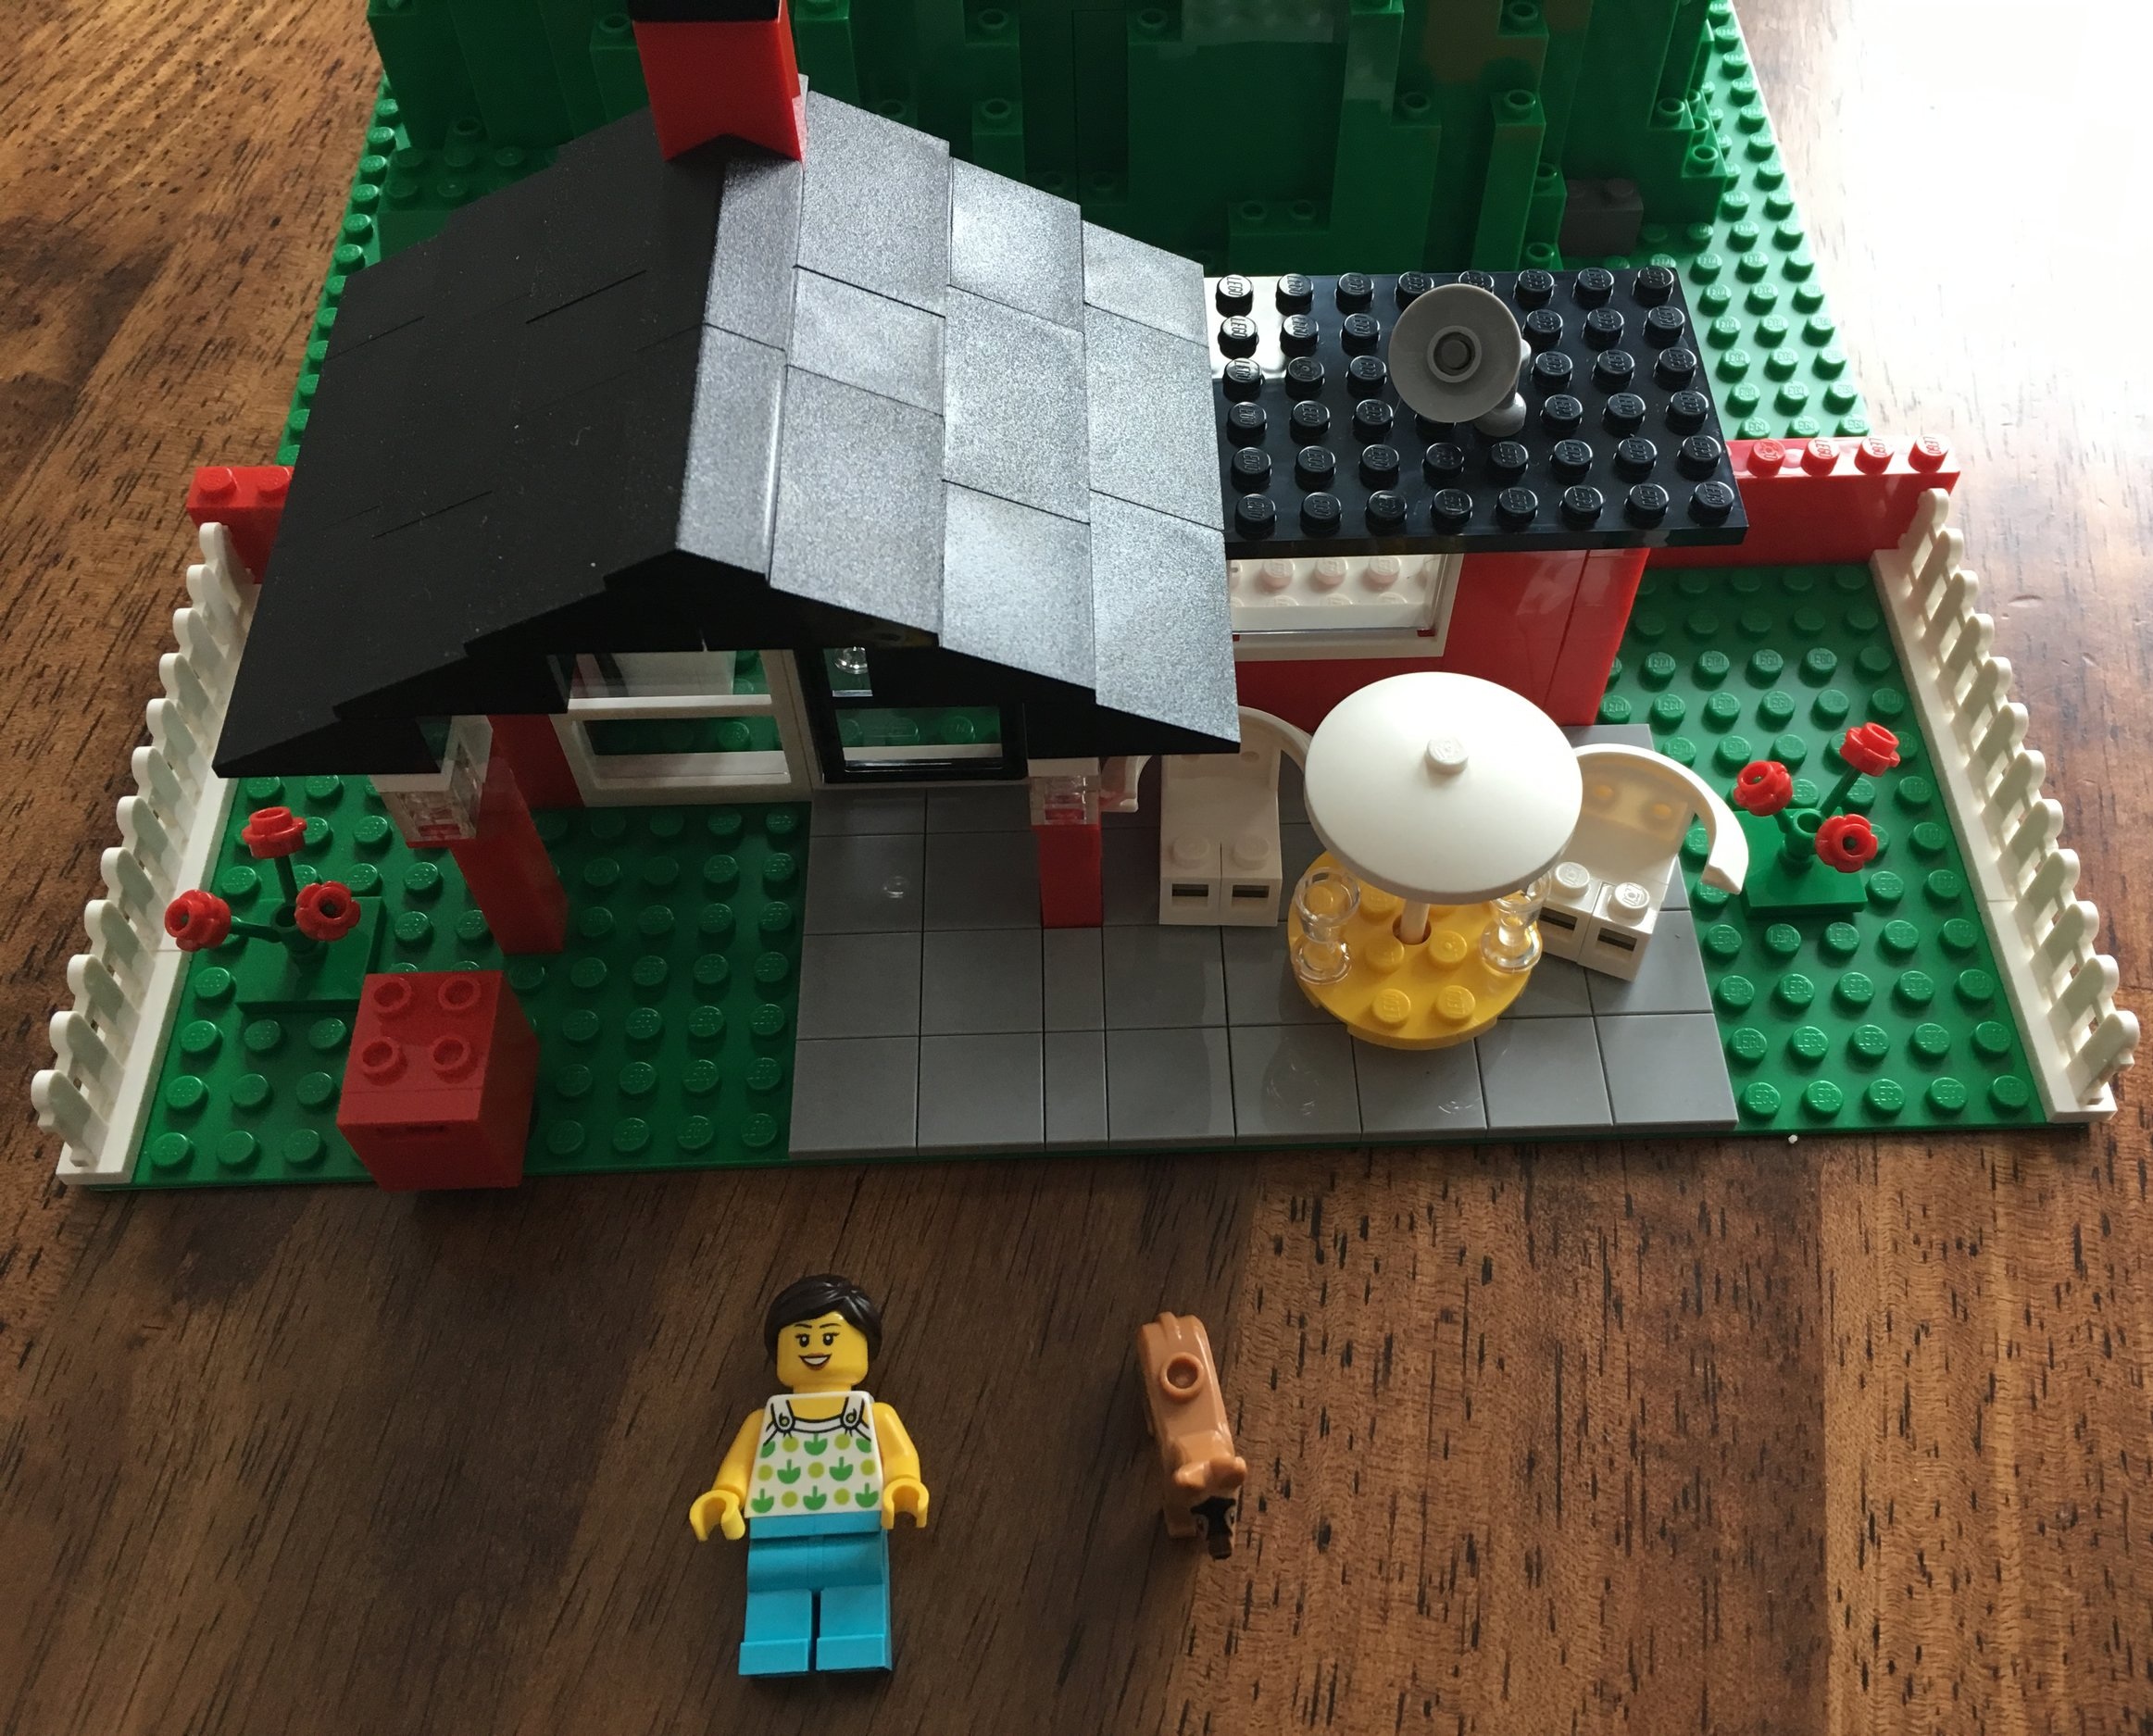
Next up is the house at the base of the wind turbine. I’m not sure what to make of the house. None of the pictures of wind turbines in the instruction booklet shows a house nearby and I have never seen one in the US or in Europe. I understand the concept of trying to show that we can use wind energy to power our houses, but I’m not sure if the house fits. The house has a mailbox, a small patio with 2 chairs and a table, a small cot (not really a bed), and some simple random appliances. The house build doesn’t do anything for me. I would have preferred a transport truck to carry blades or some sort of equipment used to install or maintain the turbine.

10268_housefront.jpg
10268_houseback.jpg

The bottom of the tower contains a small park which is not realistic. Have you ever seen a park bench at the bottom of a wind turbine tower? Enough complaining. The green BURPs are a nice touch and will be great for future MOCs needing green settings. The door on the back leads to… nowhere, but I get what they’re trying to do. It works as you see some of the pictures in the instruction booklet where there’s a door at the bottom.

10268_towerbottom.jpg
10268_towerback.jpg

Okay, so I’ve been pretty negative so far, but I will say that the building of the turbine was much better and made up for what I didn’t like about the building and the vehicle. So 5 positive things to make up for my negativism:
1 - There are zero stickers in this set. YAY! All of the parts with logos are all printed.
2 - Having recently built the Technic #42083-1 Bugatti Chiron, I was a fan of using System pieces to detail a Technic set. This set is mostly System, but it has Technic pieces to make it function. I’m a big fan of the combination of the two. I know the Creator Expert carnival sets use this as well and it would be cool to have more of the same in the LEGO world.
3 - The set is expensive, but having the Power Functions stuff included makes worth it in my opinion. Instead of having to build the set without it all, you can just install it at once. The set is not ideal for building and then easily putting in Power Functions equipment later. Some of the train sets that I own are good at designing it so you can easily add Power Functions. For this set, you might as well re-build the whole turbine, tower, and house.
4 - The tallest set out there is the #21309-1 NASA Apollo Saturn V set. This set is the second largest and it is a big one. I don’t have a photo shoot area (as you have seen) so trying to get a picture of this one was tough. I think between the movement with the Power Functions and the sheer size, this set will be a great addition to some of the LUG displays out there. I’m looking forward to seeing pictures and videos of this one being used in large City scene displays.
5 - The turbine can spin about the tower portion as the wind changes. So not only do the blades turn, but you can rotate the turbine itself. There are Power Functions wires inside so it doesn’t spin forever, but you can spin it about 180 degrees in either direction. Also, the blades can be inserted in a separate Technic pin to change their angle. This mimics how changes in conditions require changes to the blade directions of an actual turbine. Two simple things, but they really add to the set in my opinion.

10268_turbine1.jpg
10268_turbine2.jpg

I fit the entire blade section into one picture and then put a foot long ruler next to one of the blades.
The diameter of the blades is 28 inches (72 cm) so each one is about 14 inches. The tower is 26 inches (67 cm) so almost 40 inches total to the top of the blade.

10268_turbine3.jpg
10268_turbine4.jpg

Overall was it worth it? The wind turbine is great, but the rest of the set is lacking in my opinion. I picked this one up during double VIP points, I used EBates to get 2.5% back, and I got a free #40292-1 set along with it so it wasn’t a complete waste. Will this one go on sale? Hard to say. I’d like to see it on Amazon.com for 20% off, but there’s no telling what LEGO will do with the sales of this set. Should you get it? I think it depends on what you plan to do with it. Like I said, it would be great in a large City display, but on it’s own it is a tough sell.

What are your thoughts?

Set Review - #75952-1 - Newt's Case of Magical Creatures - Fantastic Beasts - The Wizarding World

Full disclosure, I have not seen the Fantastic Beasts 2 movie that was released back in November 2018 at the time of drafting this post. With that being said, I have seen the first Fantastic Beasts movie and I thought it was good. I was wondering how they would work a spin-off in and they did it. Kind of like Star Wars in that as long as you have some of the same plot details, you can make a movie about anything and make money on it. Enough blabbing…

Set number 75952-1 - Newt’s Case of Magical Creatures was released on 24 August 2018 in the US. It retails for $49.99 and with 694 pieces, it works out to be $0.072 per piece. I waited and got it 20% off on Amazon.com so even better. As of today (30 December 2018), it’s still 20% off there so if you were looking to pick this one up at a discount, now is your chance. Onto the review…

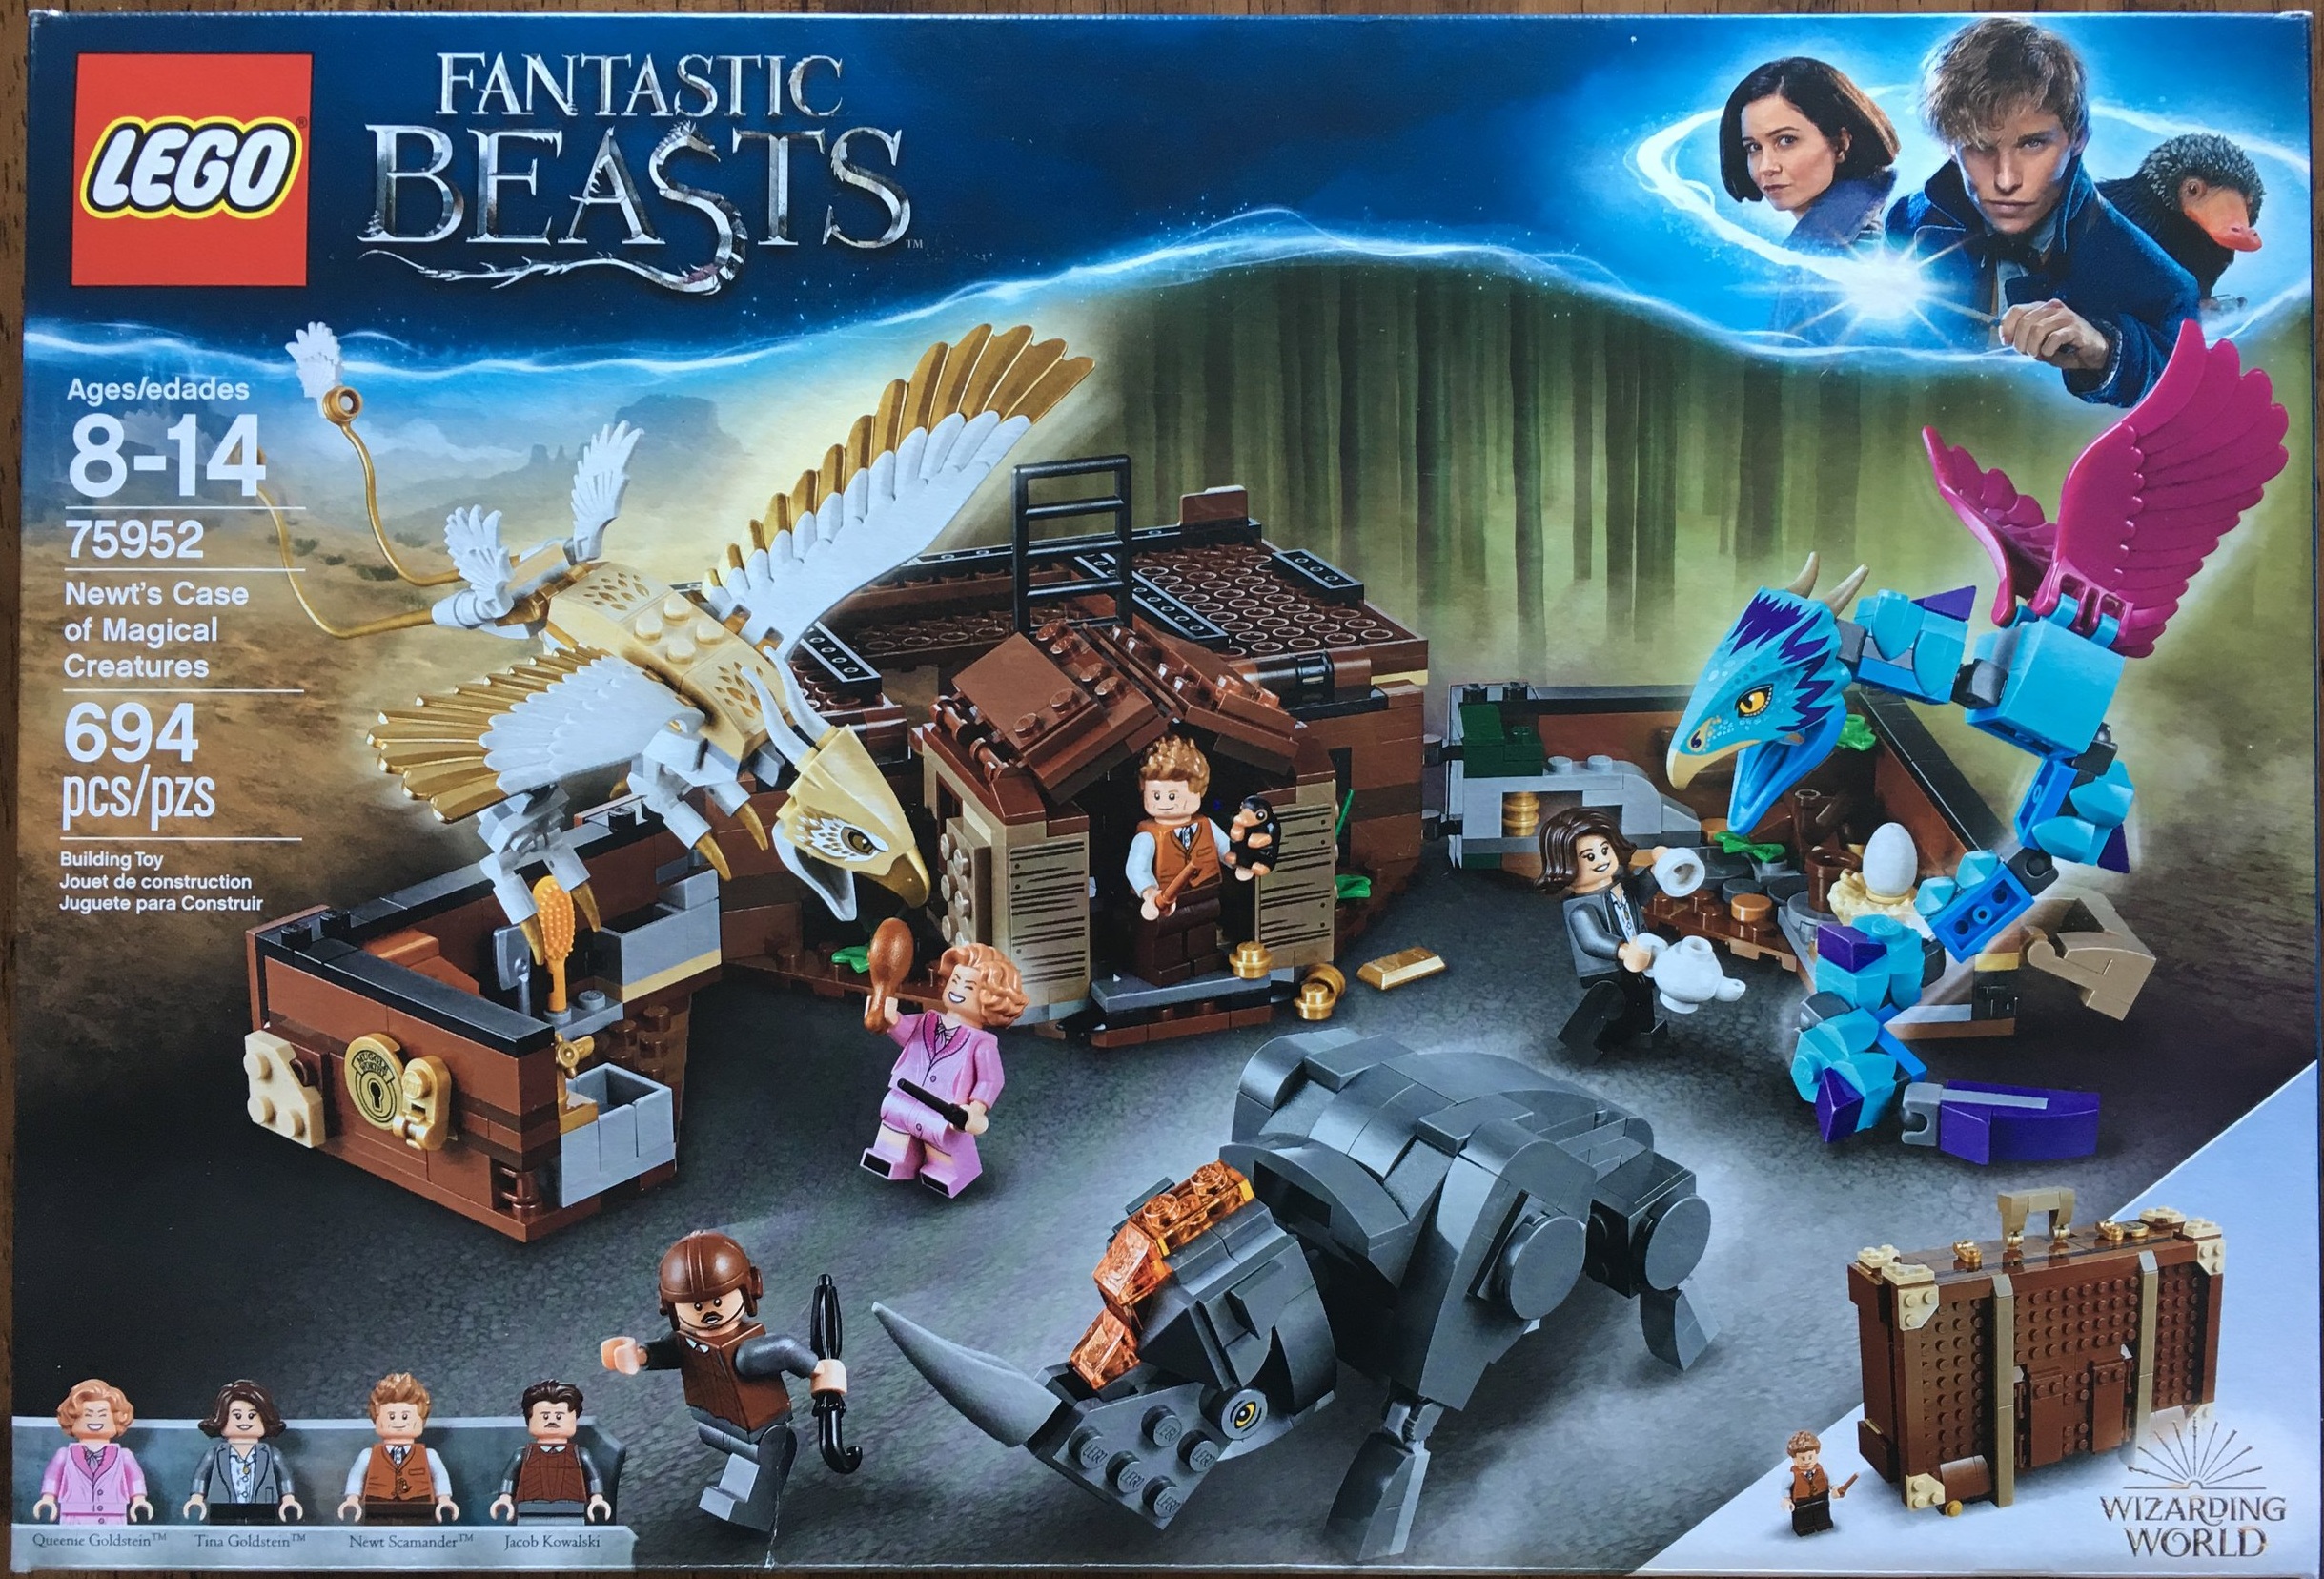
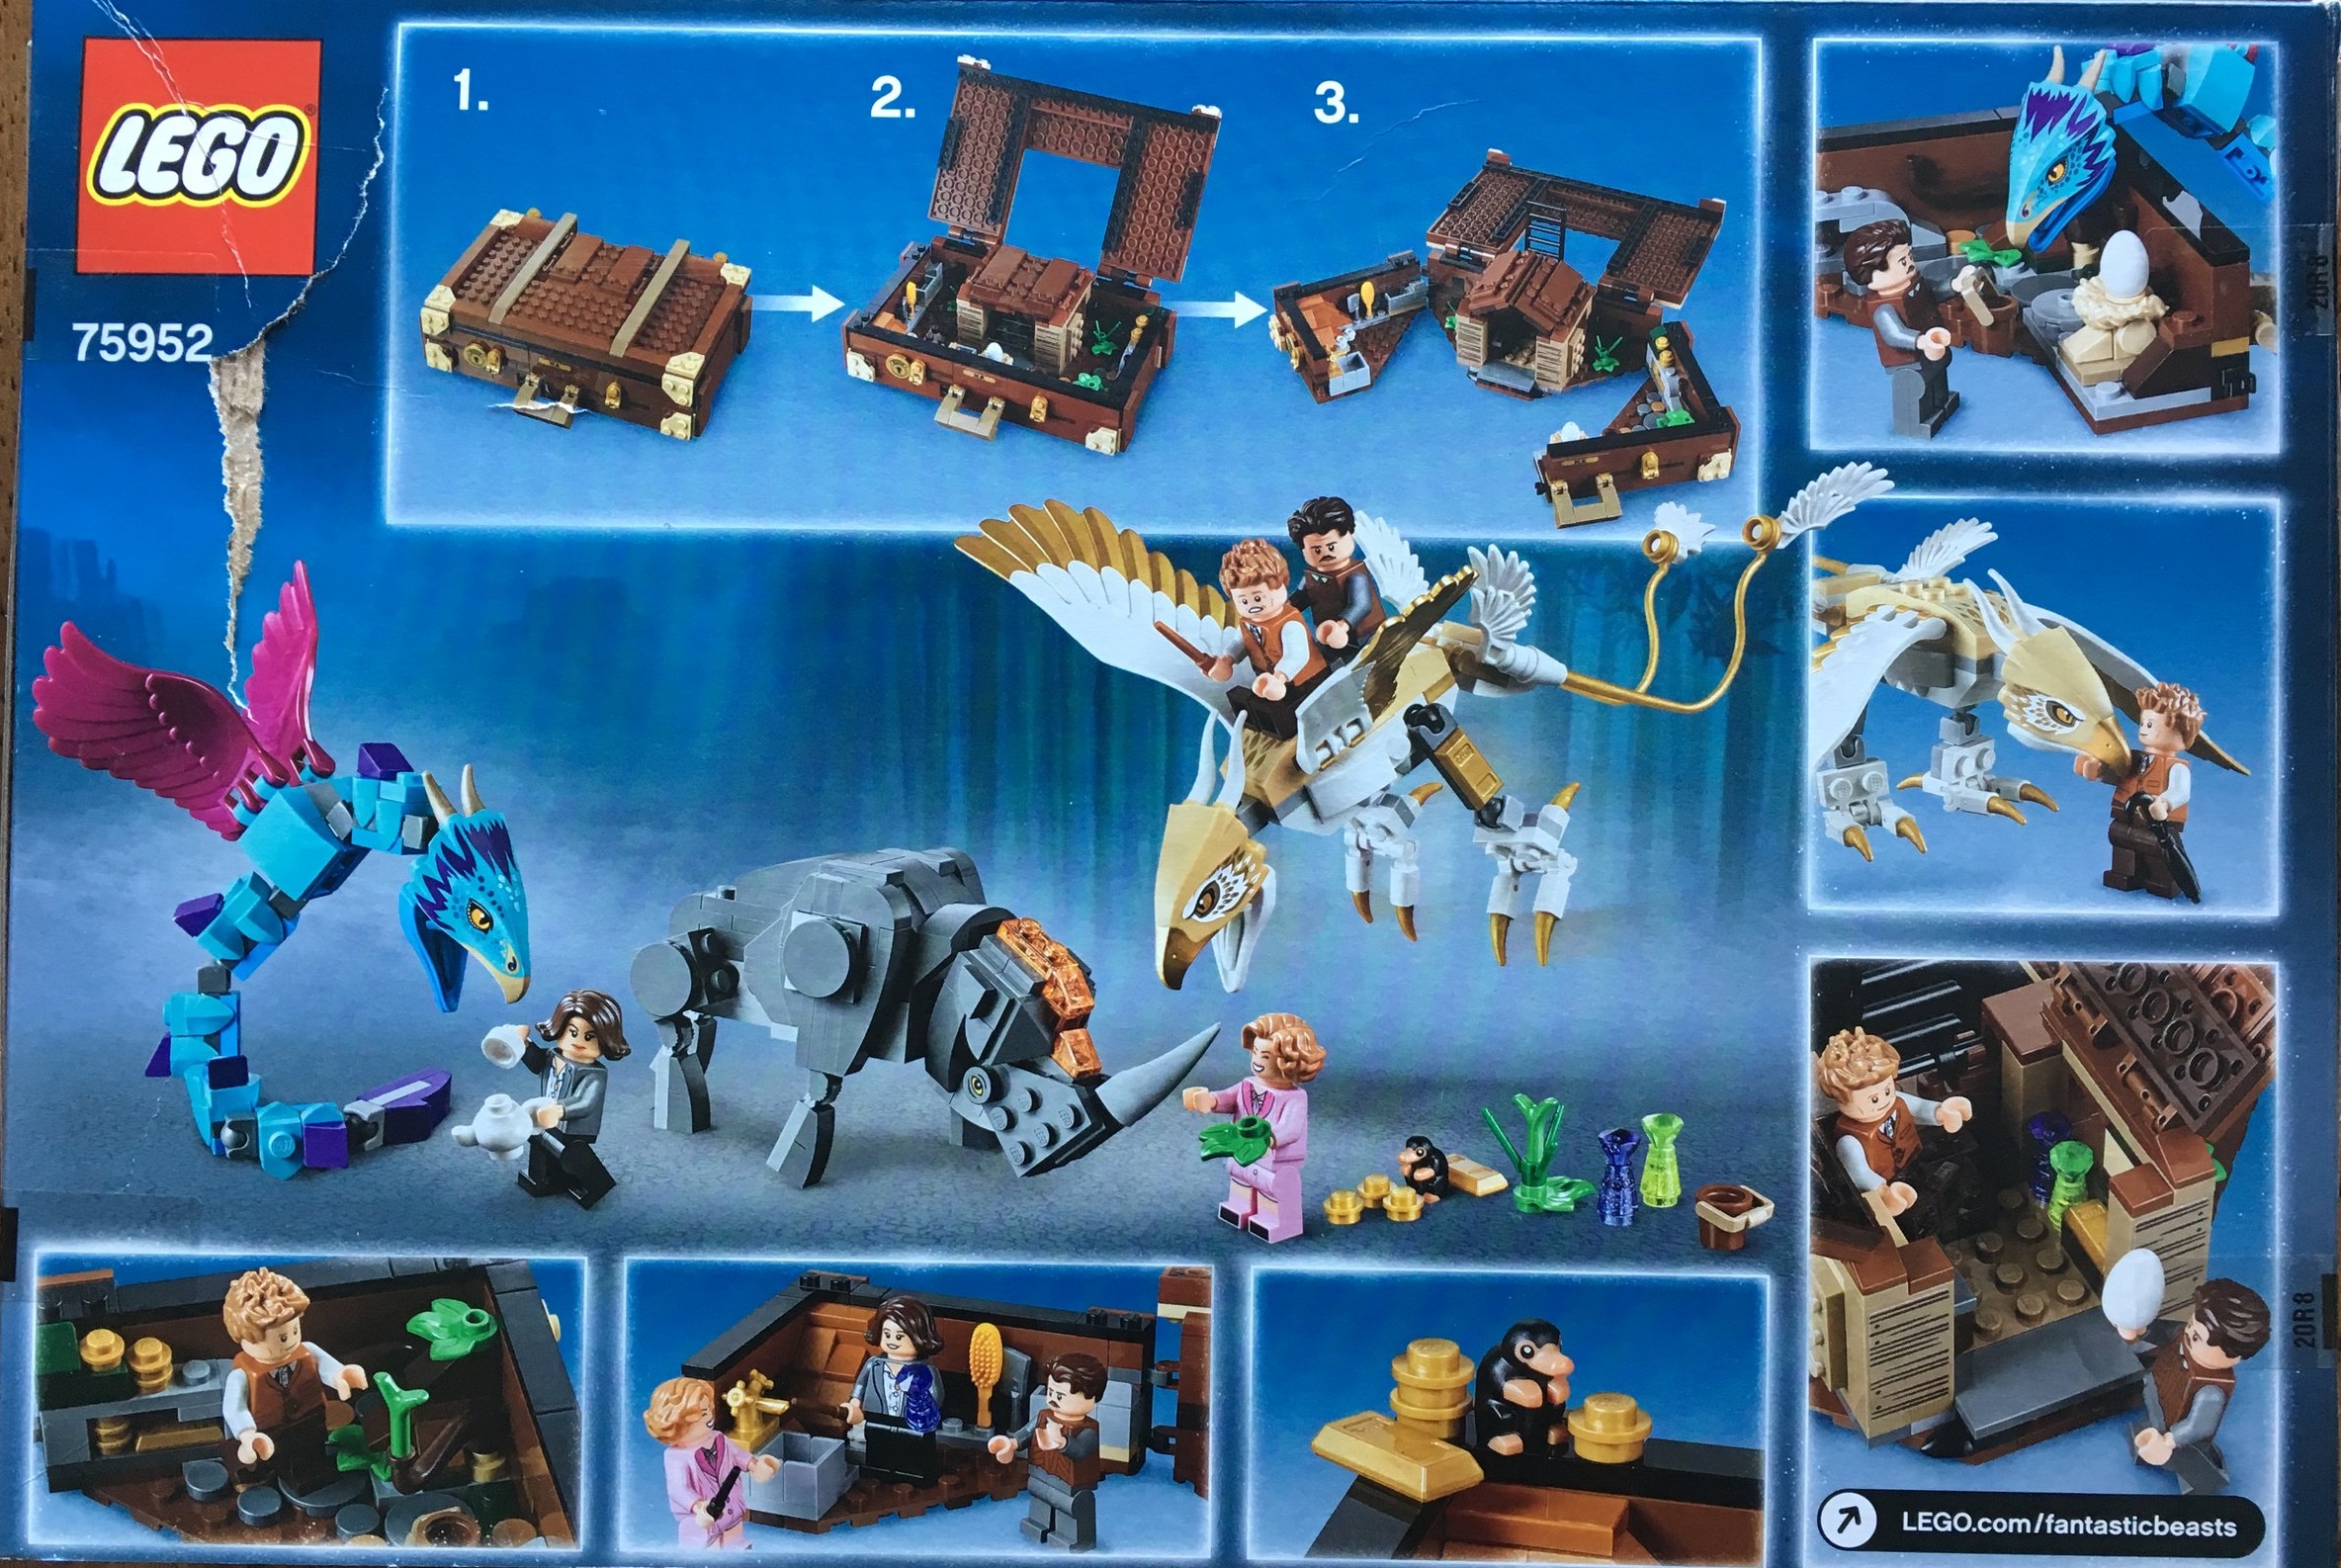
Here is the box. The front shows the case opened up with all of the creatures and minifigures. The back shows the play features. You can also see the damage that the box took during shipping on the back. Thanks Amazon.com! I guess that’s what I get… 20% off, but a banged up box.

75952_boxfront.jpg
75952_boxback.jpg

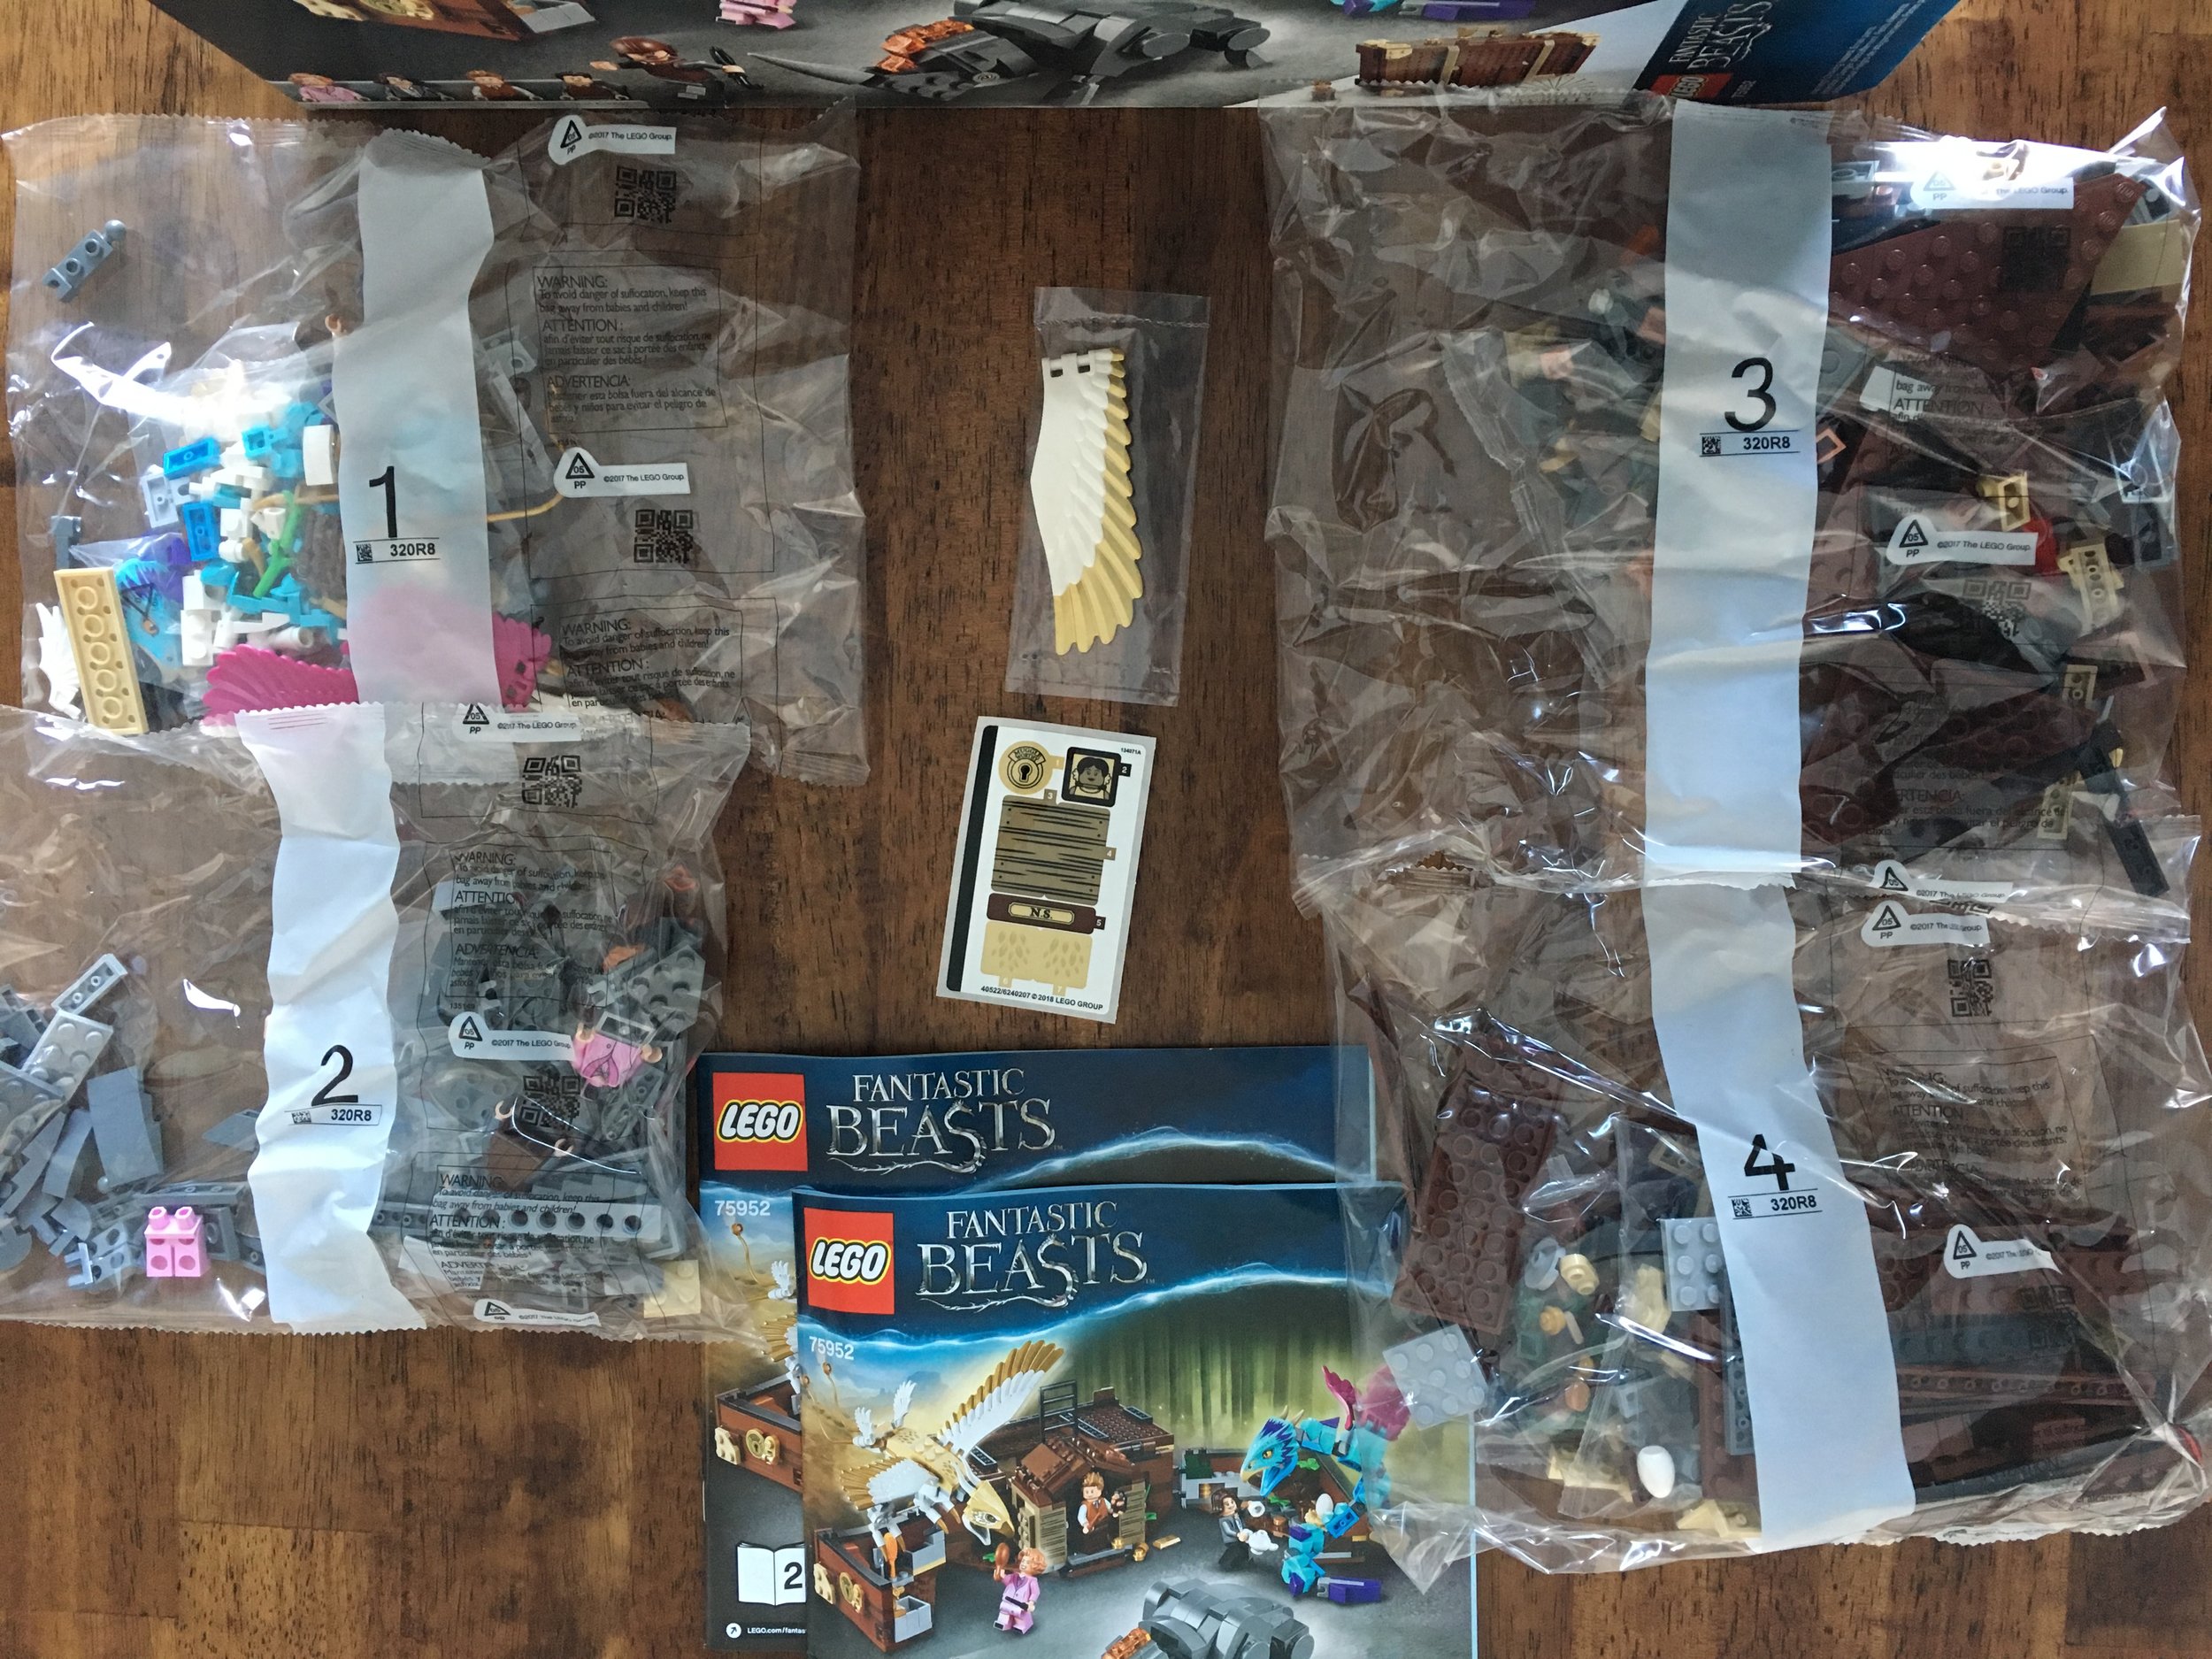
The contents of the set are four numbered bags, 2 instruction booklets that were jammed into the box, and a small sticker sheet. There is also a wing in a separate bag. I’m not a big enough fan of the movie to know all of the names of the different beasts. I looked it up and it is a Thunderbird wing. When I first opened the package, I was worried because only one wing was on its own. The other wing is in bag one. I’m not sure why one is in bag one and one is separate. So don’t panic if you can’t find the other wing loose in the box.

75952_contents.jpg

Bag one builds the Thunderbird (white and gold winged creature), the Occamy (bluish/purple creature that looks like a bird and a snake), and the Niffler (tiny duck billed platypus type creature). The 2 minifigures are Newt Scamander and Tina Goldstein. Newt has his wand and is holding a Bowtruckle (I’m not going to try and explain this one… just Google it). Tina has her wand and the tea pot used to hold the Occamy (again, Google it or just watch the movie if you haven’t seen it).

75952_bag1.jpg

The second bag includes the Erumpent (the big rhino looking creature) along with the minifigures for Jacob Kowalski and Queenie Goldstein. Jacob comes with a hair piece and a helmet and is holding an umbrella. Queenie has her wand.

75952_bag2.jpg

The third bag starts the case. I will have to go back and watch the movie as I will be honest and say that I’m not sure how accurately the case is being portrayed as compared to the movie version.

75952_bag3.jpg

The fourth bag completes the case. Here are pictures of the case opened and then closed. If anything, it captures an item from the movie, but also gives you opportunities to do your own thing. Much like the LEGO Ideas Pop-Up Book, there are many different things you could do with this case besides representing the Fantastic Beasts movie.

75952_bag4a.jpg
75952_bag4b.jpg

Here’s a final picture of everything from a top down view. Not the greatest of pictures, but it shows all that you get. From a play standpoint, it captures a lot of the characters from the movie along with a key piece of the movie. From a parts standpoint, there are some good parts that could be used in other MOCs, but nothing too out of the ordinary. The build wasn’t too challenging and really didn’t have any different techniques that stood out to me. The sticker sheet was small so that made the build slightly better as I wasn’t putting stickers on after every other instruction page. Overall, unless you’re a big fan of the movie, I wouldn’t rush out to buy this one. I wouldn’t have purchased it without the 20% off sale at Amazon.com.

What are your thoughts on this one?
75952_final.jpg

Set Review - #21315-1 - Pop-Up Book - LEGO Ideas

For those of you that have been into or at least have followed the LEGO Ideas series, #21315-1, Pop-Up Book is the 23rd in the series. Has it been that many already? It was released on 2 November 2018 in the US with a retail price of $69.99. It contains 859 pieces which works out to be $0.081 each. Not too bad in terms of price per piece and if you’re willing to wait until the end of it’s shelf life, it may go one sale at some of the retailers. Onto my review…

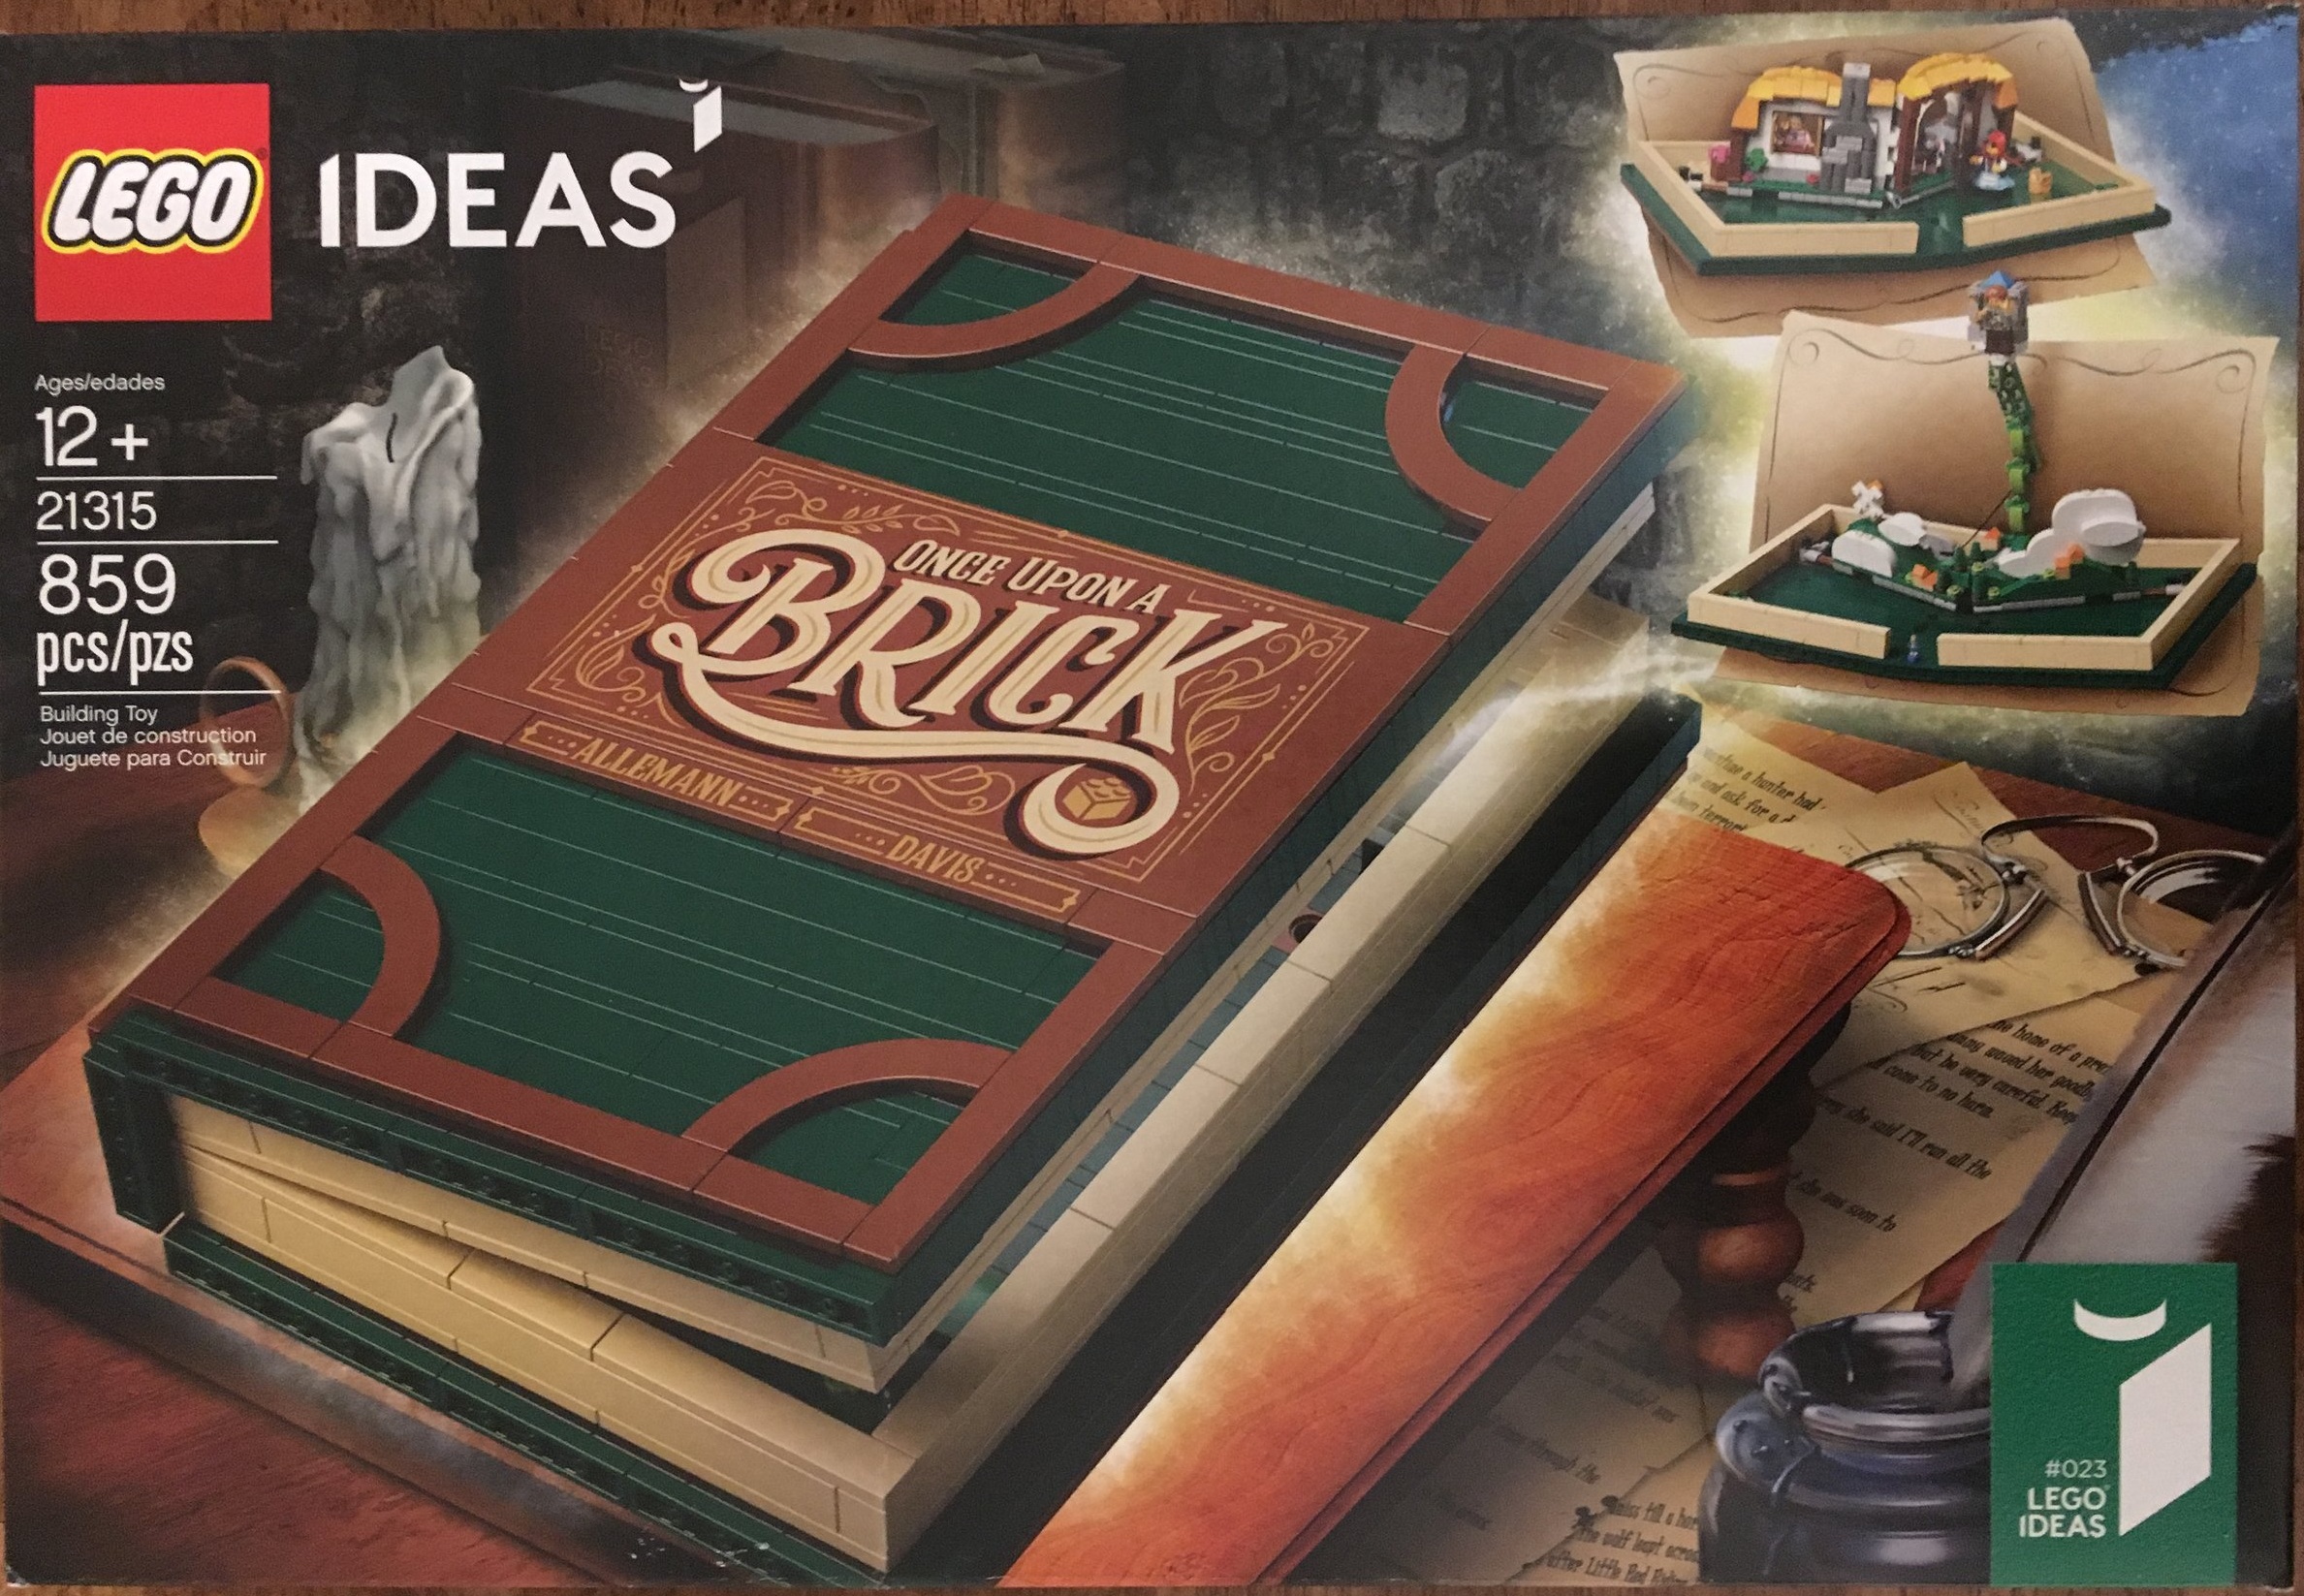
The front of the box shows the book along with some smaller pictures of the options for what can pop-up. The back shows some better details of the two pop-up options inside that can be placed inside the book.

21315_boxfront.jpg
21315_boxback.jpg

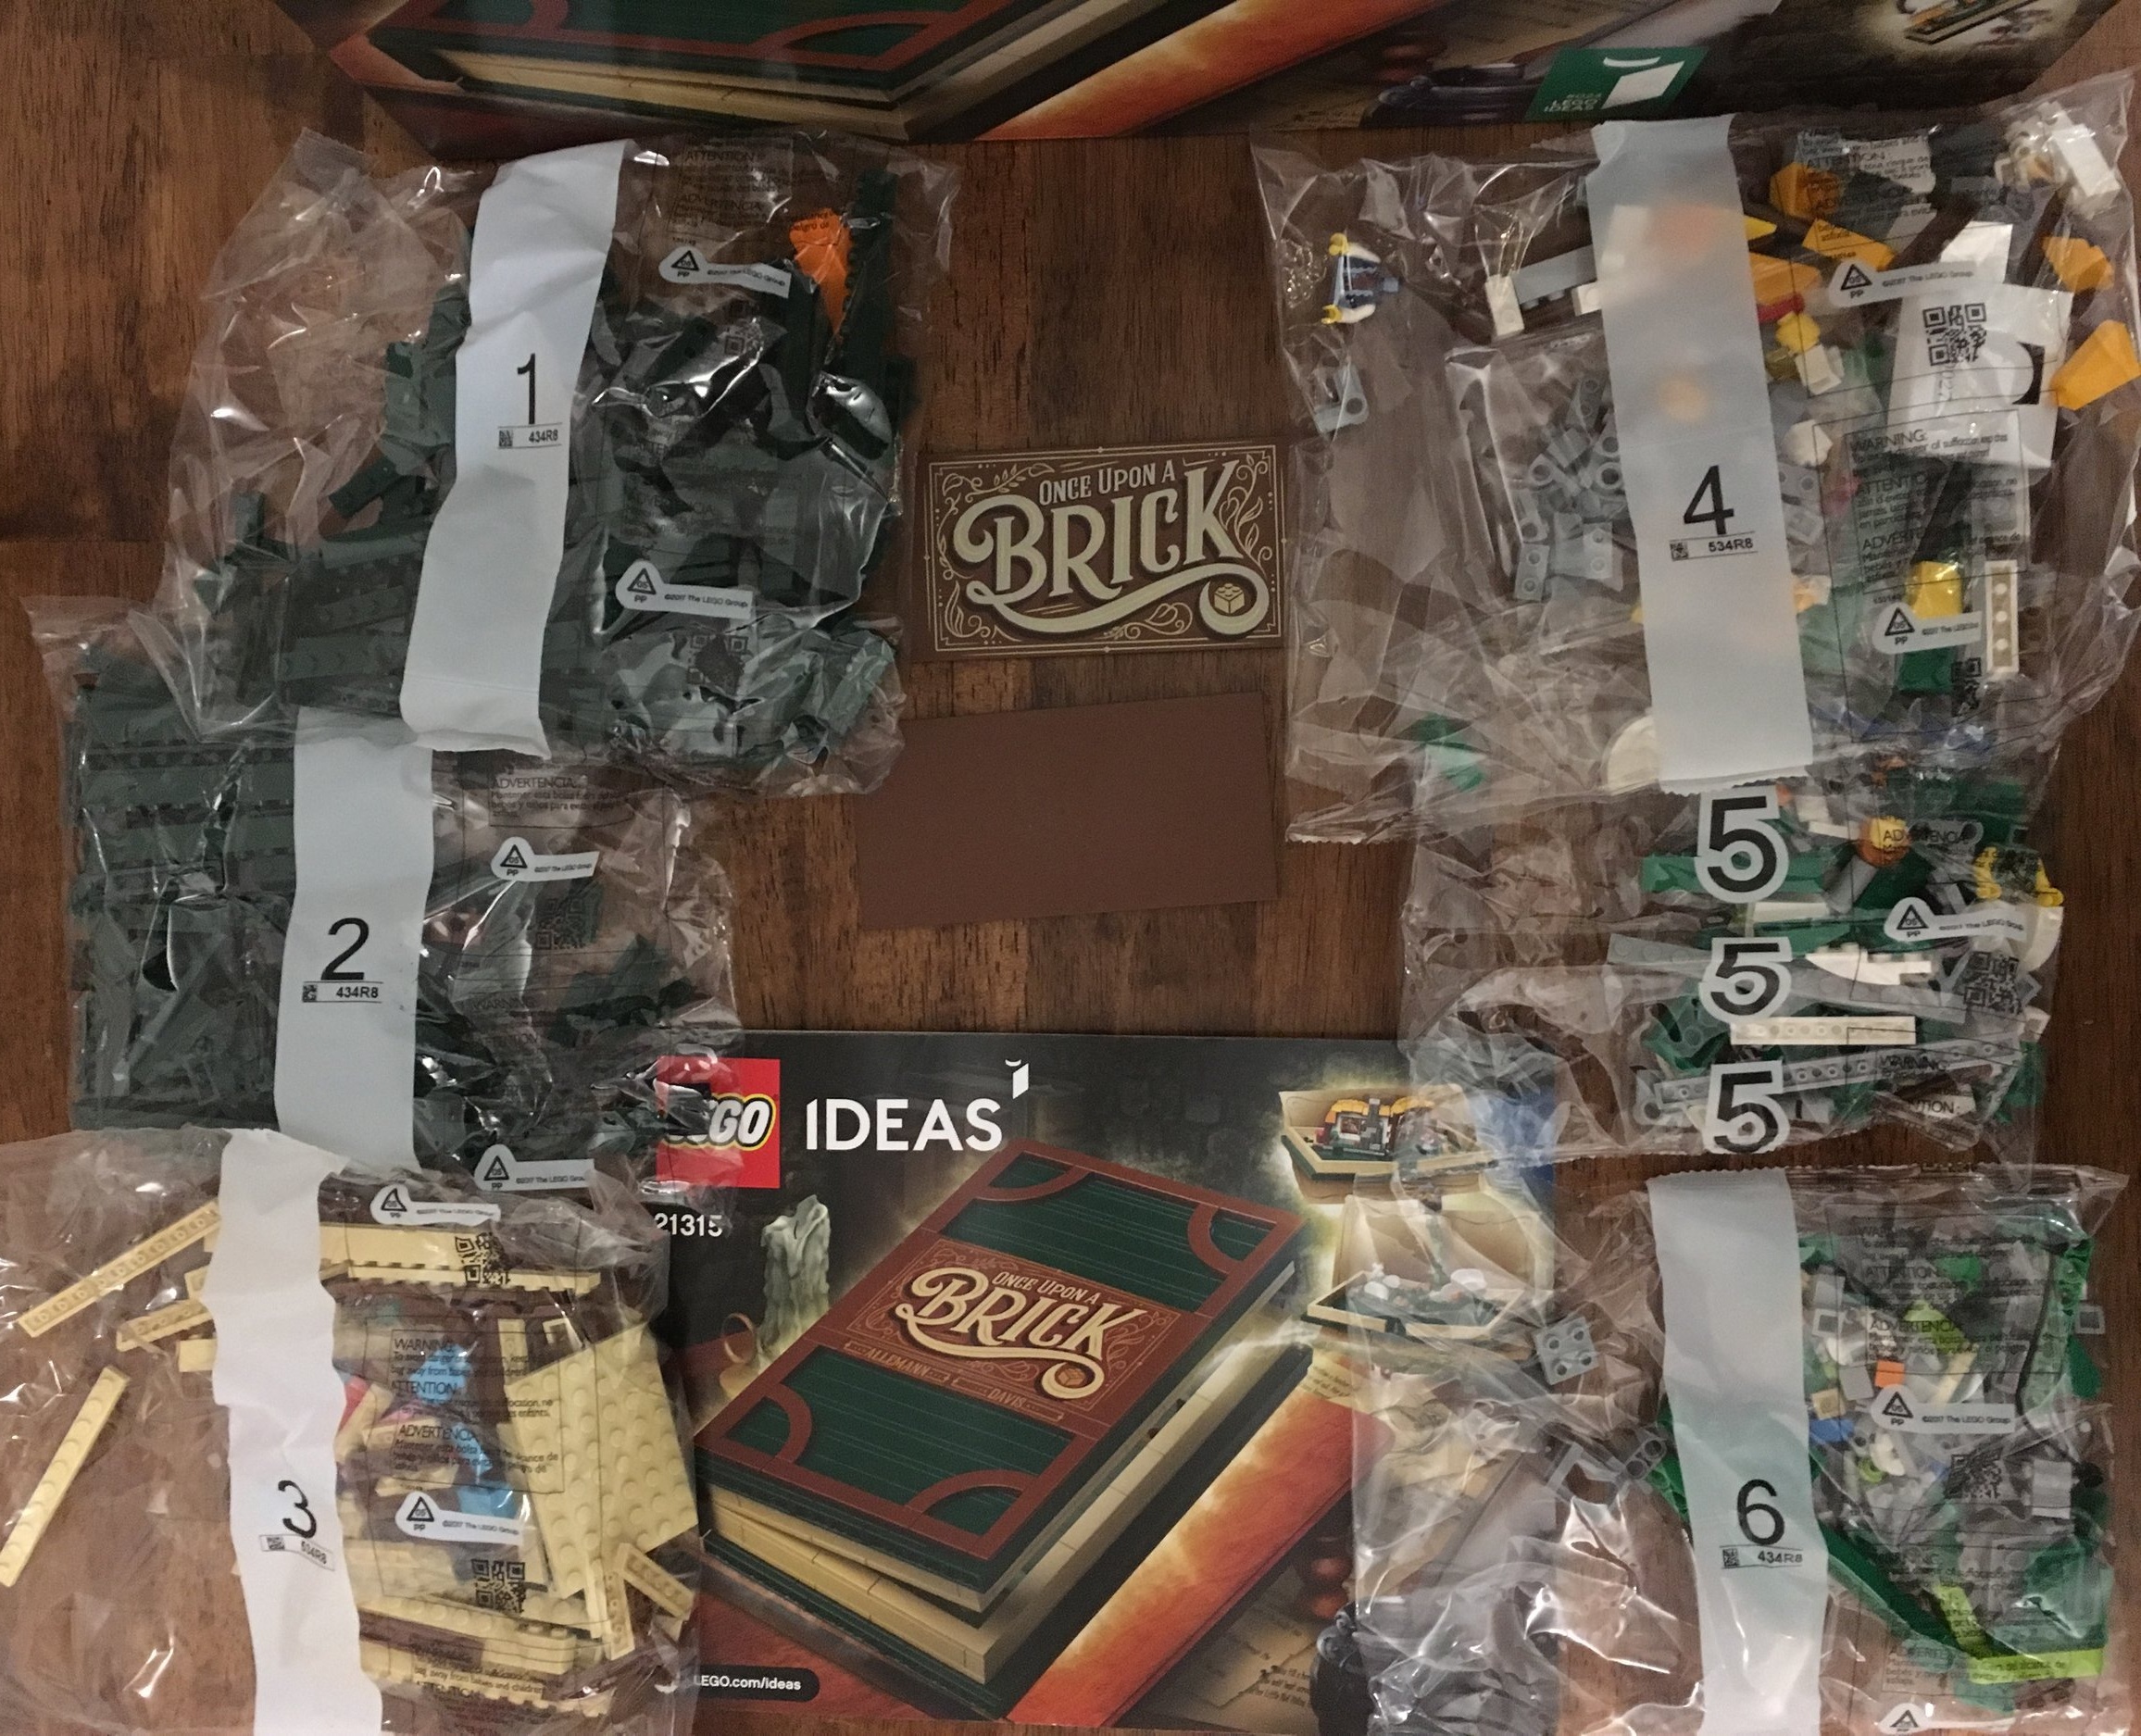
This set contains six bags of bricks. Bag one contains a piece separator. It also contains the 2 large brown 8x16 tiles with one having the title “ONCE UPON A BRICK” printed on it. I was super thankful that I didn’t have to apply that as a sticker and that the set contains no stickers at all. YAY! The instruction booklet starts off with some introductory pages. The first two are about the sets creators (Jason Alleman and Grant Davis) otherwise known as JK Brickworks for Jason and Grant has a Flickr page showing his work. The second two pages are about the set’s designers from the LEGO Company. You can see their YouTube video here. The final few pages give a history of pop-up books and the stories portrayed in this set. After you read it in English, you can switch to French and Spanish.

21315_contents.jpg

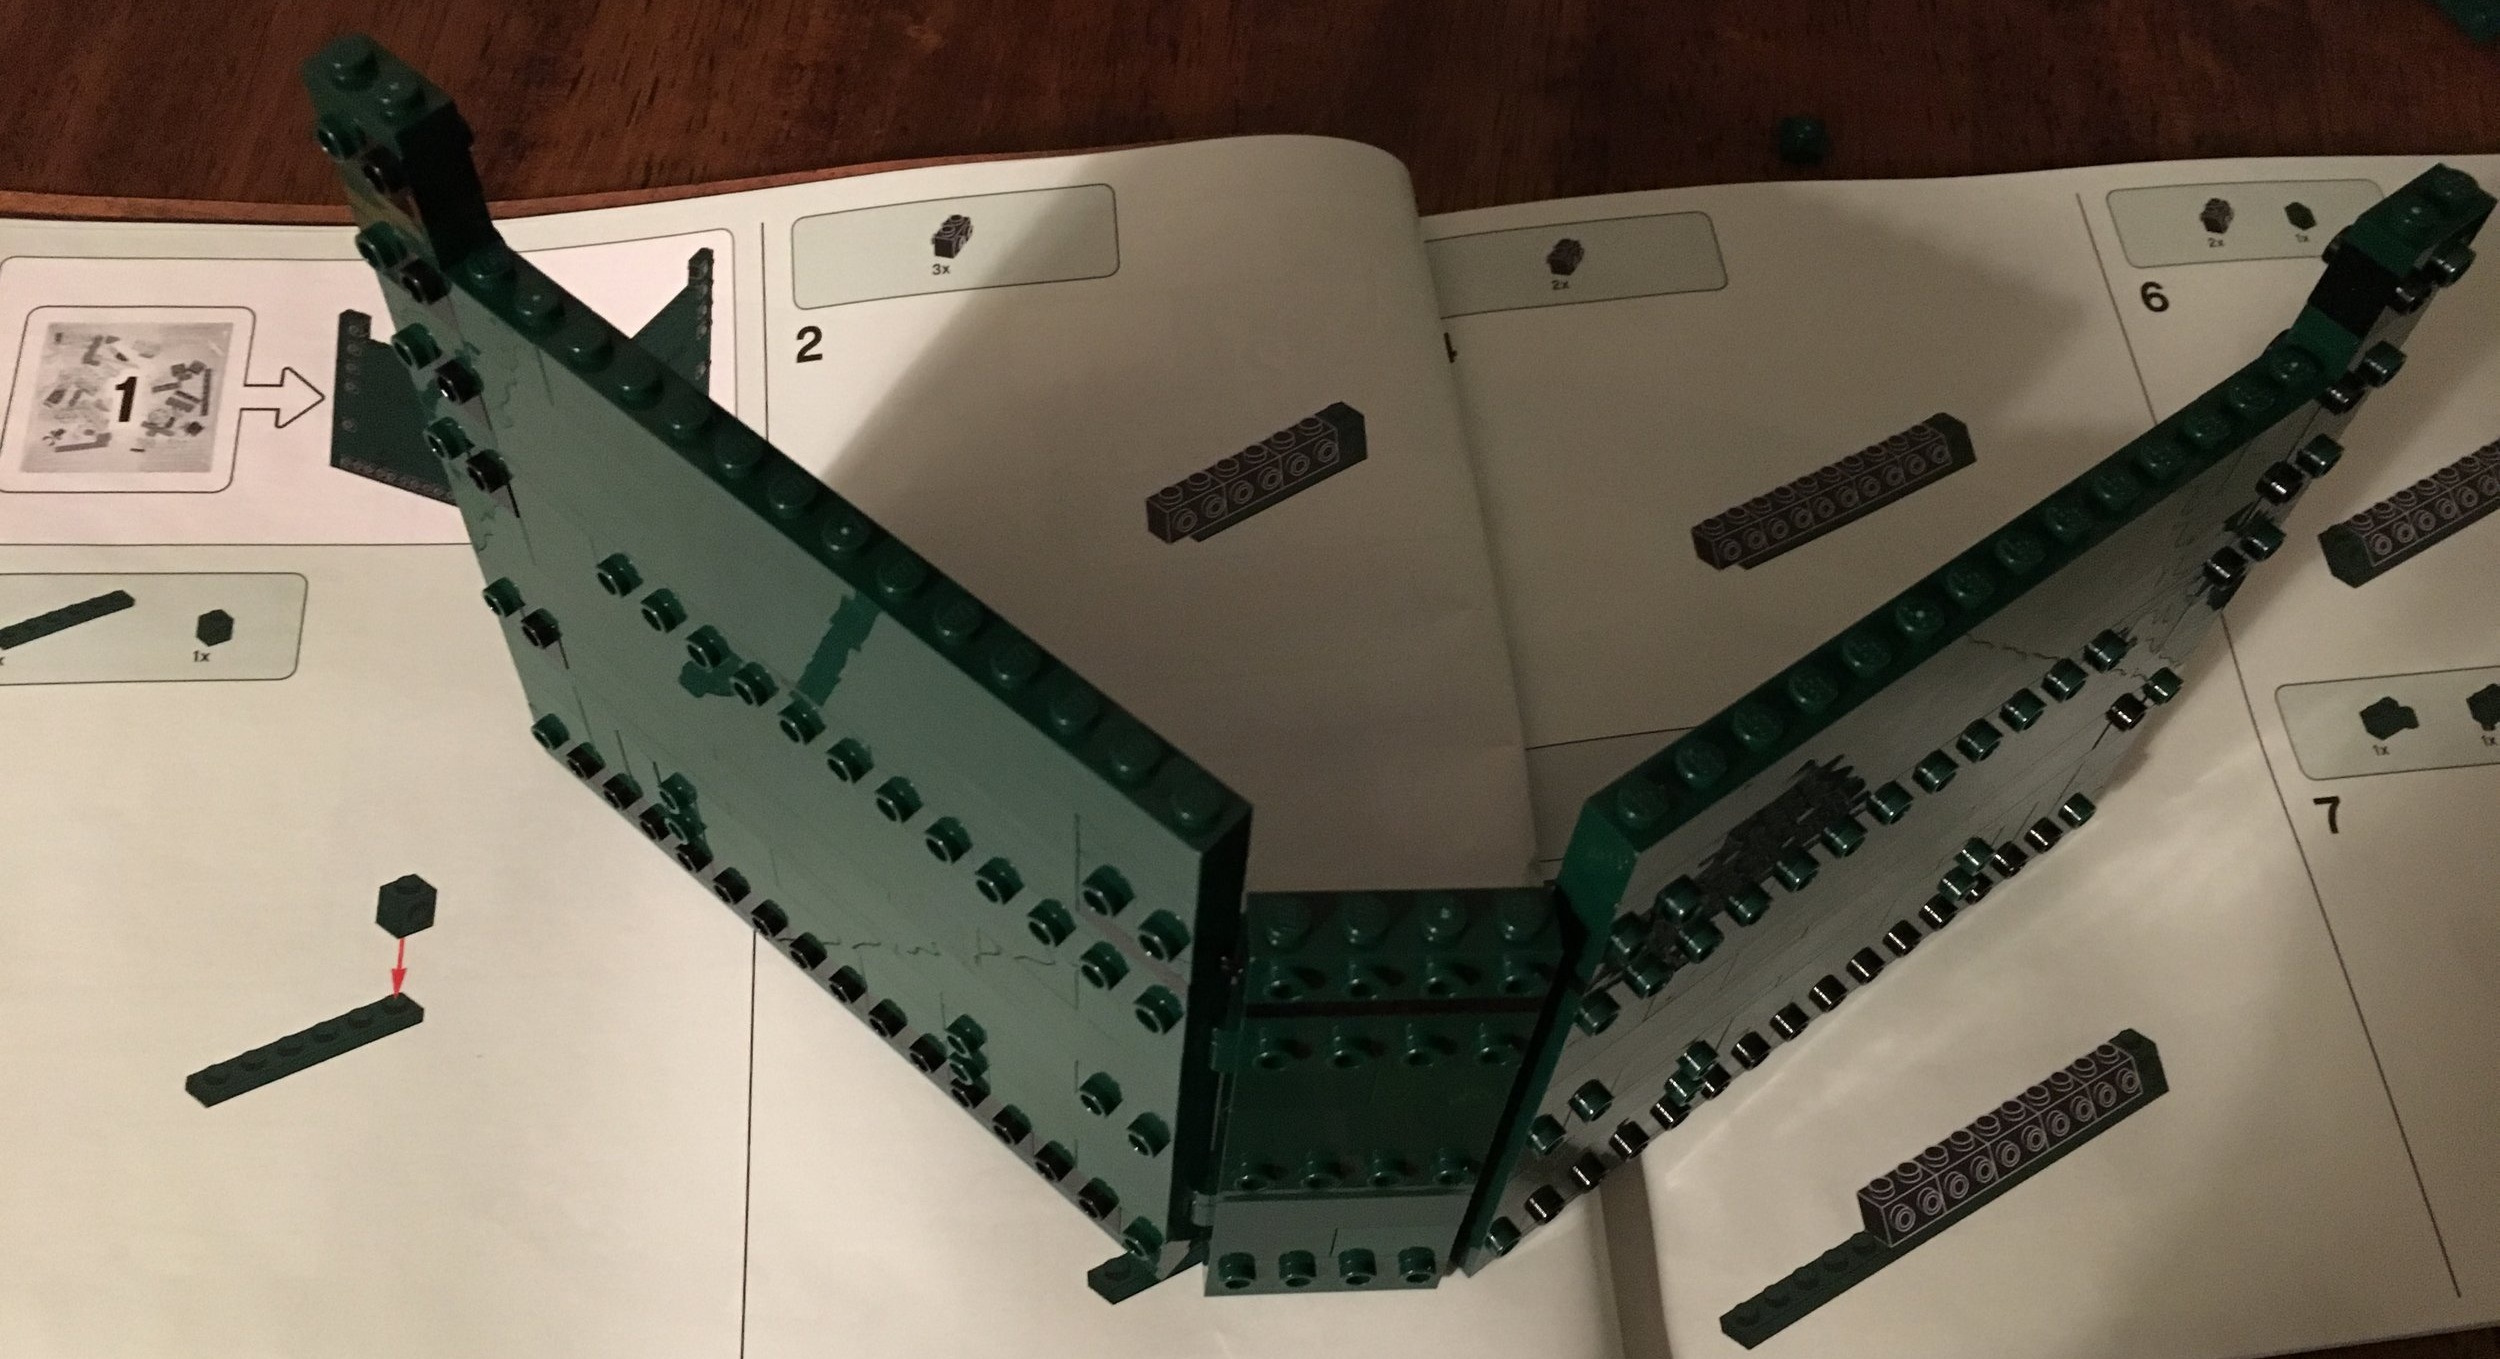
The first bag starts the build of the book’s cover. This bag is almost all parts colored what I call forest green, but Brickset calls “Earth green.” Either way, I’m a big fan of this color and even if you don’t end up liking this set, you’ll at least have a whole bunch of really great parts to build other things with out of this set in the Earth green color.

21315_bag1.jpg

The second bag completes the cover.

21315_bag2.jpg

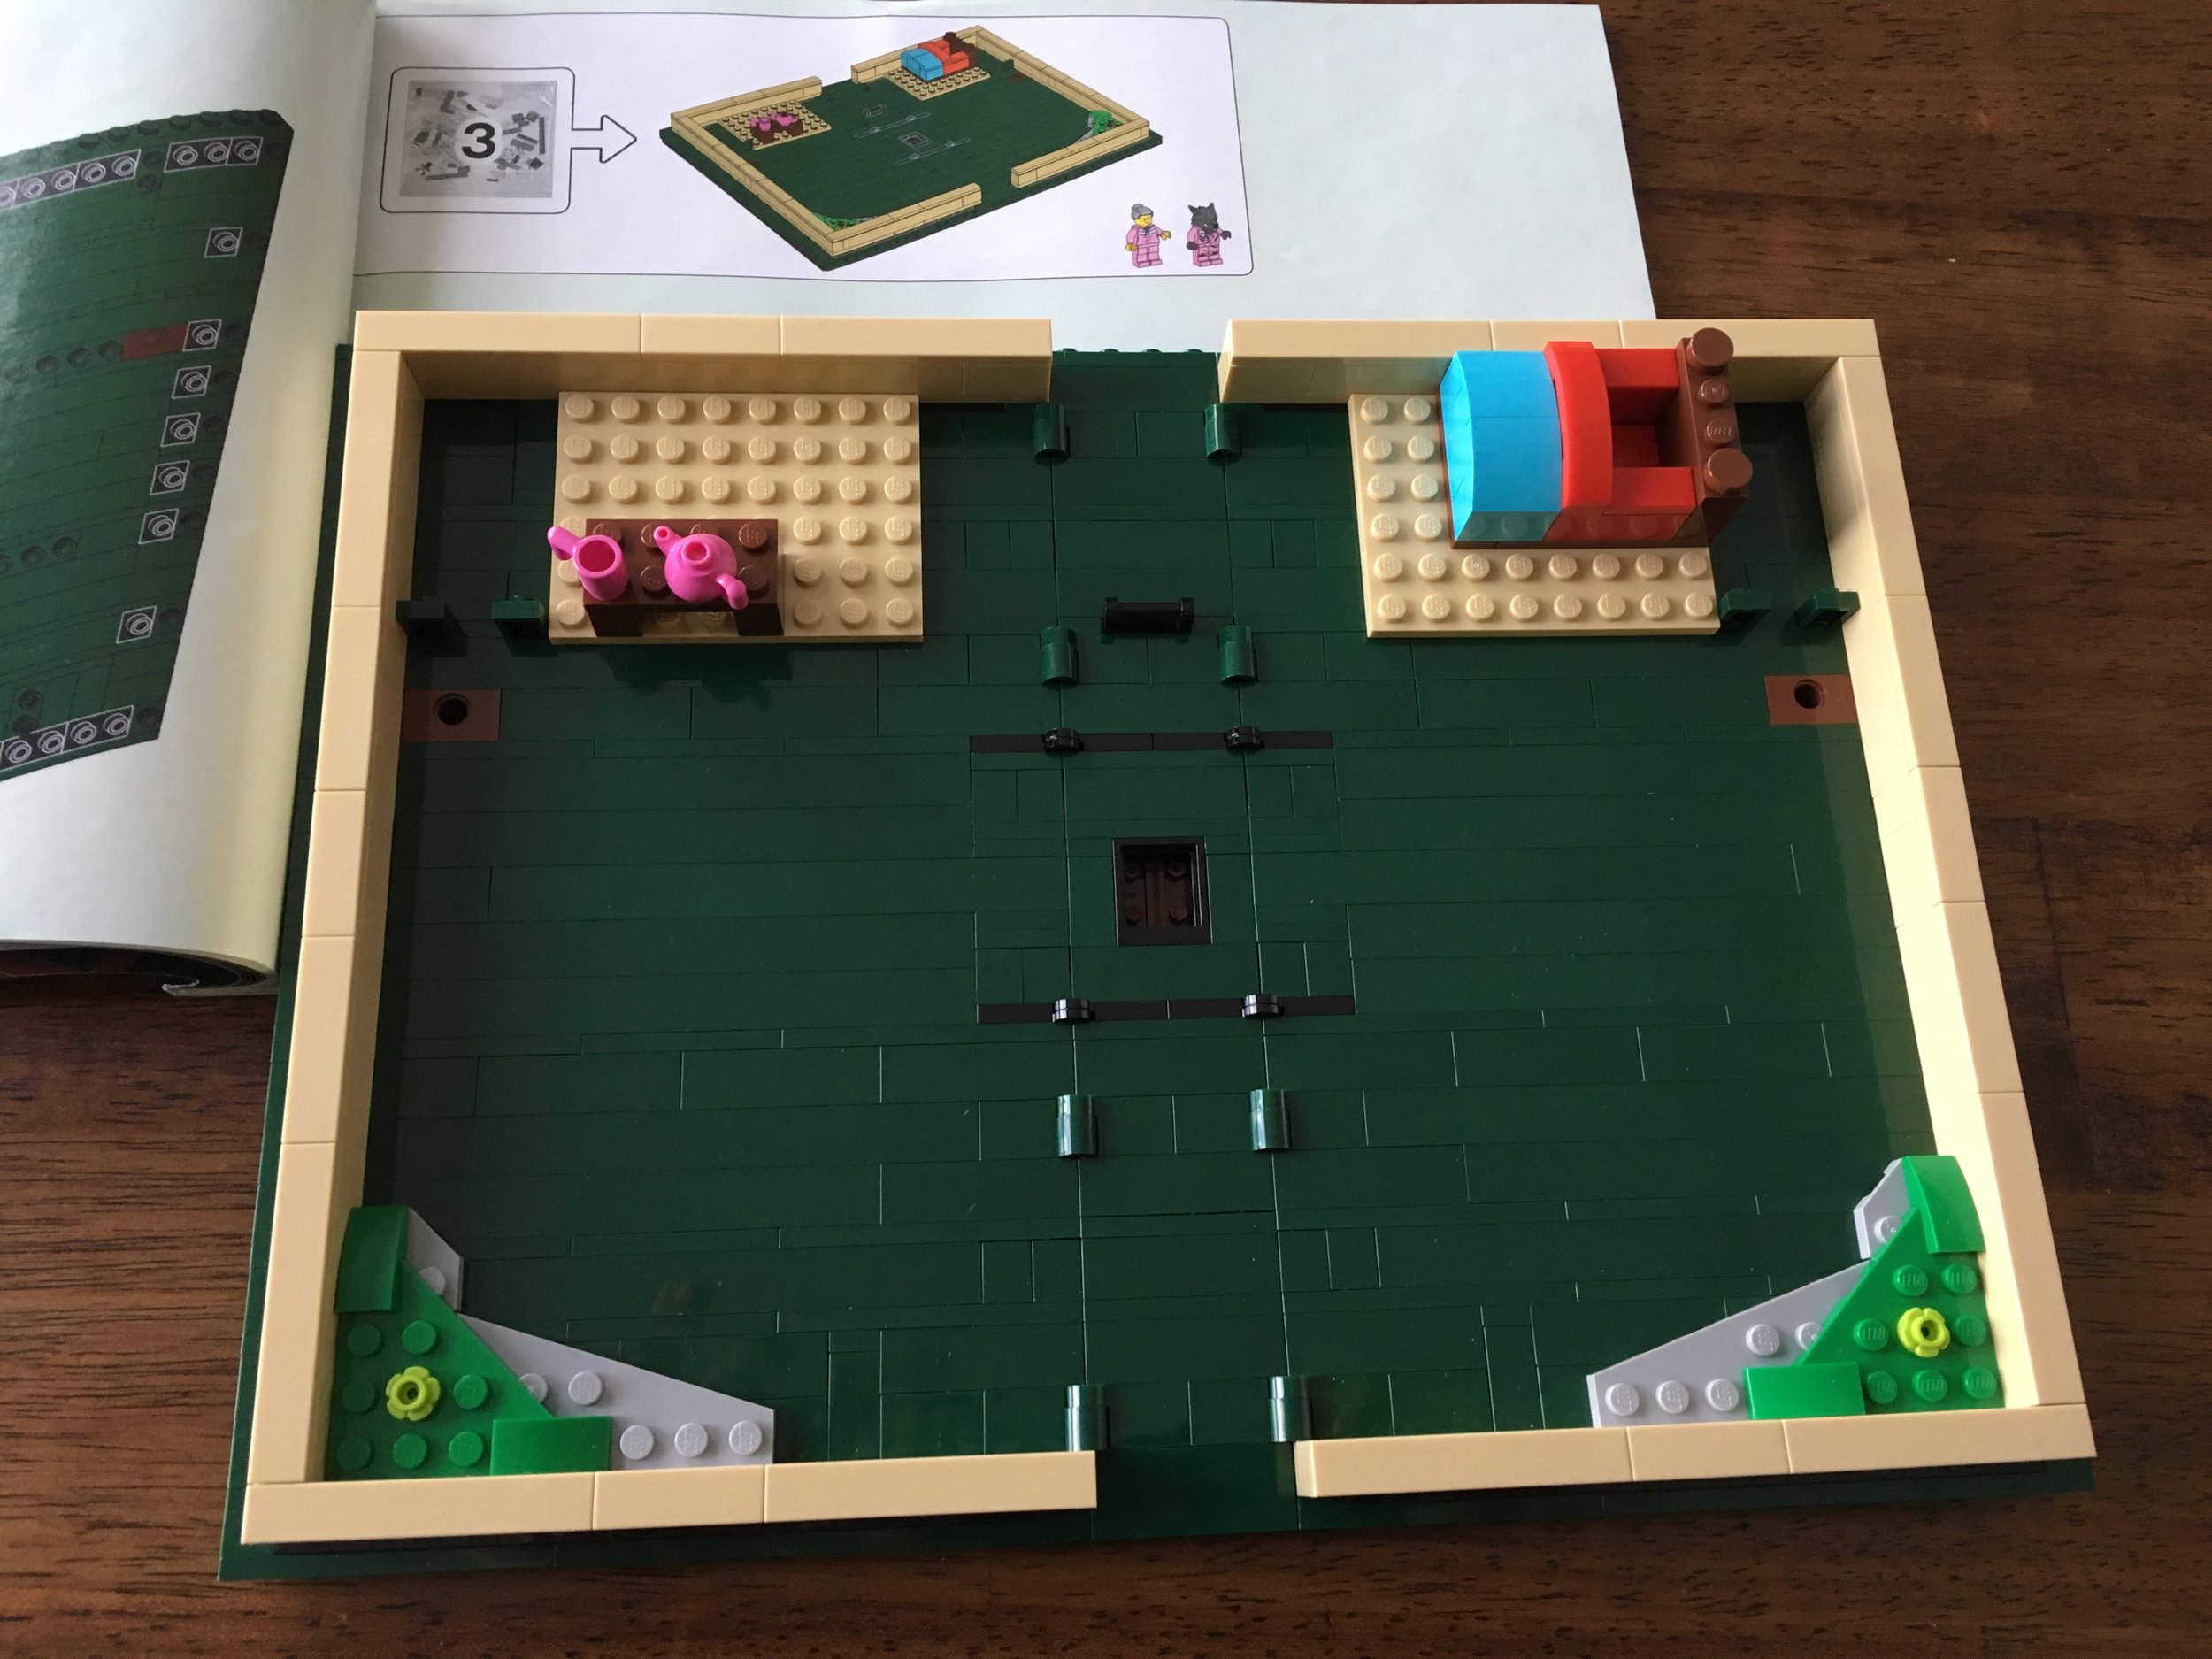
The third bag really turns the set into a pop-up book. The first picture (top left) shows the addition of the “pages” in what Brickset calls “Brick Yellow,” but I think is more of a light tan. You can also see the start of “Little Red Riding Hood” with Grandma’s bed on the right and a table with a pink tea pot and mug on the left. The second picture (top right) shows the front cover which has the 8x16 brown tile with the printed “ONCE UPON A BRICK” pop-up book title. It also has the names of the designers in 1x6 brown tiles underneath. How cool is that to have the LEGO Company printing parts that have your name on them and then having them sell a set with your name on it worldwide? Awesome!

The next two pictures (bottom left and right) show the detailing on the spine of the book and then the back cover. The back matches the front only the 8x16 tile is not printed.

Bag 3 includes the Grandma and Big Bad Wolf minifigures, but I’ll cover them next.

21315_bag3a.jpg
21315_bag3b.jpg
21315_bag3c.jpg
21315_bag3d.jpg

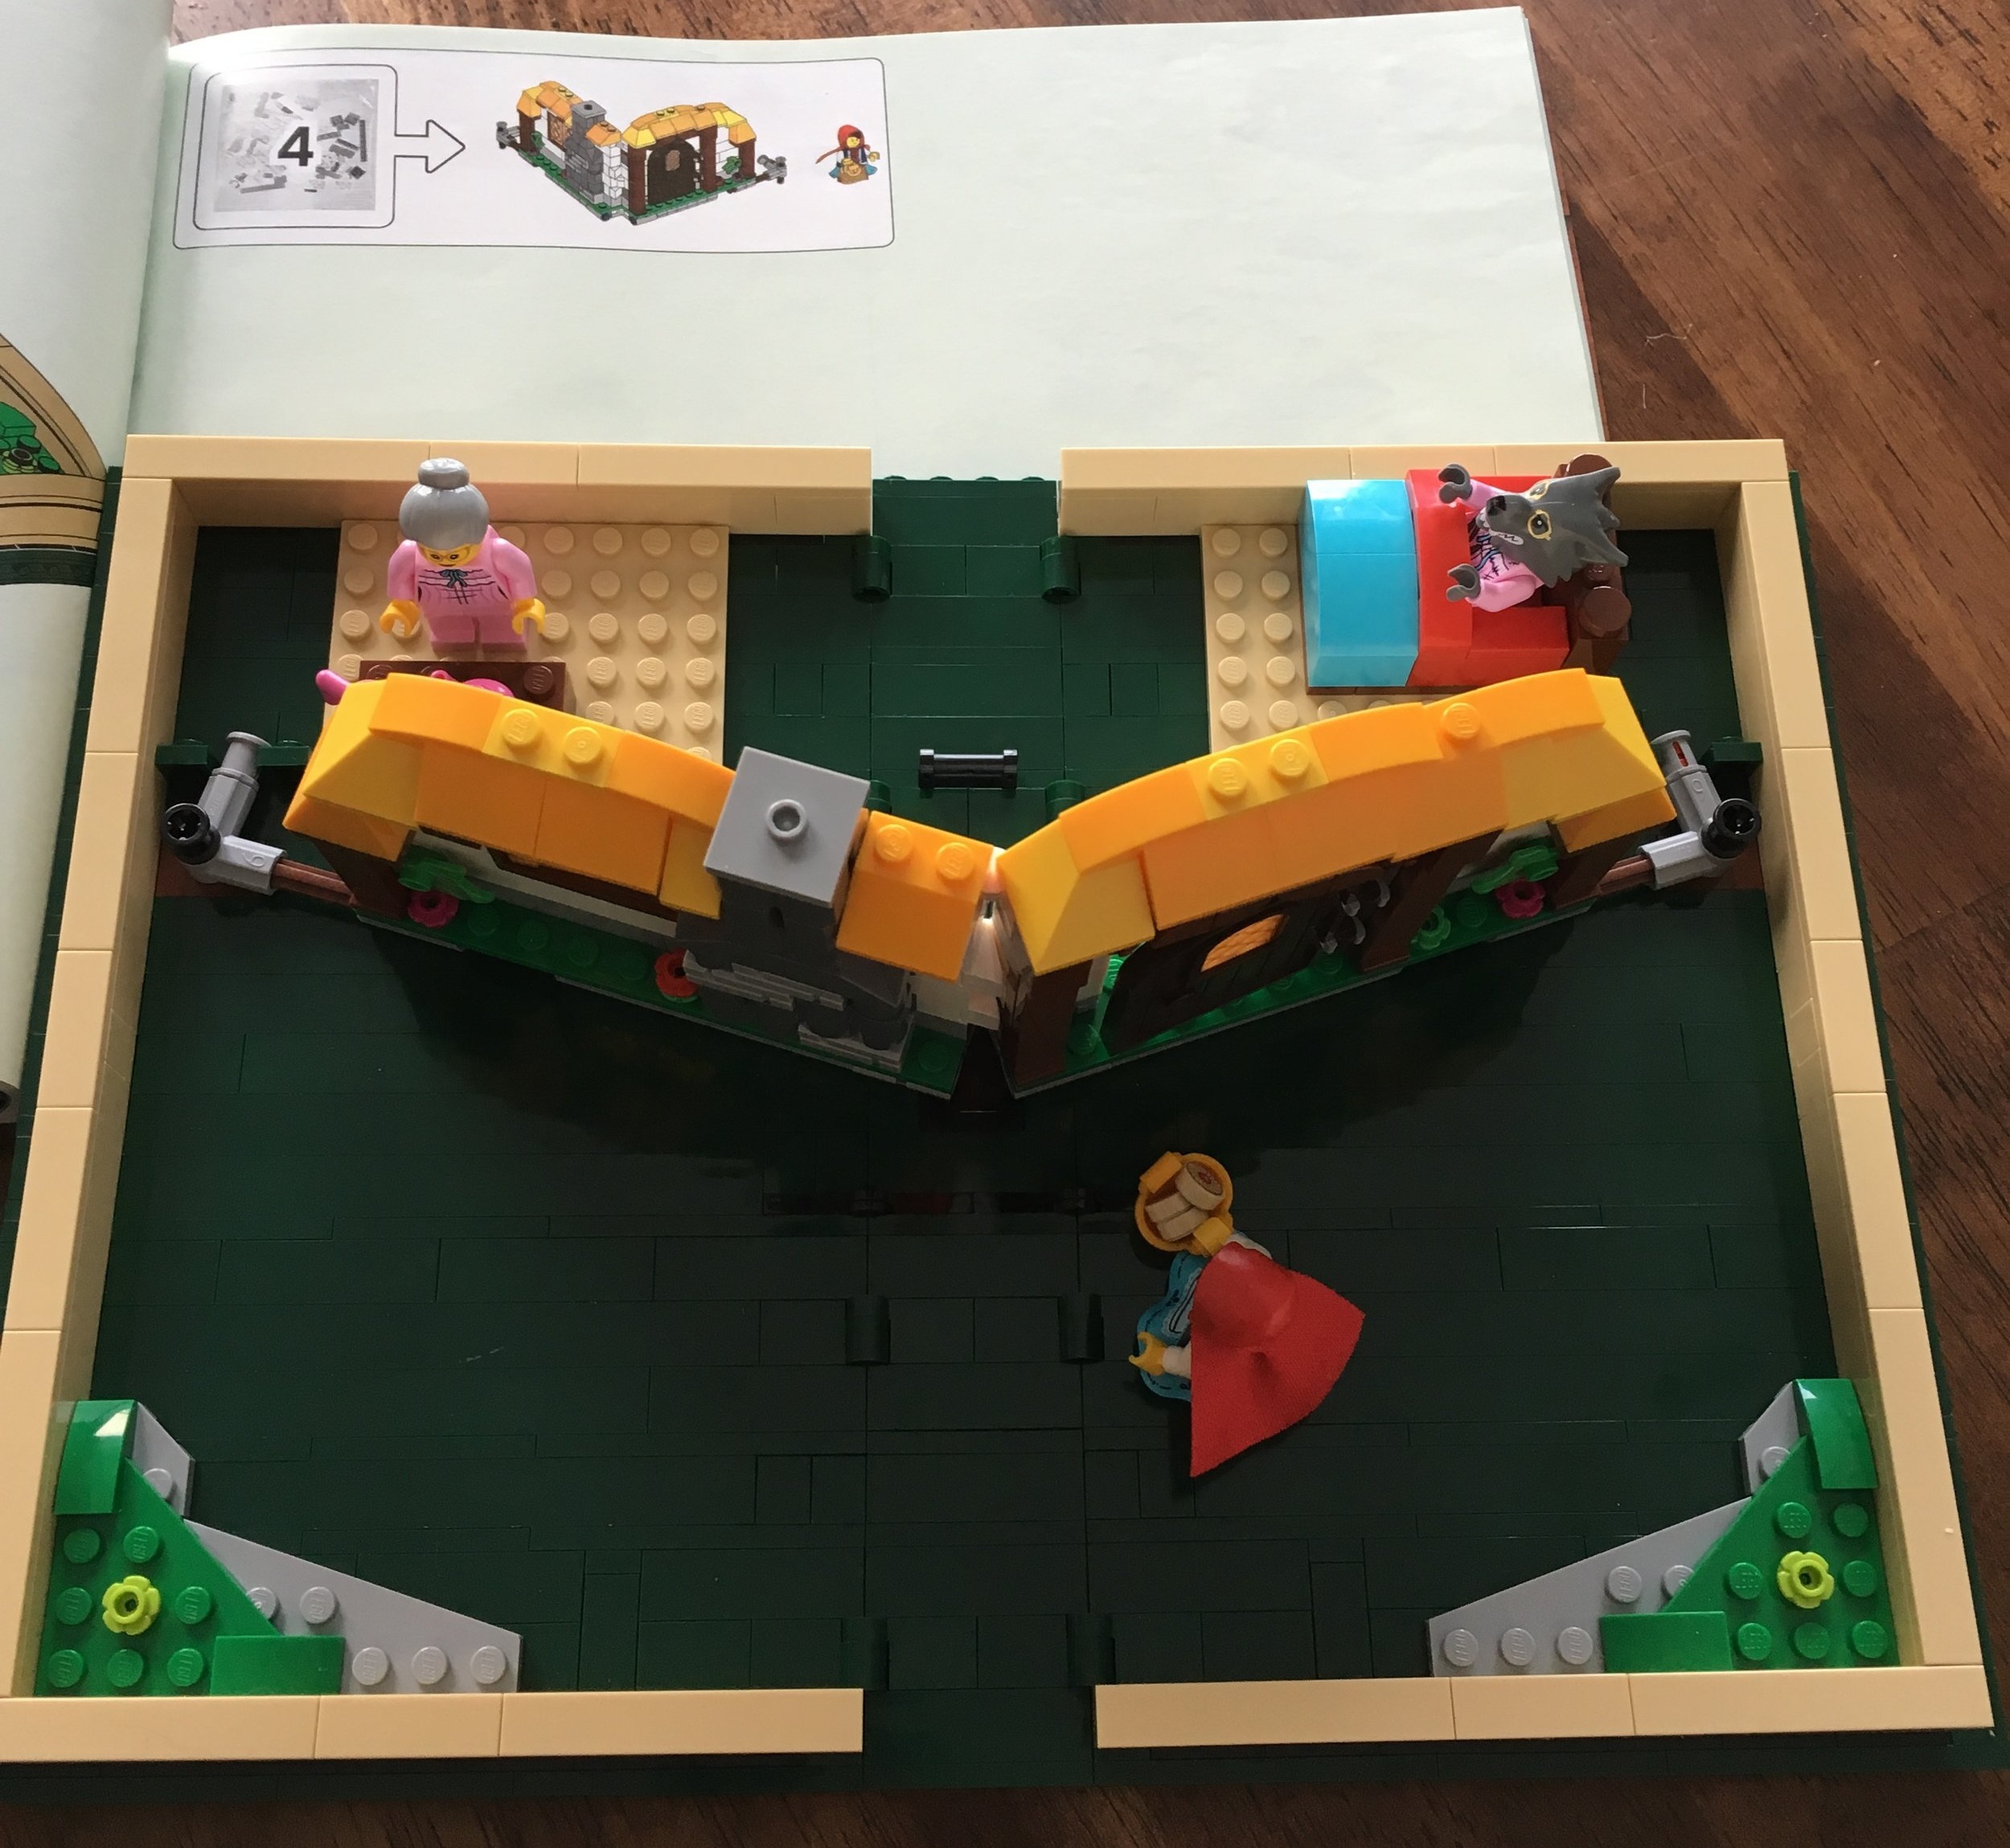
The fourth bag finishes up the “Little Red Riding Hood” scene. This bag includes Red with her bag of goodies to bring to Grandma. The pop up portion itself includes the house with a door that you can open. One could argue that there isn’t a ton of detail here, but I think between the original designers and LEGO designers, they got it right. It’s got a good amount of detail to portray the story, but it’s not over the top to the point where it loses functionality. You have to take the minifigures out to close the book, but the rest of the parts can remain when you close it.

The minifigures are great. The wolf with the tattered outfit that he stole from Grandma is very creative. I like that the wolf also has her glasses on. I never understood how Red didn’t immediately realize that it was a wolf. I guess you can tell the story how you want after you build it. Maybe it’s not a wolf, but a storm trooper or Emmet joins Red for some cookies.

21315_bag4.jpg
21315_bag4b.jpg

The fifth bag starts on “Jack and the Beanstalk.” It includes a microscale build of the village with clouds on top. There’s a windmill and some tiny houses. A piece that probably isn’t new, but was new to me was the cheese sloped size roof tile used on the windmill and two of the houses. I think it’s a good addition to the LEGO parts catalog. This bag also includes the Giant and a microfigure of Jack. The set comes with 2 microfigures of Jack so just in case you lose one or if Jack and his twin want to go hang out with the Giant.

21315_bag5.jpg

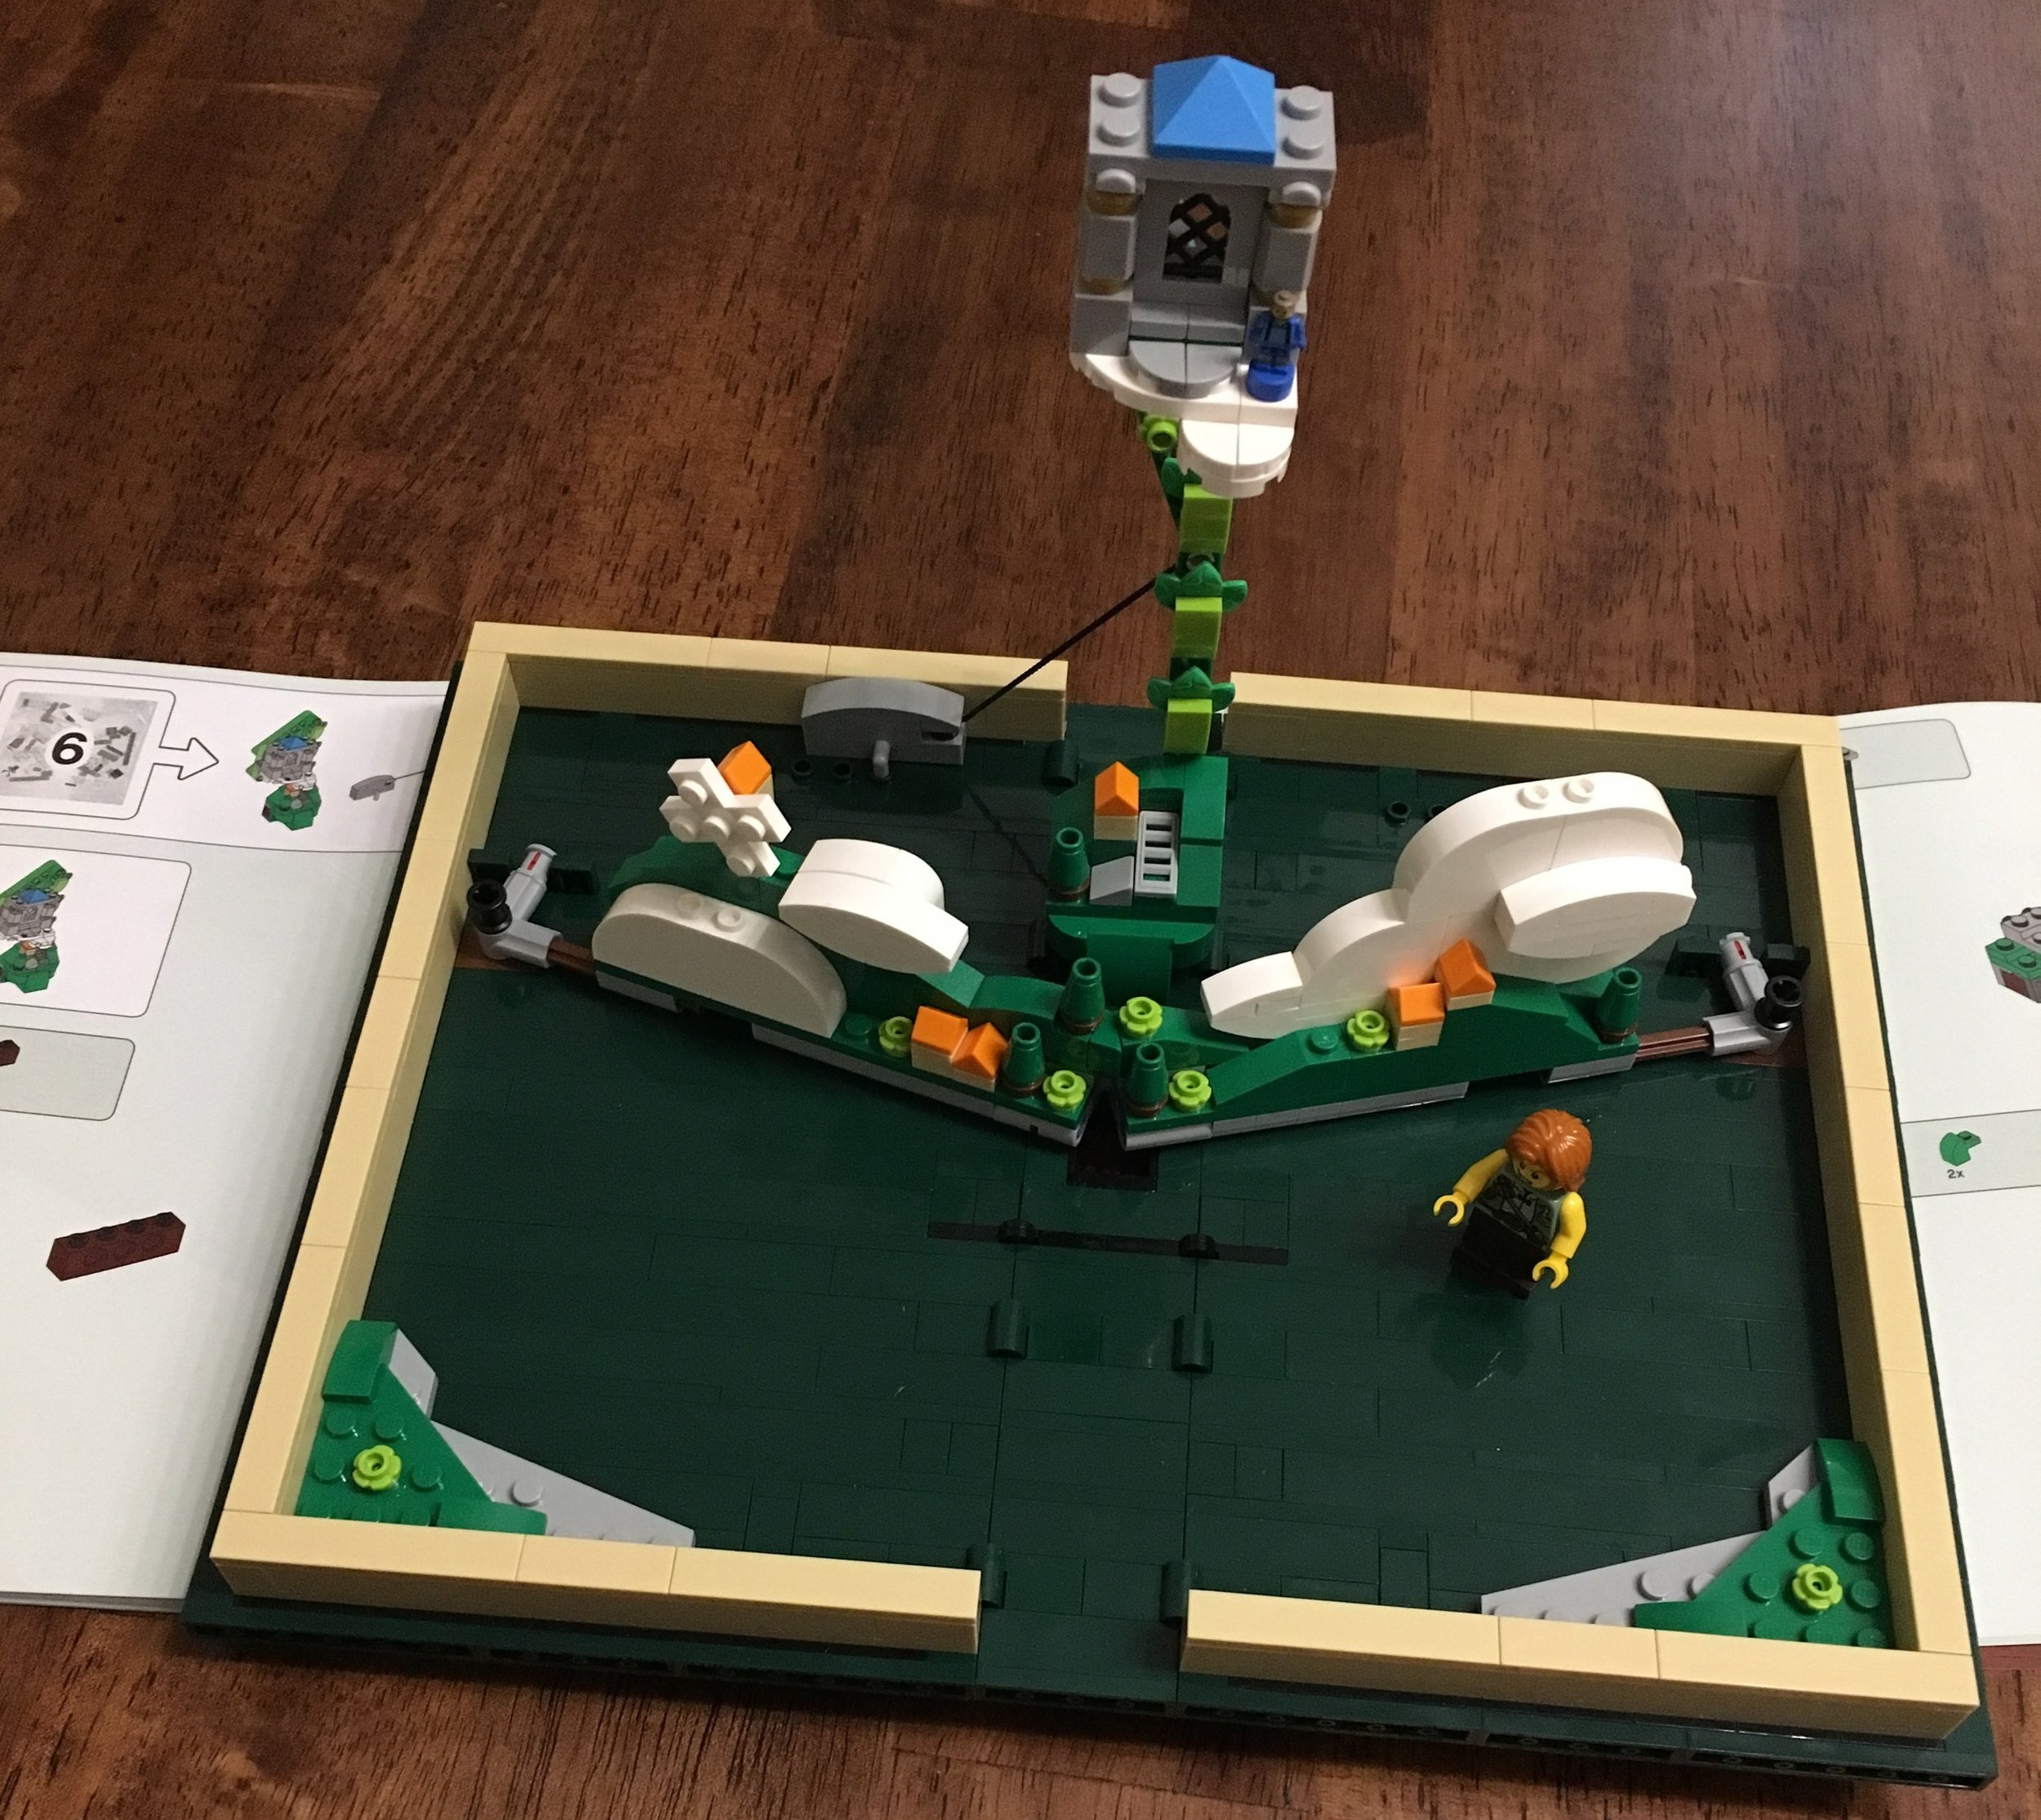
The sixth bag finishes up “Jack and the Beanstalk” with the actual beanstalk and the castle at the top. The functionality here is very creative with the use of Technic parts to make the beanstalk expand as you open up the book.

What struck me when building this set is that LEGO has left it open for builders. The title on the front cover does not say “Little Red Riding Hood” and “Jack and the Beanstalk.” It’s an open ended title. What’s been provided is a cover with a building space. The functionality for the pop-up portion of the book has been shown and there are studs on the top and bottom of the pages that you can use to insert your own stories. A quick Google search brings up results from a whole bunch of builders who have made pop up castles, pirates, and scenes from movies. At the writing of this post, LEGO Ideas is running a contest to see what kind of design you can come up with for the pop-up book. It’s definitely worth checking out some of the contest entries just to see how creative some people are when it comes to building.

Overall, this set is a win. I was a big fan. It’s a great build with a lot of great pieces and it opens up a new building technique to explore. If the price is too steep, wait a few months and keep checking on Amazon.com, Walmart, and other retailer sites to see if they have it for a discount.

Happy building!

21315_bag6.jpg

Merry Christmas 2018!

Santa_Cora_Dec2018.jpg

Merry Christmas to those of you who celebrate the holiday! I hope Santa brought you all the bricks you asked for.

This picture was taken at the store Cora in France (you can see more about LEGO and Cora here). It’s a brick built version of Santa that’s pretty tall. The store didn’t have a sign about it saying who built it or how many bricks it is made of, but I thought it would make a great post for Christmas day.

So at this store it’s Joyeux Noël! Where I live, it’s Fröhliche Weihnachten!

Either way, happy building!

Set Review - #10263-1 - Winter Village Fire Station - Creator Expert

The 2018 Winter Village set was released on 2 October 2018. It’s a fire station and adds to the line of sets that started back in 2009. This is the 10th set in the line. This year, the set is 1,166 pieces and retails at $99.99 in the US. This puts it at $0.086 per piece which is pretty decent. It’s slightly less than last year’s set ($0.089 and keep in mind that the set includes a light brick which is probably more expensive to put together).

You can see my review of the 2017 set Winter Village Train Station here.

Here is the box. Like many sets, the front shows the whole set while the back shows some of the set features.

10263_front.jpg
10263_back.jpg

The set contents are 3 sets of bags, the two instruction booklets in a bag with the sticker sheet, and a piece separator (in the first set of bags).

10263_contents.jpg

The first set of bags builds what I will call the accessories. It includes a bench with a lamp post, a Christmas tree with some gifts, an ice skating rink, the fire truck, and a sled. The Christmas tree design is one that I have not seen before. It’s better than just throwing in a one piece molded tree, but I think it misses out on some of the realism of branches that can be created using LEGO bricks. The ice rink includes a hockey player with a hockey stick on the ice. The skating area is rather small and it includes a fireman statue. The fire truck does not have a ton of detail, but it fits into the theme of vehicles used in previous Winter Village sets. This bag includes 2 fire fighters. There is a female and a male and they each come with a hair piece and a helmet. And don’t forget the fire dog! In my opinion, the stickers on the fire truck were a pain. I always find it challenging to put a sticker on a 1x2 tile or on the 1x2 cheese slope. I find it hard to get the sticker exactly centered on the tile part. I’d rather have bigger stickers on bigger pieces and printed small tiles or cheese slopes. Finally the sled includes some gifts and there is a baby minifigure with a gift on his/her shirt to ride on it. The set shows a girl minifigure along with the sled.

10263_bag1.jpg

The second set of bags completes the first floor of the fire station. As you can see, the front includes a fire hydrant and a snowman. The main doors on the first floor open in to allow the fire truck to drive in or out. There are stairs leading up to the second floor that have some white pieces attached to show the poor shoveling job that was done. Like the rest of the Winter Village theme, the back is not completed (something for you to do on your own). The truck is longer than the building itself. The back does show you some of the items in storage to include another helmet, an ax and a pick, fire extinguishers, and a clock. This set of parts bags includes a saxophone playing minifigure to… I’m not sure how he fits in.

10263_bag2a.jpg
10263_bag2b.jpg

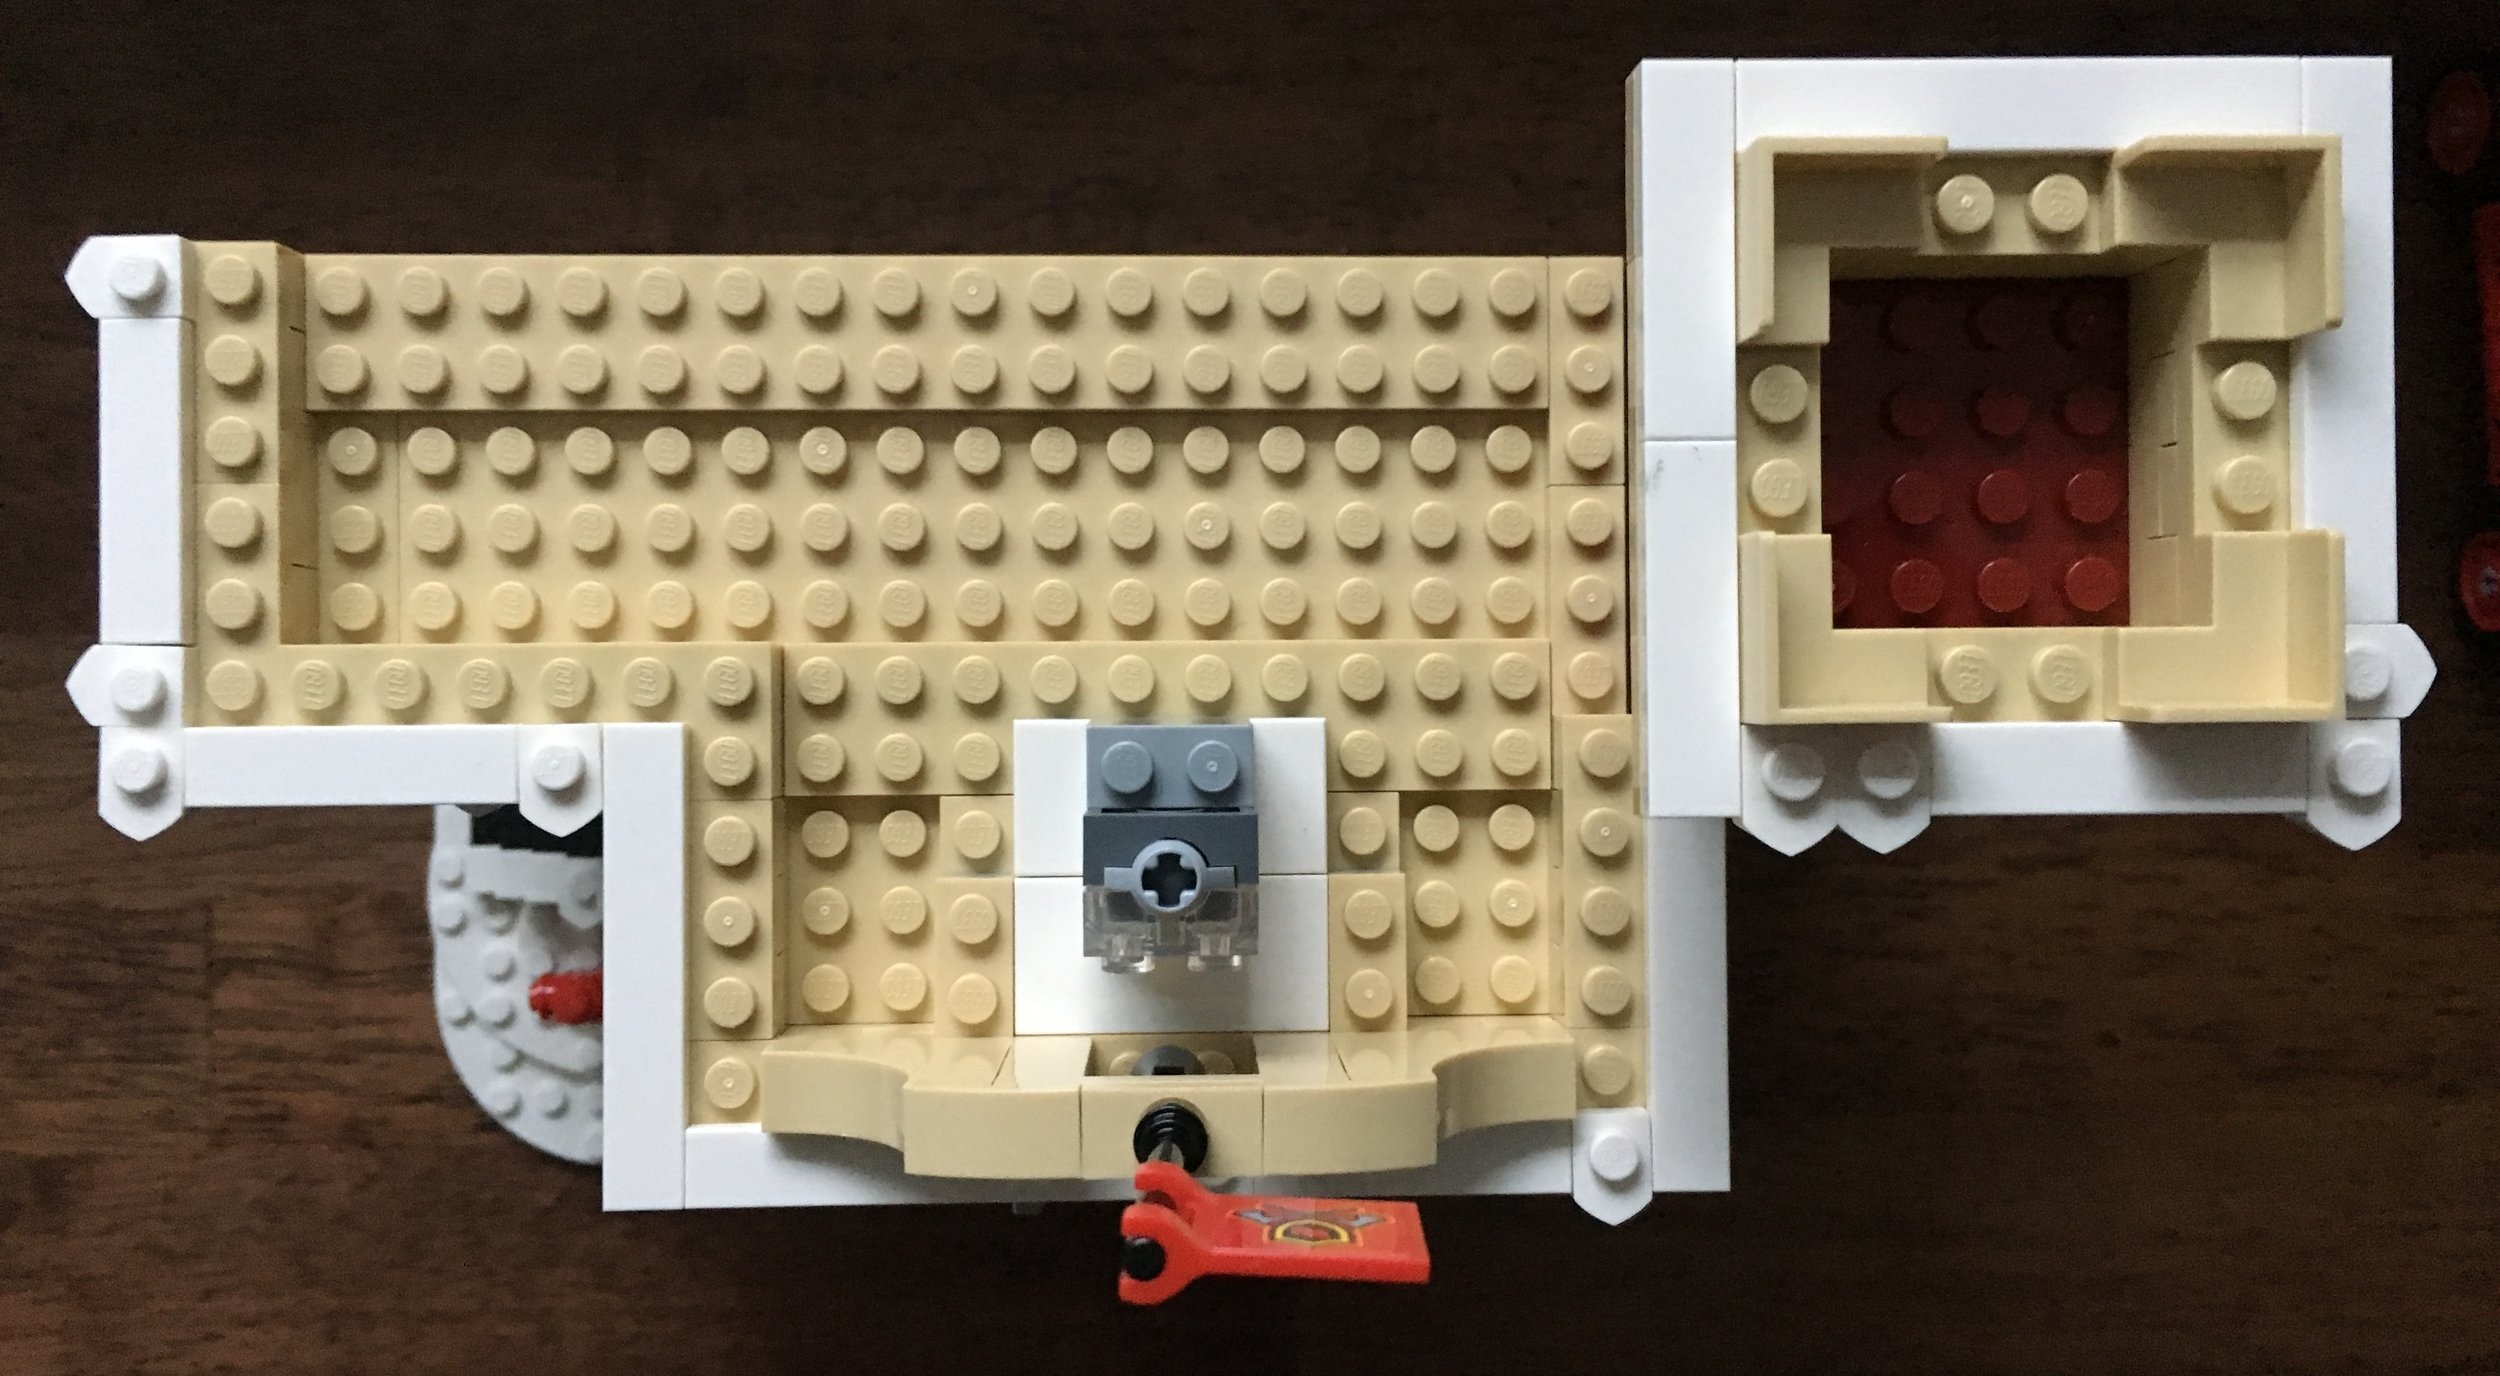
The third set of bags completes the build and adds the second floor and roof. It also includes another fire fighter. From the front, you can see the station is covered in some Christmas decorations of greenery with red. The tower above the fire pole slide area has a pretty cool design on the front and right sides. The building also has some snow along the edges. Looking inside you can see a small kitchenette with a coffee maker, stove top, and sink to help cook the hot dogs you can have with your coffee. There’s an old school red phone to get calls and a radio installed into the wall. A fold up bed is attached to the wall (the bed uses a sticker for the pillow and sheets… really?). Under the bed is a play area and a dog bone for the fire dog. The living quarters also include a table with 2 chairs.

10263_bag3a.jpg

The top of the building has a flag (with stickers to attach) and a slot for you to attach the light brick. The light brick really only lights up the front two windows and in my mind doesn’t do much for the set.

10263_bag3b.jpg
10263_bag3c.jpg

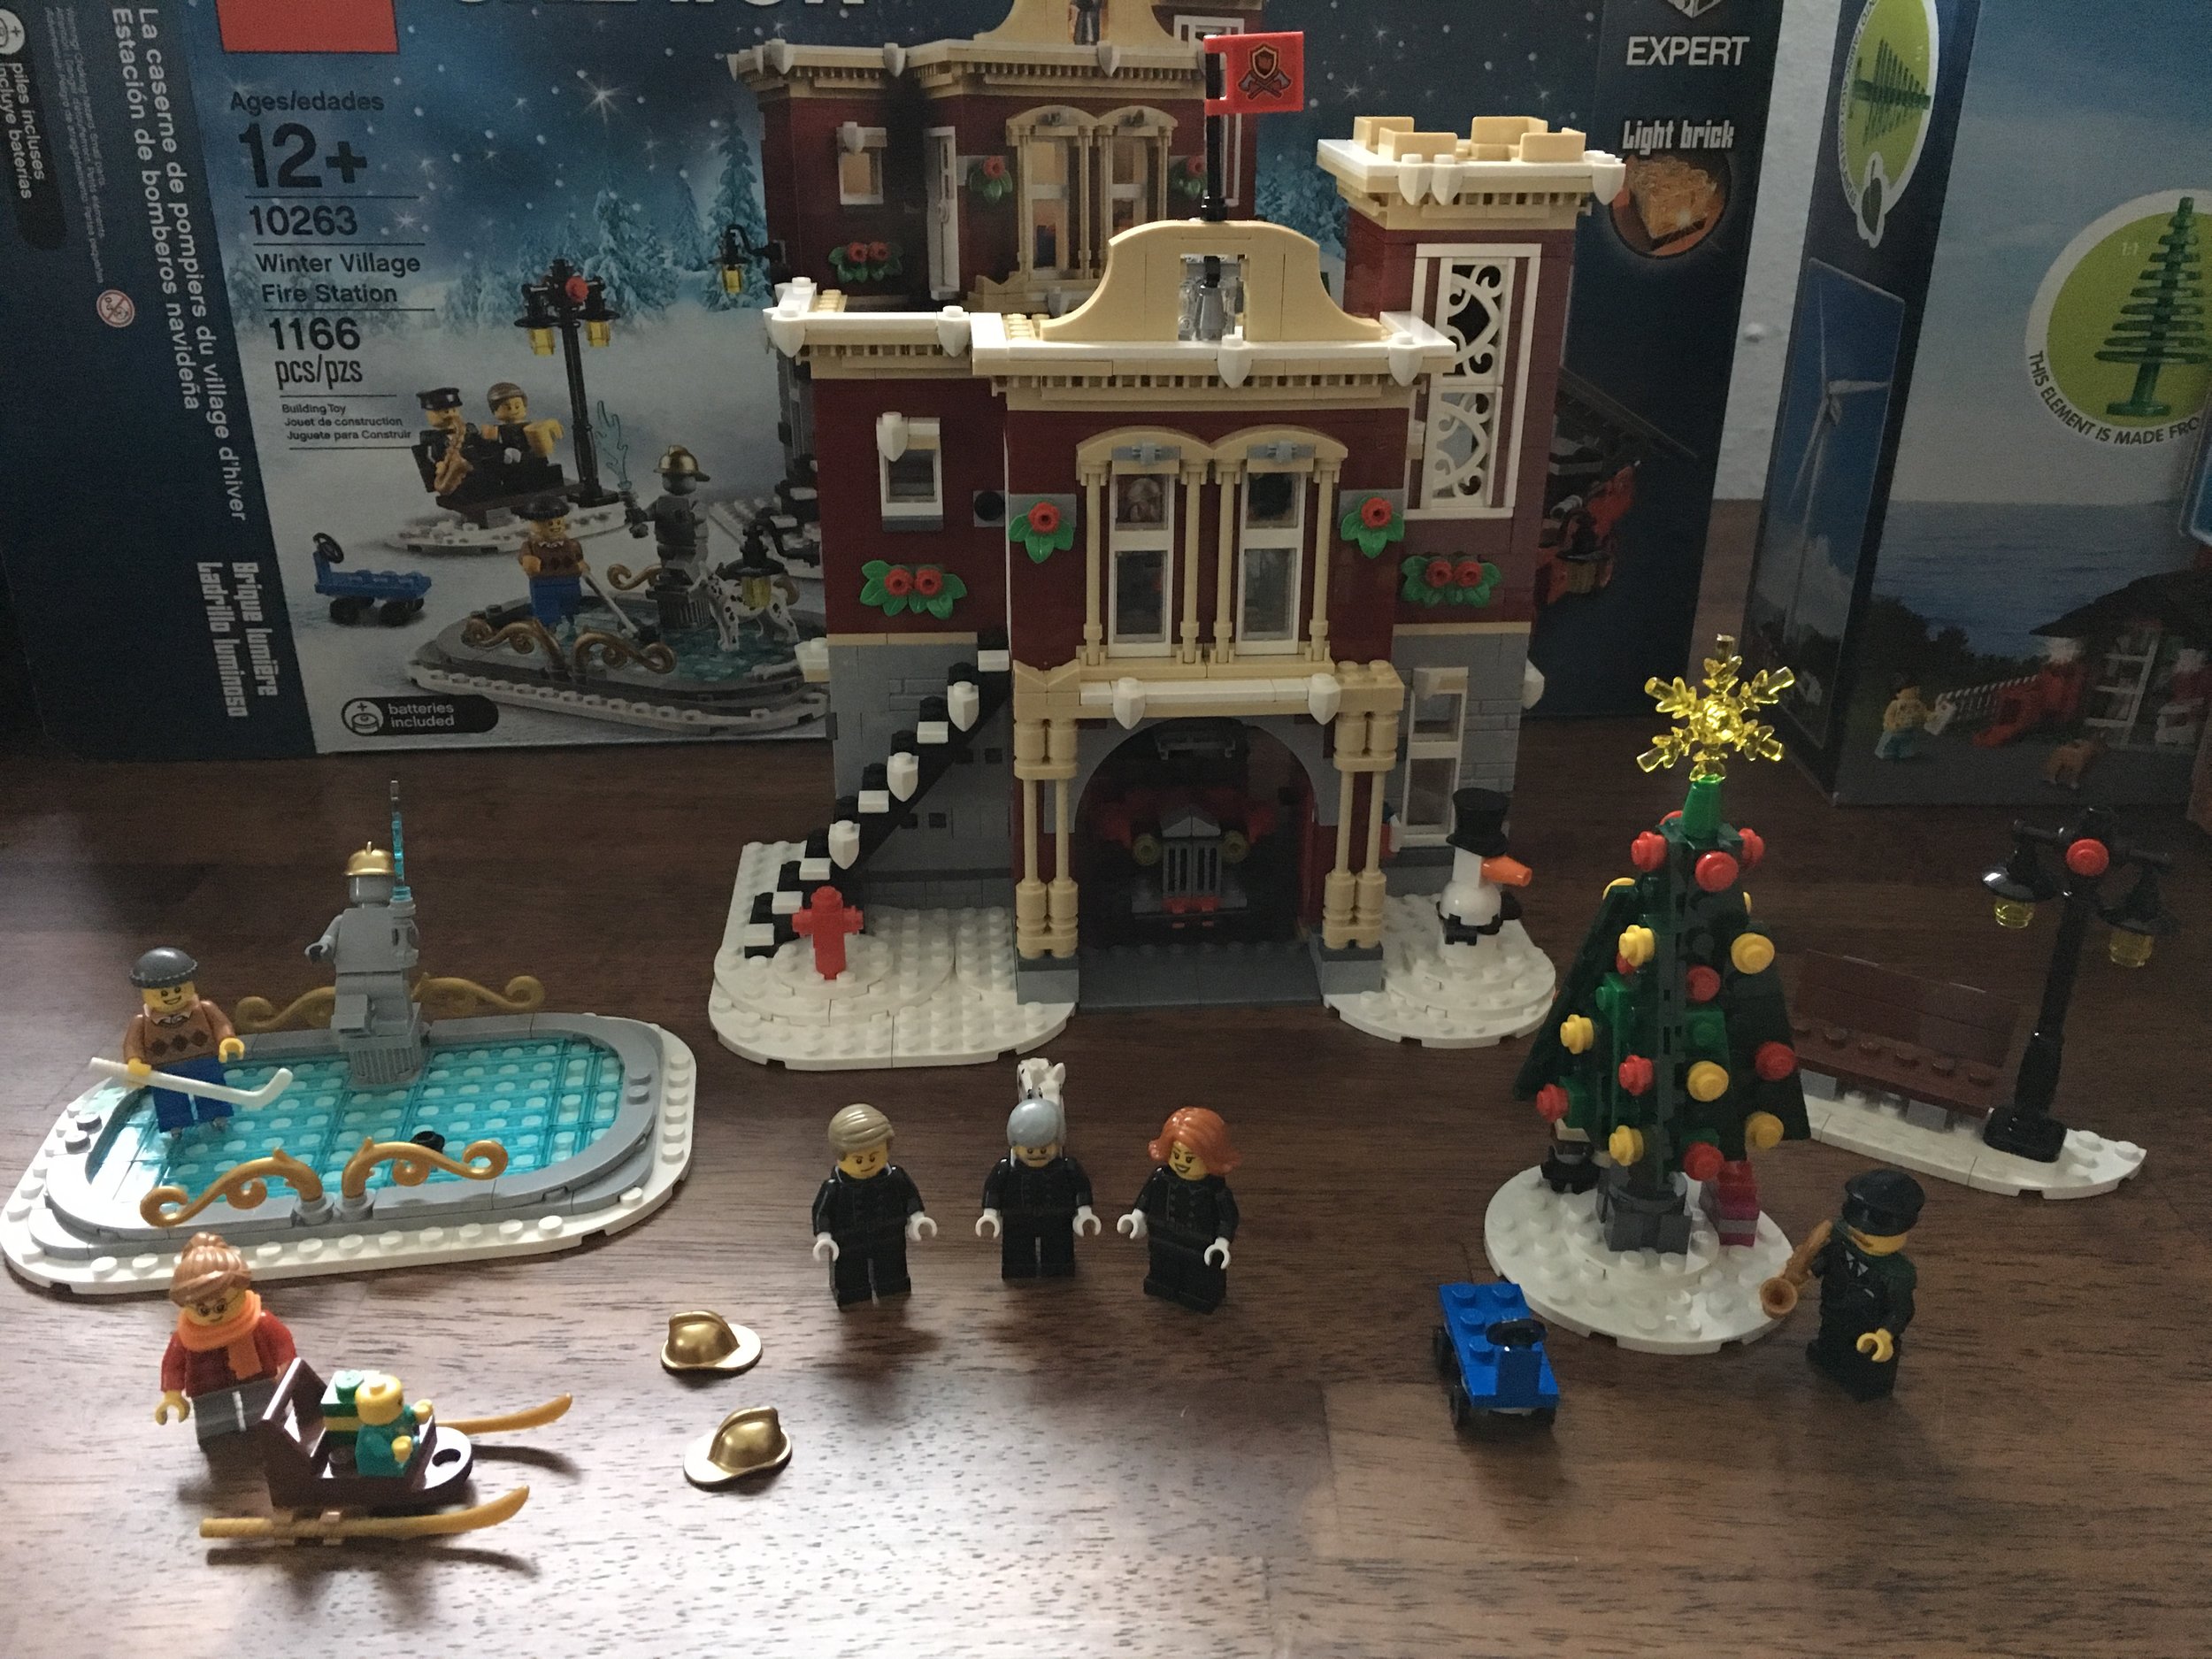
Here’s a view of the final product. I got it during double VIP points so I got some benefit, but it was not on sale. These sets typically go on sale only at the end of their shelf life so you’ll have to wait at least 2 years on this one if you want to get it on sale. Overall, I think this set fits into the Winter Village line very well. We’ve had a toy shop, a bakery, a post office, and others and a fire station is a great addition. This set has a lot of play built in and the accessories go well with the rest of the theme.

If you’ve been sucked in like me to this theme, definitely pick this set up. Wait for double VIP points or for when there is a cool free set for buying a specific amount. At $99.99, this set should put you at the right place to get whatever set is being offered.

Happy building!

10263_final.jpg